

Quick Answer / Key Takeaways
What is a custom pop up canopy tents tent?
A custom canopy tent is a portable, collapsible shelter with a printed frame and fabric tailored to your brand. It serves as a mobile storefront, event show booth tents, or promotional display. Unlike generic pop-ups, custom canopy tents feature your custom logo printed inflatable tents, colors, and messaging printed directly onto the fabric. Standard sizes include 10×10, 10×20, and 12×12. Prices range from $300 to $2,500 depending on frame type, fabric, and printing method.
How to choose the right custom canopy tent:
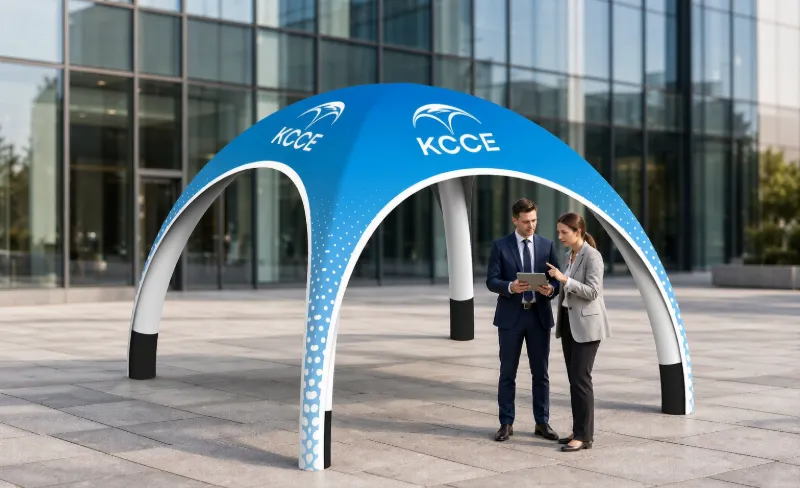
- Select your frame type. Straight-leg frames are the most durable and offer maximum interior space. Slanted-leg frames are cheaper but reduce usable square footage. inflatable domes frames sit in between.
- Pick the right size. A 10×10 fits one 6-foot table and is ideal for trade shows. A 10×20 fits two tables and works for outdoor markets. A 12×12 offers more depth for demonstrations or product displays.
- Choose the fabric. Use 600D polyester with a PVC coating for outdoor events. It resists UV rays and water, and it holds dye-sublimation printing well.
- Check the wind rating. Look for a frame rated for at least 25 mph winds. Straight-leg frames with welded joints perform best in open fields.
- Get sidewalls. A custom canopy tent with sidewalls adds branding space and protects against sun and rain. They attach via zippers or Velcro and are essential for multi-day events.
How to get a custom canopy tent with a logo:
Order from a manufacturer that offers dye-sublimation printing. This process infuses ink into the fabric, producing fade-resistant, full-color graphics. Provide a vector file (AI, EPS, or PDF) of your logo. Most companies will create a digital proof within 24-48 hours. Production typically takes 2-3 weeks, plus shipping.
Cost breakdown for a custom canopy tent 10×10:
- Basic slanted-leg frame with single-color print: $300–$450
- Straight-leg frame with full-color dye-sublimation: $500–$800
- Add sidewalls: $150–$300 extra
- Premium 900D fabric upgrade: $100–$200 extra
For a custom canopy tent 10×20, expect to pay 60–80% more than a 10×10. A 12×12 runs about 40% more than a 10×10. Always request a wind test report and warranty before purchasing.
Anyone who’s organized events knows the drill. You show up at a trade show, a weekend market, or a school fundraiser, and there it is: a sagging, unbranded pop-up that looks like it survived a hurricane. It screams “amateur hour.” I’ve watched people blow serious budget on tents that flop over in a light breeze or fade to a sad pastel after one summer. That’s why getting a custom canopy tent right matters—it’s not just a shade structure, it’s your business card, your storefront, and your first impression all rolled into one portable package.
In my years working with event organizers and brand managers, I’ve seen the good, the bad, and the truly terrifying when it comes to custom canopy tents. The market is flooded with options, and honestly, most buyers get overwhelmed by the jargon. So let’s cut through the noise. This guide breaks down the frame, the fabric, the printing, and the pricing—no fluff, just what you need to make a smart call.
Why Your Custom Canopy Tent Frame Matters Most
Here’s the thing nobody tells you on the product page: the frame is the heart of the operation. The fabric is just the skin. If the skeleton is weak, your gorgeous graphics are going to end up crumpled on the asphalt. You’re choosing between three main frame types: slanted, dome, and straight-leg.
Slanted-leg frames are the classic pop-up. They’re cheap, light, and fold up easily. But they sacrifice interior space—the legs angle inward, which means your tables and displays get pushed toward the center. You lose usable square footage where it counts.
Dome frames offer a bit more headroom and a more modern silhouette. They’re a middle ground, but they still don’t give you the vertical walls that scream “professional.”
Straight-leg frames are my recommendation for anyone who does more than one event a year. The legs go straight down, giving you maximum usable space right to the edges. You can push tables right up to the perimeter. They’re heavier, sure, but they handle wind far better.
Now, let’s talk about durability signals. When you’re comparing specs, look at the gauge of the steel or aluminum. Thicker isn’t always better if it’s cheap metal, but you want a frame that doesn’t flex like a noodle. Check the joints—welded connections are stronger than riveted ones. And check the wind rating. If a manufacturer lists a wind rating, that’s a good sign they’ve actually tested it. If they don’t mention wind at all, be suspicious.
Match the frame to your use case. A slanted frame might be fine for a single indoor trade show. But if you’re doing outdoor markets every weekend, or you’re setting up at sports events where the wind whips across an open field, you need a straight-leg frame with a solid rating. In practitioners’ experience, buying a cheap frame to “save money” just means buying the same tent twice.
Sizing: 10×10 vs. 10×20 vs. 12×12
Size is where most people get it wrong. They think bigger is always better. That’s a mistake. Let’s break down the standard options.
The 10×10 custom canopy tent is the industry standard. It fits a standard 10×10 booth space at most trade shows and expos. You can fit a 6-foot table and still have room for people to walk around. For a single vendor, it’s usually the sweet spot.
If you need more space, the custom canopy tent 10×20 gives you double the length. It’s great for food vendors who need a prep area, or for brands showcasing larger products. But remember, you’re paying for double the setup time and double the weight.
The custom canopy tent 12×12 is a less common size, but it’s a lifesaver for certain scenarios. It gives you a bit more breathing room than a 10×10, and it’s a popular choice for backyard events or farmers’ markets where you have a little more flexibility with space.
Here’s the thing about booth space rules: many expo halls have strict regulations. You can’t just show up with a 12×12 and claim a 10×10 spot. Always check the event’s floor plan and booth dimensions before you order. Height limits matter too—some venues cap the height of your tent, and if you show up with a tall dome frame that exceeds the limit, you’ll be sent home.
When does bigger hurt? Setup time is the obvious one. A 10×20 takes twice as long to set up and tear down. Weight is another factor—if you’re hauling this thing up stairs or across a parking lot, every pound counts. And transport costs: a larger tent might not fit in your car, which means renting a van or paying for shipping. For most people, a 10×10 is the pragmatic choice. You can always add sidewalls for more branding space.
Fabric: Polyester vs. Vinyl vs. Canvas
The fabric is what people see, but it’s also what protects your investment. You have three main choices: polyester, vinyl, and canvas.
Polyester is the most common for pop-up canopies. It’s lightweight, water-resistant, and relatively affordable. The best polyester fabrics have a PU or PVC coating for waterproofing. Look for a fire-retardant rating—most events require it, and it’s a safety issue you shouldn’t skip. The downside? Polyester fades faster in UV light, and it can stretch or sag over time.
Vinyl is the heavy-duty option. It’s thicker, more durable, and offers better waterproofing. It’s also more expensive and heavier. Vinyl is a good choice if you’re setting up for long periods or in harsh weather. The print quality on vinyl is excellent—colors pop and stay vibrant longer.
Canvas is the traditional choice. It’s breathable, which helps with heat buildup, and it’s incredibly durable. But it’s also the heaviest and most expensive option. Canvas is rare in pop-up tents these days—you’ll mostly see it in permanent or semi-permanent structures. For a portable custom canopy tent, polyester or vinyl is the practical choice.
When you’re thinking about a custom canopy tent fabric, remember the trade-off: weight versus durability. A lightweight polyester tent is easier to haul around, but it won’t last as long. A heavier vinyl tent is a pain to carry but will survive years of abuse. In my experience, a good quality 600D or 900D polyester with a proper coating hits the sweet spot for most users.
Print quality is directly tied to the fabric. Polyester takes dye-sublimation printing beautifully, which gives you full-bleed, photo-quality graphics. Vinyl can be printed with solvent or UV inks, which are durable but can crack if the vinyl is flexed too much. Canvas is the hardest to print on, and the colors tend to be muted.
Printing Methods: Dye-Sublimation vs. Screen Printing
This is where the magic happens—or where it goes horribly wrong. The printing method determines how your logo and graphics look, and how long they last.
Dye-sublimation is the gold standard for custom canopy tent printing. The dye is infused into the fabric at a molecular level, which means the colors are vibrant, they don’t crack, and they don’t fade easily. You can print full-bleed graphics—the design goes edge to edge with no white borders. There’s no minimum color count, so you can have a photo of your product or a complex gradient without paying extra. This is what you want for a custom 10×10 canopy tent with company logo that looks sharp and professional.
Screen printing is the older method. It’s cheaper for simple designs with a limited number of colors. If your logo is one or two colors on a white background, screen printing might save you money. But it has limitations. You can’t do full-bleed prints—you’ll have a border. And the ink sits on top of the fabric, which means it can crack or peel over time, especially with frequent folding and unfolding.
So which lasts longer? Dye-sublimation wins, hands down. The print becomes part of the fabric. It won’t crack, peel, or fade as quickly. Screen printing is fine for a budget option, but if you’re investing in a custom canopy tent with logo that represents your brand, dye-sub is the way to go.
One more thing: ask about the proofing process. A good vendor will send you a digital proof before printing. Check the colors, the logo placement, and the sizing. Don’t just glance at it—zoom in. Once it’s printed, there’s no going back.
Sidewalls, Weights & Add-Ons: What You Actually Need
You’ve got the frame and the fabric. Now what about the extras? This is where vendors make their money, but some add-ons are genuinely worth it.
Sidewalls are a game-changer. A custom canopy tent with sidewalls gives you more branding space—you can print your logo and messaging on the walls, not just the roof. They also provide wind protection and shade from low sun angles. Full walls enclose your space completely, which is great for privacy or for keeping the rain out. Half walls give you some protection while keeping the space open and inviting. The downside? Heat buildup. In the summer, a fully enclosed tent can turn into an oven. Think about ventilation before you go full walls.
Weights are non-negotiable if you’re setting up outdoors. Stakes work on grass, but they’re useless on concrete or asphalt. Sandbags are cheap and effective, but they’re heavy to haul. Weight plates are more compact and professional-looking. In practitioners’ experience, you can never have too many weights. A tent that takes off in the wind is a safety hazard, and it’s your liability.
Other custom canopy tent accessories to consider: counters and shelving for product display, lighting for evening events, and a carrying bag that actually fits the tent when it’s folded. A good bag with wheels is worth its weight in gold.
The question is: when do these add-ons pay for themselves? A counter turns your tent into a checkout station. Lighting extends your event hours. Sidewalls turn a canopy into a room. If you’re doing regular events, these aren’t luxuries—they’re necessities.
Pricing: What a Custom Canopy Tent Really Costs
Let’s talk money. The custom canopy tent price varies wildly, and you get what you pay for. For a quality 10×10 straight-leg frame with dye-sublimation printing, the price can vary widely depending on features and supplier. That’s for a tent that will last multiple seasons. A custom canopy tent 10×10 price on the low end might be tempting, but beware.
Why do the cheapest quotes hide costs? Often, it’s the frame. A low-grade frame might be made of thinner metal or have weaker joints. It might not have a proper wind rating. The fabric might be a thinner polyester that fades after one season. And the printing? It might be screen-printed with a limited color palette, or the dye-sub might be done on low-quality fabric that distorts the image.
Hidden setup fees are another gotcha. Some vendors charge extra for assembly, or for shipping to a residential address, or for a rush order. Always ask for a full quote that includes everything: the tent, the printing, the sidewalls, the weights, the bag, and the shipping.
Here’s my budget rule: if you’re buying a 10×10 quality tent, plan on a cost that can vary significantly based on options and vendor. If you’re paying less, you’re probably getting a toy. If you’re paying more, you might be overpaying for a brand name. The sweet spot is in the middle, where you get a solid frame, good fabric, and quality printing.
And remember, this is an investment. A good tent that lasts five years is cheaper than a cheap tent that lasts one season and needs replacing.
Turnaround Times & Ordering Timeline
You’ve picked your tent. When do you need it? This is where planning pays off.
Standard turnaround for a custom canopy tent is typically 2–4 weeks from proof approval to shipment. That includes production time and shipping. If you need it faster, some vendors offer rush production, but you’ll pay a premium.
Here’s the critical advice: order before event season peaks. If you’re planning for a summer event, order in early spring. If you’re planning for a fall expo, order in mid-summer. Manufacturers get slammed during peak season, and lead times stretch. A vendor who quotes two weeks in March might quote four weeks in June.
The proofing process takes time too. You’ll go back and forth with the designer on the layout. Budget for at least a few days of proofing, especially if you’re not a designer yourself. Don’t rush this step—it’s your last chance to catch mistakes.
My rule of thumb: give yourself at least six weeks from order date to event date. That gives you a buffer for production delays, shipping hiccups, and proofing revisions.
Frequently Asked Questions
Q: How much do custom canopy tents cost?
A: A quality 10×10 custom canopy tent typically has a price that varies by brand and specifications. The price depends on the frame type, fabric quality, and printing method. A basic slanted-leg frame with screen printing will be on the lower end, while a straight-leg frame with dye-sublimation printing and sidewalls will be higher. Always get a full quote that includes shipping and any add-ons to avoid surprises.
Q: Which company is the best for custom canopy tents?
A: The “best” company depends on your specific needs. Look for vendors with a proven track record, clear spec sheets, and transparent pricing. Ask for samples or references. In the industry, companies that manufacture their own frames and fabric in-house tend to offer better quality control. You can also check reviews and ask for a physical sample before committing to a large order.
Q: How can I make my own canopy tent?
A: Making your own canopy tent is possible but rarely worth it. You’d need to source a frame, fabric, and a printing method—which means buying in bulk or paying for custom fabrication. The cost and time usually exceed buying from a professional manufacturer. However, you can customize an existing tent with vinyl banners or magnetic signs for a budget-friendly option.
Q: Can I get a custom-sized pop-up canopy?
A: Yes, but it’s not always practical. Most manufacturers offer standard sizes like 10×10, 10×20, and 12×12 because they’re the industry norm. Custom sizes require custom frames and fabric cutting, which increases cost and lead time. Unless you have a specific need that a standard size can’t meet, stick with standard dimensions—they’re cheaper and easier to replace or expand.
At the end of the day, the frame and fabric beat flashy printing. A tent with a cheap frame and gorgeous graphics is still a tent that will fall over. A tent with a solid frame and decent printing will last for years and keep looking professional. So ask yourself: will your tent survive wind, rain, and a second season? If the answer is no, it’s time to upgrade.
Before you order, compare spec sheets side-by-side. Look at the frame gauge, the fabric weight, and the wind rating. Request samples of the fabric and printing. And if you want to see what quality looks like, check out KCCE’s lineup of inflatable tents and display frames—they’ve been building outdoor solutions for years, and their inflatable furniture is a clever add-on for event lounges. Don’t settle for a tent that embarrasses your brand. Get one that works as hard as you do.
Final Checklist Before You Buy
- Frame material: Aluminum over steel for weight and rust resistance.
- Frame gauge: Thicker is better. Look for at least 1.5mm wall thickness on main legs.
- Fabric: 600D or 900D polyester or vinyl. Avoid cheap 300D.
- Waterproofing: PU coating or PVC laminate. Check the hydrostatic head rating (1500mm+ is decent).
- Wind rating: Look for a tested rating (e.g., 30-40 mph). Avoid unrated tents.
- Carry bag: Wheels and reinforced handles matter—you’ll move this more than you think.
- Warranty: 1-year minimum on frame and fabric. Some brands offer 3-5 years on frames.
Maintenance Tips to Extend Tent Life
- Always dry the tent before storing to prevent mildew.
- Use a soft brush and mild soap for cleaning—never a pressure washer.
- Lubricate zippers and moving parts with silicone spray.
- Replace worn stakes and ropes before they fail.
- Store in a cool, dry place away from UV exposure.
When to Spend More vs. Save
| Scenario | Recommendation |
|---|---|
| One-time indoor event | Budget tent with decent fabric |
| Outdoor market every weekend | Mid-range with strong frame and wind rating |
| Trade shows with heavy branding | Invest in high-quality printing and fabric |
| Long-term or frequent use | Pro-grade frame and replaceable parts |
Bottom Line
Your pop-up canopy is a portable billboard, a shelter, and a sales tool all in one. It’s worth the time to choose wisely. Start with the frame, then the fabric, then the graphics. Compare specs, ask for samples, and don’t be swayed by the cheapest price tag.
If you’re ready to upgrade, a quality tent will pay for itself in the first few events. And if you’re just starting out, buy the best you can afford—it’s cheaper than buying twice.
Frequently Asked Questions
Q: How much should I spend on a pop-up canopy?
A: For most users, $200–$400 is the sweet spot. Budget tents under $150 often fail within a season. Premium tents above $600 are worth it only if you’re using them weekly or in harsh conditions.
Q: Can I leave my canopy up overnight?
A: It’s risky. Even with good stakes and ropes, sudden gusts can snap the frame or rip the fabric. Always take it down if you’re not on-site. If you must leave it, use extra tie-downs and lower the height if possible.
Q: How do I clean printed graphics without fading them?
A: Use cold water and a mild detergent. Avoid scrubbing printed areas hard. Never use solvents or bleach. For vinyl graphics, a soft cloth and soapy water work best. Dry fully before folding.
Q: What’s the difference between a pop-up and a frame tent?
A: Pop-ups are scissor-style and set up in minutes—ideal for quick events. Frame tents are modular, heavier, and more stable in wind, but take longer to assemble. If you’re a regular vendor, a frame tent might serve you better long-term.
Final Checklist Before You Buy
- Frame material and gauge (steel or aluminum, 1.5mm+)
- Fabric denier and coating (600D+ with PU or PVC)
- Wind rating and tested speed
- Size and peak height (check your event space)
- Print quality and warranty on graphics
- Carry bag with wheels and handles
- Spare parts availability (legs, tops, connectors)
- Reviews from users in similar conditions
Ready to Make the Right Choice?
Take your time, compare three or four models side by side, and ask the seller for a fabric sample before committing. A good canopy is an investment in your brand’s presence—choose one that will stand tall, look sharp, and last through many seasons.
Your next event deserves better than a wobbly, faded tent. Choose smart, and you’ll never worry about the weather again.
Quick Comparison Table: Top 10×10 Canopy Tents
| Model | Frame | Fabric | Wind Rating | Best For | Price Range |
|---|---|---|---|---|---|
| Eurmax Standard | Steel 1.5mm | 600D PU | 30 mph | Budget-friendly durability | $150–$200 |
| Quik Shadepro | Aluminum | 500D PVC | 25 mph | Lightweight portability | $200–$250 |
| ABC Canopy Elite | Steel 1.8mm | 650D PU | 40 mph | Heavy wind resistance | $250–$300 |
| Crown Shades Pro | Aluminum | 600D PU | 35 mph | Premium graphics | $300–$400 |
Maintenance Tips to Extend Lifespan
- Clean after every use – Dirt and sap degrade fabric over time.
- Lubricate moving parts – A silicone spray on scissor joints prevents rust and keeps action smooth.
- Store dry – Never pack a damp canopy; mold will ruin it within weeks.
- Inspect before each event – Check for loose rivets, bent legs, or frayed seams.
- Replace worn parts early – A $10 leg cap is cheaper than a collapsed tent mid-event.
Common Mistakes to Avoid
- Skipping the sandbags – Even a 40 mph-rated tent can lift if not anchored. Use at least 20 lbs per leg.
- Forgetting the sidewalls – They aren’t just for rain; they block wind and add branding space.
- Overlooking the carry bag – A cheap bag splits after a few uses. Look for reinforced seams and a wide opening.
- Ignoring local codes – Some venues require fire-retardant fabric. Check before you buy.
Final Verdict
For most vendors, a steel-frame 600D PU-coated canopy with a wind rating of at least 30 mph offers the best balance of cost, stability, and longevity. If you travel light and set up solo, an aluminum frame saves your back—just accept a slightly lower wind tolerance.
Whatever you choose, test it at home first. Set it up, hose it down, and let it sit in the sun for a day. You’ll learn more in that hour than any spec sheet can tell you.
Now go find the tent that fits your brand, your climate, and your budget—and make your next event unforgettable for all the right reasons.







