

Your logo on a cheap canopy is a bad billboard. I’ve seen it a hundred times—a business spends real money on a custom tent, and six months later the print is peeling, the frame is wobbling, and the whole thing looks like it survived a hurricane. It didn’t. It just wasn’t built for the job.
Here’s the thing about custom tents: they’re not all created equal. And if you’re a decision-maker—a marketing director, an event manager, a small business owner who’s about to drop serious cash—you need to know what separates a smart investment from a money pit. This guide is the decision framework I wish someone had handed me years ago. We’re talking sizing, materials, print quality, frames, accessories, lead times, costs, and maintenance. The whole nine yards.
Quick Answer
A custom tent is a branded, portable shelter—typically a pop-up canopy—that you order with your logo, colors, and graphics printed directly onto the fabric. The right one for you depends on your event type, your budget, and how many seasons you expect it to survive; a quality 10×10 with full-color dye-sublimation printing and a commercial-grade aluminum frame will cost more upfront but deliver far better long-term ROI than a cheap vinyl canopy that fades and fails.
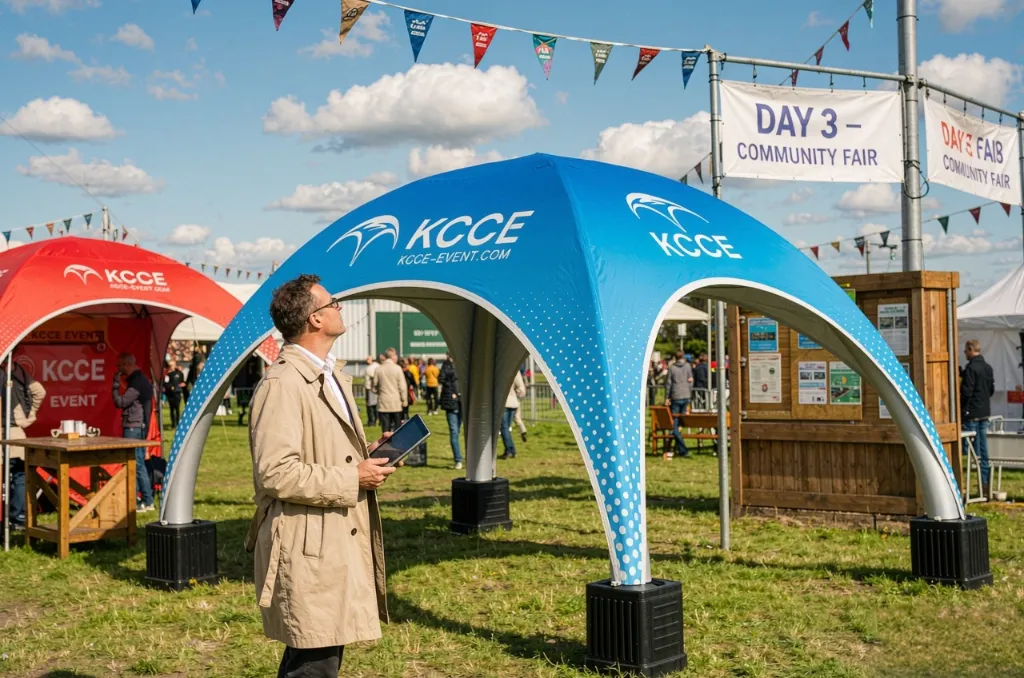
Sizing: 10×10 vs 10×20 vs 12×12 Custom Tents
Let’s start with the most common question I get: what size do I actually need? And honestly, the answer is almost always “bigger than you think, but smaller than you fear.” So let me break down the three most popular configurations.
The 10×10 custom tent is the industry workhorse. It’s the standard booth size at most trade show booth tents, farmers markets, and community events. You see them everywhere because they fit in a standard parking space, they’re manageable for one person to set up, and they don’t require special permits at most venues. If you’re just starting out or you’re a solo vendor, a 10×10 is your safest bet. It gives you roughly 100 square feet of protected space—enough for a table, some displays, and a person or two to stand behind it.
But here’s the catch: 100 square feet disappears fast. Add a second table, a cooler, a couple of chairs, and suddenly you’re tripping over your own inventory. That’s why so many vendors graduate to the custom tents with logo 10×20 option. This is essentially two 10x10s side by side, giving you 200 square feet. It’s a huge jump in usable space. You can set up a proper booth layout—product displays on one side, checkout on the other, a small meeting area in the middle. The downside? It’s heavier, it takes longer to set up, and you’ll need at least two people to handle it comfortably. Also, not every event has 10×20 spaces available, so check your venue’s rules before you commit.
Then there’s the custom canopy tent 12×12, which is the sweet spot for a lot of people, honestly. It’s 144 square feet—44% more space than a 10×10—but it doesn’t require the logistical gymnastics of a 10×20. The footprint is still roughly square, which means it fits nicely in most outdoor settings like backyard parties, sporting events, and festivals. Setup is similar to a 10×10; you’re just dealing with a slightly larger frame and canopy. I’ve seen a lot of customers land on the 12×12 as their “forever” size after starting with a 10×10 and feeling cramped.
Now, let’s talk money for a second, because I know that’s what you’re really thinking about. The custom canopy tent 10×10 price is going to be your baseline. As you size up, the cost-per-square-foot actually goes down, which is a weird but true industry quirk. A 10×20 isn’t twice the price of a 10×10—it’s usually only 60-70% more. Same logic applies to the 12×12. So if you’re budgeting for the long term and you know you’ll be doing this for multiple seasons, it’s often smarter to buy the bigger tent now than to upgrade later. Upgrading means buying a whole new tent. Buying bigger now means you only pay the difference once.
Portability is the other side of this coin. A 10×10 with a decent roller bag is generally compact enough to fit in the back of most SUVs. A 10×20 is likely to need a roof rack or a small trailer. The weight difference is notable—typically around 40-50 pounds for a 10×10 versus 80-100 pounds for a 10×20, as commonly cited in product specifications. If you’re a solo operator, that’s a real consideration. If you have a team, it’s less of an issue. Think about who’s actually going to be hauling this thing in and out of the car at 6 AM on a Saturday.
One more thing on sizing: don’t forget about headroom. The standard height for most pop-up tents is around 10-11 feet at the peak, but the leg heights are adjustable, as commonly specified by manufacturers. Some frames let you set the legs at different heights, which is great for sloping ground or for creating a more open feel. The industry standard adjustable range is roughly 5 feet to 20 feet in terms of the overall height options, depending on the frame design, as commonly seen in product listings. If you’re tall—and I mean over 6 feet—pay attention to the eave height, not just the peak. A tent that’s 10 feet at the peak might only be 6 feet at the edges, and you’ll be ducking all day.
Fabric Science: Polyester vs Vinyl vs Canvas
Okay, this is where I get a little nerdy, but trust me, this is the most important section in this entire guide. The fabric is what takes the abuse. It’s what the sun beats down on, what the rain runs off of, what the wind whips around. And it’s what your logo is printed on. Get this wrong, and nothing else matters.
The three main options are polyester, vinyl, and canvas. Each has its strengths, and each has its loyal fans. Let me walk you through them.
Polyester is the default choice for most custom pop up tents, and for good reason. The key spec to look for is the denier rating—that’s the thickness of the yarn, and it directly correlates with durability. The industry standard for quality custom tents is 600D polyester, which is a nice balance of strength and weight. It’s what a lot of reputable manufacturers use, including those offering commercial-grade options. Polyester is lightweight, it folds down compactly, and it takes dye-sublimation printing beautifully, which gives you those vibrant, full-color graphics that don’t crack or peel.
The downside of polyester is that it’s not as inherently waterproof as vinyl. It’s water-resistant, sure, but in a heavy downpour, you might see some seepage through the seams if the tent isn’t properly sealed. Most quality polyester tents come with a waterproof coating and taped seams, but it’s worth asking about. Also, polyester is more susceptible to UV degradation over time. The colors will fade faster than vinyl if you leave it out in the sun all season.
Vinyl is the heavyweight champion. It’s thicker, tougher, and more waterproof than polyester. If you’re setting up a custom canopy tent with sidewalls for a multi-day festival, vinyl is the material you want. It stands up to wind better, it shrugs off rain, and it’s much harder to puncture or tear. The print quality is also excellent—vinyl has a smooth surface that takes ink very well.
But vinyl has trade-offs. It’s heavy. A vinyl canopy is going to weigh significantly more than a polyester one, which means more muscle to set it up and more strain on the frame. It also doesn’t fold as compactly, so your storage bag is going to be bigger. And vinyl is less breathable, which means it gets hotter underneath—not great if you’re selling at a summer farmers market. The other thing to know is that vinyl can crack in extreme cold, so if you’re doing winter events, that’s a consideration.
Canvas is the traditionalist’s choice. It’s what they used for circus tents and military shelters for centuries. Canvas is extremely durable, naturally water-resistant when treated, and it has a classic, premium look that polyester and vinyl just can’t match. If you’re doing a high-end event—a wedding, a corporate retreat, a VIP lounge—canvas is the material that says “quality.”
The downsides? Canvas is expensive, it’s heavy, and it requires more maintenance. It needs to be properly dried before storage or it will mildew. It’s also not as easy to print on with modern dye-sublimation methods, so your logo options might be more limited. Canvas is a niche choice, but for the right application, it’s unbeatable.
Here’s a quick comparison to help you decide:
| Feature | Polyester (600D) | Vinyl | Canvas |
|---|---|---|---|
| Weight | Light | Heavy | Heaviest |
| Waterproofing | Good (coated) | Excellent | Good (treated) |
| UV Resistance | Moderate | Excellent | Good |
| Print Clarity | Excellent | Excellent | Moderate |
| Durability | Good | Excellent | Excellent |
| Cost | Lowest | Mid-High | Highest |
| Best For | Trade shows, markets | Festivals, long-term outdoor | Weddings, premium events |
Now, a note on the “custom tent material” question that I get asked constantly. There’s no single “best” material—it depends entirely on your use case. If you’re a realtor doing weekend open houses, 600D polyester is perfect. If you’re running a beer garden at a summer music festival, you want vinyl. If you’re doing a luxury brand activation, canvas is the move. Match the material to the job, not to the trend.
Print Quality: Dye Sublimation vs Screen Print
You’ve got the right size, you’ve picked the right fabric. Now comes the fun part: putting your logo on it. And this is where a lot of people make expensive mistakes.
There are two main printing methods for custom tents: dye sublimation and screen printing. They produce very different results, and the right choice depends on your design, your budget, and how long you need the tent to look good.
Dye sublimation is the gold standard for custom printed tents. Here’s how it works: your design is printed onto a special transfer paper using heat-sensitive dyes. The paper is then pressed against the fabric at high temperature, which turns the dye into a gas. That gas penetrates the fibers of the fabric and bonds with them at a molecular level. The result is a print that’s literally part of the fabric—it won’t crack, peel, or fade easily. The colors are vibrant, the details are sharp, and you can do full-bleed designs that cover the entire canopy with no visible seams or borders.
This is what you want for a custom logo tent where your branding is the whole point. The print quality is photo-realistic, which means you can do gradients, shadows, and complex artwork without any issues. The downside is that dye sublimation has a higher setup cost, and there’s usually a MOQ policy. Most manufacturers require you to order at least one tent, obviously, but some have minimums of 5 or 10 if you want the best per-unit pricing. It’s also not ideal for white ink—dye sublimation works best on light-colored fabrics, so if your design has a lot of white in it, you’ll need to work with the manufacturer to figure out the best approach.
Screen printing is the older, more traditional method. Ink is pushed through a mesh stencil onto the fabric, one color at a time. It’s great for simple designs—a logo with a few solid colors, text, basic shapes. Screen printing is cheaper for large runs, and it produces a thicker ink layer that’s very durable. It’s also the better choice if you’re printing on vinyl, since the ink adheres well to that surface.
But screen printing has limitations. You’re limited to the number of colors you can use (each color requires a separate screen), and you can’t do gradients or photo-realistic details. The print also sits on top of the fabric rather than bonding with it, which means it can crack and fade over time, especially with repeated folding and unfolding. For a custom tent that you plan to use for multiple seasons, screen printing is usually the wrong choice—unless your design is simple enough that the limitations don’t matter.
So which one should you choose? My rule of thumb is this: if your logo is simple—say, two or three colors, no gradients—and you’re ordering a large quantity, screen printing can save you money. If your design is complex, or you need it to look perfect for years, or you’re only ordering one or two tents, go with dye sublimation. The cost difference is smaller than you might think, and the quality difference is huge.
Speaking of which, let’s talk about artwork files, because this is where I see the most delays in the ordering process. Your manufacturer needs a vector file—something like an AI, EPS, or PDF—not a JPEG or PNG. Vector files are resolution-independent, which means they can be scaled to any size without losing quality. A JPEG might look fine on your laptop screen, but blow it up to 10 feet wide and it’ll be a pixelated mess. If you don’t have a vector file, your manufacturer can usually trace your logo for a small fee, but it’s faster and cheaper if you have it ready.
Also, make sure your file is set up in CMYK color mode, not RGB. CMYK is the color space used for printing, and RGB colors (which you see on your monitor) don’t always translate perfectly. Your manufacturer will provide a digital proof before they print, so you’ll have a chance to catch any color issues. But getting the file right from the start saves everyone time.
One more thing: don’t forget about bleed and safe zones. If your design goes all the way to the edge of the canopy, you need to extend the artwork beyond the trim line (that’s the bleed) so there are no white edges after cutting. And keep important elements—like your logo or contact info—at least a few inches away from the edges (the safe zone) so they don’t get cut off or distorted by the seams.
Frame Construction: What Separates Cheap from Strong
The fabric gets all the attention, but the frame is what keeps everything standing. A flimsy frame will make even the most beautiful custom tent look bad, and it’s a safety hazard in windy conditions. So let’s talk about what separates a cheap frame from a strong one.
The two main frame materials are steel and aluminum. Steel is heavier, stronger, and usually cheaper. It’s a good choice if you’re setting up a semi-permanent structure that doesn’t need to move often. But for a pop-up tent that you’re hauling to events every weekend, steel gets old fast. The weight adds up, and steel is more prone to rust if the coating gets scratched.
Aluminum is the industry standard for quality custom pop up tents. It’s lightweight, corrosion-resistant, and strong enough for most applications. The key is the grade of aluminum and the thickness of the tubing. Commercial-grade aluminum frames are typically made from 6061 or 6063 alloy, which offers a good balance of strength and weight. The wall thickness of the tubing matters too—thicker walls mean a stronger frame, but also more weight.
Here’s a trick I use to evaluate frame quality: check the joints. The weakest point on any pop-up tent frame is where the pieces connect. Cheap frames use plastic connectors that crack under stress. Quality frames use reinforced plastic or metal connectors with a self-locking mechanism. You want a frame that clicks into place securely and doesn’t wobble when you shake it. The best frames have a quick-release mechanism for the push-pin system that locks the legs and the top.
Now, let’s talk about wind ratings. This is a number that gets thrown around a lot, but it’s often misunderstood. A wind rating is the maximum wind speed at which the tent can be safely used, assuming it’s properly anchored. Most quality pop-up tents are rated for winds up to 20-25 mph, which is a moderate breeze. Some heavy-duty models are rated for 30 mph or more, according to product specifications. But here’s the thing: the wind rating only applies if you’ve got the tent properly weighted down. A tent that’s not anchored will fly away in a 10 mph gust, regardless of its rating.
The industry standard for anchoring is to use weights on each leg—usually 20-40 pounds per leg, depending on the tent size and the wind conditions, as commonly recommended by safety guidelines. Some tents come with built-in weight bags, others have loops where you can attach sandbags or water weights. And don’t forget about staking. If you’re setting up on grass, use stakes through the leg holes or the attached straps. If you’re on pavement, you’ll need weights.
This is also where the “heavy duty custom tent” category comes in. Heavy-duty tents have thicker frames, stronger fabric, and more robust hardware. They’re designed for extended outdoor use—think months-long deployments, not weekend events. They cost more, but they last longer. If you’re a professional event company or you’re doing a long-term installation, the extra cost is worth it.
One thing I always tell people to check is the warranty. A quality frame should come with a warranty that covers the structure for at least a year, and ideally longer. Some manufacturers offer limited lifetime warranties on their frames, which is a good sign—it means they expect the frame to outlast the fabric. Lush Banners, for example, advertises a commercial-grade aluminum frame with a limited lifetime warranty. That’s the kind of confidence you want in a supplier.
And don’t forget about replacement parts. Frames break, connectors snap, and fabric tears. If you buy from a reputable manufacturer, you should be able to order replacement parts—legs, tops, connectors, fabric canopies—individually. That’s a huge advantage over buying a cheap tent from a big-box store, where you have to buy a whole new tent if anything breaks. Ask your supplier about replacement part availability before you buy.
Accessories That Matter: Weights, Walls, and Cases
You’ve got the tent. Now let’s talk about the stuff that makes it actually usable. Accessories are where a lot of first-time buyers get caught off guard, because the base price of the tent doesn’t include everything you need.
Sidewalls are the most important accessory, in my opinion. A custom canopy tent with sidewalls transforms your open-air shelter into a protected enclosure. You can block the wind, keep out the rain, create privacy, and display more branding. Sidewalls come in two main types: full walls that cover the entire opening, and half walls that cover the bottom half. Full walls are better for bad weather and for creating a secure space. Half walls are better for airflow and for keeping your display visible while still providing some protection.
If you’re doing a trade show booth, sidewalls are almost essential. They create a professional, enclosed space that separates you from the chaos of the show floor. And they double as additional branding space—you can print your logo, your messaging, and even your product photos on the walls. The brandedcanopytents.com site has a “Build Your Own Shelter” tool that lets you customize your tent with sidewalls and other options, which is a great way to visualize what you’re getting.
Weights and anchoring systems are non-negotiable. I mentioned this earlier, but it bears repeating: an unanchored tent is a hazard. Most manufacturers offer weight bags that attach to the legs, and you can fill them with sand or water on-site. Some venues require you to use weights—many event organizers won’t let you set up without them. Budget for at least 20-40 pounds per leg, and make sure your anchoring system is compatible with the surface you’ll be on.
Roller bags are worth the investment. A custom pop up tent without a proper case is a tent that’s going to get damaged in transit. The bag protects the fabric from tears and the frame from bends. Look for a bag with wheels and a handle—you’ll thank yourself when you’re hauling it across a parking lot. Some manufacturers include a bag with the tent, others charge extra. If it’s not included, budget for it.
Other accessories to consider:
- Table covers to match your tent branding
- Carpet or flooring for a more premium look
- Lighting for evening events
- Banner stands for additional signage
- Repair kits with spare parts and fabric patches
When it comes to pricing, there’s a big difference between bundle pricing and individual accessory costs. Most manufacturers offer package deals that include the tent, sidewalls, and a bag at a discounted price. The brandedcanopytents.com site, for instance, has “package deals” for their 10×10, 10×15, 10×20, and 13×13 tents. These bundles are almost always cheaper than buying everything separately. If you know you’re going to need sidewalls and a bag, get them bundled.
But here’s my advice: don’t over-accessorize on your first order. Start with the essentials—tent, bag, weights, maybe sidewalls if you need them. Use the tent a few times, figure out what’s missing, and then buy the extras. You’ll save money and you’ll avoid buying things you don’t actually need.
Lead Times and Ordering Process
Okay, you’ve made your decisions. Now you need to actually order the thing. And this is where a lot of people get frustrated, because custom manufacturing takes time. Let me walk you through the process so you know what to expect.
The first step is the proof approval. After you submit your artwork, the manufacturer will create a digital proof—a mockup of what your tent will look like. This is your chance to catch any issues with the design, the colors, or the placement. I cannot stress this enough: review the proof carefully. Once you approve it and the printing starts, changes are expensive or impossible. Look at the logo placement, the text, the colors—everything. If something looks off, say something.
The proof approval process typically takes 1-3 business days, depending on how quickly you respond and how complex your design is, as is standard in the industry. If your artwork is ready to go and there are no issues, you can move to production quickly. If you need to make changes, the clock resets.
Production time is the big variable. For a standard custom pop up tent with dye sublimation printing, production typically takes 7-15 business days, as noted by many manufacturers. This includes printing the fabric, sewing the canopy, assembling the frame, and quality-checking the finished product. If you’re ordering a more complex product—a custom canopy tent with sidewalls, or a heavy-duty model—add a few more days.
Shipping is another 3-7 business days for domestic orders, depending on the shipping method and your location, as is typical for most carriers. And here’s a pro tip: if you’re ordering for a specific event, add a buffer of at least a week to your timeline. Things go wrong—shipping delays, proof revisions, production hiccups. You don’t want to be sweating bullets the day before your big trade show.
Now, about rush orders. Most reputable manufacturers offer expedited production for an additional fee. The typical rush turnaround is 3-5 business days for production, which is about as fast as it gets for custom printing. You’ll likely pay a premium for it, usually 15-30% more, as is common in the industry. the manufacturer’s current workload. And you’ll pay a premium for it, usually 15-30% more. My advice: don’t rely on rush orders. Plan ahead. But if you’re in a bind, it’s good to know the option exists.
Seasonal bottlenecks are a real thing in this industry. The peak season for custom tents is spring and summer—that’s when all the outdoor events happen. If you’re ordering in March for a June event, you’re competing with everyone else for production slots. Lead times can stretch to 4-6 weeks during peak season, as is common in the industry. If you’re ordering in November for a January event, you’ll probably get faster production. Plan accordingly.
One more thing about the ordering process: communication matters. A good manufacturer will keep you updated throughout the process—when the proof is ready, when production starts, when your order ships. If you’re not getting updates, ask. And if you’re working with a supplier who’s unresponsive during the sales process, that’s a red flag. They’ll probably be even worse after they have your money.
Cost Breakdown: What You Actually Pay For
Let’s talk money. Custom tent prices vary wildly, from budget options under $200 to professional-grade setups that run $1,500 or more. The custom canopy tent 10×10 price is the benchmark everyone uses, so let’s start there.
A basic 10×10 custom tent with single-color screen printing might cost around $300-500, according to typical industry pricing. That’s your entry-level option—suitable for occasional use, but not built for the long haul. A mid-range 10×10 with dye sublimation printing and a decent frame will run approximately $500-800, which is often considered the sweet spot for most small businesses. And a premium 10×10 with a commercial-grade aluminum frame, heavy-duty fabric, and full-color printing can cost $800-1,200 or more, depending on the brand and features. This is what you want if you’re a professional event company or you plan to use the tent for years.
The custom canopy tent 12×12 price follows a similar curve, but with a bump of roughly 20-30% over the 10×10, based on typical market comparisons. Expect to pay approximately $600-1,000 for a mid-range 12×12, and $1,000-1,500 for a premium model, according to industry estimates.
Custom tents with logo 10×20 options are where the real money comes in. A mid-range 10×20 will run approximately $900-1,400, and a premium model can reach $1,800-2,500, based on typical pricing from suppliers. Remember what I said earlier about cost-per-square-foot—the 10×20 is actually a better deal per square foot than the 10×10, even though the absolute price is higher.
So what are you actually paying for? Let me break it down:
- Materials: The fabric and frame account for about 40-50% of the cost. Higher denier fabric, thicker aluminum, and premium components all add up.
- Printing: Dye sublimation adds approximately $100-300 to the cost, depending on the complexity of your design and the amount of coverage, based on typical pricing. Full-bleed printing costs more than a simple logo.
- Labor: Cutting, sewing, and assembling the tent is skilled work. This is 20-30% of the cost.
- Overhead: The manufacturer’s rent, utilities, equipment, and profit margin. This is 20-30% of the cost.
- Shipping: Usually quoted separately, and it’s not trivial. A 10×10 in a bag is a bulky package.
Now, the hidden costs. These are the things that catch people off guard:
- Setup fees: Some manufacturers charge a one-time setup fee for creating the printing templates. This is usually $50-150, and it’s often waived for larger orders.
- Artwork services: If your logo needs to be redrawn or converted to vector format, that’s an extra charge. Expect $50-100 per hour.
- Storage: If you don’t have space to store your tent, that’s a cost. A 10×10 in its bag is about the size of a large suitcase, but a 10×20 is a lot bigger.
- Replacement parts: Frames break, fabric tears. Budget 10-15% of the purchase price per year for maintenance and replacement parts, as a general guideline.
- Insurance: Some venues require you to have liability insurance for your booth setup. This is usually cheap—$200-500 per year—but it’s a cost.
Here’s my honest take on pricing: you get what you pay for. I’ve seen too many people buy a $200 tent from a big-box store, watch it fall apart after three events, and then spend $800 on a quality tent anyway. They would have saved money by buying the quality tent first. If you’re planning to use your custom tent more than a few times, buy the best you can afford. The cost-per-use over the life of the tent will be lower.
And if you’re looking for a cheap custom canopy tent 10×10, remember that “cheap” and “cost-effective” are different things. A cheap tent that fails is the most expensive tent you can buy.
Maintenance: Extending Your Custom Tent’s Life
You’ve made the investment. Now let’s make it last. A quality custom tent, properly maintained, should give you 3-5 years of regular use, based on typical product lifespans. Maybe longer. But neglect will kill it in a season.
Cleaning is the first line of defense. After every event, brush off any loose dirt and debris. For deeper cleaning, use a mild soap and water solution—nothing harsh, no bleach, no abrasive scrubbers. Focus on the areas that get the most dirt: the top of the canopy, the edges, and the areas around the frame connections. Rinse thoroughly and let it dry completely before packing it away. This last part is critical—storing a wet tent is how you get mildew, and mildew will destroy the fabric and ruin your print.
Storage matters almost as much as cleaning. Your tent should be stored in its bag, in a cool, dry place. Avoid storing it in direct sunlight or in a hot attic—heat and UV will degrade the fabric and the print over time. And don’t store it with heavy items on top of it. The frame can bend, and the fabric can crease.
Repairs are inevitable. The most common issues are:
- Torn fabric: Small tears can be patched with repair tape or fabric glue. Larger tears might require professional repair or a replacement canopy.
- Bent frame pieces: If a leg or a top piece gets bent, you can often replace just that piece. This is where having a good manufacturer matters—they should have replacement parts available.
- Broken connectors: The plastic connectors at the joints are the most common failure point. Replace them immediately if they crack, because a broken connector will stress the rest of the frame.
- Faded print: This is harder to fix. You can’t reprint a canopy that’s already been printed. The best you can do is prevent fading by storing the tent indoors and not leaving it out in the sun longer than necessary.
Now, the big question: when do you repair, and when do you replace? Here’s my decision framework:
Repair if:
- The damage is cosmetic (small tears, minor scuffs)
- The frame is structurally sound
- The repair cost is less than 30% of the replacement cost
- You’re mid-season and can’t afford downtime
Replace if:
- The fabric is badly faded or the print is unreadable
- The frame is bent or cracked in multiple places
- The repair cost exceeds 50% of the replacement cost
- The tent is more than 3-4 years old and showing multiple signs of wear
One more thing: warranty coverage. Most quality custom tents come with a warranty that covers manufacturing defects. The typical warranty is 1-3 years on the fabric and frame, though some manufacturers offer longer, according to common industry practices. Lush Banners, for example, offers a limited lifetime warranty on their commercial-grade aluminum frames. Read your warranty carefully and understand what’s covered. And keep your receipt and order confirmation—you’ll need them if you have to file a claim.
Frequently Asked Questions
Q: Can I get a custom tent made?
A: Yes, absolutely. Custom tents are a standard product category, and most manufacturers offer full customization—size, fabric, frame, and printing. You’ll typically work with a manufacturer or a specialty retailer like those mentioned in this guide to design your tent, approve a digital proof, and then have it manufactured to your specifications. The process usually takes 2-4 weeks from order to delivery.
Q: How much are custom tents?
A: Prices vary widely based on size, material, and print complexity. A basic 10×10 custom tent can cost $300-500, while a premium 10×10 with commercial-grade materials and full-color dye sublimation printing runs $800-1,200. Larger sizes like 10×20 or 12×12 cost proportionally more. Remember that the custom canopy tent 10×10 price is the industry benchmark, and other sizes scale from there.
Q: How much does it cost to make a custom 10×10 tent?
A: For a standard 10×10 custom tent with a quality polyester canopy, an aluminum frame, and dye sublimation printing, expect to pay $500-800 from a reputable manufacturer. Budget options with screen printing can be cheaper, and premium options with heavy-duty materials will cost more. The custom canopy tent 10×10 price also depends on whether you’re ordering a single unit or in bulk.
Q: Can I design my own tent?
A: Yes, within certain parameters. You provide the artwork—ideally a vector file like AI, EPS, or PDF—and the manufacturer will create a digital proof showing how your design will look on the tent. You can specify colors, logo placement, and which panels get printed. However, the structural design of the tent (the frame and canopy shape) is typically standard, as it needs to be engineered for stability and ease of setup.
References
1. Custom Canopy Tents with Logo | Branded Pop-Up Tents – mvpvisuals.com
2. Custom Canopy Tents – Quality Branded Pop Up Tents 5-20 ft – lushbanners.com
- inflatable tent full guide







