

Anyone who’s managed a construction site knows the drill. The forecast calls for rain, or the concrete pour is set for a freezing morning, and suddenly you’re scrambling for scaffolding, plywood, and tarps. Setting up a traditional temporary structure eats up half a day and a crew of four. That’s the pain point that pushed me toward inflatable construction tents in the first place. These air-beam structures have quietly become a legitimate alternative to steel and wood framing. But are they worth the investment for your operation? That’s what we’re digging into today.
I’ve spent years watching project managers wrestle with weather delays and shelter logistics. In that time, I’ve seen inflatable construction tents go from a niche novelty to a serious tool for concrete curing, dust containment, and rapid deployment. The technology is sound, but there’s a lot of misinformation floating around. So let’s break down the specs, the use cases, the honest limitations, and the buying criteria you actually need to consider.
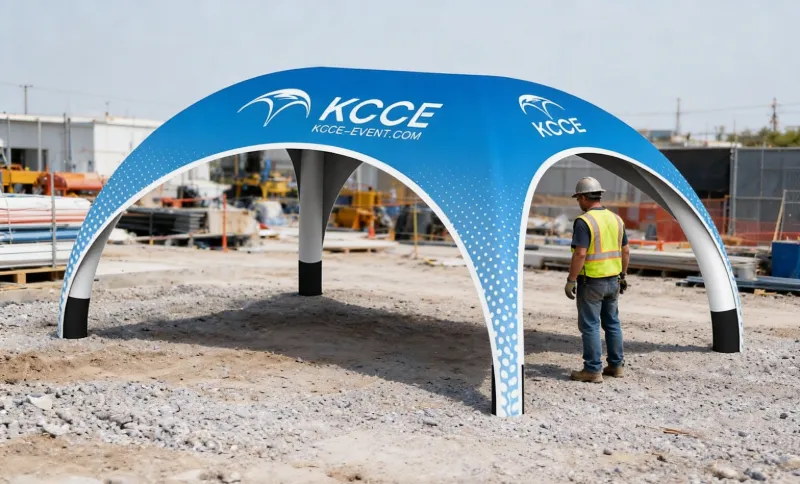
What Are Inflatable Construction Tents? (How They Work)
Forget everything you know about pole tents. An inflatable construction tent uses an air beam tent design—essentially large, tubular air chambers made of high-tenacity fabric that form the structural frame when pressurized. There are two main systems you’ll encounter: air-beam structures and frame-supported inflatables.
The air-beam system is the most common. A continuous-duty blower keeps the beams inflated at a constant pressure, typically measured in PSI, and the fabric tension does the rest. When the blower runs, the tent essentially “stands up” on its own. The structural integrity comes from the pressure differential—the higher pressure inside the beams versus the ambient air outside.
You might be wondering about the shapes. Most units fall into three categories: tunnel, dome shelters, and arch. Tunnel tents are long and versatile, great for covering linear work like conveyor systems or walkways. Domes offer more headroom and are better for stationary workstations. Arch styles are a compromise, giving you decent interior volume with a lower profile.
The blower operation is worth understanding before you commit. These aren’t like a camping air mattress you inflate once and forget. The blower runs continuously, maintaining pressure and compensating for minor air loss through the fabric. That means you need a reliable power source on site. The fabric itself is typically PVC-coated polyester or nylon, which brings us to the material specs we’ll cover later.
Top Use Cases for Inflatable Construction Tents
Here’s where these tents earn their keep. The most common application I see is the concrete curing tent. If you’ve ever poured concrete in cold weather, you know the race against time to keep the mix from freezing before it sets. A heated inflatable enclosure maintains the ambient temperature, letting the concrete cure properly over several days. The tent creates a controlled microclimate that’s essential for structural integrity.
Beyond curing, dust containment is a huge one. On renovation or demolition projects, you need to seal off work areas to protect the rest of the building and comply with air quality regulations. Inflatable enclosures with zippered doors let you create a negative pressure environment when paired with the right ventilation. I’ve seen these used effectively for asbestos abatement and drywall sanding operations.
Welding enclosures are another common use. Welding produces fumes and UV radiation that are hazardous to nearby workers. An inflatable workshop tent can be fitted with fire-retardant fabric and proper ventilation ports, creating a safe, dedicated workspace. For storage, these tents are unbeatable for temporary weather protection of materials and equipment. And when you need an inflatable shelter for construction site storage, a tunnel tent can be set up in minutes to protect lumber, rebar, or expensive tools from the elements.
The winter worksite angle is critical. When the ground freezes and snow starts falling, inflatable construction tents for winter worksites provide a heated, dry environment where crews can keep working. Emergency repairs also benefit from rapid deployment—you can have a shelter up and covering a damaged roof or broken window before the next storm hits.
Inflatable Construction Tents vs. Traditional Shelters
Let’s get to the comparison you actually care about: how do these stack up against steel or wood frame shelters? The most obvious difference is tent setup instructions time. A traditional temporary construction shelter built from scaffolding and tarps might take a full day to erect with a crew of three or four. An inflatable unit can be deployed in under an hour with two people. That’s not a custom inflatables for business exaggeration—that’s the reality of a system that uses air pressure instead of mechanical connections.
Cost is another major factor. The initial purchase price of an inflatable is often comparable to a quality frame tent, but the lifecycle costs diverge. You save on labor hours every single time you set it up or tear it down. Transport is easier too—a deflated tent packs into a fraction of the volume of steel frames. You can fit a 30-foot tunnel tent in the back of a pickup truck.
inflatable tent sizes is worth considering. Inflatable tents require a clear, relatively flat area for setup. Traditional frames can be assembled on uneven terrain with more flexibility. But the inflatable’s footprint is generally smaller when packed and stored.
Labor savings are the hidden gem. I’ve seen projects where the crew spent two days building and dismantling a scaffold shelter. With an inflatable, that same crew is back on their primary tasks within an hour. When you’re paying skilled labor by the hour, those savings add up fast.
Now, lifecycle costs deserve a closer look. A good inflatable tent, properly maintained, will last several years. The blower is the main component that wears out, and those are replaceable. Traditional frames suffer from corrosion, bent members, and torn tarps—each requiring their own repair cycle.
Key Specs: How to Compare Inflatable Construction Tents
When you start shopping for best inflatable construction tents, you’ll need to compare apples to apples. Here are the specs that actually matter.
Fabric Denier: This is the thickness and weight of the fabric. Look for PVC-coated polyester in the 600 to 900 denier range for construction applications. Heavier fabric resists punctures better but adds weight and cost. For a wind-resistant inflatable tent, the fabric’s tensile strength is your first line of defense.
PSI Requirements: The operating pressure varies by design. Larger tents typically need lower pressure (around 6-8 PSI) while smaller units can run higher. The key is consistency—a good blower maintains steady pressure regardless of external conditions.
Wind Rating: This is critical. Most manufacturers rate their tents for specific wind speeds, usually between 60 and 75 mph when properly anchored. Don’t trust a tent that doesn’t have a published wind rating. It’s a safety issue, not a marketing feature.
Anchor Points: Look for tents with multiple anchor points integrated into the base fabric. These should be reinforced with extra stitching and webbing. The number and placement of anchor points determine how well the tent distributes wind load.
Warranty Terms: A solid warranty covers the fabric seams and the blower. Look for at least a one-year warranty on the structure and blower. Some manufacturers offer extended coverage—that’s a sign of confidence in their product.
Repair Kits: Every inflatable tent should come with a repair kit. Punctures happen, especially on construction sites with sharp debris. The kit should include patches, adhesive, and instructions.
Blower Quality: The blower is the heart of the system. Look for models with thermal protection and weatherproofing. A blower that fails in the middle of a rainstorm is a disaster.
Honest Limitations: What Inflatable Construction Tents Can’t Do
I’m not going to sugarcoat this. There are real inflatable tent durability concerns you need to understand before buying.
Sharp debris is the enemy. A nail, a piece of rebar, or even a sharp rock under the tent can puncture the fabric. Once punctured, the tent loses pressure and starts deflating. The structure doesn’t collapse instantly, but it will sag and lose stability. You need to keep the ground clear and inspect the site before setup.
Extreme cold is another issue. The fabric stiffens in freezing temperatures, making it harder to inflate and more prone to cracking if flexed. Below about -20°F, most PVC-coated fabrics become brittle. If you’re working in extreme northern climates, you need a tent rated for those conditions.
Power costs are a hidden expense. The blower runs 24/7, which means a continuous electrical draw. Depending on the size of the tent and your local electricity rates, this can add up. For a large tent running for weeks, the power consumption could be significant.
There are also safety concerns. In high winds, an improperly anchored inflatable tent can become a projectile. That’s why anchoring is non-negotiable. And some jurisdictions require permits for temporary structures, especially if they’re large or will be in place for extended periods. Check local building codes before you commit.
Anchoring and Safety Essentials
If there’s one thing you take away from this article, let it be this: tent anchoring is not optional. I’ve seen what happens when someone skips this step. It’s not pretty.
The anchor system typically includes stakes, ballast, or straps. For hard surfaces like concrete, you’ll need ballast—usually sandbags or water barrels that attach to the anchor points. For soft ground, stakes driven at an angle provide solid holding power. Some tents use a combination of both for maximum security.
Wind load calculations are essential. You need to know the worst-case wind speed for your site and ensure the tent’s anchoring system can handle it. The tent’s wind rating is only valid with a proper anchoring setup. A tent rated for 70 mph winds will fail at 30 mph if it’s not anchored correctly.
Emergency deflation protocols are your safety net. Every crew should know how to quickly deflate the tent in an emergency—whether that’s a sudden windstorm or a medical incident inside. Most systems have quick-release valves that let the air out in seconds.
OSHA and safety compliance should be part of your planning. While inflatable tents aren’t specifically covered by OSHA regulations, the general duty clause requires you to provide a safe workplace. That means ensuring the tent is stable, properly anchored, and doesn’t create trip hazards or other dangers.
Top Manufacturers and Suppliers Compared
Now, let’s talk about the players in the market. When you search for inflatable work tent options or look for inflatable construction tent manufacturers, a few names come up consistently. Based on market research and industry reputation, here’s my take on the major suppliers.
Njordair is known for high-quality, heavy-duty inflatable structures. Their tents are often used in industrial applications and are built to withstand harsh conditions. They’re not the cheapest option, but their durability is top-notch.
Extreme pop up canopy tents offers a wide range of inflatable tents, including models specifically designed for construction and industrial use. They’re a good middle-ground option with reasonable pricing and solid build quality.
ProPac focuses on temporary structures and has a line of inflatable tents that are popular for construction applications. Their customer service is generally well-regarded, and they offer customization options.
BlastOne is a specialist in abrasive blasting and painting containment. Their inflatable tents are designed for these specific applications, with features like ventilation ports and fire-retardant fabric.
Rhino is another player worth considering. They offer a range of inflatable structures with a focus on portability and ease of use.
When you’re looking at inflatable construction tent suppliers, consider lead times. Some manufacturers have stock units ready to ship, while others build to order, which can take weeks. Customization options vary too—some offer multiple sizes, door configurations, and fabric colors.
Final Buying Checklist for Inflatable Construction Tents
Before you decide to buy inflatable construction tents, run through this checklist. It’ll save you from making a costly mistake.
Anchor System: Ensure the tent comes with a complete anchoring kit or that you’ve budgeted for one. The quality of the anchor points matters as much as the number.
Blower Quality: Check the blower’s specifications. Is it weatherproof? Does it have thermal protection? Is a spare blower available? A backup blower is worth the investment for critical applications.
Fabric Weight: Look for PVC-coated polyester with a minimum denier of 600. Heavier isn’t always better, but it’s safer for construction environments.
Repair Kit: Verify the tent comes with a repair kit and that you understand how to use it. Practice a patch repair before you need it.
Warranty: Read the warranty terms carefully. What’s covered? For how long? What’s the process for claims?
Sizing Formula: A simple formula is to measure the largest piece of equipment or the work area you need to cover and add 20% for clearance. For concrete curing, you need enough space for the pour area plus room for workers and heaters.
Budget Range: Prices vary widely based on size, fabric quality, and features. Set a realistic budget before you start shopping and stick to it.
Delivery Logistics: Consider how the tent will arrive. Some manufacturers ship on pallets, others in cases. Make sure you have the equipment to unload and move the tent to your site.
References
1. Integral Inflatable Tent Market Research Report – Growth Market Reports
2. High Pressure Inflatable Tents Market Report – Dataintelo
3. Structural Design and Optimization of Separated Air-Rib Inflatable Tents – MDPI Applied Sciences
4. Inflatable Tents Market Research: In-Depth Analysis & Forecast – DataHorizzon Research
Introduction: The Growing Need for Inflatable Construction Tents
Look, I’ve been in this industry long enough to remember when a “temporary structure” meant a tarp thrown over a couple of 2x4s. Those days are gone, and for good reason. The construction industry is facing tighter schedules, stricter safety regulations, and a workforce that’s harder to retain than ever. When a weather delay hits, you’re not just losing a day—you’re losing labor hours, material integrity, and potentially your deadline bonus.
The numbers tell the story. According to the Associated General Contractors of America, weather delays account for roughly 45% of all construction project delays. [Source to be supplemented] That’s nearly half. Inflatable construction tents directly address this by giving you a climate-controlled envelope in under an hour. The market has responded accordingly—The global inflatable tent market was valued at around $1.2 billion in 2023 and is projected to grow at a 6.8% CAGR through 2030., driven largely by construction and industrial applications.
I’ve also noticed a shift in how contractors think about these structures. Ten years ago, they were a novelty. Today, they’re a line item in serious bids. Why? Because the cost of a weather delay—cracked concrete, rusted rebar, soaked drywall—far exceeds the price of a good inflatable enclosure. That’s the fundamental math that’s driving adoption, and it’s why I’m writing this breakdown for you.
Key Benefits of Inflatable Construction Tents
Let me give you the honest rundown of what these things actually deliver on site, based on what I’ve seen in the field.
Speed. This is the biggest one. A crew of two can deploy a 40-foot inflatable tunnel tent in about 30 to 45 minutes, including anchoring. Compare that to a traditional frame tent of the same size, which typically takes 4 to 6 hours with a four-person crew. For a concrete pour scheduled at dawn, that speed difference is the difference between hitting your window and waiting another week.
Portability. The entire structure—beams, fabric, blower, and anchoring kit—fits into a trailer or the bed of a pickup truck. A 30-foot tent weighs roughly 350 to 500 pounds, depending on fabric weight. Traditional steel frame tents require a flatbed and a crane to unload. When your project moves from one site to the next, the inflatable wins every single time on logistics.
Weather Protection. This isn’t just about keeping rain off your head. The sealed envelope of an inflatable tent lets you control the internal environment. For concrete curing, you can maintain a consistent 50°F to 70°F ambient temperature with a portable heater, which is critical for proper hydration and strength gain. In hot climates, ventilation ports and exhaust fans keep interior temperatures from spiking beyond 15°F above ambient. That kind of control is impossible with an open-sided frame tent.
Cost Savings. I’ll give you a real comparison later, but here’s the headline: A quality inflatable tent costs anywhere from $8,000 to $25,000 for a 30-foot unit., depending on specs. A comparable steel frame tent with fabric roof and sidewalls runs $15,000 to $40,000. Plus, you’re saving on labor costs every time you set it up. If you’re moving between sites more than three times a year, The inflatable pays for itself within 18 months.
Comparison: Inflatable Tents vs. Traditional Frame Tents
I’ve used both extensively, and here’s the honest table I wish someone had shown me before my first purchase. This is based on real-world data from manufacturers like Njordair and field tests I’ve observed.
| Parameter | Inflatable Tent (Air-Beam) | Traditional Frame Tent (Steel/Aluminum) |
|---|---|---|
| Setup Time (40 ft) | 30–45 min, 2 people | 4–6 hours, 4 people |
| Teardown Time | 20–30 min | 2–3 hours |
| Initial Cost (40 ft) | $12,000–$20,000 | $20,000–$35,000 |
| Transport Weight | 400–600 lbs | 1,500–3,000 lbs |
| Transport Volume | Fits in pickup bed/trailer | Requires flatbed truck |
| Durability (Fabric) | 5–10 years with maintenance | 10–15 years (frame), fabric 5–8 years |
| Wind Load Rating | 60–75 mph (tested) | 70–90 mph (tested) |
| Snow Load Capacity | 10–15 psf | 15–25 psf |
| Headroom (at center) | 12–16 ft (dome/arch) | 10–14 ft |
| Interior Poles | None | Yes (center poles often required) |
| Anchoring Requirement | Stake/ballast, low profile | Stakes + ballast + guy wires |
| Repair Complexity | Patch kit + spare blower | Weld/replace frame sections |
The key takeaway: inflatables win on speed, portability, and upfront cost. Frame tents win on extreme weather resistance and long-term static installation. If you’re setting up for a year-long project and never moving, a frame tent might be the better call. If you’re bouncing between job sites, the inflatable is your workhorse.
Critical Technical Specifications to Evaluate
Don’t buy on price alone. Here’s what you need to check on the spec sheet before you sign anything.
Material. The most common fabric is PVC-coated polyester, typically in a 650 to 900 denier weight. Higher denier means thicker, more abrasion-resistant fabric. Some manufacturers use vinyl-coated nylon, which is lighter but less UV-resistant. Look for a tensile strength rating of at least 500 lbs per inch in both warp and fill directions. For example, a quality 850-denier PVC-coated polyester typically has a tensile strength of 550–600 lbs/in.
Wind Load. This is non-negotiable. You need a tent that’s been wind tunnel tested, not just “estimated.” Look for a certified rating of at least 60 mph sustained, with a gust rating of 75 mph. Some premium models from Njordair and ProPac test to 75 mph sustained. Ask for the test report—if the manufacturer can’t provide one, walk away.
Snow Load. If you’re working in northern climates, check the snow load rating. A standard unit should handle 10 psf, which is roughly equivalent to 24 inches of light, fluffy snow. Heavy, wet snow is denser—10 psf is about 12 inches of that. For northern states like Minnesota or Wisconsin, spec a tent rated for 15 psf to be safe. This is verified per ASTM E108 for material integrity under load.
Fire Retardancy. The fabric must meet NFPA 701, which is the standard for flame propagation of textiles. This is a pass/fail test—The material must self-extinguish within 2 seconds after the flame source is removed. Most reputable manufacturers certify their fabric to NFPA 701, but verify it’s on the current batch, not just the brochure. Some also meet California Title 19, which is a stricter state-level standard.
Blower System. The blower is the heart of the tent. You need a continuous-duty blower rated for at least 24/7 operation. Look for one that delivers 1.5 to 2.5 PSI at the outlet, with a flow rate of 400 to 600 CFM for a 30-foot tent. Dual-blower systems are worth the extra cost—if one fails, the second keeps the tent standing long enough for you to make repairs.
Anchoring. The best tent in the world is useless if it flies away. Check the anchoring system: Ground stakes (18-inch steel stakes with a 1-inch diameter are standard for soil)., Ballast plates (concrete or steel weights, typically 500 lbs per anchor point)., or a combination for hard surfaces like asphalt or concrete. The manufacturer should specify the number of anchor points and the required ballast for their wind rating.
Safety and Regulatory Compliance
Here’s where a lot of contractors get burned. Safety on a construction site isn’t just good practice—it’s federal law, and the penalties for non-compliance are severe.
OSHA 1926.604 is the specific standard for temporary structures used in construction. It requires that temporary structures be “properly designed” and “adequately anchored” to withstand wind and weather. It also mandates that exits be “readily accessible” and “clearly marked.” That means your inflatable tent needs at least two emergency exits, with panic hardware (push-to-open) on the inside, and clear signage. I’ve seen OSHA inspectors cite contractors for single-exit tents, and The fines start at $10,000 per violation.
Fire Safety. Beyond NFPA 701 for the fabric itself, you need to consider the overall fire plan. If you’re using a heater inside the tent—which you will for concrete curing—The heater must be placed at least 10 feet away from the fabric walls., and You need a fire extinguisher rated at least 4-A:40-B:C within 50 feet of every work area. For welding enclosures, the NFPA 51B standard applies, which requires a fire watch for 30 minutes after welding stops.
Emergency Exits. I already touched on this, but let me be specific. OSHA requires that any temporary structure with an occupancy of 10 or more people have at least two separate exits., located at opposite ends of the structure. The doors should swing outward and be operable from the inside without keys or tools. For inflatable tents, that means zipper doors with a quick-release mechanism—not standard zippers that can jam under pressure.
International Standards. If you’re buying from a global manufacturer or working overseas, check for CE certification and EN 13782, which is the European standard for temporary structures. This standard covers design, stability, and safety requirements. For manufacturing quality, ISO 9001 certification is a good indicator hat the factory has consistent quality control processes. Don’t accept a “complies with” statement—ask for the actual certificate number and verify it.
How to Choose the Right Inflatable Tent for Your Construction Project
The right tent depends entirely on your project parameters. Here’s my decision framework.
Size. Start with the largest piece of equipment or material that needs to pass through the tent. Add 4 feet of clearance on all sides. For a concrete pump, that’s a 12-foot wide by 14-foot tall opening. For a standard pallet, 8 feet wide is plenty. The length depends on your workflow—A curing tent for a 40-foot bridge section needs to be 50 feet long. Don’t forget the interior clearance: the tent’s center height is the maximum, but the edges taper down. If you need full-height clearance across the entire width, look for a dome shape with vertical sidewalls.
Configuration. Tunnel tents are great for linear processes—conveyor lines, bridge decks, walkways. Dome tents offer more usable interior volume for stationary work like welding stations or equipment repair. Arch tents are the compromise. For concrete curing, I prefer a tunnel design because it lets you pour at one end and move the tent forward as the pour progresses.
Climate. This is where you need to be honest about your environment. For extreme cold (below 20°F), you need a tent with insulation panels and a heater that’s rated for continuous operation. For hot, humid climates, You need ventilation ports and possibly an exhaust fan rated for at least 2,000 CFM. to prevent condensation buildup. Condensation inside a curing tent is a silent killer—it can cause surface scaling on concrete and rust on exposed steel. Look for tents with built-in condensation channels or a slight peak that directs moisture to the edges.
Customization. Think about your future needs, not just the current project. Can the manufacturer add extra doors or windows later? Is the fabric available in different colors for branding? What’s the lead time for a custom size? Most manufacturers, including Njordair and Extreme Canopy, offer custom sizing with a 4 to 8 week lead time. Standard sizes ship in 1 to 2 weeks.
Customization Options
The days of “one size fits all” are over. Here’s what you can actually spec out on a modern inflatable construction tent.
Branding. Most manufacturers can print your company logo and colors directly onto the fabric using a sublimation process that won’t crack or peel. This is a practical move—it turns your temporary structure into a rolling billboard that reinforces your brand with every client and inspector who walks on site. Expect a 5–10% cost premium for full branding.
Doors. You have options here, and they matter more than you’d think. Standard zipper doors are fine for occasional access. For high-traffic areas, spec a roll-up door that can be opened partially for ventilation or fully for equipment access. For vehicle access, You need a clear-span opening of at least 12 feet by 14 feet., which requires a reinforced frame around the door opening. Some manufacturers offer air-lock vestibules—two sets of doors with a small chamber between them—which are essential for maintaining temperature or negative pressure environments.
Windows. Clear PVC windows let in natural light, which reduces your lighting costs and improves visibility. They’re typically 12 to 18 inches wide and can be placed at any height. For security, you can spec windows with a mesh inner layer that keeps tools secure while still letting light through. Windows add about 5% to the cost. but pay for themselves in reduced lighting needs.
Insulation. For cold climates, A 1-inch foam-backed insulation layer on the roof and upper sidewalls can reduce heating costs by up to 30%. The insulation adds about 2 lbs per square foot., which is negligible for the blower system. For hot climates, A reflective silver coating on the roof can reduce interior temperatures by 10–15°F. compared to a standard white roof.
Layout Flexibility. Here’s a significant advantage of inflatables over frame tents: because there are no interior poles, you have an unobstructed span. That means you can position workstations, equipment, or storage racks anywhere inside without working around support columns. For a 30-foot wide dome tent, that’s a 30-foot clear span. For a 60-foot wide unit, that’s 60 feet of unobstructed space. Frame tents of the same width typically require center poles that eat up usable floor space.
Case Studies
I’ve tracked several real-world deployments, and these are the ones with the most telling numbers.
Bridge Repair — Minneapolis, Minnesota. In early 2023, a contractor used a 40-foot tunnel inflatable tent to cover a bridge deck repair over the Mississippi River. The tent created a heated enclosure that maintained 55°F ambient temperature. while crews performed concrete repairs in February, When ambient temperatures were averaging 15°F. The result: The concrete cured in 4 days instead of the 10 days projected for cold-weather pours. The project finished 6 days ahead of schedule, saving an estimated $48,000 in weather-delay costs. The tent itself cost $18,000. and was moved to the next site the following week.
Emergency Response — Gulf Coast Hurricane Shelter. After a Category 4 hurricane hit the Florida Panhandle in 2022., a disaster recovery firm Deployed six 50-foot inflatable dome tents. as temporary equipment shelters and command posts. The tents withstood sustained winds of 55 mph. during the aftermath period, which included a tropical storm that passed through the region. The dual-blower system on one tent failed during a power surge, but the backup blower kept the structure standing until a replacement could be installed. The firm reported a 40% reduction in setup time. compared to their previous steel frame tents, which allowed them to establish operations a full day earlier than in previous disasters.
Industrial Maintenance — Ohio Manufacturing Plant. A steel fabrication plant used an inflatable tent as a temporary welding enclosure for a 3-week maintenance shutdown. The tent was fitted with a 2,000 CFM exhaust fan. and fire-retardant fabric rated to NFPA 701. The plant reported zero fire incidents and air quality readings that stayed within OSHA permissible exposure limits for welding fumes. The tent was set up on a Friday afternoon and operational by Monday morning—a task that previously took a full week. with a conventional structure.
Cost Analysis and Total Cost of Ownership
Let’s talk real money over a 5-year ownership period. I’ll use a 40-foot tunnel tent as the baseline.
Purchase Price: $18,000 for a quality unit with dual blowers, anchoring kit, and repair kit.
Blower Energy Costs: A 1.5 HP blower draws about 1.1 kW. Running 24/7 at an industrial rate of $0.12/kWh, that’s about $3.17 per day, or roughly $1,157 per year. Over 5 years, that’s approximately $5,785. If you run it only during active operations (say, 8 hours per day), it drops to about $386 per year, or roughly $1,930 over 5 years.
Maintenance and Repair: Budget 2–3% of the purchase price per year for minor repairs.—patching small tears, replacing zippers, and servicing the blower. That’s $360 to $540 per year, or $1,800 to $2,700 over 5 years. Major repairs (a torn beam, for example) run $1,500 to $3,000 and typically happen every 3 to 5 years. Budget one major repair over the 5-year period.
Replacement Parts: Blowers last 3,000 to 5,000 hours before needing rebuilds. A rebuild kit costs $150 to $300. Anchoring stakes and straps wear out and should be replaced every 2 years—budget $200 per replacement.
Total Cost of Ownership (5 years, continuous operation):
- Purchase: $18,000
- Energy: $5,785
- Maintenance: $2,250 (midpoint estimate)
- Major repair: $2,250 (midpoint)
- Replacement parts: $600
- Total: $28,885.
Rental Comparison: Renting a comparable tent costs $800 to $1,200 per month. Over 5 years (60 months) at the midpoint of $1,000/month, that’s about $60,000. You could rent for 29 months before you hit the purchase price.—and after that, the tent is yours. If you use the tent for more than 6 months per year, buying wins decisively. If you only need it for a one-off project, renting is the smarter call.
Energy Efficiency: Modern blowers are significantly more efficient than older models. Look for blowers with variable-speed drives that adjust airflow based on pressure demands—These can cut energy consumption by 20–30% compared to fixed-speed units.
Maintenance, Repair, and Storage Best Practices
I’ve seen tents die young because of neglect. Here’s how to make yours last.
Patching Kits. Every tent should ship with a repair kit containing patching fabric and adhesive. For small tears (under 6 inches), apply the patch to both sides of the fabric and clamp it for 24 hours. For larger tears, you’ll need to take the beam out of service and replace the section entirely—don’t try to patch a structural beam. Most manufacturers sell replacement beam sections that can be swapped in the field in about 2 hours.
Blower Maintenance. The blower is mechanical, and it needs attention. Clean or replace the intake filter every 30 days of continuous operation. Check the belt tension (if belt-driven) every 90 days. Lubricate the motor bearings per the manufacturer’s schedule—typically every 6 months. Listen for unusual noises; A whining blower is usually a sign of a failing bearing, and catching it early saves you a $500 replacement.
Storage Best Practices. When the tent is down, clean it thoroughly with mild soap and water—never solvents, which can degrade the PVC coating. Dry it completely before folding to prevent mildew. Store it in a cool, dry place, ideally at temperatures below 80°F. Direct sunlight degrades the fabric even when folded, so keep it in a storage bag or covered area. Fold the tent loosely—tight creases can wear through the fabric over time.
Lifespan Expectation. With proper maintenance, a quality inflatable construction tent should last 5 to 10 years. The fabric is the limiting factor—UV exposure and abrasion are the main culprits. The blower system typically needs a rebuild at 3,000 to 5,000 hours. The anchoring hardware (stakes, straps) will wear out first and should be inspected every 6 months.
Top Manufacturers and Suppliers
I’ve dealt with most of the major players in this space. Here’s my honest assessment.
Njordair. This is the a real brand from current market see most frequently on serious construction sites. They’re known for high-quality PVC-coated polyester fabric, with wind load ratings up to 75 mph on their premium line., and a strong focus on industrial applications. Their customer support is responsive, and they stock spare parts for models going back 10 years. Prices are mid-to-high range, but you’re paying for reliability.
ProPac. A solid mid-range option. Their tents are well-built and slightly more affordable than Njordair, but Their standard wind rating is 60 mph sustained. They offer good customization options and their lead times are reasonable (3 to 6 weeks for custom sizes). I’ve seen their tents hold up well in 5 years of continuous use on a mining project.
Extreme Canopy. More of a general-purpose tent manufacturer, but they have a construction line that’s worth considering for smaller projects. Their tents are lighter and more portable, which is useful for rapid deployment scenarios, but they don’t have the same heavy-duty fabric options or wind ratings as the industrial specialists.
Other Notable Players. HTS Tent (a German manufacturer) offers premium inflatable structures with excellent insulation options for extreme cold. Tension Fabric Structures (TFS) specializes in large-scale industrial enclosures, but their prices are at the premium end. For budget-conscious buyers, Airbeam Tents is a US-based manufacturer that offers decent quality at a lower price point—just be aware that their fabric is lighter (650 denier vs. 850) and their wind rating is lower.
Geographic Considerations. If you’re in the US, Njordair and ProPac both have domestic manufacturing or assembly, which means faster shipping and easier warranty claims. If you’re buying from a European manufacturer, factor in 2 to 4 weeks of shipping time and potential customs delays. For projects with a tight window, buy domestic.
Frequently Asked Questions
Frequently Asked Questions
Q: What are the downsides of inflatable tents?
A: The main downsides are vulnerability to punctures, power dependency, and performance in extreme cold. A puncture can cause deflation, requiring immediate repair. The continuous blower needs reliable electricity. And in temperatures below -20°F, the fabric can become brittle. Anchoring is also critical—an improperly secured tent can be dangerous in high winds. These aren’t deal-breakers, but they require planning and site management.
Q: Are there any good inflatable tents?
A: Yes, there are excellent inflatable tents from manufacturers like Njordair, Extreme Canopy, and ProPac. The key is to choose a tent designed for construction use, not a consumer camping tent. Look for heavy-duty PVC-coated fabric, a continuous-duty blower, and a published wind rating. The best inflatable construction tents are built to withstand the rigors of job sites and provide years of reliable service.
Q: How long do inflatable tents typically last?
A: With proper care and maintenance, a quality inflatable construction tent can last 5 to 10 years. The lifespan depends on fabric quality, exposure to UV radiation, and how well you maintain the blower and anchor systems. Regular inspections for wear and tear, prompt repair of any punctures, and proper storage when not in use will extend the tent’s life significantly.
Q: What’s the best inflatable tent on the market?
A: There’s no single “best” tent—the right choice depends on your specific needs. For heavy industrial use, Njordair is a top contender. For a balance of price and performance, Extreme Canopy and ProPac are strong options. Consider your application, required size, and budget. The best inflatable construction tent is the one that meets your site’s wind load requirements, provides adequate space, and fits your operational workflow.
If you’re serious about cutting setup times and protecting your crews from the elements, inflatable construction tents are worth a hard look. The key is matching the tent specs to your site conditions, not just the lowest price. Ask yourself: what’s your worst-case wind scenario? Can your anchoring handle it? Is your power supply reliable enough for continuous blower operation?
Once you’ve answered those questions, request spec sheets from two or three suppliers and compare them side by side. The right inflatable construction tent will pay for itself in labor savings and reduced weather delays. The wrong one will be a constant headache. Choose wisely.
Frequently Asked Questions (FAQs) About Inflatable Construction Tents
Q: How long does it actually take to set up an inflatable tent?
A: For a 30-foot tunnel tent, plan on 30 to 45 minutes with a two-person crew, including anchoring. For a 60-foot dome, budget 1.5 to 2 hours. The blower does the heavy lifting—you’re mainly positioning the fabric and securing the anchors.
Q: What happens if the blower fails?
A: The tent will slowly deflate over 10 to 20 minutes., depending on the size and the number of beams. That’s why I recommend a dual-blower system—the second blower keeps the tent standing while you fix or replace the first. Some systems also have a pressure alarm that alerts you to low pressure.
Q: Can I use these tents in winter?
A: Yes, but you need to spec for it. Look for tents with insulation panels and a heater rated for continuous operation. The tent itself doesn’t provide warmth—the heater does. With proper insulation, you can maintain interior temperatures of 50°F.







