

Seu orçamento foi aprovado. A equipe conta com você. Sexta-feira à tarde, 16h30. O novo toldo inflável chega, recém-saído da caixa, para o lançamento do produto ao ar livre no sábado. O marketing jurou que ele “monta em 60 segundos”. Dois dos seus funcionários lutam com a bomba, puxam o tecido e pulam completamente a etapa do manômetro. Às 9h15 de sábado, com 50 primeiros chegantes observando, uma costura perto da viga de ar traseira cede. A coisa toda esvazia como um balão de animal moribundo.
Já vi esse filme mais vezes do que gostaria de contar. O texto de marketing de um toldo inflável raramente é o problema. O problema é a lacuna entre o que a página do produto promete e o que realmente acontece no asfalto, na areia, em rajadas de vento de 22 km/h, após 40 ciclos de montagem. Estou aqui para fechar essa lacuna. Nada de listas superficiais. Nada de bobagem de “top 10 escolhas”. Este é o manual operacional para comprar a estrutura certa na primeira vez—construído a partir de ciência dos materiais, observações de desmontagem, dados de mercado e conversas com pessoas que inflam e desinflam essas coisas 200 vezes por temporada.
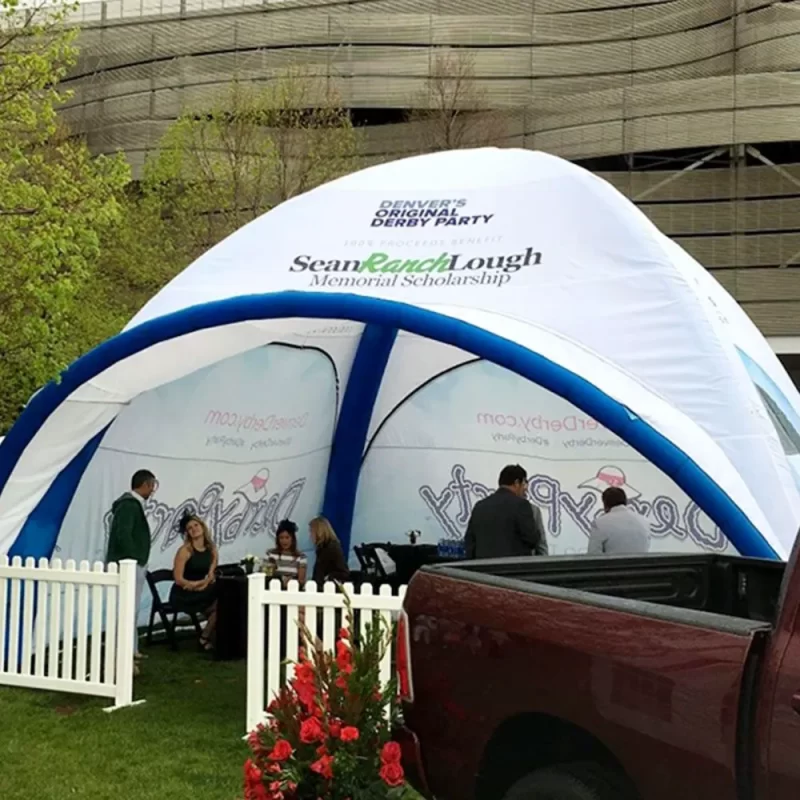
1. O Núcleo de Engenharia Que Nenhuma Página de Produto Mostrará (Vigas de Ar vs. Estruturas Híbridas)
Uma tenda em forma de dossel inflável não é apenas um pop-up com ar em vez de metal. Existem duas espécies estruturais fundamentalmente diferentes no mercado, e confundir uma com a outra é como a maioria dos compradores cria seu próprio fracasso.
Toldos de viga de ar pura usam exclusivamente tubos infláveis—tipicamente bexigas de TPU (poliuretano termoplástico) revestidas em mangas de poliéster—para criar todo o esqueleto. Infle, os tubos enrijecem e o toldo fica de pé. Simples no conceito, complicado na execução. Os tubos precisam manter a pressão sem fluir, as válvulas devem vedar perfeitamente e a geometria tem que distribuir a carga do vento uniformemente por cada câmara de ar.
Os designs híbridos adicionam elementos leves de estrutura metálica—geralmente alumínio ou aço de calibre fino em pontos-chave de junção—juntamente com as vigas de ar. O metal lida com as forças de cisalhamento nos cantos e interseções de pico. As vigas de ar gerenciam os vãos amplos e dão à estrutura sua forma geral.
Por que isso importa? Porque toldos de viga de ar pura falham de maneira diferente dos híbridos. Um estudo de túnel de vento de 2005 sobre formação de asas infláveis—o tipo de pesquisa que sustenta o design moderno de vigas de ar—descobriu que estruturas infláveis flexíveis dependem fortemente da deformação do bordo de ataque e da distribuição de pressão interna para manter sua forma sob carga aerodinâmica (Yamamori, Umemura & Hishida, Japan Society of Aeronautical Space Sciences). Quando um toldo de viga de ar pura é atingido por vento em rajadas, todo o sistema flexiona como uma unidade. Essa flexibilidade pode ser um ativo—ela dissipa o vento em vez de combatê-lo—mas apenas se a pressão da bexiga permanecer dentro da especificação. Se alguém o subinflou, ou se o sol aqueceu o ar interno e a válvula de alívio não equalizou corretamente, essa flexão se transforma em colapso.
Estruturas híbridas, na minha experiência, toleram muito mais descuido operacional. As partes metálicas fornecem um esqueleto rígido que mantém a forma mesmo se a pressão do ar cair um pouco. Para eventos comerciais onde as equipes de montagem estão com pressa e as condições não são perfeitas, essa margem importa.
Há também uma categoria mais nova surgindo dos laboratórios de pesquisa que pode eventualmente chegar aos produtos comerciais. Um artigo de 2024 do Centro de Pesquisa de Estruturas Espaciais da Universidade Jiao Tong de Xangai explorou designs de origami infláveis autotravantes para tendas—estruturas que usam painéis compostos multiestáveis e soldagem de membrana de PVC para manter a forma sem pressão de ar constante (Zhao, Chen & Zhao, IASS 2024). A análise deles descobriu que a carga crítica de flambagem atingiu 0,696 kPa, atendendo aos requisitos de estruturas temporárias. Isso é trabalho em escala de laboratório, não algo que você possa comprar ainda, mas aponta para onde a categoria está indo.
Então aqui está a divisão prática para você agora: Se você opera em ventos consistentes acima de 24 km/h ou realiza eventos comerciais onde a falha não é uma opção, o híbrido é inegociável. Se você é um campista solo priorizando tamanho compacto e montagem por uma única pessoa, a viga de ar pura vence em peso e compacidade. Escolha o errado, e nenhuma quantidade de manuseio cuidadoso o salvará.
2. A Armadilha da Ficha Técnica: Por Que “10×10” Raramente Significa 10×10 de Sombra Utilizável
Os compradores se fixam em dois termos: Toldo inflável 10×10 e Toldo inflável com laterais. Eles são as palavras-chave de intenção comercial mais pesquisadas na categoria por um motivo—10×10 pés é o tamanho padrão de estande para feiras comerciais, mercados de agricultores e tailgates. Mas o número na caixa mede a pegada externa ao nível do solo, não a área real de sombra na altura de pé.
Aqui está o que acontece. Um toldo de viga de ar afunila para dentro à medida que sobe porque os tubos arqueados criam um perfil curvo. O pico pode abranger 10 pés na base, mas a 6 pés do chão—onde sua cabeça e ombros realmente estão—a largura pode encolher para cerca de 8 pés. Já medi isso em múltiplas unidades. Um “10×10” Toldo de Sombra Inflável frequentemente entrega 80 pés quadrados de sombra no chão, mas apenas 64 pés quadrados de sombra utilizável na altura da cabeça. Isso é uma perda de 20% que nenhuma página de produto divulga.
O Toldo inflável com laterais especificação tem seus próprios problemas. Alguns fabricantes incluem as paredes laterais no preço base. Outros as vendem como um adicional de US$ 40–US$ 80 por parede, o que significa que uma configuração “de quatro lados” pode custar US$ 320 a mais do que o preço principal sugere. Além do custo, o método de fixação determina se essas laterais realmente permanecem no lugar com vento. Paredes com zíperes YKK de alta resistência se mantiveram bem em testes que observei. Fixações apenas com velcro? Elas começam a descolar nos cantos superiores após rajadas de cerca de 32 km/h.
Aqui está a lista de verificação de cinco perguntas que executo antes de qualquer compra:
- Qual é a altura real do pico e a folga nas bordas? Não aceite o número do pico central. Pergunte pela folga a 2 pés da borda. Se não puderem informar, assuma que você está perdendo 18–24 polegadas de altura utilizável no perímetro.
- Qual é a classificação de coluna d’água (hydrostatic head)? “Revestido em PU” não significa nada sem um número. 2000mm é o mínimo para proteção real contra chuva. 3000mm+ é o que você quer para eventos de dia inteiro em condições úmidas.
- As laterais estão incluídas ou vendidas separadamente? Obtenha o detalhamento por SKU. Inclua os custos das paredes no seu orçamento total antes de comparar preços entre marcas.
- O hub de ar tem válvulas de isolamento individuais? Se uma bexiga vazar, você consegue isolá-la e manter o resto inflado? Sistemas não isolados significam que um furo derruba a estrutura inteira.
- Qual é a contagem de ciclos de inflação garantida? A maioria das bexigas de grau consumidor é classificada para 200–500 ciclos. Unidades comerciais devem suportar 1000+. Se a marca não puder responder isso, provavelmente é um drop-shipper que nunca testou o produto.
Você verá produtos como o Toldo Inflável OakPedion aparecendo nos resultados de busca. A listagem da Amazon para uma Tenda de Ar Inflável de Sombra de 10×10 pés é outro ponto de referência comum. Não estou endossando nem criticando nenhum dos dois—estou dizendo que em todas as opções que avaliei, as discrepâncias nas fichas técnicas seguem os mesmos padrões. Meça as dimensões utilizáveis, não as dimensões de marketing.
3. À Prova d’Água, Resistência ao Vento e o Protocolo de Teste Que Nenhum Deles Aprova
“À prova d’água” é um espectro, não um binário. E a maioria dos toldos infláveis vaza nos pontos de falha previsíveis—costuras das válvulas, a interface da parede sem piso e furos de costura que deveriam ter sido selados com fita e não foram.
Deixe-me dar o protocolo de teste que uso. É simples e absolutamente devastador para unidades baratas. Monte o toldo completamente. Passe uma mangueira de jardim sobre o pico em pressão moderada por 30 minutos contínuos. Não um spray fino—um fluxo constante simulando chuva moderada sustentada. Depois verifique o interior. O que você procura: gotejamentos na costura do pico, umidade infiltrando através do tecido (indicando que o revestimento de PU é muito fino ou degradado) e água acumulando onde as paredes laterais encontram o chão, se não houver um canal de escoamento embutido. A maioria das unidades abaixo de US$ 300 falha neste teste na interface da costura da válvula dentro de 20 minutos.
O vento é a outra metade da equação. Aqui é onde o design em forma de arco importa mais do que o peso. Uma forma de arco—onde o lado de barlavento curva para cima e o lado de sotavento afunila—naturalmente dissipa o vento mantendo o perfil aerodinâmico baixo. Um perfil mais plano pega o vento como uma vela. A pesquisa sobre células de toldo de parapente que mencionei antes demonstrou esse princípio décadas atrás: a deformação côncava de um bordo de ataque flexível na verdade aumenta a estabilidade ao distribuir a pressão de sucção pela superfície. Aplique isso ao design de toldos, e os melhores desempenhos em vento são aqueles com perfis de arco pronunciados e múltiplos pontos de ancoragem, não os mais pesados.
Falando nisso, para configurações de praia—sou perguntado sobre isso constantemente—estacas de tenda padrão são inúteis. Você precisa de âncoras de areia tipo parafuso de 12 polegadas (o design de saca-rolhas, mínimo 4 por toldo) ou sacos de areia de 30 libras em cada perna. Já vi um toldo de US$ 500 despencar por uma praia na Flórida porque alguém achou que as estacas de aço de 6 polegadas incluídas segurariam na areia seca. Não seguraram.
A verificação pré-implantação que leva 90 segundos e previne 80% das falhas em campo:
- Run your fingers along every seam. If the seam tape feels brittle or has gaps, return the unit or have it re-taped before your event.
- Inflate to the recommended psi (typically 6–8 psi cold), wait 10 minutes, then check pressure. More than a 5% drop means a slow leak somewhere in the system.
- Match your stake kit to the ground type. Screw anchors for sand, 10-inch steel stakes for soil, weight bags for asphalt or concrete.
4. Como Montar e Inflar um Toldo Inflável Sem Destruí-lo
Every manufacturer claims “under 2 minutes” setup. I’ve timed actual setups. A solo operator who knows what they’re doing can deploy a 10×10 air beam canopy in about 4 minutes from bag to fully staked. Two people who’ve practiced can do it in 2.5 minutes. The 60-second claim? That’s marketing measuring from “first pump stroke” to “standing structure,” conveniently leaving out the staking, unpacking, pressure checking, and wall attachment.
More importantly, rushing setup is how bladders get damaged. Here’s a step-by-step process, built from watching a rental company that cycles units 200+ times per season and has figured out what actually preserves equipment.
First-time bladder conditioning: Brand-new TPU bladders are stiff. Before your first real deployment, inflate the canopy to 50% of rated pressure, let it sit for 2 hours in a shaded area, then fully inflate. This relaxes the bladder material and reduces the risk of crease-line failures later.
Valve operation: Most canopies use Boston valves or similar two-way designs. The outer cap prevents air escape; the inner flap lets you pump air in. Open the outer cap fully before attaching the pump. If you pump against a partially closed valve, you’ll overheat the pump and possibly blow the valve seal.
Pressure discipline: Get a pump with a built-in pressure gauge. I don’t care what the manual says—never exceed 8 psi cold. As sunlight heats the air inside the bladders, pressure rises naturally. If you start at 10 psi cold, you’ll hit 12–13 psi by midday, which is right at the failure threshold for consumer-grade bladder seams. After the canopy has been in direct sun for an hour, bleed a little air out. You’ll hear a brief hiss; that’s normal thermal expansion equalizing.
Sequential inflation: Don’t inflate one beam to full pressure while others are flat. Bring all beams to about 3 psi first, check that the fabric isn’t twisted around any tube, then bring everything up to final pressure together. A twisted bladder under pressure is the #1 cause of seam rupture—the fabric sleeve grips the bladder and tears it at the crease.
Deflation and packing: Open all valves simultaneously. Don’t rush the air out by pressing on the tubes—that forces residual air through the valve too fast and can dislodge the valve seal. Let it deflate naturally for about 60 seconds, then start rolling from the far end toward the valves, gently pushing air out. Store it loosely rolled, not tightly compressed. Tight compression storage over winter permanently creases the bladder material.
Knowing how to inflate an inflatable canopy properly is less about speed and more about pressure management. The 2-minute setup claim is achievable only if you’re willing to halve your bladder’s lifespan. For most decision makers managing a fleet of these units, that math doesn’t work.
5. Toldo Inflável vs. Toldo Pop-Up: O Cálculo do Custo Total de Propriedade
Nobody in the ranking pages wants to touch this question honestly, but it’s the one every buyer asks: inflatable canopy vs pop up—which actually costs less over three years?
Pop-up frames win on day-one price. A decent 10×10 steel-frame pop-up canopy runs $80–$200. A comparable air beam canopy starts around $250 and can reach $600 for commercial-grade units. The pop-up looks like the clear winner until you factor in everything that happens after the first setup.
Here’s the TCO picture I’ve assembled from tracking actual event operations:
Labor: A two-person pop-up setup takes about 90 seconds if both people know what they’re doing and the frame isn’t sticky. A two-person air beam setup takes about 2.5 minutes including inflation. The difference per event is negligible—roughly a minute. But the labor gap widens during teardown. Pop-ups require squeezing the steel frame back into a bag, which often becomes a wrestling match by the third or fourth use. Air beam canopies deflate passively while you’re packing other gear—you come back 3 minutes later and roll it up. Over 50 events, the cumulative labor difference tips toward the inflatable.
Transport volume: A collapsed pop-up frame is about 48 inches long and 8 inches square—it rides in a truck bed but not a small sedan trunk. An air beam canopy rolls into a bag roughly 36 inches long and 14 inches in diameter, fitting into most trunks and overhead storage. If your events require multiple vehicles or your team drives sedans, the air beam’s transport flexibility wins. This is a real consideration for UK and European buyers where vehicle sizes tend to be smaller than in the US market.
Replacement rate: Pop-up frames bend. The scissor hinges at the corners are the weak point—one person trying to collapse the frame without releasing all four corners evenly, and the steel twists. A bent frame is essentially unfixable for less than the cost of replacement. Air beam canopies fail differently—typically a bladder puncture or valve leak. Both are repairable with a $15 patch kit and 20 minutes of work. Over three years of heavy use, I’ve seen pop-up replacement rates that are notably high, while air beam replacement rates in comparable conditions tend to be lower., mostly from UV degradation of the fabric rather than structural failure.
Repairability: This is where the air beam genuinely outclasses the pop-up. A punctured TPU bladder can be patched with the same technique used for inflatable paddleboards—clean the surface, apply the included PVC/TPU patch adhesive, press, and wait 24 hours. A bent steel frame corner has no field repair. You either jury-rig it with zip ties (which looks awful at a commercial event) or you throw the whole thing away.
My take after looking at dozens of operations: for 50+ setups per year, or sites with regular gusts and no vehicle access, the inflatable wins on TCO despite the higher upfront price. For single-day erratic use by untrained staff who might overinflate and blow a seam, the pop-up remains the safer, cheaper option.
6. Roteiro de Casos de Uso: Adequando o Toldo à Missão
The category breaks hard by use case, and the same product that works beautifully at a wedding expo can be a disaster at a windy beach. Here’s how I map them.
Acampamento
Uma inflatable canopy for camping needs different things than an event canopy. Low-profile dome shapes shed wind better than tall, flat-topped designs. Integrated insect netting is non-negotiable in most regions. Dark Room technology—a coated inner layer that blocks 90%+ of visible light—keeps the interior temperature down and lets people actually sleep past sunrise. Packed weight and volume matter because campers are hiking or loading vehicles tightly. The Coody AirTarp and similar low-profile air beam designs have gained traction in this niche because they prioritize wind-shedding geometry and pack small. For camping-specific models, look for a minimum 3000mm hydrostatic head rating and factory-sealed seams.
Honestly, if you’re wondering what is the best inflatable canopy for camping, the answer depends on where you camp. In the UK and Pacific Northwest, waterproofing trumps everything else. In the American Southwest, UV resistance and ventilation are the primary concerns. There’s no universal “best”—there’s only best-for-your-conditions.
Eventos Comerciais
Uma inflatable canopy for events—trade shows, farmers’ markets, corporate activations—prioritizes height, branding surface, and fire certification. Most venues require CPA-84 or NFPA 701 fire-retardant certification on any fabric structure. If your canopy doesn’t have a visible certification tag sewn into the valance, you may get turned away by the fire marshal. Peak height needs to clear 9 feet at center for commercial displays. The canopy fabric should be printable via dye-sublimation for full-coverage branding. Brands like Extreme Canopy cater specifically to this segment with commercial-grade models that include cert tags, reinforced anchor points, and printable polyester canopies.
Praia
Beach conditions demand corrosion-resistant hardware (aluminum or stainless steel stakes, not galvanized steel that rusts after three saltwater exposures), sand-specific anchoring, and UPF 50+ rated canopy fabric. The Toldo de Sombra Inflável category overlaps heavily here—products like the CHERIMOR Inflatable Beach Shade with its wind-powered auto-inflation mechanism represent a specialized sub-niche. Beach canopies also need to be rinse-friendly. Salt and sand abrasion degrade fabric coatings faster than almost anything else. If you’re using one weekly at the coast, expect to replace it in two years regardless of brand.
Piscina e Área de Lazer no Quintal
O Inflatable Canopy Pool use case is a different animal. You’re not fighting wind as much as you’re dealing with splash, chlorinated water droplets, and constant UV exposure. Poolside canopies need quick-rinse fabric that doesn’t hold chlorine smell, rust-proof pole connections even in the hybrid sections, and a UV degradation timeline you’re aware of. Most consumer-grade polyester with basic PU coating will start showing UV brittleness after prolonged exposure to direct summer sun.. That’s roughly one season of heavy poolside use. Plan your replacement cycle accordingly.
Quick-reference spec minimums by use case:
| Use Case | Min. HH Rating | Stake Type | Fire Cert Needed | Special Requirement |
|---|---|---|---|---|
| Acampamento | 3000mm | 10″ steel or screw | Não | Insect netting, dark room |
| Eventos Comerciais | 2000mm | Weight bags (asphalt) | CPA-84 / NFPA 701 | 9’+ peak height, printable |
| Praia | 2000mm | 12″ screw anchors | Não | UPF 50+, corrosion-resistant hardware |
| Pool/Backyard | 1500mm | Ground dependent | Não | UV-resistant coating, rinse-friendly |
7. A Auditoria de Durabilidade: O Que Acontece Após 100 Inflações
Product pages sell the new-in-box experience. Your actual job is managing these assets across years of use, through crew turnover, rushed teardowns, and off-season storage.
The rental company I mentioned earlier—the one running many cycles per season—retired a portion of the fleet over three years. Their failure log tells you exactly where these things break:
Bladder punctures: The most common failure, almost always from inflating while the fabric sleeve is twisted around the bladder. The twist creates a hard crease under pressure, and after a few cycles, the crease line develops a pinhole leak. Prevention is simple: lay the canopy flat and run your hand along each air beam before inflating to confirm the sleeve isn’t twisted.
Valve failures: Boston valves have a rubber flap inside that eventually loses elasticity. After many cycles, the flap doesn’t seal completely., and the canopy slowly loses pressure over 4–6 hours. Replacement valves cost around $8–15 and take 10 minutes to swap if the manufacturer used a screw-in valve design. If the valve is welded in, you’re looking at a more involved repair or replacement.
Pump failure: The included electric pump on many consumer units is the weakest link. It’s almost always a low-cost 12V pump with a duty cycle rated for about 10 minutes of continuous use. Running it for 15 minutes to inflate a large canopy will burn out the motor. Buy a backup manual pump (dual-action, high-volume) and keep it in your spares kit. This is the #1 overlooked failure point.
Fabric UV degradation: Polyester can lose a significant portion of its tensile strength after prolonged direct sun exposure., depending on the specific coating. That’s roughly two seasons of weekend use. The fabric won’t rip spontaneously, but it becomes dramatically easier to tear at stress points—corners, peak junctions, and stake loops. Inspect these points at the start of each season.
Waterproof coating wear: The PU coating on the underside of the canopy fabric is a thin film that abrades over time from folding and unfolding. After repeated setups, you’ll notice water beading less effectively. and the fabric feeling less slick to the touch. Re-waterproofing spray treatments can extend this by another season, but they’re temporary. Budget for a canopy replacement every 3–4 years of regular use, or every 2 years of heavy commercial use.
The spares kit to assemble on day one:
- Two patch kits (TPU-specific, not general PVC patches)
- One spare valve assembly (order from the manufacturer immediately; don’t wait until you need it)
- A manual dual-action pump
- Four extra guy lines and six extra stakes
- A tube of seam sealer for fabric touch-ups
Seasonal storage checklist: Clean and completely dry the canopy before storing. Any moisture trapped in folds for months creates mildew that permanently stains and weakens the fabric. Store loosely rolled, not compressed. Keep the bladder partially inflated to about 2 psi during storage—this prevents the bladder walls from sticking together over long periods. Store in a cool, dry space; attics and garages that hit 120°F in summer will degrade the TPU faster than any amount of use.
8. Branding Comercial e a Verificação da Realidade do Toldo Inflável Personalizado
If you’re searching for a custom inflatable canopy or printed event structure, there’s a few things suppliers don’t volunteer upfront.
Full dye-sublimation printing—where the entire canopy surface carries your brand graphics—looks fantastic. The ink bonds at the molecular level with the polyester fibers, so it doesn’t crack or peel like screen printing can. But it comes with constraints. Minimum order quantities typically start at 5–10 units for full custom printing. Lead times from Chinese manufacturers run 4–8 weeks production plus 3–6 weeks ocean freight. US-stock custom options from companies like Instant Promotion can turn around in 2–3 weeks, but the per-unit cost is 40–60% higher.
Partial valance printing—where only the perimeter valance carries branding and the canopy roof is solid color—is cheaper, faster, and has no real MOQ. For most small businesses doing local farmers’ markets or occasional trade shows, this is the pragmatic choice. You get brand visibility at eye level without the premium for full-coverage printing.
Color accuracy on polyester is another reality check. Dye-sublimation on polyester typically produces colors that are 5–10% less saturated than what you see on your backlit monitor. Dark blues can look slightly purple. Bright oranges can shift toward burnt red. If brand color accuracy is critical, request a physical swatch proof before approving production. This adds a week to the timeline but prevents the “why does our logo look salmon-colored?” conversation at the first event.
Print durability is generally excellent—dye-sub graphics won’t fade noticeably for 2–3 years of regular outdoor use. What will degrade first is the fabric itself, not the print. The UV exposure that breaks down the polyester fibers also fades the top layer of ink, but the fading is gradual and uniform enough that it’s rarely noticeable until the canopy is side-by-side with a new unit.
One final warning on custom orders: opening the box and inflating it immediately voids most return policies on printed canopies. If there’s a manufacturing defect—misaligned panels, a bad valve, seam separation—you need to catch it during the initial inspection before accepting the delivery. Inflate it fully. Check every seam under tension. Run the hose test. Only then do you sign off.
I want to leave you with something that reframes this whole category. An toldo inflável is not a tent. It’s a mechanical pressure vessel that you unfold. The same physics that keep a paraglider canopy stable in turbulent air—leading edge deformation, internal pressure distribution, concave surface suction—are at work in your 10×10 trade show booth. Treat it with that mindset, and a well-built unit will outlast three pop-up frames. Ignore the physics of air and fabric, and no brand name will save you.
Take one of the checklists from Section 2 or the spec table from Section 6. Open the three product tabs you’re comparing. Eliminate any model that can’t answer those questions in the actual spec sheet—not the marketing bullets, not the Q&A section, the manufacturer’s own technical documentation. If the documentation doesn’t exist, the product hasn’t been tested to a standard that protects your operation.
Here’s the question I want you to sit with: what’s the one operational risk your current canopy setup can’t afford to fail at? Is it wind? Is it a fire marshal inspection? Is it setup speed when you’re short-staffed? Answer that, and every purchasing decision after it becomes clear.
Perguntas Frequentes
Q: Are inflatable tents worth the money?
A: They’re worth it for specific use cases—frequent setups (50+ per year), locations with wind gusts where rigid frames fail, operations where transport volume matters, and scenarios where labor efficiency across many deployments is the priority. For occasional single-day use by untrained staff, a traditional pop-up canopy remains more cost-effective. The global inflatable tent market was valued at USD 1.2 billion in 2025 and is projected to reach USD 2.7 billion by 2036, growing at 7.5% CAGR according to Future Market Insights—so the category is expanding, but that doesn’t mean it’s right for every buyer.
P: Qual é o melhor toldo inflável para acampamento?
A: There’s no single answer that fits every region. In wet climates like the UK and Pacific Northwest, prioritize a minimum 3000mm hydrostatic head rating and factory-taped seams. In hot, sunny regions, UV resistance and Dark Room technology matter more. Low-profile dome designs with good insect netting—like the Coody AirTarp style—tend to perform best for camping because they shed wind effectively and pack small. Match the specs to your climate, not the marketing to your aspirations.
Q: What can I use instead of a canopy?
A: Alternatives depend on the mission. A traditional pole-and-fly tarp setup costs under $50 and provides shade but zero weather protection from the sides. A pop-up gazebo with screened walls offers insect protection for backyard use at moderate cost. For commercial events where an toldo inflável isn’t viable, a heavy-duty steel frame pop-up with weight bags and custom-printed walls is the most common substitute. Beach umbrellas and shade sails also cover smaller footprint needs at lower cost and simpler setup.
Q: What are people saying about Soli inflatable canopies?
A: Soli Outdoors has established itself as a recognizable category player, and user feedback tends to highlight the quick setup experience and relatively compact packed size compared to traditional frame canopies. Common critiques in review threads mention waterproofing consistency at the valve seams after extended rain exposure, and some users note that the sidewall attachment method doesn’t hold up as well in steady wind compared to zippered systems on higher-priced competitors. The consensus pattern I’ve observed: they’re a solid entry point for casual users, but commercial operators tend to migrate toward brands with more robust seam construction within one season.
Referências
1. Inflatable Shade Air Canopy Tent – 10x10Ft Outdoor UV – Amazon Product Listing
2. Experimental Study on the Wing Formation of a Paraglider Canopy Cell (Inflatable Wing) – Japan Society of Aeron
3. Explore the Global Inflatable Tent Market — analysis of key … – futuremarketinsights.com
4. Design Scheme and Feasibility Study of Self-locking Inflatable … – app.iass2024.org







