

You might spend $3,000 or more on a tent that you use only a few times a year. Here’s how to not hate yourself later.
That’s the reality for most exhibitors. You walk into a trade show, see those impressive booths with custom canopies, and suddenly the credit card is out before you’ve even thought it through. The tent arrives, sits in storage for eleven months, then gets dragged out for a handful of events. The math rarely works in your favor unless you actually sit down and think about what you’re doing.
I’ve spent years in the event and exhibition industry, and I’ve watched companies torch their entire marketing budget on the wrong display tents. I’ve also seen small startups absolutely crush it with a single well-chosen 10×10 pop-up canopy. The difference isn’t budget—it’s knowledge. So let’s fix that.
Quick Answer
The best display tent for trade shows depends on your booth size, venue type, and how often you’ll actually use it. That said, for most exhibitors, a 10×10 pop-up canopy with a commercial-grade aluminum frame, 600D polyester fabric, and full sidewalls is often considered a good choice of cost, durability, and brand visibility. Prioritize frame strength and fabric quality over brand name, and whatever you do, budget for weight bags if you’ll be outdoors.
What Size Display Tent Do You Really Need?
Let’s start with the question that trips up more first-time buyers than anything else: what size do you actually need? Sounds simple, right? The answer depends on several factors that have nothing to do with how much space you think you want.
The 10×10 as Industry Standard
The 10×10 trade show tent is the workhorse of the industry. It’s the standard booth space dimensions at most trade shows, conventions, and vendor events. Here’s why that matters: when you register for a show, the organizer almost always offers booth spaces in 10×10 increments. You get a 10×10, a 10×20, or maybe a 10×30 if you’re feeling ambitious.
The beauty of the 10×10 is that it’s manageable. One person can set it up with a little practice. It fits in most vehicles. You don’t need a crew of four and a cargo van to transport it. And honestly, for a first-time exhibitor or a company testing a new market, it’s the smart play.
But here’s the thing—a 10×10 is also limiting. Once you put a table inside, you’ve got maybe six feet of walkable space. Two staff members can work it comfortably, but three becomes a crowd. Your product display options shrink fast. If you’re planning to demo equipment or host meetings at your booth, you’ll feel cramped before the first hour is over.
When to Size Up to 10×15 or 10×20
If you’ve done a few shows and you’re consistently hitting capacity, it’s time to think bigger. A 10×15 gives you that extra five feet of depth, which translates to more breathing room for product displays or a small meeting area tucked in the back corner. It’s a middle ground that a lot of exhibitors overlook, but it’s genuinely useful.
The 10×20 is where things get interesting. You can create zones—a demo area up front, a consultation table in the middle, and storage or a private meeting spot in the back. You can bring in furniture, maybe a small inflatable display piece to draw attention. The downside? Setup time jumps, transport gets harder, and the price tag climbs significantly.
In my experience, the 10×20 is the sweet spot for companies that are serious about trade shows but not quite ready for a custom booth build. It gives you room to actually work the show rather than just survive it.
Ceiling Height Rules You Shouldn’t Ignore
Here’s a detail that catches people off guard: many convention centers have ceiling height limits for booths. You’ll see rules like “maximum height 8 feet at the front, 12 feet at the back” or “no canopy structures exceeding 10 feet without approval.” These aren’t suggestions—violate them and you risk having your setup rejected or paying penalties.
For outdoor events, the restrictions are usually looser, but you still need to think about clearance. A standard pop-up canopy with a peaked roof might hit 10-11 feet at the center. That’s fine for most outdoor venues, but if you’re in a pavilion or under a structure, check the clearance first.
My advice: before you buy, check the exhibitor guidelines for the shows you plan to attend. If they’re all indoor convention center events, a 10×10 with a straight-leg frame that keeps a low profile is your safest bet. If you’re mixing indoor and outdoor, you need something more versatile.
Pop-Up vs. Dome vs. Custom: Which Frame Type Wins?
Now let’s talk about the structure itself. This is where a lot of buyers get confused, and honestly, the marketing doesn’t help. Every manufacturer claims their frame is the best, lightest, strongest, easiest. Let me cut through the noise.
The Classic Pop-Up Canopy Frame
The traditional pop-up canopy—the one you see at every farmers market, tailgate, and vendor fair—uses a scissor-style truss frame. You unfold it, extend the legs, and lock it into place. Setup takes about five minutes with two people, or ten minutes solo if you’ve done it before.
These frames come in two flavors: straight leg and slant leg. Straight leg gives you full vertical walls, which means your sidewalls and banner space are maximized. Slant leg tapers inward, which looks fine for casual use but eats into your usable space and makes sidewall attachment awkward. For trade shows, straight leg is the only sensible choice.
The frame material matters more than you’d think. Cheap tents use thin steel that bends and rusts. Commercial-grade options use thicker steel or aluminum alloy. The difference in weight is noticeable—a cheap tent might weigh 40 pounds, while a commercial unit comes in closer to 70-80 pounds. That extra weight is your friend; it means the frame won’t buckle in a breeze.
Dome Tents: The Modern Alternative
Dome tents are the newer option, and they’re gaining traction for good reason. Instead of a scissor truss, they use a segmented pole system that creates a smooth, dome-shaped profile. The wind sheds better than a flat-top canopy, and the interior feels more spacious because there’s no center support to work around.
The dome design also looks more polished. If you’re trying to project a premium brand image, a dome tent reads differently than a standard pop-up. It’s the difference between a vendor stall and a branded activation space.
Setup time is comparable, maybe slightly faster with practice. The poles lock together and the fabric stretches over the frame. Two people can have a dome tent up in under ten minutes without breaking a sweat.
The trade-off is cost. Dome tents typically cost more than comparable pop-up canopies, with a common price difference of 20-30%. And replacement parts can be harder to source since the frame design is less standardized across manufacturers.
When Custom Is Worth the Investment
Let’s be honest: most exhibitors don’t need a fully custom tent. A stock tent with custom printing gets you 90% of the branding impact at half the cost. But there are situations where custom makes sense.
If you’re doing a multi-show circuit and your booth is a core part of your marketing strategy, a custom tent designed around your specific booth space, product displays, and traffic flow is a legitimate investment. You’re not just buying a tent—you’re buying a brand experience.
Custom also matters when you need specific features: integrated lighting, hanging banners, reinforced corners for high-wind areas, or a layout that accommodates your product dimensions. Companies like MVP Visuals and ExpoPrint that specialize in custom trade show tents can build exactly what you need, and they’ll handle the design work so your branding is on point.
But here’s my honest take: if you’re on a budget or this is your first show, don’t go custom. Buy a quality stock tent with good printing. Upgrade later when you know what you actually need.
Fabric, Frame Material, and Weather Resistance
You might be wondering why some tents cost $300 and others cost $1,500 when they look similar in photos. The answer is materials, and this is where you should not skimp.
Fabric: More Than Just a Print Surface
The fabric on a trade show tent does double duty: it displays your brand and it protects you from the elements. Cheap tents use 150D or 200D polyester that’s thin, translucent, and prone to fading. Commercial-grade tents use 600D or higher polyester with a waterproof coating and UV protection built into the fibers.
Here’s the practical difference. A thin fabric will show your brand’s colors as washed-out versions of themselves. The print looks dull from across the aisle. After a few shows in direct sun, the colors fade noticeably. You’ll end up replacing the tent long before the frame wears out.
A 600D fabric holds color vibrantly. It blocks light so your branding pops. It sheds rain without leaking through the seams. And it resists the UV damage that turns cheap tents into sun-faded ghosts.
Some manufacturers offer flame-retardant fabric options, which is worth checking if you’re exhibiting in venues that require it. Many convention centers have fire codes that mandate flame-retardant materials for anything covering a booth.
Frame Material: Steel vs. Aluminum
Straight leg frames are typically made from steel or aluminum alloy. Steel is heavier and stronger, but it rusts if the coating gets scratched. Aluminum is lighter and corrosion-resistant, but it costs more and can flex under extreme load.
For trade shows, I lean toward aluminum if your budget allows. The weight savings matter when you’re hauling gear through a convention center on a hand truck. And the corrosion resistance means your tent survives storage in damp garages or trailers without developing rust spots.
That said, a quality steel frame from a reputable manufacturer is perfectly fine. The key is the gauge of the material and the quality of the welds. A thick-walled steel frame with solid welds will outlast a thin aluminum frame that flexes under stress.
Wind Rating and Weight Bags
Here’s the hard truth: no pop-up canopy is truly windproof. They’re designed to withstand moderate breezes, not storms. But the difference between a tent that survives a gusty afternoon and one that ends up in a neighbor’s booth is significant.
Most commercial-grade tents have a wind rating of 20-25 mph when properly secured, according to manufacturer specifications. That means you need weight bags or stakes, and you need them deployed correctly. A common mistake I see at outdoor events: exhibitors set up their tent, then skip the weights because “it’s not that windy.” Then a gust hits and the tent lifts off the ground, crashing into the booth next door.
Weight bags for canopy tents are not optional accessories—they’re safety equipment. Many manufacturers recommend a certain amount of weight per leg for outdoor use, typically around 40-50 pounds per leg for a 10×10 canopy. It sounds like a lot, but it’s the difference between a stable structure and a projectile.
For indoor trade shows, weights aren’t usually necessary, but stakes are often prohibited because they damage convention center floors. In that case, you’re relying on the weight of the tent itself plus whatever you have inside. A heavy commercial tent with tables and displays will stay put in most indoor environments.
Indoor vs. Outdoor: Different Needs
The indoor vs. outdoor question shapes every other decision you make. Indoor shows have climate control, no wind, and flat floors. Your tent is purely a branding structure. You can get away with a lighter, simpler setup.
Outdoor events are a different beast. You’re dealing with sun, wind, rain, and uneven ground. Your tent needs to be substantial. The frame needs to be robust. The fabric needs to be waterproof. You need weights, possibly stakes, and a plan for rain.
If you’re doing both, buy for the outdoor scenario. A tent that’s overkill indoors is still perfectly usable. A tent that’s fine indoors but flimsy outdoors will leave you scrambling at the worst possible moment.
Sidewalls, Back Walls, and Accessories You Can’t Skip
The tent itself is only half the story. The accessories determine whether your booth looks professional or thrown together.
Sidewalls: Not Optional for Most Shows
Tent sidewalls for trade shows serve two purposes: branding and privacy. A full set of sidewalls turns your canopy into a branded enclosure that blocks sightlines and creates a defined space. It makes your booth look intentional rather than like a farmer’s market stall.
Most trade show tents come with a back wall standard, but sidewalls are often sold separately. Some shows require them for exhibitors in certain booth configurations—if your booth backs up to a common area or another exhibitor, a plain open side looks unfinished.
The fabric for sidewalls should match your tent fabric for a cohesive look. Printed sidewalls with your branding extend your visual presence and can be more cost-effective than additional banner stands.
Weight Bags and Stakes: The Non-Negotiables
I already touched on weight bags, but let me emphasize: buy them with your tent, not later. The number of exhibitors who show up to outdoor events without weights is staggering. Then they’re scrambling to borrow cinder blocks or sandbags from the venue.
Weight bags come in two styles: empty bags you fill with sand or water, and pre-filled weights. Empty bags are cheaper and easier to transport, but you need a sand source at the venue. Pre-filled weights are convenient but heavy to haul.
For trade shows, look for weight bags that attach securely to your tent legs. Some designs have straps that wrap around the leg, others have a sleeve that slides over. Make sure you get the type that matches your frame.
Table Covers and Flags: The Finishing Touches
Tabletop display accessories and branded table covers for trade shows complete the look. A plain folding table under a branded tent looks unfinished. A branded table cover with your logo and colors ties everything together.
Advertising flags—the feather-style flags you see at events—add vertical presence that draws attention from a distance. They’re especially useful for outdoor shows where your tent might be in a row of similar tents. A tall flag with your branding helps attendees find you.
The accessories add up, so budget for them. A complete booth setup with a tent, sidewalls, table covers, and flags can easily cost 50% more than the tent alone.
Brand Comparison: Eurmax vs. TentCraft vs. Displays2Go
Let’s talk brands, because that’s what everyone asks about. I’ll give you my honest take based on what I’ve seen in the field.
Eurmax: The Value Pick
Eurmax has become a popular choice for exhibitors who want commercial quality without the boutique price tag. Their 10×10 tents with full sidewalls are a common sight at events, and the reviews are generally strong.
The build quality is solid for the price. The frames are sturdy, the fabric holds up well, and the printing quality is respectable. Eurmax doesn’t have the brand cachet of some competitors, but they deliver what they promise.
The main downside is that Eurmax is a direct-to-consumer brand, so you don’t get the design support or account management that a specialty trade show company provides. If you know exactly what you want, that’s fine. If you need help, you’re on your own.
TentCraft: The Custom Specialist
TentCraft positions itself as a premium custom tent manufacturer. They do full custom printing, they offer a range of high-quality materials, and they have a design team that helps you get your branding right.
The quality is genuinely excellent. The fabric feels substantial, the printing is sharp, and the tents look professional from every angle. If you’re exhibiting at high-stakes shows where your booth is a key part of your brand presence, TentCraft is worth the investment.
The catch is price. TentCraft runs significantly more expensive than Eurmax or Displays2Go. You’re paying for the design expertise, the higher-grade materials, and the brand name. For companies doing a full show circuit, it can be worth it. For occasional exhibitors, it’s hard to justify.
Displays2Go: The One-Stop Shop
Displays2Go is the Amazon of trade show displays. They carry everything—tents, banners, table covers, flags, and every accessory you can imagine. Their catalog is vast, and their prices are competitive.
The quality is generally good, though it varies by product line. Their budget options are fine for light use, while their commercial-grade lines compete with the specialists. The advantage is convenience: you can order everything for your booth from one place and get it shipped together.
The downside is that you’re choosing from stock options rather than getting a custom solution. If you want a truly custom tent with unique dimensions or features, Displays2Go isn’t the right choice. But for a standard 10×10 with your logo printed on it, they’re a solid option.
USA vs. Import Manufacturing
Here’s a question that comes up a lot: should you buy American-made or import? The honest answer is that it depends on your priorities.
Domestic manufacturers like TentCraft and Mountain View Tent Company offer higher quality control, faster shipping, and easier warranty support. If something goes wrong, you’re dealing with a US company with US labor laws and consumer protections.
Import brands like Eurmax and many of the budget options on Amazon offer significantly lower prices. The quality has improved dramatically over the past decade, and for many exhibitors, the savings outweigh the potential risks.
My take: if you’re buying a tent you’ll use for years, the domestic option is worth considering. If you’re on a tight budget or testing the waters, an import brand will serve you fine.
How Much Should You Budget? (Real Price Ranges)
Money talk. This is where I’ve seen the most confusion, so let me lay out realistic numbers.
Budget Tier: $200-$500
At this price point, you’re getting an entry-level tent. The frame is lighter, the fabric is thinner, and the printing might not be as vibrant. These tents work for occasional indoor use or low-stakes outdoor events.
The problem with budget tents is that they don’t last. After a few shows, the fabric fades, the frame bends, and you’re back to shopping. If you’re only exhibiting once a year, a budget tent might be fine. If you’re doing multiple shows, you’ll end up spending more in the long run.
Mid-Range: $500-$1,200
This is the sweet spot for most exhibitors. You get a commercial-grade frame, 600D fabric, and quality printing. The tent will survive years of regular use. Brands like Eurmax and Displays2Go’s commercial lines fall in this range.
At this price, you should expect a tent that sets up easily, looks professional, and holds up to the rigors of trade show travel. Add sidewalls, weight bags, and accessories, and your total investment lands around $1,000-$1,500.
Commercial Tier: $1,200-$3,000+
This is where custom manufacturers like TentCraft and MVP Visuals operate. You’re paying for premium materials, custom design services, and higher-grade printing. These tents are built for serious exhibitors who treat trade shows as a core marketing channel.
The quality difference between mid-range and commercial is real, but it’s not always visible in photos. It shows up in the fabric weight, the frame stability, the print clarity, and the overall durability. If you’re exhibiting 10+ times a year, the commercial tier pays for itself through longevity.
Hidden Costs Nobody Mentions
Here’s what gets people: the tent is the cheapest part of the booth. You need table covers, flags, weight bags, a carrying case, maybe lighting. Those accessories add 30-50% to your total cost.
Transport is another factor. A 10×10 tent with accessories doesn’t fit in a compact car. You need a vehicle with cargo space, or you’re paying for shipping to the venue. For out-of-town shows, shipping a tent can cost $100-$300 each way.
And don’t forget setup labor. If you’re paying staff hourly to set up and tear down the booth, that’s a real cost. A tent that takes 45 minutes to set up costs you more than a tent that takes 15 minutes.
租赁与购买对比
If you’re only doing one show a year, renting might make more sense than buying. Trade show tent rental is available through many display companies, and it eliminates the storage, transport, and maintenance headaches.
The downside of renting is that you’re limited to what the rental company offers. You won’t get the same branding quality as a tent printed specifically for you. And over multiple shows, rental costs exceed purchase costs.
My rule of thumb: if you’re doing 3+ shows a year, buy. If you’re doing 1-2, consider renting. If you’re not sure, buy a mid-range tent and treat it as an investment—it’ll hold its value if you decide to sell it later.
Setup, Transport, and Storage: The Practical Reality
Let’s talk about the parts of owning a trade show tent that nobody puts in the marketing materials.
Setup Time and Crew Requirements
A quality 10×10 pop-up tent with sidewalls takes about 15-20 minutes to set up with two people. Solo, plan for 30-45 minutes. The frame goes up quickly, but attaching sidewalls and securing weights takes time.
Dome tents are similar, maybe slightly faster once you’re practiced. The pole system is intuitive, and the fabric fits snugly without needing to be stretched and clipped at multiple points.
Here’s a pro tip: practice setup at home before your first show. Nothing kills your confidence like fumbling with a tent in a crowded loading dock while other exhibitors watch. Run through the setup twice at home, and you’ll be able to do it in your sleep.
Carrying Case and Vehicle Fit
Most commercial tents come with a wheeled carrying case. That’s a feature you want—a 70-pound tent without wheels is a back injury waiting to happen.
For vehicle fit, a 10×10 tent in its case is roughly 6-7 feet long and 12-14 inches in diameter. That fits in most SUVs with the back seats folded down, or in a pickup truck bed. A 10×20 tent is a different story—you’re looking at a cargo van or trailer.
If you’re flying to shows, check the airline’s oversized baggage policy. Shipping a tent is usually more practical than carrying it on a plane, but you’ll need to plan ahead.
Storage and Maintenance
A tent stored properly lasts years. A tent stored haphazardly falls apart. It’s that simple.
Always dry the tent completely before packing it for storage. Moisture leads to mold and mildew, which ruins fabric and creates an unpleasant smell. If you packed a damp tent after a rainy show, unpack it and dry it as soon as you get home.
Store the tent in its carrying case in a dry, temperature-controlled space. Avoid leaving it in a hot garage or a damp basement. Extreme temperatures and humidity degrade both the fabric and the frame.
Inspect the tent periodically—check for rust spots on the frame, loose stitching, or worn grommets. Catch problems early and you can fix them before they become expensive.
Quick Comparison Table: 10×10 vs 10×15 vs 10×20
Let me give you a quick reference for the three most common sizes.
| Größe | Price Range (Mid-Range) | Aufbauzeit | Best Use Case |
|---|---|---|---|
| 10×10 | $500-$1,200 | 15-20 min with 2 people | First-time exhibitors, standard booth spaces, indoor shows |
| 10×15 | $700-$1,500 | 20-30 min with 2 people | Product demos, small meeting areas, outdoor events |
| 10×20 | $1,000-$2,500 | 30-45 min with 2-3 people | Multi-zone booths, serious exhibitors, custom setups |
The 10×10 is the industry standard for good reason—it fits the standard booth space at most shows, it’s manageable to transport and set up, and it’s the most affordable entry point. The 10×15 is a compromise that gives you extra depth without jumping to the complexity of a 10×20. The 10×20 is where you can create a real presence, but it demands more from your crew, your vehicle, and your budget.
The Branding Question: Custom Printing and Design
Your tent is a billboard. The whole point of buying a branded tent is to get your message in front of attendees. So let’s talk about getting the printing right.
What Makes Good Tent Printing
Quality printing on a tent comes down to three factors: the fabric, the ink, and the design. High-quality fabric holds ink better and shows colors more accurately. Good dye-sublimation printing embeds the ink into the fabric rather than printing on top of it, which means the colors don’t crack or peel.
Your design needs to work at a distance. Attendees see your booth from across the aisle, not up close. Big, bold logos and short, punchy messages work better than intricate details and long paragraphs. Think about what you want someone to remember when they walk past your booth.
Working with a Design Team
If you’re buying from a custom manufacturer like ExpoPrint or MVP Visuals, they’ll typically offer design services. You provide your logo and branding, and they create a tent design that uses the space effectively.
The key is to give them good source files. A high-resolution logo in vector format (AI, EPS, or SVG) will print much better than a low-resolution JPEG from your website. If you don’t have vector files, ask your designer or marketing team to create them.
The ROI of Branded Tents
According to industry research, the average trade show attendee spends a significant amount of time exploring exhibits.over the course of a show. That’s a lot of time walking past your booth. A well-branded tent that catches the eye and communicates your value proposition is one of the most cost-effective marketing tools available.
The math is simple: a $1,000 tent used at five shows, seen by 500 attendees per show, costs you $0.40 per impression, based on those assumptions. Compare that to the cost of digital advertising or direct mail, and the tent wins every time.
Making Your Tent Stand Out
Beyond the tent itself, there are ways to make your booth memorable. This is where creativity pays off.
Vertical Elements
Feather flags and tall banners draw attention from a distance. They’re especially effective at outdoor events where your tent might be in a long row of similar tents. A flag with your branding visible from 50 feet away gives attendees a target to walk toward.
Interactive Elements
Consider adding something for attendees to do at your booth. A product demo, a giveaway, or a game can draw people in. The tent provides the space; the experience provides the reason to stop.
Lighting
If you’re in an indoor venue with dim lighting, consider adding lighting to your booth. Battery-powered LED lights can highlight your products and create a welcoming atmosphere. Just check the venue’s rules on electrical equipment before you bring anything.
Inflatable Options: A Different Approach
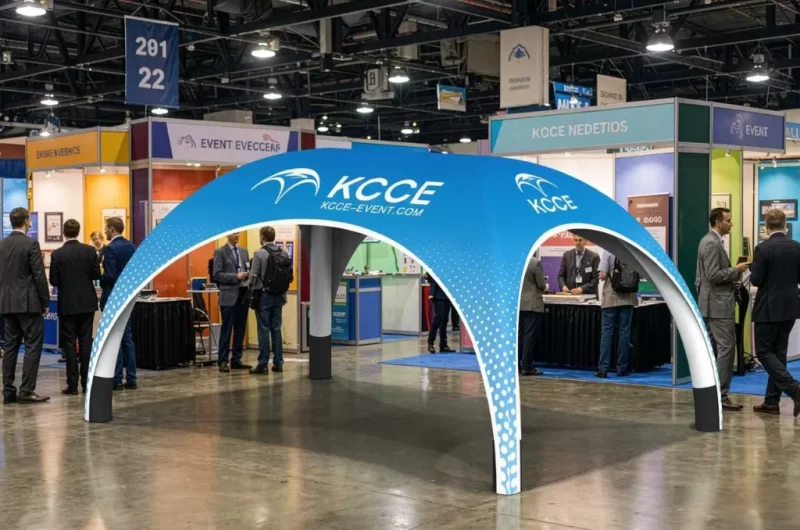
I should mention that not all display tents for trade shows are the traditional pop-up style. Inflatable tents have gained popularity for their unique visual impact and ease of setup. A quick-setup inflatable arch or tent can create a dramatic entrance that draws attention in a way that traditional canopies can’t match.
Companies like KCCE specialize in inflatable solutions, offering products like aufblasbare Zelte that combine brand visibility with practical functionality. These tents use air-filled frames instead of metal poles, which makes them extremely portable and quick to set up—often in under 10 minutes.
The trade-off is that inflatable tents require an air blower to stay inflated, which means you need a power source or a battery-operated blower. They’re also more vulnerable to punctures than metal-framed tents. But for creating a memorable brand presence, especially at outdoor events, inflatable options are worth considering.
If you’re exploring inflatable options, you might also look at KCCE’s inflatable furniture for comfortable, branded seating that complements your tent setup.
Der Umweltaspekt
Sustainability is becoming a bigger factor in purchasing decisions, and trade show displays are no exception. Many exhibitors are looking for tents made from recycled materials or tents that can be reused across multiple shows.
The good news is that a quality commercial tent is inherently sustainable—it lasts for years, reducing the need for single-use displays. If sustainability matters to your brand, look for manufacturers that use eco-friendly fabrics and printing processes.
Final Thoughts: Making the Right Choice
Here’s what it comes down to. The size and frame type of your display tent matter more than the brand. A 10×10 with a commercial-grade frame and quality fabric will serve you better than a premium brand with a flimsy build.
Will your next show be indoor or outdoor—and does your tent choice reflect that? If you’re doing outdoor events, you need weight bags, waterproof fabric, and a frame that handles wind. If you’re strictly indoor, you can focus more on branding and aesthetics.
Measure your booth space, then compare 2-3 brands side-by-side. Look at the frame construction, the fabric weight, and the printing quality. Ask about warranty and replacement parts. And most importantly, think about how the tent will be used over the next few years, not just at your next show.
The right tent is an investment in your brand’s presence at every event you attend. Choose wisely, and it’ll pay for itself many times over.
Häufig gestellte Fragen
Q: What is the best tent for vendor events?
A: For most vendor events, a 10×10 pop-up canopy with a commercial-grade aluminum frame and 600D polyester fabric is the best choice. It’s the standard size for vendor spaces, sets up in 15-20 minutes with two people, and offers the best balance of cost and durability. Add full sidewalls and weight bags if you’ll be outdoors.
Q: What are the best types of tents for events?
A: The best type depends on your event. Pop-up canopy tents are versatile and work for both indoor and outdoor use. Dome tents offer better wind resistance and a more polished look. Inflatable tents provide unique visual impact and fast setup. For trade shows, a straight-leg pop-up with sidewalls is the most practical choice.
Q: How to make your tent stand out at a festival?
A: Use vertical elements like feather flags to draw attention from a distance. Ensure your branding is bold and readable from across the aisle. Add interactive elements like product demos or giveaways to attract attendees. Consider lighting for evening events. And make sure your setup looks complete—a tent with sidewalls and branded table covers looks more professional than an open canopy.
Q: What is a market tent called?
A: Market tents are commonly called pop-up canopies, canopy tents, or instant shelters. In the trade show industry, they’re referred to as display tents or booth tents. The terms are largely interchangeable, though “pop-up canopy” usually refers to the scissor-frame style, while “display tent” encompasses a broader range of structures.
Q: Are 10×10 trade show tents heavy duty enough?
A: Yes, if you buy a commercial-grade model. A heavy duty display tent with a thick-walled steel or aluminum frame and 600D fabric can handle years of regular use and moderate wind when properly secured with weight bags. Budget-tier tents are not heavy duty and may not survive multiple shows or outdoor conditions.
Q: Do display tents require weights for outdoor trade shows?
A: Absolutely. Weight bags are essential safety equipment for outdoor shows. Most manufacturers recommend 40-50 pounds per leg, totaling 160-200 pounds for a 10×10 tent. Without weights, a gust of wind can lift the tent and send it crashing into neighboring booths. Never skip the weights for outdoor events.
Q: How much do custom canopy tents for trade shows cost?
A: A custom canopy tent 10×10 with full printing typically costs between $500 and $1,500 for mid-range quality. Premium custom tents from specialty manufacturers run $1,200 to $3,000 or more. Your total investment, including sidewalls, weight bags, and accessories, will likely be 30-50% higher than the tent itself.
Q: What’s the difference between a dome tent and a pop-up canopy?
A: Dome tents use a segmented pole system that creates a smooth, dome-shaped profile, offering better wind resistance and a more polished appearance. Pop-up canopies use a scissor-frame design that’s more common and often less expensive. Dome tents typically cost 20-30% more but look more premium and shed wind more effectively.
Quellen
1. Maßgeschneiderte Messezelte für Stände, Ausstellungen und Veranstaltungen – mvpvisuals.com
2. Trade Show Tent 10x10ft Booth – lushbanners.com
3. Maßgeschneiderte Design-Messestände & Ausstellungskanopizeite – expoprint.io
4. Why Custom-Branded Tents Matter for Trade Shows – mvtents.com
5. Large A-Shaped Tent for Trade Shows & Exhibitions – facebook.com







