

Let me be straight with you before we get into the weeds: most people shopping for trade show branding tents have no idea they’re about to overpay by a wide margin. I’ve watched companies drop serious money on the wrong setup, then wonder why their booth looks like a yard sale while a competitor three aisles over is pulling in a crowd. The difference isn’t luck. It’s almost always a mix of bad sizing, cheap materials, and a vendor that promised the world and delivered a glorified beach umbrella.
You could pay 3x more if you buy wrong — and that’s not an exaggeration. I’ve seen it happen enough times that I’m writing this guide to keep you from becoming a cautionary tale. We’re going to cover real prices, honest vendor comparisons, and the size guidance most blogs skip because they’d rather just sell you something.
Quick Answer
Trade show branding tents are custom-printed canopy structures used as portable, branded booths at expos, outdoor events, and corporate functions, with costs ranging from roughly $400 for a basic 10×10 pop-up to over $2,500 for a premium 10×20 with full graphics — and the price difference comes down to frame quality, fabric, print method, and warranty, not just size.
What Are Trade Show Branding Tents?
Let’s define the thing we’re actually talking about. A trade show branding tent is, at its core, a portable canopy structure with your logo, colors, and messaging printed directly onto the fabric. They go by a dozen names — branded canopy tents, custom logo tents, pop-up tents, event marketing tents — but they all serve the same purpose: creating an instant, recognizable space for your brand in a crowded environment.
The concept is deceptively simple. You’ve got a collapsible metal frame and a fabric top that snaps or slides onto it. Pull it out of a wheeled case, extend the legs, pop the top into place, and you’ve got a shelter that doubles as a billboard. The whole setup takes two people maybe fifteen minutes on a good day, though I’ve seen veterans do it in under five.
The real distinction comes down to the frame style, and this is where first-time buyers get confused:
Pop-up tents are the most common. The frame is attached to the canopy fabric with a scissor-like mechanism, so the whole thing expands outward like an accordion. You pull it up, lock the legs, and you’re done. These are fast, portable, and the standard for most trade show work. The tradeoff is that the fabric is permanently attached to the frame, which means if one part fails, you’re often replacing the whole unit.
Straight-leg tents are the workhorses of the outdoor event world. The canopy is separate from the frame, and the legs are straight poles that slide into grommets on the fabric. They’re sturdier in wind, easier to repair, and generally last longer because you can replace individual components. The downside? Setup takes longer, and you need to manage more parts.
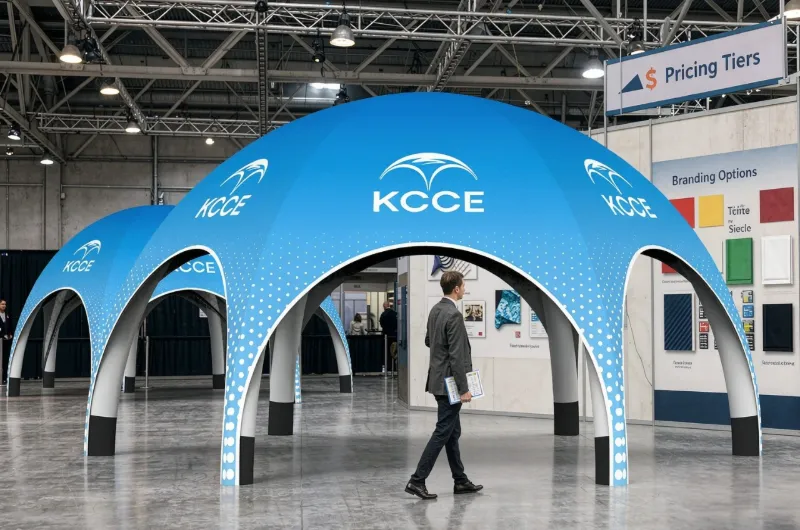
Kuppelzelte are the specialty option. Curved rooflines, more headroom, and a distinctly more premium look. They cost more and weigh more, but if you’re trying to make a statement at an outdoor expo or a multi-day festival, the visual difference is worth considering.
From my experience, most first-time buyers default to a pop-up because it’s what they’ve seen at every trade show they’ve attended. And honestly, for indoor shows, that’s often the right call. But if you’re doing outdoor events with any regularity, the straight-leg design will save you headaches down the road.
The typical use cases are broader than you might think. Trade shows and expos are the obvious ones, but I’ve seen custom logo tents at farmers markets, job fairs, college recruitment events, sporting events, charity fundraisers, and even as temporary registration areas at corporate conferences. The common thread is that someone needs a visible, branded presence in a space that isn’t theirs.
How Much Do Trade Show Branding Tents Cost?
Here’s where things get real, because this is the question everyone asks and almost no one answers with actual numbers. Let’s fix that.
For a standard 10×10 trade show tent, which is a common size in the industry, the price range is approximately $400 to $1,800 depending on quality tier. A custom canopy tent 10×10 price sits somewhere in the middle of that range if you’re buying from a reputable vendor.
But here’s the thing — those numbers don’t tell the whole story. The market splits into three tiers, and knowing which tier you’re in matters more than the sticker price.
The budget tier ($400–$700) is where you’ll find the impulse buys. These are usually pop-up tents with lighter aluminum frames, basic polyester fabric, and screen-printed graphics. They’ll get you through a show or two, but the fabric tends to fade, the frame can bend if you’re not careful, and the print quality is noticeably lower. I’ve seen these tents start to look ragged after just a handful of events. If you’re doing one show a year and don’t care much about longevity, this tier works. Just don’t expect it to last.
The mid tier ($700–$1,200) is where most serious buyers should land. You’re getting a sturdier frame, better fabric with dye-sublimation printing (more on that in a minute), and a warranty that actually covers something. The print quality is significantly better — your logo will look crisp and colors will pop. For a business that does two to four shows a year, this is the sweet spot.
The premium tier ($1,200–$2,500+) is for companies that treat their tent as a long-term asset. These are commercial-grade frames, often aluminum with reinforced joints, premium fabrics that resist fading and tearing, and full-bleed graphics that wrap around all four sides. Vendors in this tier typically offer better warranties — some even offer limited lifetime warranties on frames. If you’re doing eight or more shows a year, or if your tent is a core part of your brand presence, this is where you should be looking.
Now, about the hidden costs that nobody mentions on the product page. This is where budgets get blown:
Shipping is the first surprise. A 10×10 tent in its case is bulky and heavy, so freight costs can run $50 to $150 depending on your location and the vendor’s shipping policy. Some vendors offer free shipping over a certain order amount, but don’t assume it.
Weights are non-negotiable if you’re doing outdoor events. A pop-up tent without weights becomes a kite in anything above a light breeze. You’ll need about 20 to 40 pounds per leg, which means buying sandbags, water weights, or metal plates. That could cost another $50 to $200 depending on the style you choose.
Carrying bags are sometimes included and sometimes not. A decent wheeled case for a 10×10 tent typically costs $40 to $100. Worth it, because carrying a tent bag by hand through a convention center parking lot is a special kind of misery.
Graphics and accessories add up fast. Table covers with your logo, banner stands, counter units, lighting, carpet — the tent is just the starting point. I’ve seen companies spend more on accessories than they did on the tent itself.
Let me give you a concrete example. A mid-tier 10×10 from a reputable vendor might list at around $850. Adding shipping, weights, a wheeled case, and a branded table cover could bring the total to roughly $1,185. That’s the real trade show branding tents price — not the number on the product page.
The takeaway here is simple: don’t shop on sticker price alone. Calculate the total cost of ownership, including everything you’ll need to actually use the tent at a show.
10×10 vs. 10×20: Choosing the Right Size
This is the decision that trips up more first-time buyers than anything else, so let’s break it down properly.
Das 10×10 trade show tent is the industry standard. It matches the standard booth space at most indoor trade shows, which means you can drop it into a 10×10 exhibitor space and you’re compliant with venue rules. It’s compact enough to fit in most vehicles, light enough for two people to manage, and affordable enough that it’s the default choice for small and medium businesses.
A 10×10 gives you roughly 100 square feet of space. That’s enough for a table, a couple of chairs, some literature, and maybe a small display. It’s a presence, but it’s not a destination. If your goal is to have a professional-looking spot where you can talk to prospects one-on-one, a 10×10 gets the job done.
Das 10×20 trade show tent is a different animal. At 200 square feet, it’s twice the space, which means you can create distinct zones — a demo area, a meeting space, a product display. It’s the size you’ll see at larger expos where companies are trying to make a statement. Custom tents with logo 10×20 options are popular among companies that want to stand out at outdoor events or large indoor shows.
But here’s what nobody tells you about the 10×20: it’s not just double the cost. It’s double the cost plus a logistics headache. The tent weighs more, the case is bigger, and you’ll need a larger vehicle to transport it. Setup takes longer, and you’ll want at least three people to handle it comfortably. And if you’re doing indoor shows, you need to verify that the venue actually has 10×20 booth spaces available — not all of them do.
Let me give you a quick comparison:
| Faktor | 10×10 | 10×20 |
|---|---|---|
| Square footage | 100 sq ft | 200 sq ft |
| Typical price range | $400–$1,800 | $800–$3,000+ |
| Einrichtungszeit | 10–15 min with 2 people | 20–30 min with 3 people |
| Vehicle requirement | Most SUVs and sedans | Pickup truck or van |
| Am besten geeignet für | Single table, small booth | Multi-zone displays, larger presence |
| Indoor show compatibility | Universal | Check venue availability |
For first-time buyers, here’s my decision checklist:
- How many shows are you doing per year? If it’s fewer than three, a 10×10 is probably sufficient.
- What’s your typical booth layout? If you need a demo area plus a meeting space, you need the 10×20.
- What’s your transport situation? Measure your vehicle’s cargo space before you commit to a size.
- What do your competitors use? Walk the floor of your biggest show and note the sizes. Match or slightly exceed the norm.
- What’s your budget for accessories? Remember, the larger tent needs more weights, a bigger case, and more table covers.
One more thing — don’t forget about the in-between sizes. A 10×15 is an option that some vendors offer, and it can be a smart compromise if you need more space than a 10×10 but can’t justify the jump to a 10×20. It’s not a standard booth size at most indoor shows, though, so it’s best for outdoor events where you have more flexibility.
Materials and Print Quality: What Actually Matters
You might be wondering why two tents that look identical in photos can differ in price by $800. The answer is in the materials, and this is where vendor marketing gets murky.
Fabric is the first battleground. The three main options are polyester, vinyl, and canvas.
Polyester is the most common for trade show tents. It’s lightweight, relatively affordable, and takes dye-sublimation printing beautifully. The tradeoff is durability — a standard polyester canopy will start to show wear after a few seasons, especially if it’s exposed to harsh sun or wind. Look for a denier rating (the thickness of the fabric threads) if the vendor provides it. Higher numbers mean tougher fabric.
Vinyl is heavier and more durable. It’s the go-to for tents that will see heavy outdoor use. The downside is that vinyl is harder to print on with the same color vibrancy, and it’s noticeably heavier to carry around. You’ll also pay more for it.
Canvas is the premium option, usually cotton or a cotton-poly blend. It’s the most durable and has a distinctly upscale look. But it’s heavy, expensive, and slow to dry if it gets wet. Canvas is rare in the trade show world — you’ll mostly see it in high-end outdoor event rentals.
Print quality is where the real value lives. The two main methods are screen printing and dye-sublimation.
Screen printing pushes ink through a mesh stencil onto the fabric. It’s cheaper for simple designs and holds up well, but it’s limited in color complexity. Fine details and photographic images don’t reproduce well, and the ink can crack or fade over time.
Dye-sublimation is the industry standard for custom trade show tents. The design is printed onto transfer paper, then heat-pressed into the fabric at high temperatures. The dye becomes part of the fabric itself, which means it can’t crack, peel, or fade as easily. You get full-color printing with sharp details and vibrant colors. It costs more, but for a branded tent, it’s the difference between looking professional and looking homemade.
The frame is the third pillar. Most trade show tents use aluminum, but the quality varies wildly. Cheap frames use thin-wall aluminum that bends under stress. Commercial-grade frames use thicker tubing with reinforced joints and better locking mechanisms. Some vendors offer steel frames, which are heavier but nearly indestructible — these are rare in the pop-up world because the weight makes them impractical.
Warranties tell you a lot about a vendor’s confidence. A one-year warranty is the bare minimum. A three-year warranty on the frame is a good sign. Some vendors offer limited lifetime warranties on frames, which says they believe the product will hold up. Always read the warranty terms carefully — some cover only manufacturing defects, while others cover damage from normal use.
Here’s a practical tip from someone who’s been through this: ask the vendor for a fabric swatch before you buy. A good vendor will send you physical samples of their materials so you can feel the difference. If they won’t, that’s a red flag. Also, check the print quality up close — look at how sharp the edges are on fine text and whether the colors look accurate to your brand guidelines.
Top 7 Trade Show Branding Tent Vendors Compared
Alright, let’s talk about who you’re actually buying from. I’ve spent time researching the major players, and here’s my honest take on the ones that keep coming up in conversations.
| Vendor | Preisspanne | Druckqualität | Garantie | Shipping Speed | Am besten für |
|---|---|---|---|---|---|
| MVP Visuals | $500–$2,000 | Excellent | Limited lifetime on frames | 5–10 business days | Full-service branding with design support |
| Displays2Go | $400–$1,500 | Good | Varies by product | 3–7 business days | Budget-conscious buyers |
| LookOurWay | $450–$1,600 | Good | 1–3 years | 4–8 business days | Custom graphics with quick turnaround |
| Lush Banners | $500–$1,800 | Excellent | Limited lifetime on aluminum frames | 5–10 business days | Commercial-grade pop-up and inflatable tents |
| Mod | $600–$2,500 | Excellent | Limited lifetime | 5–10 business days | Premium buyers wanting design flexibility |
| ExpoPrint | $450–$1,500 | Good | 1–2 years | 7–14 business days | International orders with free design service |
| Branded Canopy Tents | $400–$1,400 | Good | 1–3 years | 5–10 business days | Package deals on 10×10 and 10×20 tents |
Now, let me give you the real talk on each of these.
MVP Visuals is a solid choice if you want a one-stop shop. They handle custom displays, inflatables, and canopy tents, which means you can brand your entire booth through a single vendor. Their trade show tent lineup covers the standard sizes, and their print quality is consistently good. The free design support is a nice touch if you don’t have an in-house designer. Their site mentions a 20-year history, which suggests they’ve been around long enough to know what works.
Displays2Go is the budget-friendly option that’s been in the game for a long time. Their catalog is enormous, which is both a blessing and a curse — you’ll find what you need, but you might also get overwhelmed. Their tents are decent quality for the price, though you’ll notice the difference if you put one next to a premium option. They’re a good starting point if you’re price-sensitive, but read the reviews carefully for the specific model you’re considering.
LookOurWay has carved out a niche with fast turnaround times. If you’ve got a show in three weeks and need a custom tent, they’re worth a look. Their print quality is solid, and their pricing is competitive. The tradeoff is that their warranty terms are average, and their customer service is hit-or-miss based on what I’ve seen in reviews.
Lush Banners is one of the more interesting players in this space. They offer both aluminum pop-up tents and inflatable options, which gives you flexibility depending on your needs. Their trade show tent page highlights easy pop-up design with self-lock mechanisms, adjustable heights, and commercial-grade aluminum frames with limited lifetime warranties. They also offer free shipping on orders over $399, which can save you a chunk of change. Their print quality is excellent, and their “High Quality. On Time. On Budget!” tagline isn’t just marketing — they’ve got a good reputation for delivering on their promises. If you’re exploring inflatable options for a faster setup or a more unique look, their aufblasbare Eventzelte are worth comparing side-by-side with traditional pop-ups.
Mod is the premium option. If you want the best-looking tent on the floor and you’re willing to pay for it, Mod delivers. Their design tools are top-notch, and their print quality is among the best in the industry. The catch is the price — you’ll pay a premium for the name and the quality. If you’re doing high-profile events where appearance matters more than budget, Mod is worth the investment.
ExpoPrint is worth mentioning because they offer a free design service and free artwork fixes, which is a nice value-add if you’re not design-savvy. They’re based internationally, which means shipping times can be longer, but their pricing is competitive. Their 3D design tool lets you visualize your tent before you order, which is genuinely useful.
Branded Canopy Tents focuses specifically on custom canopy tents, which means they’ve got deep expertise in this niche. Their package deals on 10×10 and 10×20 tents are worth checking out if you want a complete setup. They also have a useful blog covering topics like color psychology for event tents, which suggests they understand the branding side of the business, not just the manufacturing side.
Here’s my honest advice: if you want the best balance of quality, price, and support, Lush Banners and MVP Visuals are your top picks. If you’re on a tight budget, Displays2Go will get you through your first show. If you’re doing high-profile events and money isn’t the primary concern, Mod is the way to go.
Are Custom Logo Tents Worth the Investment?
This is the question every decision-maker eventually asks, and the answer is more nuanced than a simple yes or no.
Let’s start with the data. According to the Center for Exhibition Industry Research (CEIR), the average trade show attendee spends 8.3 hours exploring exhibits. That’s over eight hours of potential face-to-face time with your brand, and in a crowded hall with hundreds of exhibitors, visibility is everything.
A custom logo tent is essentially a billboard that you control. It tells attendees who you are, what you stand for, and where to find you. In a sea of pipe-and-drape booths with printed banners, a well-designed branded canopy stands out. It signals that you’re established, professional, and serious about your presence.
But here’s where the ROI conversation gets interesting. The math changes dramatically based on how often you exhibit.
If you’re doing one show a year, a $1,000 tent amortizes to $1,000 per show. That’s a hard number to justify if you’re only generating a handful of leads. In that case, renting might make more sense — you get the branded presence without the capital investment.
If you’re doing four shows a year, that same tent costs $250 per show. Now we’re talking. And if you’re doing eight or more shows annually, the tent is effectively paying for itself by the second year. Add in the brand consistency across events, and the value compounds.
For a mid-tier tent that lasts three to five years, the cost per show drops dramatically the more you use it. That’s the fundamental argument for owning rather than renting.
Now, when is a tent the wrong choice? Here are the scenarios where I’d tell you to rent instead:
- You’re testing a new market. If you’re not sure a particular show will be worth repeating, don’t invest in a tent until you know.
- You’re doing a one-off event. A single festival or expo doesn’t justify the purchase.
- You don’t have storage space. Tents need to be stored properly between shows. If they’re going to sit in a damp garage, they’ll deteriorate fast.
- Your branding changes frequently. If you’re rebranding or updating your messaging every year, a custom tent becomes a disposable asset.
Here’s another angle worth considering: the tent is just one piece of your booth strategy. A branded canopy tent sets the stage, but you still need table covers with your logo, banner stands, literature, and people who know how to work a show. The tent is an investment in visibility, not a substitute for a good booth experience.
One thing I’ve noticed in my years in this industry: companies that buy the cheapest tent possible often end up buying a second one within a year or two. The frame bends, the print fades, or the tent just looks worn next to competitors. Meanwhile, companies that buy mid-tier or premium tents are still using them five years later. The “buy cheap, buy twice” adage applies perfectly here.
Setup, Maintenance, and Longevity Tips
You’ve bought the tent. Now let’s talk about making it last.
Einrichtungszeit varies by tent type and experience level. A basic pop-up tent takes 10 to 15 minutes with two people the first time you set it up. After a few shows, you’ll get it down to five minutes. Straight-leg tents take longer — figure 20 to 30 minutes. Inflatable tents, which are becoming more popular in the industry, can be set up in under five minutes with the right air pump.
Here’s a setup checklist that will save you headaches:
- Practice at home first. Never set up a new tent for the first time at a show. You’ll be fumbling while attendees watch.
- Check the weather forecast. If wind is expected, add extra weights before you set up, not after.
- Bring spare parts. A basic tool kit with a mallet, zip ties, and spare bungee cords can save a show.
- Inspect the frame before setup. Look for bent poles or loose joints before you extend the tent.
- Have a plan for teardown. Know how to properly fold the tent back into its case. Improper folding is the #1 cause of premature tent damage.
Storage is where tents go to die. A tent that’s stored properly can last years. A tent that’s shoved into a closet or left in a car trunk will deteriorate fast. Here’s what you need to know:
- Always dry the tent before storing. Moisture leads to mold and mildew, which will ruin the fabric and create a smell that’s impossible to remove.
- Store in the original case or a breathable bag. Plastic bags trap moisture.
- Keep it out of direct sunlight. UV rays degrade fabric and cause colors to fade, even when the tent is packed.
- Store in a climate-controlled space. Extreme heat and cold can weaken the frame joints and fabric.
Cleaning is simpler than you think. Most tents can be cleaned with mild soap and water. Avoid harsh chemicals and pressure washers, which can damage the print and fabric. Spot-clean stains as soon as you notice them — the longer they sit, the harder they are to remove.
Repairs are often more practical than replacement. If a pole bends, you can often buy a replacement pole from the manufacturer. If the fabric tears, a patch kit can extend the life of the tent. The key is knowing what’s repairable and what’s not. Frame damage is usually repairable. Fabric damage that affects the printed area is harder to fix because you can’t easily match the print.
How long does a tent actually last? In my experience:
- Budget tents: 1–2 seasons of regular use before they start looking rough
- Mid-tier tents: 3–5 seasons with proper care
- Premium tents: 5+ seasons, sometimes much longer
The variable isn’t just the tent quality — it’s how often you use it, how carefully you handle it, and how well you store it. I’ve seen premium tents destroyed in one season by careless handling, and budget tents that lasted five years because the owner treated them like they were made of gold.
Accessories worth buying:
- Weights — non-negotiable for outdoor events. Get 20-40 pounds per leg.
- A wheeled case — your back will thank you.
- Table covers with your logo — they complete the branded look and are relatively inexpensive.
- A counter unit — gives you a professional check-in area and hides clutter.
- Lighting — if you’re doing evening events or dimly lit indoor spaces, LED lighting makes a huge difference.
- Anchoring kit — for outdoor shows, stakes and tie-downs add an extra layer of security.
One more tip: label everything. If you’re doing multiple shows a year, you’ll eventually mix up parts from different tents. A permanent marker and some tape can prevent a lot of confusion.
Setup, Maintenance, and Longevity Tips (Continued)
Let me add a few more things I’ve learned the hard way, because this section deserves more depth than a quick list.
The wind factor. You’ll hear vendors talk about wind ratings, but treat those numbers with skepticism. A tent rated for 30 mph winds can still become airborne if the wind hits it at the wrong angle. The rule I use: if you’re setting up in winds above 15 mph, use every weight and anchor you have. If it’s above 25 mph, consider whether you should be setting up at all.
The learning curve. Your first setup will take twice as long as you expect. Your second setup will be faster. By your fifth show, you’ll have a routine. But here’s the thing — if you’re rotating staff, make sure you have written instructions or a video of the setup process. Nothing slows down a show morning like a team that’s never set up the tent before.
The spare parts kit. I always carry a small kit with zip ties, a mallet, a multi-tool, and spare bungee cords. These have saved me more times than I can count. A broken bungee cord at 8 AM on show day can derail your entire setup if you don’t have a backup.
The teardown trap. Tents are easier to set up than to take down, especially if you’re tired after a long show day. Rushing the teardown leads to bent poles and torn fabric. Give yourself an extra 15 minutes at the end of the show to do it properly.
How Many Shows Will Your Tent Survive?
Let me give you a realistic picture of tent longevity, because the marketing materials won’t.
A budget tent that typically costs under $600 may survive around 5–10 shows, a mid-tier tent in the $700–$1,200 range may last about 15–25 shows, and a premium tent in the $1,200+ range could last 30 or more shows.wn stresses the frame. Every hour of sunlight degrades the fabric. Every time you drag the case across a parking lot, you’re scuffing the material.
A mid-tier tent in the $700–$1,200 range should survive 15–25 shows with proper care. That’s two to three years of a typical trade show schedule. The better frame quality and fabric durability make a real difference.
A premium tent in the $1,200+ range can last 30+ shows, and some vendors’ limited lifetime warranties on frames mean you might never need to replace the frame at all. The fabric will eventually wear out, but that’s replaceable in many designs.
Here’s a practical way to think about it: divide the tent cost by the number of shows you expect it to survive. That gives you your true cost per show. A $500 budget tent that lasts around 8 shows costs about $62.50 per show. A $1,200 premium tent that lasts roughly 30 shows costs about $40 per show. The premium tent is actually cheaper per use — and it looks better the whole time.
This is the math that convinces me to steer buyers toward mid-tier or premium options whenever the budget allows. The upfront cost is higher, but the per-show cost is lower, and you’re not replacing your tent every year.
Top 7 Trade Show Branding Tent Vendors Compared (Detailed Notes)
Let me expand on a few of the vendors I mentioned earlier, because the table only tells part of the story.
Lush Banners deserves a deeper look. Their trade show tent lineup includes both aluminum pop-up tents and inflatable options, which is more variety than most vendors offer. Their pop-up tents feature a self-lock and quick-release mechanism, which genuinely makes setup easier. They offer adjustable heights and eight different sizes, so you’re not stuck with a one-size-fits-all approach. The commercial-grade aluminum frame with a limited lifetime warranty is a strong selling point — few vendors back their frames that confidently. And their free shipping on orders over $399 is a meaningful saving when you’re ordering a tent plus accessories. For those considering inflatable alternatives, their inflatable furniture options can also serve as branded seating or lounge areas that complement your main tent setup.
MVP Visuals is another vendor worth considering seriously. Their 20-year history in the industry suggests they’ve been through multiple product cycles and know what works. They handle custom displays, inflatable arches, tunnels, and other event branding products, which means you can build a cohesive booth experience with one vendor. Their logo canopy tents are a core product, and their design support is genuinely helpful if you need help with your artwork.
ExpoPrint is an interesting option if you’re working with a limited design budget. Their free design service and free artwork fixes can save you money if you don’t have an in-house designer. Their 3D design tool is also useful for visualizing your tent before you commit to an order. The tradeoff is longer shipping times, so plan ahead.
Branded Canopy Tents has an entire blog section on color psychology for event tents, which tells me they understand the branding side of the business. Their package deals on 10×10 and 10×20 tents are worth comparing against other vendors, especially if you want a complete setup with weights and accessories.
Here’s my honest take on how to choose: start with your budget and your show schedule. If you’re doing fewer than three shows a year, pick the best tent you can afford in the mid-tier range. If you’re doing more, invest in a premium option. Then compare quotes from two or three vendors — Lush Banners, MVP Visuals, and one other that fits your specific needs. Ask for samples of their fabric and print quality before you commit.
Häufig gestellte Fragen
Q: What is the cost of a 10×10 canopy tent with logo?
A: A custom canopy tent 10×10 price typically ranges from $400 to $1,800 depending on the quality tier. Budget tents start around $400, mid-tier options run $700–$1,200, and premium tents can reach $1,800 or more. Remember to factor in shipping, weights, and a carrying case, which can add $200–$300 to the total cost.
Q: Are custom logo tents worth it for trade shows?
A: For companies doing three or more shows per year, yes. A mid-tier tent costing $800–$1,200 that lasts about 15–25 shows works out to roughly $40–$80 per show. The branded presence also helps you stand out — the Center for Exhibition Industry Research notes the average attendee spends 8.3 hours exploring exhibits, and visibility matters in a crowded hall.
Q: How long does a branded pop-up tent last?
A: Budget tents typically survive 5–10 shows, mid-tier tents last 15–25 shows, and premium tents can last 30+ shows with proper care. Storage, handling, and setup technique significantly impact longevity. Always dry the tent before storing, keep it out of direct sunlight, and practice setup at home before your first show.
Q: What’s the difference between pop-up and straight-leg tents?
A: Pop-up tents have the fabric attached to a scissor-style frame that expands outward, making them faster to set up but harder to repair. Straight-leg tents have a separate canopy and frame, making them sturdier in wind and easier to maintain. Pop-up tents are the standard for indoor trade shows; straight-leg tents are better for outdoor events.
Q: Can I rent a trade show tent instead of buying one?
A: Yes, and renting makes sense for one-off events, testing new markets, or when you lack storage space. However, if you’re doing multiple shows per year, owning is more cost-effective. A $1,000 tent used at four shows costs about $250 per show, and the tent remains an asset you can use for years.
Q: How much wind can a trade show tent handle?
A: Most vendors provide wind ratings, but treat them as guidelines, not guarantees. In winds above 15 mph, use all available weights and anchors. Above 25 mph, consider whether setting up is safe. Wind can hit tents at unexpected angles, so err on the side of caution with extra weighting.
Q: What accessories do I need with my tent?
A: At minimum, you need weights for outdoor events, a carrying case, and a table cover with your logo. A counter unit, lighting, and spare parts kit are worth adding if your budget allows. These accessories can add roughly $200–$400 to your total cost, so plan accordingly.
Q: How do I choose between a 10×10 and a 10×20 tent?
A: A 10×10 is the industry standard for indoor shows and suits a single table setup. A 10×20 provides twice the space for demo areas and meeting zones but costs more, weighs more, and requires a larger vehicle. Consider your show frequency, booth layout, and transport situation before deciding.
Quellen
1. Maßgeschneiderte Messezelte für Stände, Ausstellungen und Veranstaltungen – mvpvisuals.com
2. Messezelte – lushbanners.com
3. Why Custom-Branded Tents Matter for Trade Shows – mvtents.com
4. Maßgeschneiderte Design-Messestände & Ausstellungskanopizeite – expoprint.io
5. Color Psychology for Event Tents: What Attracts Customers? – brandedcanopytents.com







