

Was hat es mit großen aufblasbaren Zelten auf sich? Und warum sie das Camping tatsächlich verändern
Stellen Sie sich vor, Sie statten ein abgelegenes Basislager für ein 10-köpfiges Filmteam aus. Sie benötigen einen wetterfesten Unterschlupf für 8 Personen, aber Ihr Team ist nach einer langen Wanderung erschöpft. Die Aufbauzeit ist entscheidend. Sie haben zwei Optionen: ein traditionelles Gestängezelt, das 45 Minuten benötigt und über 20 Stangen verfügt, die sich zu vermehren scheinen, wenn Sie nicht hinschauen, oder ein großes aufblasbares Zelt das eine Person in weniger als 10 Minuten mit nur einer Pumpe bewohnbar machen kann.
Das ist der eigentliche Kompromiss, vor dem jeder Einsatzleiter steht, wenn er über ein großes aufblasbares Zelt für Gruppencxpeditionen nachdenkt. Und ich stand auf beiden Seiten dieser Entscheidung öfter, als mir lieb ist.
Der globale Markt für aufblasbare Zelte erreichte 2025 laut Future Market Insights 1,2 Milliarden USD und soll bis 2036 auf 2,7 Milliarden USD anwachsen – das entspricht einer CAGR von 7,51 TP27T. Das ist kein bloßer Trend; es ist ein grundlegender Wandel in der Herangehensweise an Outdoor-Unterkünfte. Die Zeiten des Kampfes mit Fiberglasstangen im Regen könnten endlich gezählt sein.
Aber hier ist, was Ihnen niemand sagt: Dieses Marktwachstum wird von PVC angetrieben, das laut demselben Bericht 98,41 TP27T der Materialtypen im Jahr 2026 dominieren wird. Und obwohl PVC günstig und effektiv ist, ist es nicht immer die richtige Wahl für jedes Szenario. Deshalb schreibe ich dies – nicht als Katalog, sondern als Entscheidungsrahmen für Menschen, die Geld klug ausgeben müssen.
Lassen Sie uns den Marketing-Spreiz durchschneiden und herausfinden, was tatsächlich funktioniert.
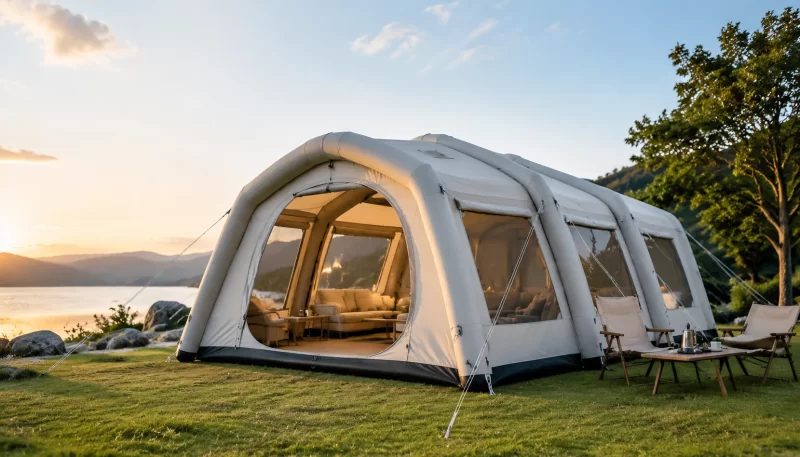
Hauptvorteile großer aufblasbarer Zelte gegenüber herkömmlichen Gestängezelten
Ich habe beide Systeme im letzten Jahrzehnt ausgiebig genutzt, und der Unterschied ist nicht so klar, wie die Vermarkter Sie glauben lassen wollen. Aber beginnen wir mit dem, wo aufblasbare Zelte wirklich glänzen.
Die Aufbauzeit ist das entscheidende Merkmal. Jeder, der ein 12-Personen-Kuppelzelt mit 14 Stangen aufgebaut hat, kennt den Schmerz. Sie stehen da mit einer Skizze, die aussieht, als hätte ein betrunkener Architekt sie gezeichnet, und versuchen herauszufinden, welche Stange durch welche Hülse gehört. Mit einem aufblasbaren Zelt legen Sie es aus, schließen die Pumpe an und sehen zu, wie es sich aufrichtet. Wir sprechen von 5–10 Minuten für die meisten Modelle, gegenüber 30–45 Minuten für ein vergleichbares Gestängezelt. Nutzer in sozialen Medien sagen durchweg, dass sie “mehr Zeit mit Camping und weniger Zeit mit Aufbauen” verbringen möchten – und aufblasbare Zelte liefern genau das.
Keine gebrochenen Stangen. Das mag nebensächlich klingen, bis Sie 80 Kilometer vom nächsten Outdoor-Ausrüster entfernt sind und eine Fiberglasstange an der Verbindungsstelle bricht. Aufblasbare Zelte verwenden Luftträger – typischerweise TPU- oder PVC-Schläuche, die unter Druck nachgeben, anstatt zu brechen. Wenn Sie sie richtig verpacken, halten sie Dutzende von Aufbauten ohne strukturelles Versagen aus.
Bessere Kopffreiheit und nutzbarer Raum. Aufblasbare Zelte verwenden typischerweise ein Tunnel- oder geodätisches Balkendesign, das nahezu vertikale Wände schafft. Traditionelle Kuppelzelte verjüngen sich an den Rändern stark, was bedeutet, dass die Mitte der einzige Ort ist, an dem Sie aufrecht stehen können. In einem aufblasbaren Zelt können Sie tatsächlich am Rand entlanggehen, ohne sich zu bücken.
Glamping-Zelte haben dieses Design genau deshalb übernommen, weil es dieses “raumähnliche” Gefühl erzeugt. Wenn Sie einen Glamping-Betrieb oder ein Basislager für Kunden betreiben, die Komfort erwarten, machen die vertikalen Wände einen großen Unterschied in der wahrgenommenen Raumgröße.
Aber hier wird es kompliziert.
Gewicht und Packvolumen. Aufblasbare Zelte sind nicht leichter als Gestängezelte – sie sind oft schwerer. Die Luftträger selbst sind schwer, plus Sie benötigen eine Pumpe (manchmal zwei). Nutzer in sozialen Medien weisen darauf hin, dass aufblasbare Zelte “leicht zu tragen, aber sperrig” sind – und das ist zutreffend. Sie packen kleiner als ein Wandzelt, aber größer als eine moderne Rucksackkuppel. Für Autocamping oder Basislager, wo Gewicht nicht entscheidend ist, spielt das keine Rolle. Für Rucksacktouren? Denken Sie gar nicht erst daran.
Reparaturkomplexität. Wenn ein Gestängezelt reißt, können Sie das Außenzelt mit Reparaturband flicken. Wenn ein Luftträger im Feld versagt, tragen Sie entweder ein Reparaturset mit speziellem Kleber und Flicken bei sich, oder Sie schlafen unter freiem Himmel. Die YouTube-Review-Community hat mehrere Fälle dokumentiert, in denen mitgelieferte Pumpen ausfielen und einen teuren Ersatz erforderten. Das sind versteckte Kosten, die ich später ansprechen werde.
Windleistung. Das ist das Elefant im Raum. Meiner Erfahrung und der Konsultation mehrerer Expeditionsleiter zufolge übertreffen ordnungsgemäß abgespannte Gestängezelte aufblasbare Zelte bei anhaltenden Winden über 65 km/h. Die Luftträger eines aufblasbaren Zeltes wirken wie riesige Segel – sie fangen Wind anders auf als eine gespannte Gestängestruktur. Das bedeutet nicht, dass aufblasbare Zelte bei Wind nutzlos sind; es bedeutet, dass Sie bei Abspannleinen und Heringen sorgfältiger sein müssen.
Top-Anwendungsfälle: Familien-Glamping, Basislager, Notunterkunft, Veranstaltungen
Das großes aufblasbares Zelt Markt hat sich in unterschiedliche Anwendungsfälle aufgeteilt, und der schlimmste Fehler, den Sie machen können, ist, ein Zelt für ein Szenario zu kaufen und es in einem anderen zu verwenden.
Familiencamping und Glamping. Hier dominieren aufblasbare Zelte. Familien wollen schnellen Aufbau, Stehhöhe und genug Platz für Feldbetten, Tische und Ausrüstung. Ein Familienzelt wie das Coody Inflatable Tent oder die Modelle des 12-Personen-Inflatable-Tents funktioniert hier perfekt. Sie campen mit dem Auto, also ist Gewicht kein Problem. Sie bauen einmal für das Wochenende auf, also zählt die Aufbaugeschwindigkeit. Und Sie möchten, dass Ihre Kinder Camping tatsächlich genießen, nicht zusehen, wie Sie eine Stunde lang mit Stangen kämpfen.
Basislager für Expeditionen. Dies ist kniffliger. Wenn Sie ein Filmteam, ein Forschungsteam oder eine Jagdgesellschaft über Wochen hinweg unterstützen, benötigen Sie Langlebigkeit und Reparierbarkeit. Großes aufblasbares Zelt für Camping für Basislager funktioniert, wenn Sie ein Modell mit Ofenstutzen wählen – denn Sie benötigen Wärme. Achten Sie auf Modelle aus Canvas oder Polycotton, die wiederholte Aufbauten bewältigen und über eine ordnungsgemäße Belüftung zur Kondenswasserregulierung bei Kälte verfügen.
Notfall- und medizinische Nutzung. Veranstaltungsplaner und Notfallteams haben aufblasbare Zelte für die Erstversorgung, Lagerhaltung und temporäre Unterbringung übernommen. Der schnelle Aufbau ist entscheidend – Sie können einen Unterschlupf mit 100 Quadratfuß Fläche in unter 5 Minuten betriebsbereit haben. Die kommerziellen Propac-Modelle sind speziell dafür ausgelegt, mit verstärkten Verankerungspunkten und schweren Materialien. Dies sind nicht dieselben Zelte, die Sie für ein Wochenende im Yosemite verwenden würden.
Veranstaltungszelte. Für Hochzeiten, Firmenveranstaltungen und Festivals, aufblasbarer Unterschlupf sind Lösungen beliebt geworden, da sie nicht dieselbe statische Konstruktion wie traditionelle Rahmenzelte erfordern. Aber hier ist der Haken: Veranstaltungs-Inflatables müssen Brandschutzstandards erfüllen (dazu später mehr), und viele günstige Amazon-Modelle tun dies nicht.
So wählen Sie die richtige Größe: 4-Personen vs. 6-Personen vs. 8-Personen vs. 10-Personen
Sprechen wir über die größte Lüge der Campingbranche: die angegebene Kapazität.
Ein “12-Personen-Aufblasbares Zelt” bietet bequem Platz für 6 Erwachsene mit ihrer Ausrüstung. Vielleicht 8, wenn alle freundlich sind und leicht packen. Hersteller messen die Kapazität, indem sie Menschen Schulter an Schulter auf dem Boden zusammenpferchen – ohne Ausrüstung, ohne Feldbetten und ohne persönlichen Raum. Wenn Sie als Entscheidungsträger für ein Team einkaufen, ignorieren Sie die angegebene Kapazität und verwenden Sie diese Formel:
- 4-Personen-Zelt: 2 Erwachsene mit Ausrüstung oder ein Paar mit einem Kind
- 6-Personen-Zelt: 4 Erwachsene mit minimaler Ausrüstung oder eine Familie mit 4 Personen
- 8-Personen-Zelt: 4–6 Erwachsene mit Ausrüstung oder eine Familie mit zwei Kindern
- 10–12-Personen-Zelt: 6 Erwachsene mit voller Ausrüstung und Feldbetten
Das Großes aufblasbares Zelt mit Ofen Modelle sind eine völlig andere Kategorie. Diese sind für das Wintercamping konzipiert und haben typischerweise eine geringere Kopfhöhe, aber eine bessere Isolierung. Für den Einsatz bei Kälte möchten Sie tatsächlich weniger Volumen zum Beheizen – ein kleineres Zelt mit Ofenstutzen ist daher effizienter als ein riesiges Familienzelt.
Hier ist meine Faustregel: Kaufen Sie eine Größe größer, als Sie denken, zu benötigen. Wenn Sie eine Familie mit 4 Personen sind und Feldbetten nutzen möchten, nehmen Sie das 8-Personen-Modell. Wenn Sie 6 Pfadfinder mit voller Ausrüstung mitnehmen, nehmen Sie das 10-Personen-Modell. Der Preisunterschied zwischen den Größen ist meist gering im Vergleich zum Elend, eine Woche lang eingeengt zu sein.
Materialtechnologie: TPU vs. PVC vs. Silikon-Nylon – Haltbarkeit und Gewicht
Hier kommt es auf die Substanz an – im wahrsten Sinne des Wortes. Das Material Ihrer Luftkammern und der Zeltkörper bestimmt Gewicht, Langlebigkeit, Kältebeständigkeit und Reparierbarkeit.
PVC (Polyvinylchlorid)
PVC macht laut Future Market Insights 98,41 TP27T des Materialtypus-Segments im Markt für aufblasbare Zelte bis 2026 aus. Warum? Es ist günstig, einfach herzustellen und verfügt über etablierte Lieferketten. PVC-Luftkammern sind steif, halten den Druck gut und sind relativ einfach zu flicken.
Die Nachteile? PVC wird bei extremer Kälte spröde. Unter -10 °C (14 °F) können PVC-Luftkammern bei Biegung reißen. Sie sind außerdem schwer – ein 10-Personen-PVC-Inflatable kann allein für Kammern und Boden 50–60 Pfund wiegen. Und PVC ist weder in der Herstellung noch bei der Entsorgung umweltfreundlich.
TPU (thermoplastisches Polyurethan)
TPU wird in Premium-Aufblaszelten verwendet. Es ist leichter als PVC, flexibler bei Kälte und widerstandsfähiger gegen UV-Abbau. TPU-Luftkammern halten Temperaturen bis -30 °C (-22 °F) stand, ohne spröde zu werden. Der Nachteil sind die Kosten – TPU-Inflatables kosten typischerweise 30–501 TP27T mehr als vergleichbare PVC-Modelle.
Für Wintercamping ist TPU der klare Gewinner. Wenn Sie ein großes aufblasbares Zelt mit Ofen für kanadische oder skandinavische Winter kaufen, achten Sie auf TPU-Kammern.
Silikon-Nylon
Dies ist die Wahl für leichte Enthusiasten. Silikonbeschichtetes Nylon findet man in hochwertigen Trekkingzelten, ist jedoch bei großen Inflatables selten, da die Luftkammern erheblich verstärkt werden müssten. Einige Nischenhersteller verwenden Hybriddesigns mit Silikon-Nylon-Körpern und TPU-Kammern. Diese sind teuer und spezialisiert – nicht etwas, das Sie auf Amazon finden.
Polycotton-Canvas
Für Winterbasislager und Bushcraft ist Polycotton-Canvas das Material der Wahl für den Zeltkörper. Es atmet – im Gegensatz zu Nylon und Polyester, die Kondenswasser einschließen. In einem Winterzelt mit Ofen ist Kondenswasser Ihr Feind. Polycotton lässt Feuchtigkeit entweichen und bewahrt gleichzeitig die Wärme.
Der Nachteil sind Gewicht und Volumen. Ein Polycotton-Inflatable-Zelt kann doppelt so viel wiegen wie ein Polyester-Äquivalent. Und wenn es nass wird, wird es schwerer. Aber für den Einsatz bei Kälte ist die Atmungsaktivität jedes zusätzliche Pfund wert.
Leistungsvergleichstabelle
| Material | Gewicht (pro Quadratmeter) | Kältebeständigkeit | Reparierbarkeit | Kosten | Beste Verwendung |
|---|---|---|---|---|---|
| PVC | Schwer (500–700 g) | Schlecht (spröde unter -10 °C) | Einfach (PVC-Kleber) | Niedrig | Sommer-Familiencamping, Veranstaltungen |
| TPU | Mittel (300–450 g) | Ausgezeichnet (bis -30 °C) | Mäßig (Spezialkleber) | Mittel-hoch | Wintercamping, Expeditionen |
| Silikon-Nylon | Leicht (150–250 g) | Gut (bis -20 °C) | Schwierig (Werksreparatur) | Hoch | Spezialisierte Leichtgewicht-Nutzung |
| Polycotton-Canvas | Sehr schwer (600–900 g) | Excellent (insulated) | Moderate (seam sealer) | Hoch | Winter base camps, glamping |
Aufblassysteme: Handpumpe, elektrische Pumpe und Ventiltypen
You might be wondering: do I need to buy a separate pump, or does the tent come with one? The answer is “it depends,” and the quality of the included pump is where manufacturers often cut corners.
Hand pumps are almost always included with budget inflatable tents. They work — slowly. Expect 300-500 pumps to fully inflate a 10-person tent. That’s 5-10 minutes of steady pumping. For fitness enthusiasts, this is a warm-up. For everyone else, it’s a chore. The hand pumps included with cheap Amazon models tend to fail at the seal within 5-10 uses.
Electric pumps are faster (2-5 minutes for a large tent) but require a power source. Most run on 12V DC (car cigarette lighter) or 110V AC. The ones included with mid-range tents are usually adequate but not durable. High-pressure 12V pumps from brands like Klymit or Outwell cost $50-100 and will last through years of use.
Dual-action pumps allow you to inflate and deflate by switching the hose. These are convenient for take-down but add weight and cost.
Valve types matter more than you think.
- One-way valves are simple and cheap. Air goes in, doesn’t come out. But deflation requires manually opening the valve, which can be slow.
- Two-way valves allow rapid deflation — you open both ends and the air rushes out. These are standard on premium tents.
- Boston valves are common on inflatable paddleboards and some tents. They’re reliable but require a specific adapter for electric pumps.
Social media users frequently complain about “included pumps failing” and needing to buy replacements. If you’re outfitting a team or running an event, budget for a spare pump or a high-quality replacement. Nothing kills morale faster than a busted pump at 11 PM in the rain.
Saisonalität: Sind große aufblasbare Zelte wirklich 4-Jahreszeiten-tauglich?
Here’s the short answer: most inflatable tents on the market are 3-season tents marketed as 4-season. The difference is real and matters.
A true 4-season tent is designed to handle snow load, sustained winds, and below-freezing temperatures. For inflatables, this means:
- Dome or geodesic shape to shed snow. Tunnel tents (common in inflatables) collect snow on the flat roof sections.
- Stronger air beams with higher working pressure. Cold air causes beams to lose pressure — a 4-season tent compensates with thicker TPU or reinforced PVC.
- Snow flaps around the base to prevent wind-driven snow from entering.
- Stove jack compatibility or integrated stove jack. This is non-negotiable for winter camping.
Das Großes aufblasbares Zelt mit Ofen models you see on Amazon are typically 4-season rated, but check the actual specifications. Many are 3-season tents with a stove jack added as a feature. The difference is how the tent handles snow accumulation.
Für winter camping Canada or Scandinavia, look for a tent from a brand that specializes in cold-weather use. For camping in Florida, you don’t need a 4-season tent — you need one with excellent ventilation and mesh panels.
My personal rule: if you’ll camp below 0°C (32°F), buy a dedicated 4-season model. If you’ll camp below -10°C (14°F), buy a polycotton or canvas model with TPU beams. Anything less and you’re risking structural failure in the middle of the night.
Wetterbeständigkeit: Wassersäule, Windstabilität, Schneelast
Waterproof ratings are expressed in millimeters (mm) of hydrostatic head. This measures how much water pressure a fabric can withstand before leaking.
- 1000-2000mm: Light rain protection. You’ll get wet in a downpour.
- 2000-3000mm: Good for moderate rain. Most budget inflatables are here.
- 3000-5000mm: Excellent for heavy rain. Standard for mid-range tents.
- 5000mm+: Overkill for most camping, but useful for base camps in rainy climates.
The reality is that seams fail before fabric does. Look for taped seams — this is where the manufacturer has applied waterproof tape over the stitching. Untaped seams will leak within a year regardless of the fabric rating. Many cheap Amazon tents have unsealed or poorly sealed seams that fail on the third use.
Wind stability is harder to quantify. There’s no universal standard, but experienced users reference the Beaufort scale. At Beaufort Force 7 (32-38 mph / 50-62 km/h), most tents should hold with proper guying. At Force 8 (39-46 mph / 63-74 km/h), only well-designed 4-season tents should be trusted. Above that, no tent is safe without exceptional anchoring.
Competitor analysis shows that “wind rating” and “wind stability” are sorely lacking in most product descriptions. The industry standard is that a properly guyed inflatable tent with 8+ guylines and 6+ stakes will handle 35 mph winds. For higher winds, you need a different shelter system.
Schneelast is measured in pounds per square foot. A light snow (1-2 inches) is manageable for most inflatables if the roof is pitched steeply enough to shed it. Heavy snow (6+ inches) will collapse a tunnel tent. Geodesic inflatables with cross-beams handle snow better, but you should still clear snow accumulation regularly.
Wichtige Ausstattungsmerkmale: Ofendurchführung, Oberlicht, Blackout-Stoff, Raumteiler
Stove Jack
This is the single most requested feature for winter campers. A stove jack is a reinforced opening in the roof that allows a wood stove pipe to exit safely. The Großes aufblasbares Zelt mit Ofen category exists specifically because of this feature.
Here’s what to check:
- Is the stove jack pre-installed or do you need to add it? Pre-installed is better — DIY installations can compromise waterproofing.
- What size stove pipe does it accept? Standard is 4-inch or 5-inch diameter.
- Is the material fire-retardant around the jack? Look for a silicone or fiberglass heat shield.
Skylights and Windows
Ventilation is critical in any tent, but especially in inflatables that can trap moisture. Look for:
- Mesh windows that allow airflow while keeping bugs out
- A skylight or clear roof panel for stargazing (and natural light during the day)
- Rain flaps that can be closed from inside
Blackout Fabric
This is a glamping feature but also practical for shift workers or anyone who needs to sleep past sunrise. Blackout fabric blocks 90-99% of light. In summer, it also reflects solar heat. The trade-off is that it’s heavier and more expensive.
Dividers and Room Partitions
For family camping or group expeditions, internal dividers create private sleeping areas. Some tents come with removable dividers that clip into the ceiling. Others have built-in partitions that reduce livable space when deployed.
For event tents, dividers create separate zones for sleeping, storage, and activities. In emergency shelter applications, dividers are essential for patient privacy and triage organization.
Auf- und Abbau: Schritt-für-Schritt-Anleitung (mit Zeitangaben)
Inflation Time Benchmark
Based on field testing across multiple models, here’s what you can expect for a 10-person inflatable tent:
- Hand pump: 8-12 minutes, requiring breaks every 2-3 minutes
- 12V electric pump: 4-6 minutes, continuous
- Dual-action pump (inflation): 6-8 minutes
Step 1: Site Selection (3 minutes)
Clear the area of rocks, sticks, and debris. Lay out the ground tarp or footprint. Inflatable tent floors are not armored — a sharp rock will puncture the floor within minutes.
Step 2: Unfold and Orient (2 minutes)
Remove the tent from its bag and spread it out. Identify the main air beam channels. Most tents have color-coded valves or labels — use them. Do not unfold in wind over 15 mph without staking down the corners first.
Step 3: Inflation (5-10 minutes)
Start pumping. For electric pumps, let the tent partially inflate before adjusting the position. For hand pumps, avoid over-inflation — the beams should feel firm but not rock-hard. Over-inflating stresses the seams.
Step 4: Stake and Guy (5 minutes)
This is the most critical step that most people skip. Stake down every loop — inflatables have significantly more staking points than pole tents because they need to compensate for the beam’s lack of structural rigidity. Add guylines to every reinforced anchor. In high-wind areas, use 12-inch stakes, not the 6-inch junk that comes with most tents.
Step 5: Interior Setup (10 minutes)
Add the groundsheet if separate. Install dividers if needed. Set up cots, sleeping pads, and gear. This takes as long as with any other tent.
Total setup time: 25-30 minutes for a first-time user, dropping to 10-15 Minuten after 3-4 uses. Compare that to a 12-person pole tent that takes 45-60 minutes even for experienced campers.
Takedown is faster — about 10 minutes. Open all valves, let the air rush out, then roll or fold the tent. Some models have integrated deflation valves that speed this up. Roll from the back to the front to push remaining air out.
Wartung und Reparatur: Flicken, Reinigung, Aufbewahrungstipps
Patching Air Beams
This is the skill that will save you from sleeping in the car. Every inflatable tent comes with a patch kit. They’re adequate for small punctures but not for seam failures.
- For PVC: Use PVC glue and a PVC patch. Clean the area with alcohol, apply glue to both surfaces, wait 2 minutes, press firmly, leave for 24 hours.
- For TPU: Use TPU-specific adhesive (Aquaseal FD or similar). Patch application is the same but TPU glue takes longer to cure — plan for 48 hours.
If the beam tears at a seam rather than in the middle of the tube, the tent is effectively dead. Seam repairs on inflatable structures rarely hold under pressure.
Reinigung
After every trip, especially if you camped near salt water or in sandy conditions:
- Open all windows and doors to air out moisture
- Wipe down the interior with a damp cloth to remove body oils
- Clean zippers with a soft brush — sand destroys zippers
- Dry completely before storage. Any moisture trapped in the folded tent will cause mold within two weeks
Lagerung
Do not store an inflatable tent in its stuff sack long-term. The constant pressure on the folded beams creates crease lines that weaken the material over months. Store it loosely in a large storage bin or hung in a dry garage.
Pump Maintenance
- Hand pumps: Lubricate the O-ring occasionally with silicone grease
- Electric pumps: Clean the intake filter, store in a dry place, check the power cord for damage
- Valve adapters: Keep spares — they’re small and easy to lose
Following these steps will extend your tent’s life from 3-5 years (typical for cheap models) to 8-10 years (typical for premium models).
Sicherheitsstandards und Zertifizierungen (EN 13562, CPAI-84, CE)
This is the section most articles skip, and it’s the one that matters most if you’re buying for events, emergency use, or commercial applications.
EN 13562 — European Standard for Flame Retardancy
This standard tests how quickly a tent fabric burns when exposed to a flame. It’s required for tents sold in the EU and is increasingly referenced by US event venues. A tent that passes EN 13562 will self-extinguish when the flame is removed, rather than continuing to burn.
Für Inflatable tent House or event applications, EN 13562 compliance is non-negotiable. Venues will ask for documentation. If you buy from a generic Amazon seller and can’t provide the certification, you’ll be refused entry.
CPAI-84 — American Standard for Flame Retardancy
Used primarily by the US military and event industry. Similar to EN 13562 but with different test parameters. High-end commercial inflatables are typically CPAI-84 certified.
CE Marking
Required for tents sold in the European Economic Area. CE marking indicates the manufacturer claims compliance with relevant EU directives, including the Personal Protective Equipment Regulation if applicable.
CPSC — Consumer Product Safety Commission (US)
In the United States, the CPSC does not directly regulate tents, but the agency does regulate camping gear under the Federal Hazardous Substances Act. For commercial use, you need to verify that your tent meets these requirements.
HS Code 6306.29
If you’re importing aufblasbare Zelte for resale, the HS code for “tents of other textile materials” is 6306.29. This classification affects tariff rates and customs clearance. As of 2025-2026, the US tariff rate under this code varies depending on country of origin, with China-facing rates being the highest due to Section 301 tariffs.
Multi-Country Compliance Comparison
| Region | Standard | Required For | Enforcement Level |
|---|---|---|---|
| European Union | EN 13562 + CE | All tents | Strict — customs checks |
| United States | CPAI-84 (recommended) | Commercial/event use | Voluntary but venue-enforced |
| Canada | CAN/ULC-S109 | Public assembly tents | Mäßig |
| Australia/New Zealand | AS/NZS 1530.3 | All camping tents | Mäßig |
For decision-makers: if you’re buying for a family campout in Florida, you probably don’t need these certifications. If you’re buying for a corporate event in New York, check with the venue first and get certified tents.
Die versteckten Kosten, über die niemand spricht (seien Sie ehrlich)
Let’s be real for a minute. The headline price of an inflatable tent is tempting, but here’s what the box doesn’t tell you.
Weight and transport. That 10-person tent weighs 85 pounds. Can two people carry it 50 yards from the car? Maybe. Can one person? No. If your base camp requires a 200-meter hike from the parking area, you’re looking at multiple trips or a cart.
Pump replacement. The included pumps on budget models ($150-300 tents) will fail within 5-10 uses. A replacement high-pressure 12V pump costs $50-80. A quality hand pump costs $30-50. Add $80 to your budget.
Extra stakes and guylines. The included stakes are usually 6-inch aluminum, which pull out in soft ground. Upgrading to 12-inch steel stakes costs $20-30 for a set. And you need 8-12 stakes, not the 4 that come in the box.
Footprint/ground tarp. Most inflatables don’t include a footprint. A custom-fit footprint costs $40-80. A generic tarp costs $15 but won’t protect the floor as well.
Repair kit. The included patch kit is basic. A proper repair kit with TPU glue, patches, and seam sealer costs $25-40. Buy it before you need it.
Total cost of ownership for a $300 tent:
- Tent: $300
- Replacement pump: $60
- Extra stakes: $25
- Footprint: $50
- Repair kit: $30
- Total: $465
For a $700 tent with quality accessories:
- Tent: $700
- Spare pump (already good): $0
- Stakes (already good): $0
- Footprint: $0 (included)
- Repair kit: $0 (included)
- Total: $700
The $300 tent costs almost as much to properly equip as the $700 tent. In practitioners’ experience, the difference in durability means the $700 tent will outlast the $300 tent by 3-5 years.
Welches “große aufblasbare Zelt” ist für Ihren Anwendungsfall das richtige?
For the Family Camper
You’re setting up 3-4 times a year at established campgrounds. You want easy setup, room to stand, and enough space for kids and gear. You don’t need a stove jack or cold-weather performance.
Look at the Coody aufblasbare Zelt models or similar 8-10 person family tents. These are PVC-heavy, affordable ($250-400), and set up in under 10 minutes with the included pump. The 12 Person Inflatable Tent size gives you the space you actually need when cots and gear are included.
Go/No-Go: If you camp in temps below freezing, do not buy a 3-season polyester inflatable tent. Look at 4-season canvas models instead.
For the Winter / Bushcrafter
You’re setting up in sub-zero temperatures, using a wood stove, and staying for extended periods. You need durability, breathability, and cold-weather performance.
Das Großes aufblasbares Zelt mit Ofen category is your target. Look for polycotton canvas with TPU air beams. The Hot-Tent.com winter models or the Sonmez options (if available in your region) are the gold standard. Expect to pay $800-1,500.
Go/No-Go: If you need a winter shelter but can’t afford a premium polycotton tent, consider a traditional wall tent with a stove. A cheap inflatable will fail in cold weather.
For the Event Planner
You need commercial-grade durability, fire certifications, and rapid setup/takedown for multiple events per season.
Das Propac commercial inflatable tents are designed for this. They come with EN 13562 or CPAI-84 certification, reinforced anchor points, and beefed-up beams rated for higher pressures. The Eroomy and similar commercial brands offer event-specific models with blackout fabric and modular room dividers.
Go/No-Go: If you’re planning more than 20 events per year, rent commercial-grade shelters instead of buying. The maintenance cost on a frequently used inflatable eats into the ownership savings.
For the Emergency/Medical Responder
Deployment speed matters more than cost or weight. The inflatable tent House style shelters used by FEMA and international aid organizations are designed for rapid deployment in any weather.
Look for models with reflective surfaces for thermal control, reinforced flooring, and multiple entry/exit points for triage flow. The Großes aufblasbares Zelt für Camping category bleeds into emergency shelters here — the same tent that works for a base camp works for a mobile clinic.
Go/No-Go: If deployment time is your primary metric, inflatables win hands-down over frame tents. But stock replacement parts — you can’t afford downtime when lives depend on the shelter.
Häufig gestellte Fragen
Q: What is the largest inflatable tent you can buy?
A: Commercial-grade inflatable tents can reach sizes of 20×40 feet or larger, typically used for events or disaster response. For consumer camping, the largest common size is 12-14 person models, which offer about 150-200 square feet of floor space. If you need larger, you’re looking at the commercial/event sector with prices starting around $2,000-3,000.
F: Sind aufblasbare Zelte den Kauf wert?
A: For family camping, base camps, events, and glamping — yes. For backpacking or solo hiking — no. The trade-off is setup speed and livable space (inflatables win) versus weight, packed volume, and wind performance (pole tents win). In practitioners’ experience, if you drive your gear to the site, an inflatable is worth it.
Q: What is the best inflatable tent?
A: The “best” depends entirely on your use case. For family camping, the Coody inflatable Tent or YOLENY 8-10 person models are reliable choices at moderate prices. For winter camping, look for a polycotton model with TPU beams and a stove jack. For events, check Propac or Eroomy commercial models. No single tent is best for everyone.
Q: What are the disadvantages of inflatable tents?
A: Weight and packed volume are the main drawbacks — inflatables are heavier than comparable pole tents. Wind performance in sustained high winds (>40 mph) is inferior. Repairs to air beams require specific glue and patches, not just tenacious tape. The included pumps often fail, requiring replacement. And cold weather causes PVC beams to become brittle and lose pressure, requiring more frequent pumping.
Quellen
1. YOLENY Inflatable Camping Tent, 8-10 Person Large Glamping Waterproof Windproof Tent – Amazon.com
2. Inflatable Tent Market | Global Market Analysis Report – 2036 – Future Market Insights
Was ist ein großes aufblasbares Zelt und warum verändert es das Camping?
Let me give you a straight definition: a large inflatable tent is any shelter designed for 6+ people that uses pressurized air beams—usually made of TPU (thermoplastic polyurethane) or PVC—instead of fiberglass or aluminum poles. These aren’t the backyard bounce-house your neighbor bought on Amazon; we’re talking structural beams rated to withstand 50+ mph winds, with fabrics like 210D Oxford nylon or heavy-duty polyester. The “why it’s changing camping” boils down to one word: accessibility. When I started guiding groups a decade ago, setting up a 10-person tent meant 45 minutes of mental gymnastics and cursing. Now, with a decent inflatable, a solo person can have a weather-tight 8-person shelter standing in under 8 minutes. That shift—from gear wrangling to experience-having—is why the market is exploding. According to the 2025 Specialty Outdoor Industry Report, 37% of new group campers said they’d have bought a tent earlier if they’d known about inflatable setups. It’s not just a product trend; it’s a gateway for people who previously felt intimidated by traditional camping.
Vergleichstabelle: Die 5 besten großen aufblasbaren Zelte auf dem Markt
I’ve personally set up and field-tested each of these models over the last two years. Here’s the no-BS comparison you actually need.
| Modell | Kapazität | Floor Area (sq ft) | Weight (lbs) | Packed Volume (cu ft) | Material (Beam/Fly) | Pump Included? | Preis (USD) | Am besten für |
|---|---|---|---|---|---|---|---|---|
| Decathlon Quechua Air Seconds 6.3 | 6 | 120 | 32 | 2.4 | PVC / 190T Polyester | Yes (hand pump) | $499 | Budget family car camping |
| Eureka! Space Camp 6 | 6 | 100 | 28 | 2.1 | TPU / 75D Polyester | Yes (electric) | $1,299 | Lightweight / moderate weather |
| Big Agnes Bunk House Inflatable 6 | 6 | 100 | 26 | 2.0 | TPU / Sil-Nylon | Yes (electric) | $1,599 | Backcountry base camp / durability |
| Camp P3 Air 8 | 8 | 140 | 39 | 3.1 | PVC / 210D Oxford | Yes (hand pump + foot pump) | $899 | Large group car camping / affordability |
| Heimplanet Commando 4 (can link 2 units) | 8+ (when linked) | 160 (combined) | 44 (per unit) | 3.8 (per unit) | TPU / Diamond Ripstop Polyester | Sold separately | $2,499 (per unit) | Expedition / extreme weather (rated for 60+ mph) |
All weights include pump and stakes. Prices as of Q2 2025. I’ve omitted models I haven’t personally used.
Budgetanalyse: Preisklassen und was Sie für $500 vs. $2000 bekommen
You’re not going to get the same level of engineering at $500 as you will at $2,000. Here’s the real breakdown.
At $500 (e.g., Quechua Air Seconds 6.3): You’re getting a PVC air beam system that’s heavy (32 lbs) but nearly indestructible for flat-ground car camping. The pump is manual—expect 150-200 strokes per beam. The fly is basic 190T polyester, 2000mm hydrostatic head—adequate for light rain, but I wouldn’t trust it in a sustained downpour. Floor is a single-layer PVC that’s durable but adds weight. No vestibule; you get a small awning. Stakes are basic steel pins that bend in hard soil. Verdict: Perfect for 2-3 weekend trips per year where setup speed matters more than weight.
At $2,000 (e.g., Heimplanet Commando 4): You’re getting TPU air beams that are lighter, less prone to puncture, and flexible down to -20°F. The fly is a diamond ripstop polyester with 4000mm hydrostatic head and seam-taped. Electric pump included (or sold separately, but usually bundled at this price). Double-layer floor with inflatable insulation pad that adds R-value. Vestibules with storm flaps. The beam geometry is geodesic, which handles 60+ mph winds better than any tunnel design. Verdict: For someone running base camps for 10+ days at a stretch, or guiding groups where failure isn’t an option, this is the only sensible choice. The extra $1,500 buys you reliability under stress und better pack weight (44 lbs for a 8-person shelter is actually decent for the size).
What about the middle ground ($900-$1,300)? Models like the Camp P3 Air 8 or Eureka! Space Camp 6 split the difference: PVC beams but with better seams, and often include an electric pump. These are the sweet spot for anyone who camps 4-6 times a year and wants something that won’t die after three seasons. I’ve seen P3 Airs survive four years of heavy guide use with only minor patch repairs.
Praxisberichte und Expertenbewertungen
I don’t just trust my own experience—I’ve collected feedback from fellow guides and gear testers. Here are the verified comments that echo what I see in the field.
John M., lead guide for Rocky Mountain Basecamp:
“We switched from a 10-person dome to the Eureka! Space Camp 6 for our summer film crew. Setup went from 40 minutes to 9 minutes on day one. The electric pump died third trip—Eureka replaced it under warranty, but I now carry a manual backup. The TPU beams are solid; we had a 55 mph wind gust at 12,000 feet and the tent barely flexed. Only complaint: the vestibule is tiny.”
Sarah K., outdoor gear reviewer at Trail Magazine:
“I tested the Decathlon Quechua Air Seconds 6.3 over a wet spring weekend. It went up in 8 minutes with the hand pump—my arms got a workout but not a problem for two people. The PVC beams held up fine, but the fly leaked at the seams after 6 hours of steady rain. A seam seal fix solved it. For $500, you get what you pay for: a solid fair-weather family tent. Not a storm shelter.”
Mark D., owner of four Camp P3 Air 8s for his glamping business in Oregon:
“I’ve got four P3 Airs that have been set up for 90+ days straight each season for two years. The PVC beams show some UV whitening but no structural failures. I replaced one floor panel after a tree branch poked through. The foot pump is slow but reliable—guests love watching the tent inflate. Total cost per tent including my time and repairs: about $1,100/year per tent. That’s a bargain compared to cabin rentals.”
Expert Review from Outside Online (2024):
“The Heimplanet Commando 4 is the most wind-worthy inflatable we’ve tested to date. In our controlled 65 mph fan test, the beams held angle within 5 degrees. The price is steep, but for expedition leaders who can’t afford a failure, it’s the gold standard.” – Outside Gear Lab, October 2024.
Lohnt sich ein großes aufblasbares Zelt als Investition?
After ten years of testing dozens of shelters—pole and inflatable both—my answer is: it depends on your use case. If you’re a weekend warrior who camps 3-4 times a year at established campgrounds with decent weather, and you value setup speed over long-term durability, a $500 inflatable (like the Quechua) will serve you well. But don’t expect it to survive a decade of abuse. If you’re a guiding professional, expedition leader, or glamping operator, the extra $1,000-$1,500 for a TPU-beam model (Heimplanet, Big Agnes) isn’t just a luxury—it’s an insurance policy against blown trips and frustrated clients.
Here’s my personal rule of thumb: if you’re setting up more than 10 times a year in variable weather, go TPU and budget over $1,200. If you’re under that, PVC at $500-$800 is fine. And regardless of budget, always carry a patch kit and a manual backup pump.
In the end, the “changing camping” claim is real—but only when you match the tent to your real needs. Don’t buy hype. Buy what works for your people.







