

Schnelle Antwort / Wichtige Erkenntnisse
What are display tents for trade shows?
Display tents for trade shows are portable, branded canopy structures that define a booth space and create a visual anchor for exhibitors. They range from basic 10×10 pop-up canopies to heavy duty custom structures with sidewalls, lighting, and full graphic coverage. Unlike tabletop displays, tents provide vertical presence, making your brand visible from across the exhibition hall.
How to choose the right trade show tent:
1. Measure your space first. A 10×10 booth is the industry standard. For outdoor events, you can go larger (10×15 or 10×20), but verify venue restrictions on height and footprint. Most indoor halls have 10–12 foot height limits.
2. Match the tent to the environment. Indoor shows require fire-retardant fabric (NFPA 701 certified). Outdoor shows require waterproof, UV-resistant fabric (500D polyester or vinyl-laminated). Hybrid tents work for both.
3. Choose the right frame. E-Z Up style frames are fine for occasional indoor use. Heavy duty aluminum or steel frames with reinforced joints are necessary for frequent setup or outdoor wind exposure. Expect to pay $800–$1,500 for a quality custom 10×10 tent.
4. Invest in custom graphics. Dye-sublimation printing on 300D or 500D polyester gives the sharpest, most durable results. Provide 300 DPI artwork with a minimum 3-week lead time. Include your logo on all four sides plus the top canopy for maximum visibility.
5. Don’t skip safety equipment. Indoor venues require 20–30 lbs per leg; outdoor shows often require 40–50 lbs per leg plus stakes. Use sandbags or steel base plates — never cinder blocks. Check your venue’s exhibitor manual for exact weight specs.
6. Budget for accessories. Sidewalls, LED lighting, carpet, and counter tables add 30–50% to your total tent cost but dramatically improve booth professionalism and lead capture.
Where to buy:
Major suppliers include MVP Visuals, Absolute Exhibits, and Canopy Mart. For budget options, search “display tents for trade shows amazon” — but verify fabric quality and fire ratings before purchasing. Custom printing from specialized suppliers like Showdown Displays or Suntime offers better durability and design support.
Key takeaway: A trade show tent is not overhead — it’s your brand’s physical headquarters for the day. Invest in a heavy duty, custom-printed tent that matches your venue requirements, and you’ll see measurable returns in foot traffic, lead quality, and brand recall.
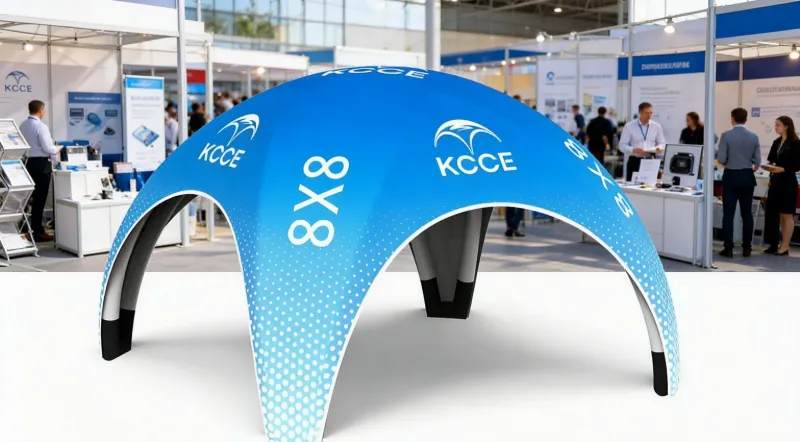
Picture this: you’ve dropped five grand on a booth space, flown your team in, printed the brochures, and the one thing holding your entire brand presentation together is… a sagging, flea-market-looking canopy that’s missing a corner pole. I’ve seen it happen more times than I care to count. The tent is the physical anchor of your brand identity for the day — the first thing attendees see before they read a single word of your messaging. And honestly, choosing the right display tents for trade shows is about way more than just covering square footage. It’s a strategic decision that hits your brand perception and your lead generation ROI directly.
This guide isn’t another fluffy marketing piece. I’ve been in this industry long enough to separate the practical from the pretty, and I’m going to walk you through the decisions that actually matter — the indoor vs. outdoor dilemma, sizing logic most people get wrong, fabric and frame differences that determine whether your tent survives the season, and the safety stuff (weights, fire ratings) that nobody talks about until something goes wrong.
Why Trade Show Tents Are Essential for Your Exhibition Success
Here’s the thing about trade shows: attention is the currency, and you’ve got about three seconds to earn it. A well-designed tent does something a banner stand or a tablecloth simply can’t — it creates a destination. According to suppliers like MVP Visuals, custom trade show tents function as complete branding environments, not just overhead coverage. They give you vertical presence in a sea of tabletops, which matters when attendees are scanning from across the hall.
Think about the math for a second. At a typical expo, your booth is competing with hundreds of others. A branded canopy with crisp graphics, proper lighting, and a professional structure signals that you’re an established player. A tired, wrinkled pop-up says the opposite. In my experience, exhibitors who treat their tent as a strategic asset rather than an afterthought see noticeably better foot traffic — and foot traffic is the first step to qualified leads.
There’s also the practical layer. Tents define your space, especially in outdoor or semi-outdoor venues where “your booth” isn’t clearly marked by walls. They provide shade, shelter, and a psychological boundary that invites people in. Without one, you’re just a table in a field.
Honestly, the biggest mistake I see people make isn’t picking the wrong tent—it’s picking one without asking the right questions first.
Before you even open a browser tab, sit down and answer a few things straight. Are you mostly working indoor expo halls, or are you dealing with outdoor festivals? Maybe it’s a mix of both. How many shows are we talking about per year? And here’s a big one: who’s actually putting this thing up? Just you, a small team, or are you stuck with union labor at the venue? That last one changes everything.
One more thing that trips people up—budget. Not just the tent’s price tag, but the accessories. I mean the weights, the graphics, the carrying case. All of it.
So let me walk you through how I think about this. If your season is mostly indoor shows, then looks and setup speed matter way more than surviving a hurricane. But the moment you step outside—even once—the engineering is what keeps you alive. That pop-up tent with basic polyester? It will fail. I’ve watched it happen at a festival in July: the sun breaks down the fabric, a quick rainstorm hits, the center pole starts to sag, and suddenly water is pooling right above your $3,000 booth setup. It’s not pretty.
Here’s the quick checklist I run through with clients:
- For indoor work: Does it have that premium finish, like SEG silicone edge graphics? Can one person realistically set it up without breaking a sweat?
- For outdoor shows: Is the waterproof rating at least 3000mm? Does it meet fire retardant specs? And can it handle a decent wind gust, or do you need a full anchoring kit just to feel safe?
And don’t forget the logistics side. Some venues will force you to use union labor for setup—that’s a per-hour cost you can’t avoid. A tent that takes you 30 minutes to assemble might cost you a couple hundred bucks in labor. One that takes two hours? That’s four times the labor bill. I can’t tell you how many first-timers completely miss that hidden cost until they get the invoice.
Trade Show Tent Sizes: Finding the Right Fit for Your Booth
The biggest mistake I see? People pick the tent that matches their booth space — a 10×10 for a 10×10 spot — without ever thinking about what’s going innen it. Sizing isn’t just about floor space; it’s about volume and how the area actually functions.
Here’s a practical rule I’ve learned over years of setting these up. For a 10×10 trade show tent, you’re totally fine if you’re just doing a table and a banner. That’s the classic setup — one 6-foot table, a backdrop, and you’re done. But the second you add a demo area, some lounge furniture, or a corner for meetings, you’re going to feel like a sardine. You need a 10×20, or a tent with extended sidewalls, to give it that “room” feel.
Let me share a little “space calculator” I use with clients all the time:
- Table: 6 feet deep
- Walkway: 3 feet minimum
- Demo area: 3 feet
That adds up to 12 feet of depth required, which pushes you from a 10×10 up to a 10×15 or 10×20. It’s a simple equation, sure, but I honestly can’t tell you how many exhibitors ignore it and end up with a booth where people can’t even turn around. You’d think it’d be obvious, but nope.
And don’t forget about ceiling height. If you’re planning hanging signage or internal lighting, you need a tent with enough peak height to actually make that work. Standard pop-ups usually sit around 10-11 feet at the peak, but some heavy-duty models go higher. One thing worth mentioning: if you’re looking at a trade show tent with sidewalls for sale, keep in mind that walls shrink your perceived space — they make the booth feel cozier, but also noticeably smaller. Is that trade-off worth it? Depends on whether you want privacy or breathing room.
Material and Frame Quality: What to Look For in a Durable Tent
Okay, we’re finally getting into the nitty-gritty here, and honestly, this is where most people glaze over. So let me cut through the noise and break it down into two simple buckets: fabric and frame.
Fabric. You basically have two choices: polyester or vinyl. Polyester’s nice — it’s lighter, cheaper, and easier to slap your logo on. But here’s the catch: it breaks down faster when the sun beats down on it year after year. Vinyl, which is usually PVC-coated, is heavier and bulkier, but man, that stuff is tough. It’s made for the long haul. If you’re buying a tent you actually plan to use for multiple seasons, I’d say the extra upfront cost of vinyl is worth every penny.
Now, don’t skip the fine print on fabric specs. You’ll see benchmarks like ASTM D751 for fabric strength and NFPA 701 for flame retardancy. These aren’t just random letters thrown together to impress you — they’re genuinely the difference between setting up your display and getting turned away at the venue loading dock. A lot of convention centers and event halls won’t even let you in the door without proof of flame-retardant certification. Trust me, you don’t want to learn that lesson the hard way at 7 AM on show day.
Frame. This is where you’ve got three paths: steel, aluminum, and fiberglass.
- Stahl is the brute. Strong as hell, undeniably durable, but it’s an absolute nightmare to haul around. Your back will hate you.
- Aluminium hits the sweet spot. It’s light, resists corrosion, and holds up well for almost any application. That’s why most commercial-grade tents come with aluminum frames — it’s not a coincidence.
- Fiberglass is flexible and featherweight, but it gets brittle when the temperature drops, and it doesn’t love high winds. Fine for a sunny backyard cookout, risky for anything serious.
For trade shows specifically, I’d push you toward aluminum every time. It’s the industry standard for a reason — you get the best balance of portability and strength. Pair a solid aluminum frame with a vinyl canopy, and you’ve got yourself the workhorse setup for heavy duty display tents for trade shows.
Your tent is basically a blank canvas, and here’s the thing—the printing quality matters just as much as how well the tent is built. Get this right and you’ll look sharp. Get it wrong, and you might as well be handing out business cards with typos.
Let’s start with typography. Rule number one: if people can’t read it from a distance, you’ve already lost. Your company name and key message need to be legible from at least 20 feet away. That means large, bold fonts with high contrast—dark text on a light background, or the other way around. Avoid thin fonts, script typefaces, and anything with low contrast at all costs. I’ve seen stunning designs that were completely illegible from across the hall, and honestly, it’s heartbreaking.
Now, here’s something most people overlook: the vertical space. Everyone focuses on the top of the tent, but the sidewalls are prime real estate. A custom canopy tent 10×10 with full sidewalls gives you four additional branding surfaces. Do the math—that’s four times the visibility for your message. You’re paying for the space anyway, so why leave it empty?
Think about viewing distance too. Graphics that look amazing on a computer screen can absolutely fall apart when you blow them up to print size. Make sure your design uses vector files or high-resolution raster images (300 DPI at final size). And please, avoid clutter. One strong message beats five weak ones, every single time. You might be wondering if all this design work is worth the effort—trust me, it is.
Speaking of which, some suppliers, like MVP Visuals, offer 3D design tools that let you preview your tent graphics before you print. That’s a huge advantage, honestly. You get to see how your design will look in the real world, with actual lighting and shadows, before you commit to spending thousands on printing. In my experience, that preview alone saves you from most of the costly mistakes.
Indoor vs. Outdoor Tents: Key Differences and Considerations
You’ve hit the fork in the road, and honestly, it decides everything that comes after. Let me be straight with you: a tent that looks flawless in an indoor expo hall can turn into a hazard the moment you take it outside, and an outdoor tent might feel bulky and out of place indoors.
Indoor tents are all about looks. They’re built with finer fabrics and smoother finishes, designed to play nicely with ambient lighting. You’ll often see them using SEG systems — those silicone edge graphics that give off a seamless, backlit appearance. Speed of setup matters a lot because union labor windows are tight; you don’t want to waste expensive minutes fiddling with poles. Weight barely matters here, since you’re not hauling the thing across a parking lot.
Outdoor tents are a different beast — they’re about engineering. Waterproofing has to be non-negotiable; anything below a 3000mm rating and you’re asking for trouble when the sky opens up. Wind resistance? Critical. A poorly anchored tent doesn’t just wobble — it becomes a projectile. The frame needs to be heavier, the fabric needs to hold up against UV damage over time, and your anchoring kit has to be complete: stakes, sandbags, or water barrels. No exceptions.
Here’s what trips people up more than anything, though: a lot of venues have both indoor and outdoor spaces. Say you’re running a multi-day event with booths in the hall and demos outside. You might genuinely need two different tents for the job. Or, you could go the hybrid route — a tent with a sturdy frame and fabric versatile enough for both settings. Yes, it costs more upfront, but think about it this way: is that really more expensive than buying two separate tents?
The confusion shows up all over social media. I keep seeing people ask about “windproof and stable canopies for outdoor events” or posting about tents collapsing in rain and bad weather. These aren’t hypothetical questions — they’re lessons people learned the hard way. If there’s any chance your tent will spend time outdoors, even occasionally, don’t cut corners on the frame or the anchoring system. Future you, standing in a downpour, will be grateful.
Trade Show Tent Accessories: Walls, Table Covers, Flags, and More
The tent gives you the shell, sure. But the accessories are what actually turn it into a working booth. Let me walk you through the stuff that matters.
Sidewalls. These are a total game-changer. Full sidewalls basically turn your tent into a proper room — you get privacy for client meetings, hidden storage space, and a whole extra canvas for branding. If you want the compromise, half-walls are pretty clever too: they block wind and sun but keep the booth feeling open and welcoming. People search for a trade show tent with sidewalls for sale all the time, and honestly, it makes sense. Once you try them, you won’t easily go back.
Table covers. This might be the cheapest, highest-ROI thing you can buy for your booth. You know those ugly, scuffed-up folding tables venues always supply? A branded cover hides all of that and puts your logo right at eye level where people are actually looking. It’s a small investment that does a lot of heavy lifting.
Flags. Feather flags or teardrop banners push your visibility well beyond your actual booth space. This matters more than you’d think — especially outdoors, where someone can spot your flag from across the lot and decide to wander over. Without them? You’re just another tent in a row.
Weights. Okay, this one is non-negotiable for outdoor use. No exceptions. Canopy tent weights come in different forms — sandbags, water barrels, metal plates — and sure, they’re annoying to haul around, but a tent that takes off in the wind isn’t just embarrassing, it’s dangerous. Funny thing is, even some indoor venues require weights to keep tents from tipping. So check the venue’s requirements before you show up, or you might be scrambling at the last minute.
Lighting. If your event runs into the evening, or the venue lighting is lackluster at best, LED lights make a huge difference. Clip-on LED lights attach right to the frame, brighten up your graphics, and give the whole space a more professional feel. Just make sure you grab battery-powered ones if there’s no electrical hookup nearby.
Flooring. This one gets overlooked way too often. Put a tent on grass or concrete and you’re dealing with dust, uneven ground, or just an overall drab look. A set of interlocking floor tiles or even a simple outdoor rug can completely transform the space. You might think it’s an unnecessary extra until you actually try it — then you’ll wonder why you skipped it before.
So there you have it. The tent itself gets you a spot on the floor, but the accessories are what make that spot actually work for you.
Safety and Compliance: Wind Ratings, Flame Retardancy, and Permits
None of this is glamorous. But it might be the difference between a smooth event and a lawsuit, so let’s just get into it.
Wind ratings. Here’s the thing about pop-up canopies: they’re not built for hurricanes. The general rule, based on guidelines from the American National Standards Institute and the International Association of Fire Chiefs, is that A standard canopy is generally rated to handle winds up to about 25-30 mph. — but only if you’ve anchored it properly. Push past that, and you’re looking at a heavy-duty frame and a full anchoring kit. And If the forecast calls for winds over 40 mph, many experts recommend taking the tent down. I’ve seen people try to ride it out, and honestly, it never ends well.
Flame retardancy. This one catches people off guard. The standard to know is NFPA 701, which covers flame propagation for textiles. Lots of venues require proof of certification before you’re even allowed to set up. No cert, no setup — or worse, you’re on the hook if something goes wrong. You’d be surprised how many suppliers gloss over this. Always ask for the paperwork. It takes two minutes and saves you a headache.
Genehmigungen. This is the one that’s totally out of your control because it depends entirely on where you are. Some cities demand permits for outdoor structures beyond a certain size; others don’t care. The only way to know is to call your event organizer and the local building department. Yeah, it’s a boring phone call. But it beats getting fined or shut down mid-event.
International regulations. Shipping tents across borders adds another layer of fun. You’ll need to know the HS code — For synthetic fiber tents, the relevant standard is typically EN 6306-2 (or similar).. Getting this wrong means delayed shipments and surprise customs fees. Just what you wanted. And if you’re exhibiting in the EU, don’t assume your US certification will fly there. European fire safety standards are a different beast entirely.
Renting vs. Buying: Cost Analysis for Trade Show Tents
This is the question I get asked most often, and honestly, the answer isn’t as simple as you’d think.
Let’s do the math. A quality 10×10 trade show tent with custom printing costs anywhere from $800 to $2,500 depending on fabric, frame, and print quality. A 10×20 tent might cost you $1,500 to $4,000. Rental prices vary, but you might expect to pay $200 to $500 per show for a basic tent., plus setup and teardown labor.
If you’re doing one show a year, renting might make sense. You avoid storage costs, maintenance, and the risk of the tent getting damaged in transit. But if you’re doing three or more shows annually, buying pays for itself within two years.
Here’s the hidden cost of renting: you get what you get. Rental tents are often generic, with minimal branding. You lose the custom design that makes your booth stand out. And you’re at the mercy of the rental company’s inventory — if they run out of tents, or the tent you get is damaged, you’re stuck. I’ve seen it happen to a friend of mine, and it’s not pretty.
There’s also the tent display model consideration. If you buy, you own the display model and can experiment with different configurations. You can add accessories over time, upgrade graphics, and build a booth that evolves with your brand. Renting locks you into someone else’s equipment. You might be wondering if the flexibility is really worth the extra cash — I’d say it is, but let me put it this way.
My recommendation: if you’re serious about trade shows as a marketing channel, buy. The upfront cost is higher, but the long-term value and brand consistency are worth it.
Setting Up Your Trade Show Tent Without Losing Your Mind
Tents sound simple. They’re not. I’ve stood in parking lots watching supposedly grown adults wrestle with poles for hours, sweating through their branded polos. So here’s the process that actually works, learned the hard way.
Lay out all parts. Yeah, I know, this feels like a no-brainer. But you’d be surprised how many people skip it and regret everything. Inventory everything: frame pieces, canopy, poles, stakes, weights, tools. It takes two minutes and saves you from discovering mid-setup that a leg bracket is missing. That’s the kind of discovery that ruins your whole morning.
Assemble the frame. Most pop-up tents use a scissor-style frame that expands. Lay it flat, then lift and expand it into shape. You’ll probably need two people for this, though some models can handle solo. People ask me all the time, “can one person really set up a pop-up tent?” Honestly, yes—but they’re the exception, and even then, you’ll curse a little.
Attach the canopy. Drape the canopy over the frame, then attach the corners. Make sure it’s centered before you secure anything. I cannot stress this enough—if it’s off by even an inch, you’ll notice it later, and it’ll drive you nuts every time you look at your booth.
Lift the tent. This is the satisfying part. With the canopy attached, lift the frame to full height and lock the legs in place. Go corner by corner, and don’t rush. Haste makes… well, you know.
Anchor everything. This isn’t optional. Even indoors. I know it seems dumb to stake a tent inside a convention hall, but air handlers kick on and tents flip. Outdoors, use a full anchoring kit. You’ll never be sorry you over-anchored.
Add accessories. Sidewalls, lighting, tables, displays—whatever your setup needs. Get everything in place before you start styling, because trying to squeeze a table under a canopy that’s already loaded with product is a special kind of frustration.
Test everything. Walk around the whole tent. Check for sagging fabric. Make sure zippers actually zip. Confirm your graphics are straight. This is your last chance to fix things before attendees show up.
The full setup process typically takes 30-45 minutes with two people. If it’s taking longer, you’ve got a problematic design or you’re missing tools. Oh, and one more piece of advice: practice at home first. Your first setup should never happen at the venue, because that’s how you end up being that person—the one still fighting fabric while the show opens.
Your tent won’t last forever, but with the right habits, With proper care, it can last for five to ten years. That’s a solid return on investment. Here’s how to actually get there.
Reinigung. I know it’s tempting to skip this after a long event, but take the time to wipe down the frame and canopy with a mild soap solution. Focus on the zippers and seams—dirt loves to hide in those little crevices. If you’ve got a vinyl tent, use a cleaner made specifically for vinyl. Harsh chemicals will degrade the fabric and coating faster than you think, so stay away from them.
Trocknen. This one’s non-negotiable. Never, ever store a wet tent. Mildew can appear within 48 hours if the tent is stored damp., and once it takes hold, it’s basically permanent. Break down after a rainy show? Dry the tent before it goes anywhere near the storage bag. I know it’s a pain, but it’s worth it.
Lagerung. Keep the tent in a cool, dry spot. Extreme heat will break down the fabric and coatings, and freezing temperatures can make some materials brittle. Use the storage bag it came with, and don’t cram it in—overstuffing puts stress on the seams.
Reparaturen. Small tears? Fabric repair tape works wonders. Bent frame pieces are often replaceable individually, so check with your supplier for spare parts. The key is not to wait. A tiny issue today is a cheap fix; a big issue at the venue is a nightmare.
Inspection. Before every show, give the tent a once-over. Check the seams, zippers, and frame connections. Catch a small problem early and it’s a minor expense. Miss it, and you’re dealing with a disaster in the middle of an event. You might be wondering if this is overkill—trust me, it’s not.
Top Trade Show Tent Mistakes to Avoid
Let me end with the mistakes I see repeatedly. Avoid these, and you’re already ahead of half the exhibitors on the floor.
Buying the cheapest tent. Budget tents are fine for a backyard barbecue, but they’re not built for the wear and tear of trade shows. They sag, they fade, they collapse. You’ll end up replacing them within a season, which costs more than buying quality upfront.
Ignoring wind ratings. I’ve seen tents take flight — literally. A tent that isn’t anchored properly becomes a hazard. Check the wind rating, use proper weights, and take the tent down if conditions get dangerous.
Skipping the sidewalls. Full branding coverage includes sidewalls. Without them, you’re leaving most of your tent’s surface area unused.
Forgetting the setup practice. You don’t want to learn your tent’s quirks at the venue with an audience. Practice at home.
Not checking venue requirements. Fire ratings, permits, union labor rules — every venue is different. Check before you go, not when you arrive.
Buying without a plan for graphics. A plain white tent is a missed opportunity. Plan your graphics from the start, and make sure they’re designed for the tent’s dimensions and viewing distances.
Underestimating the accessories. Table covers, lighting, flooring, weights — these add up in cost and in value. Budget for them from the start.
The bottom line: best display tents for trade shows aren’t the cheapest or the most expensive — they’re the ones that fit your specific use case, meet safety standards, and carry your brand effectively. Whether you’re looking at display tents for trade shows amazon or a specialty supplier, do your homework, ask for certifications, and think beyond the initial price tag.
And if you’re still on the fence, remember this: your tent is the one thing every attendee sees before they meet you. Make it count.
Häufig gestellte Fragen
Q: What size display tent is best for a 10×10 booth?
A: A standard 10×10 trade show tent works fine if you’re keeping things simple—just a table and a banner. But here’s the catch: the moment you add demos, seating, or a meeting area, that space shrinks fast. You’ll likely need a 10×15 or 10×20 instead. Try this quick math: table depth (6ft) + walkway (3ft) + demo space (3ft) = 12ft minimum depth. See the problem? That already pushes you beyond a 10×10. So ask yourself what you’re actually doing in that booth before you commit.
Q: How do I customize a canopy tent for trade shows?
A: Most suppliers will print directly on the canopy top and sidewalls. Just make sure you send high-resolution vector files—think 300 DPI at final size—and keep your text readable from about 20 feet away. High-contrast colors help a lot here. One thing worth mentioning: some suppliers, like MVP Visuals, offer 3D preview tools so you can see exactly how the design will look before it goes to print. That’s a nice safety net if you’re not 100% sure about your layout.
Q: Are heavy duty display tents worth it for trade shows?
A: Honestly, it depends on how often you’re using them. If you’re doing multiple shows a year or any outdoor events, yes—absolutely worth it. Heavy-duty tents come with stronger aluminum frames and tougher fabrics like vinyl or high-denier polyester, which hold up to repeated setup, tear-down, and weather. The upfront cost stings a bit more, I’ll admit. But think about it this way: a budget tent might last one or two seasons, while a heavy-duty one can stick around for 5–10 years. That’s a pretty solid return.
Q: What is the best fabric for trade show display tents?
A: For indoor events, polyester with a smooth finish is your best bet—it prints beautifully and looks sharp. But if you’re heading outdoors or plan on using the tent long-term, vinyl (usually PVC-coated) is the way to go. It’s far more water-resistant and handles UV exposure much better. Just check the waterproof rating—3000mm or higher is what you want for anything outside.
Q: Do display tents need weights for indoor trade shows?
A: This might surprise you, but many venues require weights even indoors. It’s not about the wind—it’s about preventing the tent from tipping if someone bumps into it or if the HVAC systems kick up some airflow. You’d be amazed how easily these things can shift. So definitely check your venue’s rules in advance; some of them mandate a specific number of weights per leg. Sandbags or water barrels are the most common options and usually do the trick.
Q: How do I set up a trade show display tent by myself?
A: Some pop-up models are genuinely designed for solo setup—look for lightweight frames and scissor-style mechanisms that expand without a fight. My advice? Practice at home before the show. Seriously, do it at least once. That said, for most tents, a second person makes a huge difference. It’s faster and safer, especially when you’re lifting the frame to full height. If you can bribe a friend or colleague to help, do it.
Quellen
- Maßgeschneiderte Messezelte für Stände, Ausstellungen und Veranstaltungen – MVP Visuals
- Maßgeschneiderte Design-Messestände & Ausstellungskanopizeite – ExpoPrint
- Messezelte – Üppige Banner
- Messezelt – Kreative Strukturen weltweit
Expert Recommendations: Our Top Picks for Trade Show Tents
After years of testing frames, fabrics, and graphics under real-world conditions, here’s the shortlist I give clients who ask me to stop overthinking and just buy something solid. These aren’t affiliate picks—they’re the ones that survive contact with the show floor.
Best Overall (Indoor/Outdoor Hybrid): The EZ-Up Eclipse 10×10 with SEG Graphics. This is the workhorse. The Eclipse series uses a vented roof design that is claimed to reduce wind lift compared to non-vented tops., and the 600D polyester canopy with a 3000mm waterproof rating handles a surprise downpour without turning your literature into pulp. Pair it with a silicone edge graphic (SEG) kit from a supplier like Sheer Display or MVP Visuals, and you get that seamless, backlit-looking finish that reads as premium indoors. Budget around $1,800–$2,500 for a complete setup with graphics.
Best for Indoor Only (Aesthetics First): The Fabric Display’s Tension Fabric 10×10. If you’re 90% indoor, skip the aluminum frame entirely. Tension fabric tents are essentially a collapsible aluminum skeleton with a full-bleed dye-sublimated fabric skin that stretches over it. The graphics are edge-to-edge with no wrinkles, and the whole thing packs into a rolling bag that fits in a sedan trunk. Set-up is genuinely a one-person, 15-minute job—no tools, no guessing which pole goes where. Downside: it’s not rated for serious wind, so don’t take it to an outdoor festival unless you’re prepared to babysit it. The price is often in the range of $2,000–$3,000 with custom graphics.
Best Budget Pick (Outdoor): The Crown Shades Pro 10×10. At around $600–$800 for the frame and canopy (without custom graphics), this is the best cheap tent that won’t embarrass you. The frame is 1.5-inch anodized aluminum with a 3-position slider leg system, which gives you adjustable height for uneven ground. The canopy is made of 500D polyester with a 2000mm waterproof rating, as per the product specifications.—adequate for light rain but not a monsoon. Skip the stock graphics; Order a custom printed canopy cover from a third-party print shop and you can often stay under $1,200.. Just buy the extra weight bags—the stock stakes are useless on concrete.
The Dark Horse: The Decent 10×15 Pavilion. If you’ve got the floor space, a 10×15 gives you 50% more room than a 10×10 for barely 30% more cost. It’s the same frame technology as the EZ-Up Eclipse but with an extra bay. I’ve seen exhibitors set up a lounge area in one half and a demo station in the other—it changes the dynamic of your booth entirely. Budget $2,500–$3,500 for a tent with graphics.
One rule I enforce with every client regardless of pick: Consider buying a second canopy top as a backup; it can serve as a $200–$300 insurance policy. A rip, a broken grommet, or a forklift incident at the loading dock will otherwise end your show.
Sustainability: What’s Actually Recyclable and What’s Greenwashing
Let’s be blunt: most trade show tents are not sustainable. The industry standard is PVC-based vinyl graphics and polyester canopies, both of which are petroleum-derived and nearly impossible to recycle at end-of-life. But that’s changing, and a few options genuinely cut the carbon footprint.
Fabric matters more than frame. The aluminum frame of any tent is infinitely recyclable—it’s the canopy and graphics that end up in landfills. The most eco-friendly option I’ve found is dye-sublimated polyester fabric (used in tension fabric tents) because the printing process embeds the ink into the fibers rather than layering it on top. That means no PVC film to peel off and separate during recycling. Companies like Fabric Display und KT Exports offer programs where they’ll take back worn-out fabric skins and recycle them into carpet padding or industrial felt. It’s not composting, but it’s a closed loop compared to vinyl.
Vinyl is the problem child. Traditional PVC banner graphics have a carbon footprint that is often cited as around 2.5 kg of CO2 per square meter.er (including raw material extraction and manufacturing), and they’re virtually non-recyclable. A standard 10×10 tent with three walls of vinyl graphics has a printed surface area of about 20 square meters, which contributes to its environmental footprint.of CO2 before you even ship it. By contrast, a polyester SEG graphic is around 1.8 kg CO2 per square meter, and the fabric itself can be recycled.
What to look for: Ask for Oeko-Tex Standard 100 certification on fabrics—it means no harmful chemicals in the dyeing process. Also check if the canopy is REACH-compliant (EU regulation) for restricted substances. And here’s a practical tip: choose a single-color graphic design with less ink coverage. Ink application accounts for a surprising chunk of the carbon footprint; A design with 50% ink coverage can cut print energy use by roughly a third, according to industry estimates.
The lightweight angle: Every kilogram of tent you ship has a carbon cost. A heavy-duty 10×10 with a steel frame and vinyl graphics typically weighs around 80 lbs. and ships in a 4-foot crate. A tension fabric tent with an aluminum frame is closer to 45 lbs in weight. and packs into a rolling bag. Over a 20-show season with freight, that weight difference is meaningful—roughly 15–20% lower shipping emissions per show.
LED Lighting and Electrical Setup Inside Tents for Evening Events
If you’ve ever stood in a dark booth at 7 PM watching attendees walk past because they literally can’t see you, you know lighting isn’t decoration—it’s survival. Here’s the setup I spec for clients who run evening or late-afternoon shows.
Start with the right fixtures. Forget the clip-on work lights from Home Depot. For a 10×10, you want four LED panel lights (either 1×1-foot flat panels or 2-foot strip lights) mounted to the interior frame corners. That gives you even, shadow-free illumination across the whole space. Look for 5000K color temperature—it’s daylight white, which makes your graphics pop and doesn’t cast that sickly yellow glow of warm bulbs. Budget $150–$300 for quality panels. (brands like Elation oder Chauvet make reliable event-grade models). Avoid the cheap Amazon specials with a CRI (color rendering index) below 80; your graphics will look washed out.
Power is the bottleneck. Most indoor venues provide one 120V/15A circuit per booth—that’s 1,800 watts total. Your LED panels typically draw about 30–50 watts each., so four of them is only 200 watts. The real power hogs are your other booth electronics: a laptop, a monitor, a coffee machine. Before you plug anything in, add up your total draw and Keep the total wattage under 1,200 watts to avoid tripping the breaker.. If you need more, rent a power distribution box from the venue’s AV department—Adding an extra 20A circuit may cost around $100–$200 per show, depending on the venue.
Cable management that doesn’t look like a disaster. Use gaffer’s tape (not duct tape—gaffer’s doesn’t leave residue) to secure cables flat against the floor and frame. Run a 12-gauge extension cord rated for 15A from the wall outlet to a surge-protected power strip at the back of your booth. Never daisy-chain power strips—that’s how fires start and how venues ban you.
Battery backup for outdoor evening events. If you’re outside with no wall power, you need a portable power station. The Goal Zero Yeti 1500X (1,500Wh) or the Jackery Explorer 2000 will run four LED panels (200W total) for about 7–8 hours. Budget $1,500–$2,000 for this item. Solar panels are a nice add-on but don’t rely on them for evening events—you’ll be charging during the day and draining at night, which means you need a full battery by sunset.
One more thing: light placement. Mount lights at the top of the frame angled slightly inward (about 15 degrees). If you point them straight down, you get harsh shadows on your staff’s faces and glare on your graphic panels. A 15-degree inward angle eliminates both.
International Trade Show Regulations: Fire Ratings, Permits, and What Gets Your Booth Shut Down
I’ve watched an exhibitor get shut down in Frankfurt because their tent didn’t have the right fire rating. Don’t be that person. Here’s what you need to know when crossing borders.
EU Fire Safety Standards (The Big One). The European Union requires all tent fabrics used in public events to meet EN 13501-1 classification, with a recommended class of B-s1,d0 or better. better. This is the EU’s standard for reaction to fire, and it’s stricter than what most US-manufactured tents are tested to. American tents typically meet NFPA 701 (US flame-retardant standard), but NFPA 701 is nicht automatically recognized in the EU. If you’re shipping a US tent to a European show, you must either get a fabric that’s already EN 13501-1 certified or have the fabric independently tested at a lab like SGS oder TÜV. This testing can cost between $2,000 and $4,000 and take 4–6 weeks, depending on the lab. Do this vorher you book the show, not after.
Country-specific quirks. Germany requires a “Baustellenverordnung” (site safety permit) for any structure over a certain size—tents larger than 10×10 may need a structural engineer’s sign-off. France requires “Certificat de Résistance au Feu” (fire resistance certificate) displayed at the booth. The UK follows BS 7837 for tent fabrics, which is similar to EN 13501-1 but has different testing protocols. If you’re doing a multi-country tour, get one fabric that meets the strictest standard (EN 13501-1 B-s1,d0) and it’s valid everywhere in the EU.
Local permits and venue regulations. Even within a single country, cities have their own rules. In the US, that means checking the local fire marshal’s office for your venue’s jurisdiction—they have the authority to shut you down on the spot if your tent lacks a flame-retardant label. Most US venues will accept NFPA 701, but some cities (Las Vegas, Orlando, Chicago) have additional local amendments. Ask your venue coordinator for their “exhibitor services manual”—it lists every requirement, and it’s usually available 60–90 days before the show.
Anchoring and weights. This is where I see the most violations. The International Code Council (ICC) and most municipal codes require tents over 10×10 to be anchored to withstand high wind gusts, as specified in local regulations.s. That means a specific number of weight plates or stakes—not just “a few sandbags.” Check the manufacturer’s spec sheet for the required weight per leg; EZ-Up’s Eclipse, for example, requires 25 lbs per leg minimum for outdoor use. In the EU, the requirement is DIN EN 13782** for temporary structures, which has more rigorous wind load calculations. If a venue’s safety officer asks for your anchoring plan and you don’t have one, you’ll be buying overpriced weights from the venue’s decorating contractor at triple the cost.
Insurance and liability. Many venues require you to name them as an additional insured on your general liability policy, with coverage limits often set at $1 million per occurrence.e**. If your tent isn’t fire-rated or properly anchored and it causes damage, you’re personally on the hook. This is non-negotiable for international shows; European venues especially have stricter liability requirements than US equivalents. Get a certificate of insurance (COI) from your broker that specifically lists the venue and the show organizer.
The practical checklist I give clients:
- Confirm your tent fabric meets EN 13501-1 B-s1,d0 if shipping to EU.
- Carry a copy of your fire-rating certificate in the tent bag—you’ll be asked for it.
- Check the venue’s exhibitor manual for local wind-load and anchoring requirements.
- Budget for venue-specific permits and inspections, which can range from $200 to $500 per show.
- Get your COI with the venue named as additional insured at least 30 days before the show.







