

Pop Up Canopy for Outdoor Events: 7 Buyer Rules That Save You From Disaster
Let me set the scene. It’s 2:47 PM on a Saturday in July. You’ve got a tent full of handcrafted soap, a line of customers three deep, and the sky just turned the color of a bad bruise. Thirty seconds later, your rented canopy is a twisted pile of aluminum and polyester, your inventory is soaked, and you’re standing there holding a soggy receipt for a deposit you’ll never see again.
Sound familiar? If you’ve organized any outdoor event in the last decade, you’ve either lived this nightmare or watched someone else live it. But here’s the thing—it didn’t have to happen. The right pop up canopy for outdoor events would have stood firm, shed the rain, and kept your merch dry. The wrong one, or worse, the rented one that’s been through forty weddings and a county fair, folded like a cheap lawn chair.
I’ve spent years in the outdoor events industry. I’ve set up canopies in parking lots, on beaches, in muddy fields, and once on a rooftop that I’m pretty sure wasn’t rated for the weight. I’ve watched vendors argue with rental companies over collapsed frames, seen brand-new canopies snap in a moderate breeze, and helped more than one friend jury-rig a sandbag system at 6 AM. So when I say I’m going to be your neutral referee here—not a brand shill, not a salesman—I mean it. This guide covers the decisions that actually matter: size, frame, fabric, and anchoring. By the end, you’ll know exactly what to buy, what to skip, and why that cheap canopy from the big-box store is probably a false economy.
Quick Answer
The best pop up canopy for outdoor events is a heavy-duty model with a crank or push-button frame, a 300D or higher polyester or vinyl top with a hydrostatic head rating of at least 2000mm, and a proper anchoring system matched to your event surface—because frame strength, not fabric color, is what keeps your event standing.
Why Your Pop Up Canopy for Outdoor Events Needs a Frame Upgrade
Let’s start with the part most people ignore until it’s too late: the frame. I can’t tell you how many times I’ve watched someone buy a canopy based on the color of the top or the size of the logo, only to discover six months later that the frame is the weak link. And honestly, it’s an easy mistake to make. The fabric is what you see; the frame is what you trust.
Push vs. Crank vs. Classic: The Setup Mechanics
There are three main ways a pop up canopy for outdoor events goes from bag to standing structure. Each has its fans, its detractors, and its specific failure modes.
Classic (scissor/push-up) frames are the ones you see most often at flea markets and weekend craft fairs. You position the canopy on its side, grab two opposite legs, and push upward until the frame locks into place. It’s simple, it’s fast once you get the hang of it, and honestly, there’s a satisfying click when everything seats correctly. The downside? If you’re under 5’6″ or over 60, or if you’re setting up solo, the classic push can be a genuine struggle. I’ve seen grown adults nearly take themselves out trying to lift a 10×10 into position on a windy day. The frame has to be lifted from the center while the legs spread—it’s a coordination test disguised as a tent setup.
Crank frames are the upgrade that most event professionals eventually gravitate toward. A gear mechanism lets you raise the canopy top by turning a handle, which means you’re using mechanical advantage instead of brute force. This is a game-changer if you’re setting up multiple canopies in a day or if your event staff changes from week to week. The crank adds a bit of weight and a bit of cost, but in my experience, it pays for itself the first time you set up alone in under ten minutes without breaking a sweat. The mechanism itself is usually pretty robust, though I’ve seen cheap crank systems strip their gears if you force them past the stopping point. Always crank gently until you feel resistance, then stop.
Push-button (automatic) frames are the relative newcomers. You press a button or pull a trigger, and the frame springs open with stored energy. These are genuinely convenient for quick setups—think food truck pop-ups, market stalls, or anywhere speed matters. But here’s the catch: more moving parts means more things to break. The spring-loaded mechanisms can fail, the buttons can jam with sand or dust, and when they go wrong, they go wrong spectacularly. I’ve seen a push-button canopy fire open unexpectedly in a van, and let me tell you, that’s not a fun surprise. For permanent event setups or heavy daily use, I’d take a crank over push-button every time.
The Repair vs. Replacement Question
Here’s a question I get constantly: “My frame broke—should I fix it or buy new?”
The honest answer: it depends on what broke. A bent leg on an otherwise solid frame? That’s often replaceable, and most reputable manufacturers sell individual parts. A cracked hub or a snapped cross-beam? That’s structural damage, and in my experience, it’s rarely worth the repair cost. The frame is the skeleton of your pop up canopy for outdoor events—if the skeleton’s compromised, no amount of new fabric will save it.
Frame repair cost versus replacement logic is pretty straightforward: if the repair quote exceeds about 40% of a new unit’s price, replace it. But more importantly, check whether replacement parts are even available for your model before you buy. Some budget canopies are essentially disposable—when the frame goes, the whole unit goes. Better brands (and I’ll get to specifics later) stock replacement tops, replacement frames, and individual components. That’s worth paying for.
One more thing on frames: pay attention to the leg design. Round legs are common on budget models, but square or oval legs are stronger and resist twisting better. And check the cross-bracing—the X-shaped supports between legs. Thicker gauge metal here means the difference between a canopy that shrugs off a gust and one that folds like a card table.
Sizing: 10×10 vs 12×12 vs 20×20
Now let’s talk about the number that’s probably already in your head: size. And look, I get it. The size chart is the first thing everyone looks at, but most people don’t really understand what those numbers mean in practice. So let me break it down.
Matching Canopy Size to Event Type
10×10 pop up canopy units are the industry standard for a reason. They fit in most standard parking spaces (barely), they’re manageable for one person to set up, and they’re the default size for farmers markets, craft fairs, and vendor events. Most market organizers allocate a 10×10 footprint per vendor, so if you’re selling at events, this is almost certainly your size. The footprint gives you room for a 6-foot table along the back and a small display table in front, with a narrow walkway for customers. It’s tight, but it works.
The 10×10 also has a practical advantage: it fits in most vehicles. With the legs collapsed and the top folded, a 10×10 pop up canopy tent slides into the back of an SUV or a minivan with the seats down. That’s not nothing when you’re hauling inventory, tables, and signage.
12×12 pop up canopy units are the sweet spot for anyone who needs a bit more breathing room. The extra two feet on each side gives you space for a second table, a wider walkway, or a small seating area. I’ve seen 12x12s used for everything from wedding reception tents to backyard party canopies to temporary outdoor offices. The trade-off is weight and portability—a 12×12 is noticeably heavier and bulkier than a 10×10, and it won’t fit in a standard vehicle without folding the seats down or using a trailer.
Here’s a consideration most people miss: some event organizers charge more for a 12×12 footprint, or don’t allow them at all because they break the uniform grid of vendor stalls. Check your event’s rules before you buy. The last thing you want is to show up with a 12×12 and find out you’re only allowed a 10×10 space.
Pop up canopy 10×20 units are the big boys. These are essentially two 10×10 frames joined together, and they’re used for longer vendor booths, food service areas, or any setup where you need a long, narrow footprint. A 10×20 gives you room for two 6-foot tables on each side with a center aisle, or a full catering setup with prep space and serving area. The downside is that these are genuinely heavy—plan on two people for setup, and make sure your vehicle can handle the length.
Table Layout Math for 6-Foot Tables
Let me give you the layout math that took me way too long to figure out. A standard 6-foot table is 6 feet long and about 2.5 feet deep (30 inches). In a 10×10 canopy, you’ve got 100 square feet of covered space. Place a 6-foot table against the back wall, and you’ve got about 4.5 feet of space between the table’s front edge and the canopy’s front edge. That’s enough for a customer to stand and browse, but not enough for a second table.
For a 12×12, you can fit two 6-foot tables end-to-end along the back, or one table along the back and one along a side, creating an L-shaped display. That gives you about 6 feet of customer space in front—much more comfortable for browsing.
For a 10×20, the layout options open up considerably. Two tables on each side with a center aisle is the classic setup—customers walk down the middle and shop both sides. Or go with a U-shape: tables along the back and both sides, leaving a central space for you to stand and interact. This is the layout I recommend for food vendors or anyone doing demonstrations.
One more sizing tip: always check the actual interior height. Most canopies have a center height of about 10 to 11 feet and an eave height of about 6 to 7 feet. If you’re tall, or if you’re hanging lighting or signage, the eave height matters more than you’d think. I’ve seen more than one tall friend develop a permanent stoop from working under a canopy with low eaves.
Waterproofing: Hydrostatic Head Explained Simply
Alright, let’s tackle the most misunderstood spec in the canopy world: waterproofing. You’ll see “water resistant” and “waterproof” thrown around like they mean the same thing. They don’t. And the difference can ruin your event.
What Hydrostatic Head Actually Means
Hydrostatic head is the measurement of how much water pressure a fabric can withstand before water pushes through. It’s measured in millimeters (mm) of water column. The test is simple: a tube is placed over the fabric, filled with water, and the height of the water column at the point where water seeps through is the hydrostatic head rating.
So what numbers matter? Here’s a rough guide based on industry practice:
- Under 1000mm: Water resistant at best. Fine for light drizzle, useless in a real rainstorm.
- 1000-2000mm: Decent for moderate rain. This is where most budget canopies land.
- 2000-3000mm: Good waterproofing. This is what I’d call the minimum for a serious event canopy.
- 3000mm and above: Genuinely waterproof. You can stand under this in a downpour and stay dry.
For a waterproof pop up canopy that you actually trust, look for at least 2000mm. And don’t just take the manufacturer’s word for it—look for the test standard. European standards (ISO 811) are the most common reference, and a rating of 2000mm under ISO 811 is meaningful. [来源待补充] Some budget brands throw around “waterproof” without any test data behind it, and that’s a red flag.
Seam Taping, Coatings, and the Rain Pooling Problem
Here’s the thing about hydrostatic head: it only measures the fabric itself. The seams are where waterproofing goes to die. When fabric panels are sewn together, the needle holes create thousands of tiny entry points for water. Without seam taping—where a waterproof tape is heat-sealed over the seams—your “waterproof” canopy will leak through every stitch line.
Check whether your canopy has taped seams before you buy. Some brands tape only the critical seams (the ridge and the corners); others tape everything. In my experience, fully taped seams are worth the extra cost.
Coating types matter too. Polyurethane (PU) coatings are common and effective, but they can degrade over time, especially in hot climates. Silicone coatings are more durable and don’t degrade the same way, but they’re harder to seam-tape. Acrylic coatings are a middle ground—decent durability and good seam compatibility.
Now, the rain pooling problem. This is the one that catches everyone off guard. A flat canopy top will collect water in the center during heavy rain, and that pooled water can weigh hundreds of pounds. If your frame isn’t strong enough, the canopy will sag, the water will pool deeper, and eventually something gives. I’ve seen frames bend, legs buckle, and fabric tear under the weight of pooled rainwater.
The solution is proper pitch. A good canopy has a slight peak in the center—usually 2 to 3 inches of rise over the width—so water runs off instead of pooling. Check the canopy’s design before you buy. If the top looks flat or nearly flat, walk away. And if you’re in an area with heavy rain, consider a canopy with a center vent or adjustable pitch so you can increase the slope in wet weather.
Anchoring Systems: Grass, Concrete, and Sand
You’ve got the right size, the right frame, the right fabric. Now comes the part that determines whether your pop up canopy for outdoor events is still standing at 4 PM or wrapped around a light pole: anchoring.
I can’t stress this enough. A canopy without proper anchoring is a liability. It’s not a question of if it’ll blow away—it’s a question of when. And when it goes, it takes your inventory, your signage, and possibly someone’s teeth with it.
Weight Bags, Auger Stakes, and Sand Anchors
The right anchoring system depends entirely on your surface. Let me break it down.
草: This is the easiest surface to anchor on, because you can actually put things in the ground. Auger stakes—long, corkscrew-shaped stakes that you twist into the soil—are the gold standard. They provide real holding power, and they’re reusable. Drive them in at a 45-degree angle, with the stake pointing away from the canopy, and you’ll get maximum resistance. For extra security, use a ratchet strap to connect the stake to the canopy frame.
The alternative for grass is standard tent stakes or rebar pins. These work, but they have less holding power than augers, especially in soft or sandy soil. If you’re in an area with loose soil, go with augers every time.
Concrete: You can’t stake into concrete, so you need weight. The classic solution is the sandbag or weight bag—a heavy fabric bag that you fill with sand, gravel, or water, with a strap or loop that attaches to the canopy legs. Fill them about three-quarters full so they conform to the ground and create more friction. In my experience, you want at least 20 to 30 pounds per leg for a 10×10, and more if there’s any wind.
The problem with weight bags is that they’re heavy to transport. Empty, they’re light, but you need to fill them on site, which means you need a source of sand or water nearby. Some event venues provide weights; others don’t. Check ahead.
A better option for concrete is dedicated canopy weights—solid blocks of rubber or concrete with a slot that fits over the canopy legs. These are heavier to transport, but they’re ready to use immediately, and they don’t leak or spill like sandbags can.
Sand: Beaches are the worst case for anchoring, because sand provides almost no holding power for stakes, and weight bags tend to sink or shift. The solution is sand anchors—large, flat, plastic or metal plates that you bury in the sand and connect to the canopy legs with straps. The sand on top of the anchor holds it in place, providing surprising holding power.
I’ve also seen people fill weight bags with sand on the beach—which works, but you’re limited by how much sand you can physically shovel. For a beach event, I’d recommend both sand anchors 和 weight bags, especially if there’s any breeze.
Wind Rating Claims vs. Real-World Stability
Here’s where I have to get a little cynical. Manufacturers love to print wind ratings on their boxes—”rated to 30 mph!”—but those ratings are usually based on ideal conditions: proper anchoring, perfect setup, and a specific wind direction. In the real world, wind doesn’t read the spec sheet.
In my experience, the actual stability of a pop up canopy depends on three things: the anchoring system, the frame strength, and the canopy’s aerodynamics. A heavy-duty frame with proper anchoring will handle more wind than a flimsy frame with the same anchoring. And a canopy with a peaked top and vents will shed wind better than a flat-top model.
The practical rule I use: if the wind is gusting over 20 to 25 mph, take the canopy down. It’s not worth the risk. And never leave a canopy unattended in windy conditions—even a heavy-duty model can become a projectile if the wind catches it right.
For pop up canopy weights, remember that the manufacturer’s “included stakes” are usually junk. The stakes that come in the box are designed to meet a minimum legal requirement, not to actually hold the canopy in a storm. Budget for a proper anchoring kit—auger stakes for grass, weight bags for concrete, sand anchors for beaches.
Fabric and Frame Materials That Last
Let’s get into the materials that determine whether your pop up canopy for outdoor events lasts two seasons or ten. This is where the difference between a $200 canopy and a $600 canopy really shows up.
Polyester vs. Vinyl vs. Canvas Tops
聚酯纤维 is the most common canopy fabric, and honestly, it’s popular for good reasons. It’s lightweight, it’s relatively inexpensive, and it can be coated for waterproofing and UV resistance. The key spec to look for is denier (D)—the thickness of the fabric threads. 300D is the budget standard, 500D is better, and 600D is what I’d call heavy-duty. A 600D polyester top with a PU coating and a 3000mm hydrostatic head rating is a genuinely waterproof, durable canopy top.
The downside of polyester is that it degrades in UV light over time. After a season or two of full sun, the fabric can become brittle, and the coating can start to flake. Look for a polyester top with UV-resistant treatment or a higher denier rating to extend its life.
Vinyl is the heavy-duty option. A vinyl canopy top is thicker, more rigid, and significantly more waterproof than polyester. It’s also more expensive and heavier. Vinyl tops are common on premium canopies and on commercial-grade units that see daily use. The trade-off is that vinyl doesn’t fold as compactly as polyester, and it can crack in very cold weather. But for sheer durability and weather resistance, vinyl wins.
Canvas is the traditional option, and it’s making a comeback. A canvas top (usually cotton canvas or a cotton-poly blend) has a classic look that’s popular for weddings and upscale events. It’s breathable, which means less condensation under the canopy, and it takes printing well. The downsides are weight, cost, and maintenance—canvas needs to be treated for water resistance, and it can mildew if stored damp. For most event organizers, polyester or vinyl is the more practical choice.
Steel vs. Aluminum vs. Hybrid Frames
The frame material is the backbone of your canopy, and the choice between steel and aluminum is a real trade-off.
Steel frames are the heavy-duty option. They’re stronger, more rigid, and more resistant to bending than aluminum. A steel frame canopy will handle wind better and last longer under heavy use. The downsides are weight and rust. A 10×10 steel frame canopy can weigh 60 to 80 pounds, which is a genuine burden if you’re setting up solo. And steel will rust if the coating is scratched, so inspect your frame regularly and touch up any bare spots.
Aluminum frames are the lightweight option. An aluminum frame canopy is typically 20 to 30 pounds lighter than the same size in steel, which makes a huge difference in setup and transport. Aluminum doesn’t rust, which is a plus for beach events or high-humidity environments. The downside is that aluminum is softer than steel—it can bend under extreme loads, and once it’s bent, it’s hard to straighten without weakening the frame.
Hybrid frames try to get the best of both worlds. The legs are steel for strength, and the cross-braces are aluminum for weight savings. This is a good compromise for most event organizers, and it’s what I’d recommend for anyone who needs a canopy that’s both portable and strong.
Replacement Canopy Top: The Smart Buyer’s Move
Here’s a strategy that will save you money in the long run: buy a canopy with a replaceable top. Most quality canopies allow you to remove the fabric top and install a replacement when the original wears out, fades, or gets damaged. This means the frame—the expensive part—can outlast multiple tops.
Before you buy, check whether the manufacturer sells replacement canopy tops for your specific model. If they don’t, you’re buying a disposable product. If they do, you’re buying a system that can last a decade or more.
Best Pop Up Canopy for Outdoor Events by Scenario
Alright, let’s get practical. Here are my recommendations for the best pop up canopy for outdoor events by scenario. These aren’t deep reviews—just honest guidance based on what I’ve seen work in the field.
Farmers Market
What you need: A 10×10 pop up canopy with a crank or push-button frame, a waterproof top, and a sturdy anchoring system.
为什么: Farmers markets are all about speed—setup and teardown happen in minutes, and you’re often in a different spot each week. The 10×10 is the standard footprint, and the crank frame saves your back when you’re setting up early in the morning. Get a top with at least 2000mm hydrostatic head, because markets run rain or shine.
优点: Compact, fast setup, fits in most vehicles.
缺点: Limited space, standard footprint means you’re not standing out.
Beach Party
What you need: A 10×10 or 12×12 with aluminum or hybrid frame, sand anchors, and a top with high UV protection.
为什么: Sand is brutal on equipment. Aluminum won’t rust, and sand anchors are essential. Look for a canopy with a vented top to handle the ocean breeze.
优点: Lightweight, rust-resistant, great sun protection.
缺点: Anchoring is extra work, sand gets everywhere.
Trade Show
What you need: A 10×10 or 10×20 with a professional look, printed sidewalls, and a crank frame.
为什么: Trade shows are about presentation. Get a canopy with a clean, professional design, and consider branded sidewalls to make your booth stand out. The crank frame makes setup and teardown quick, which matters when you’re on a tight schedule.
优点: Professional appearance, branded options, quick setup.
缺点: Premium price, sidewalls add cost.
Backyard Party
What you need: A 10×10 or 12×12 with a classic or crank frame, a mid-range top, and weight bags or stakes.
为什么: Backyard parties are low-stakes, so you can get away with a mid-range canopy. Focus on ease of setup and a decent waterproof rating. If you’re hosting regularly, consider a 12×12 for extra space.
优点: Affordable, easy to set up, versatile.
缺点: Less durable, not ideal for heavy wind.
Accessories That Save Your Event (and Your Sanity)
You’ve got the canopy. Now let’s talk about the accessories that turn a bare structure into a functional event space.
Sidewalls
Sidewalls are the single most useful canopy accessory. They provide shade, privacy, and protection from wind and rain. A full set of sidewalls turns your open canopy into an enclosed space—useful for changing rooms, storage, or creating a more professional booth appearance.
There are two types: attached sidewalls that zip or Velcro directly to the canopy, and freestanding sidewalls that clip to the frame. Attached sidewalls are more secure and look better; freestanding ones are more versatile. If you’re buying a pop up canopy 10×20 with sidewalls, make sure the sidewalls are designed for that specific size—a 10×10 sidewall won’t fit a 10×20 frame.
Lighting Hooks
If you’re hosting an evening event, you need lighting. Most canopies have a center peak that can support a light hook or hanging fixture. Some come with built-in hooks; others require you to add them. I’d recommend getting a canopy with a reinforced center peak and a hook rated for at least 10 pounds—enough for a modest LED light fixture.
Transport Bags
The bag that comes with your canopy is usually fine for storage but terrible for transport. A proper transport bag—with wheels, reinforced handles, and a durable fabric—makes a huge difference when you’re hauling your canopy from the car to the event site. It’s a small investment that saves your back and your canopy.
Fire Retardant Ratings
Here’s something most people don’t think about until it’s too late: fire retardancy. If you’re using your canopy indoors—for a trade show, a wedding, or any event in a building—the venue may require a fire retardant rating. Look for a canopy top that meets NFPA 701 or CPAI-84 standards. These are the most common fire safety standards for tent fabrics. A canopy with a fire retardant rating is also a good idea for outdoor events where open flames are present—like a catering setup with chafing dishes.
常见问题解答
Q: What is the best pop-up canopy for sporting events?
答: For sporting events, prioritize durability and wind resistance. A heavy duty pop up canopy for outdoor events with a steel or hybrid frame, a 10×10 or 10×20 footprint, and a waterproof top with at least 2000mm hydrostatic head is your best bet. Add auger stakes for grass fields or weight bags for concrete surfaces, and consider sidewalls for sun and wind protection.
Q: What is the best outdoor pop-up canopy?
答: The best outdoor pop-up canopy balances frame strength, fabric quality, and anchoring. Look for a crank or push-button frame, a 500D or 600D polyester or vinyl top with taped seams, and a hydrostatic head rating of at least 2000mm. A 10×10 pop up canopy is the most versatile size, but a 12×12 gives you breathing room.
Q: What are the common problems with pop-up canopies?
答: The most common issues are frame failure (especially hubs and cross-braces), water pooling on flat tops, seam leakage, and inadequate anchoring in wind. Many budget canopies lack replacement parts, turning a minor repair into a full replacement. UV degradation of fabric and coating over time is also a frequent problem.
Q: What are the best pop-up tents for events?
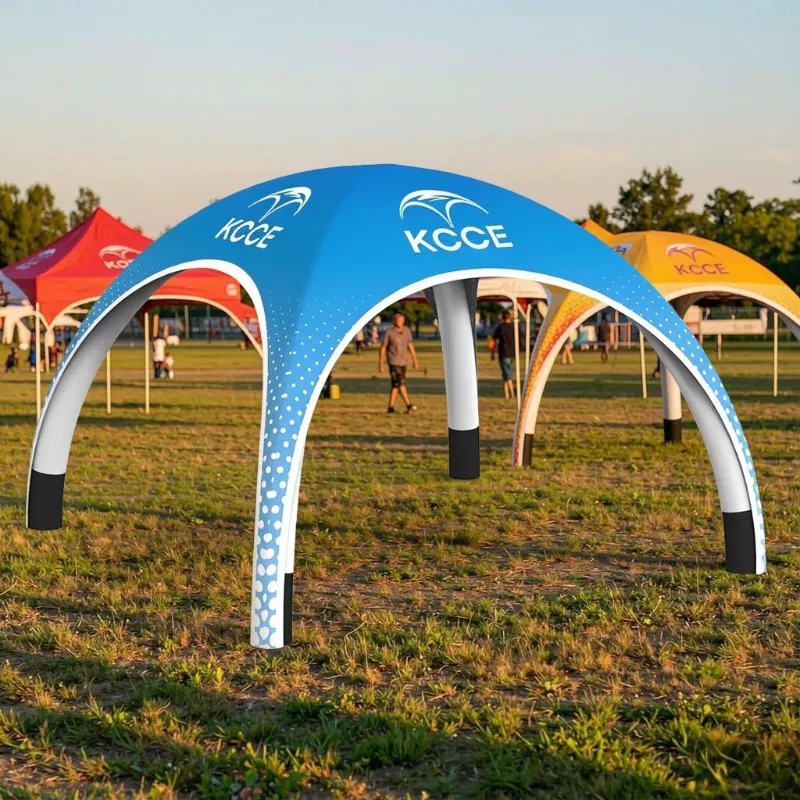
答: The best pop-up tents for events are those with heavy-duty frames, waterproof tops, and available replacement parts. For most organizers, a 10×10 or 10×20 with a crank frame and a 600D polyester or vinyl top is the right choice. If you’re looking for alternatives to traditional pop-up canopies, consider KCCE’s inflatable tents for quick setup and unique branding opportunities.
Q: How do I anchor a pop up canopy on grass?
答: Use auger stakes driven into the ground at a 45-degree angle, with the stake pointing away from the canopy. Connect the stake to the frame with a ratchet strap for maximum holding power. For extra security in soft soil, use both auger stakes and weight bags on each leg.
Q: Are pop up canopies waterproof for outdoor events?
答: Not all of them. Check the hydrostatic head rating—look for at least 2000mm for genuine waterproofing. Also verify that seams are taped and that the canopy has a peaked top to prevent water pooling. A “water resistant” label without a hydrostatic head rating is a red flag.
Q: What size pop up canopy for outdoor events do I need?
答: A 10×10 pop up canopy is the standard for markets and vendor events. A 12×12 provides more space for displays or seating. A 10×20 is ideal for food service or long, narrow booths. Match your canopy size to your event type and check venue rules on footprint allowances.
Q: How much do pop up canopies cost?
答: Prices vary widely based on size, frame material, and fabric quality. Budget models run from $100 to $200, mid-range canopies from $250 to $500, and heavy-duty commercial units from $500 to $1,000 or more. Remember that anchoring systems, sidewalls, and transport bags add to the total cost.







