

You’ve probably seen them. At outdoor festivals, sitting on dealership lots, or strapped to a semi speeding down the interstate. The 20×20 inflatable tent is everywhere these days. But if you’re the person actually making the call—a facility manager, an event director, a business owner—you know that getting a straight answer about these things is harder than it should be. You end up burning hours digging through scattered spec sheets and hunting down the truth between contradictory manufacturer claims. I’ve spent years working in the outdoor shelter industry, and honestly, the lack of consolidated info out there drives me crazy. So I’m putting it all in one place: the real specs, the honest comparisons, the setup logistics, and the hidden costs nobody talks about.
Quick Answer
A 20×20 inflatable tent gives you 400 square feet of clear-span, column-free space. It typically fits up to 100 standing guests or 8 vehicles, and you can have it fully deployed in under 10 minutes with a single continuous-duty air blower.
What Is a 20×20 Inflatable Tent? (Size & Scope)
Let’s start with the basics, because the numbers matter more than you might think. A 20×20 inflatable tent measures 20 feet by 20 feet, giving you exactly 400 square feet of covered space. That’s the headline number. But it’s the dimensions you don’t see on the spec sheet that usually trip people up.
The clearance height—the distance from the ground to the lowest point of the fabric—is typically around 6.5 to 8 feet, depending on the manufacturer and the tent’s crown design. That’s a critical number if you’re planning to park a car inside or install a lighting grid. I’ve seen buyers purchase a tent expecting to drive a van in, only to discover the clearance tops out at 6.5 feet. That’s a costly mistake.
The footprint is another thing to watch. While the tent covers 400 square feet, you’ll need a staging area of at least 22×22 feet to set it up comfortably. Those extra two feet on each side give you room to stake down the corners, run the blower ducting, and walk around without tripping over tension straps. In my experience, people forget that the inflation process requires the fabric to move and expand—you need that buffer zone.
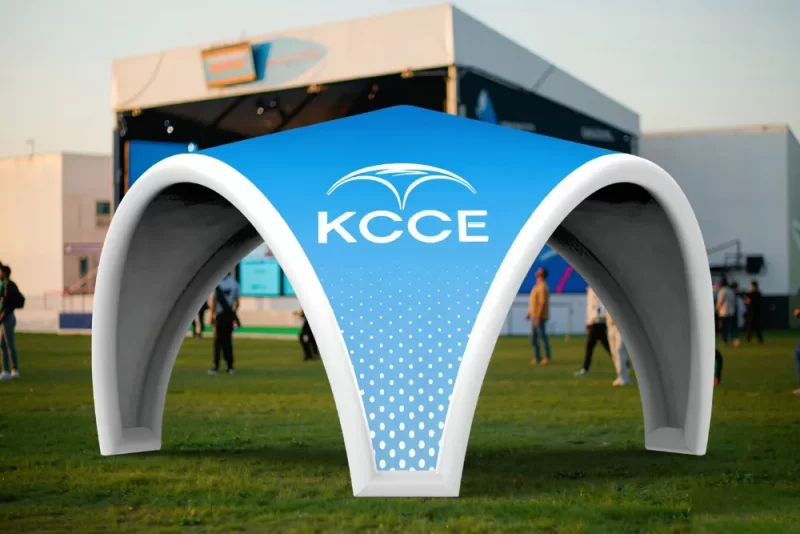
You might be wondering about the physical profile. A 20×20 inflatable tent usually has a peaked or domed roof, with side walls that can be rolled up or removed entirely. The walls are typically heavy-duty PVC or vinyl-coated polyester, which gives the structure its rigidity once pressurized. The air beams—the inflatable columns that form the frame—are usually around 10 to 14 inches in diameter when fully inflated. These aren’t your backyard pool toys. They’re engineered to maintain a specific internal pressure and hold their shape against wind loads.
Speaking of engineering, the internal air pressure is typically maintained at around 6 to 8 psi, though this varies by design. The blower runs continuously to maintain this pressure, which is a key difference from a static frame tent. You’re not just buying a tent. You’re buying a system that includes the blower, the ducting, and the pressure relief valves that prevent over-inflation.
Now, about capacity. A 20×20 inflatable tent fits roughly 100 guests for a standing reception, or about 60 to 70 people seated at banquet tables. If you’re using it for vehicles, you can fit up to 8 cars in a tight parking configuration, or 4 cars with room to open doors and walk around. I’ve also seen these used as temporary aircraft hangars for small planes, but that’s a niche application that requires custom engineering.
From a buyer’s perspective, the 20×20 size hits a sweet spot. It’s large enough to feel substantial and host real events, but it’s not so massive that it becomes a logistics nightmare. A 30×30 or 40×40 tent is a different beast entirely—you’re talking about cranes, multiple blowers, and a crew of installers. The 20×20 is manageable with a small team, which is why it’s so popular for mid-sized applications.
The “Air Tent” vs. “Canopy” Confusion
Here’s a quick aside that might save you some confusion. The market uses terms like “20×20 pop up canopy” and “20×20 air tent” interchangeably, but they’re not the same thing. A pop-up canopy typically has a metal frame that you manually extend, while an air tent uses inflatable beams. The distinction matters for weight, setup time, and durability. When you see “20×20 inflatable shelter,” that’s usually a more industrial-grade structure designed for repeated use, not a one-weekend party tent.
Complete Spec Table: 20×20 Inflatable Tent
Let me give you a realistic spec table based on what I’ve seen across manufacturers. I’m not going to pretend these are universal—they’re not. Different manufacturers build to different standards, and you should always verify with the specific supplier. But these numbers represent the typical range you’ll encounter in the industry.
| 规格 | Typical Range |
|---|---|
| Covered Area | 400 sq ft |
| Clearance Height | 6.5 – 8 ft |
| 最高高度 | 10 – 12 ft |
| Dry Weight | 150 – 250 lbs |
| 打包大小 | Approx. 4x2x2 ft (varies by design) |
| Fabric Spec | 650 – 900 GSM PVC or vinyl-coated polyester |
| Air Beam Diameter | 10 – 14 inches |
| Blower Power | 1 – 1.5 HP continuous-duty |
| 人员数量 | 5 – 15 minutes (with crew of 2-4) |
| Deflation Time | 10 – 20 minutes |
| 抗风等级 | 40 – 60 mph (with proper anchoring) |
| Operating Pressure | 6 – 8 psi |
| Waterproofing | Yes, fully welded seams |
Now, let’s unpack some of these numbers because they have real implications for your operation.
Weight and Portability: A 20×20 inflatable tent weighs between 150 and 250 pounds, packed. That’s the dry weight of the fabric and beams, not including the blower, stakes, and carrying bags. You’re looking at a total package weight of 250 to 350 pounds. That’s manageable with a small trailer or the back of a pickup truck, but it’s not something you’re going to carry by hand. You’ll need a dolly or a couple of strong people.
Fabric Quality: The fabric denier and GSM (grams per square meter) rating tell you a lot about durability. A 650 GSM fabric is entry-level commercial grade. It’ll handle occasional use but might show wear after a season of heavy events. 900 GSM is heavy-duty, used for semi-permanent installations. I always tell buyers to ask about the fabric’s UV resistance and tensile strength. The PVC coating is what makes the tent waterproof, but it also adds weight and affects how the tent handles in cold weather.
Blower Requirements: The blower is the heart of the system, and it needs to run continuously the entire time the tent is deployed. A 1 to 1.5 horsepower continuous-duty blower is standard for a 20×20. Don’t skimp here. A cheap blower will overheat and shut down, causing the tent to collapse. I recommend buying a spare blower unit upfront. They’re not expensive relative to the tent, and having a backup can save your event if the primary unit fails.
搭建时间: The manufacturer may claim “5 minutes” or “under 10 minutes,” and that’s technically true for the inflation process itself. But the total setup time—including unpacking, laying out the fabric, connecting the blower, inflating, and anchoring—is realistically 15 to 30 minutes with a crew of two to four people. The first time you set it up, budget an hour. You’ll get faster with practice.
风力等级: This is the number everyone asks about, and it’s also the most misleading. A 20×20 inflatable tent can withstand 40 to 60 mph winds if properly anchored. The key phrase is “properly anchored.” In my experience, most wind-related failures are anchoring failures, not fabric failures. We’ll get into anchoring specifics later, but know this: the wind rating on the spec sheet assumes you’ve used all the stakes, sandbags, or weight plates as instructed.
What About the “One-Pump System”?
Some manufacturers, like Aerise with their 13×13 model, advertise a “patent-pending One-Pump System” that allows setup in under 5 minutes. The same principle applies to larger 20×20 models. This is a single-point inflation design where one blower inflates all the beams simultaneously through internal ducting. It’s a real feature that speeds up setup, but it’s not magic. You still need to unroll the tent, position it, and anchor it down.
Inflatable vs. Frame Tent: Honest Comparison
This is the question I get asked more than any other: “Should I buy an inflatable tent or a frame tent?” There’s no universal answer—it depends entirely on your use case. Let me break it down without the marketing fluff.
Setup Speed and Labor
Inflatable tents win this category, hands down. A 20×20 inflatable tent can be deployed by two people in under 30 minutes, including anchoring. A comparable frame tent requires assembling a metal skeleton, which means more pieces, more connections, and more labor. You’re looking at 45 minutes to an hour with a crew of four for a 20×20 frame tent. Over a season of events, that labor savings adds up. If you’re paying staff hourly, the inflatable tent pays for itself in reduced labor costs.
Portability and Storage
The inflatable tent is lighter and packs into a smaller footprint. A frame tent has rigid metal poles that are awkward to transport and store. The inflatable’s packed size is roughly a 4x2x2 foot bundle, which fits in a standard SUV or small trailer. Frame tent poles are long and require a roof rack or a dedicated trailer. For businesses that need to move the tent between locations frequently, the inflatable is the clear winner.
Durability and Lifespan
This is where frame tents fight back. A well-maintained frame tent can last 10 to 15 years or more. The metal frame is nearly indestructible, and the fabric roof can be replaced when it wears out. Inflatable tents have a shorter lifespan, typically 5 to 10 years, because the air beams are subject to wear and tear. The fabric can develop pinhole leaks, and the beam material degrades with UV exposure. That said, many manufacturers now offer 15-year spare parts warranties. Aerise, for example, advertises a 15-year spare parts warranty on their inflatable tents. That’s a vote of confidence in the technology.
Cost Comparison
Frame tents are generally cheaper to buy upfront. A 20×20 frame tent from a budget manufacturer might cost $1,500 to $2,500. A comparable inflatable tent starts around $2,000 and goes up to $5,000 or more for premium models. However, you need to factor in the blower (included with most inflatable tents) and the labor savings over time. For a business that uses the tent frequently, the inflatable can be more cost-effective over a 5-year period.
Wind and Weather Performance
This is a nuanced one. A properly anchored inflatable tent can handle wind up to 60 mph. The flexible air beams actually absorb wind energy better than rigid metal frames in some conditions. The structure flexes and deflects rather than resisting the wind. However, frame tents have a higher absolute wind rating if they’re professionally installed with heavy anchoring. For extreme weather conditions, a frame tent with a permanent installation is more robust. For typical event use, the inflatable tent is more than adequate.
最终结论
Here’s my take: if you need a tent for occasional events, weekend use, or seasonal deployments, the inflatable tent is the better choice. It’s faster to set up, easier to transport, and simpler to store. If you’re installing a semi-permanent structure that will stay up for months or years, a frame tent is more practical. The frame tent’s longer lifespan and higher absolute strength justify the initial setup complexity.
You might be wondering about the “20×20 inflatable tent vs frame tent” decision for a specific application. Let’s talk use cases.
Best Uses for a 20×20 Inflatable Tent
The 20×20 inflatable tent is a versatile piece of equipment, but “versatile” doesn’t mean “best for everything.” Let’s look at the specific use cases where this size and type of tent genuinely shines.
Events and Parties
This is the most common application, and for good reason. A 20×20 inflatable tent provides 400 square feet of covered space, which fits about 100 guests for a cocktail party or 60 to 70 for a seated dinner. It’s ideal for weddings, corporate events, festivals, and brand activations. The clear-span design means no center poles to work around, so you can arrange tables, staging, or a dance floor without obstruction.
For event use, I recommend a tent with clear vinyl windows or open side walls to let in natural light. The inflatable structure also has a modern, clean look that photographs well. TentCraft, for example, markets their 20×20 canopy tents specifically for festivals, brand activations, and high-traffic outdoor experiences. The 400 square feet of dependable event space is the sweet spot for mid-sized gatherings.
Car Detailing and Automotive Use
This is the sleeper hit of the inflatable tent market. A 20×20 inflatable tent is large enough to accommodate up to 8 cars, making it an ideal mobile detailing bay or temporary garage. The clear-span design gives you unobstructed access to the vehicles, and the inflatable structure can be set up and taken down quickly for mobile operations.
For car detailing, you want a tent with good clearance height—at least 7 feet—and solid anchoring. You’ll also want a tent with a solid roof that doesn’t sag, because water runoff is a concern when you’re washing cars. I’ve seen detailing businesses use these tents at customer locations, trade shows, and even as semi-permanent bays in parking lots. The portability is a huge advantage—you can pack up and move to a new location in under an hour.
Emergency Shelter and Disaster Relief
This is where inflatable tents really prove their worth. In emergency situations, speed of deployment is critical. A 20×20 inflatable tent can be set up by a small team in minutes, providing immediate shelter for medical triage, command centers, or temporary housing. The structures are often used by disaster relief organizations, military units, and emergency medical services.
For emergency use, you’ll want a tent with a durable, waterproof fabric and a design that can handle rapid deployment and redeployment cycles. The 20×20 size is large enough to serve as a field hospital ward or a command post, but it’s still manageable for a small team to transport and set up. Some organizations use these as “air tents” or “inflatable shelters” in their emergency response kits.
Trade Shows and Commercial Displays
A 20×20 inflatable tent is a substantial presence on a trade show floor or in an outdoor exhibition space. The inflatable structure can be custom-printed with your branding, creating a memorable and professional display. The clear-span interior gives you space for product displays, demo stations, or meeting areas.
For trade show use, you’ll want a tent with a high-quality print surface and a design that’s easy to set up and tear down in a convention center environment. Some manufacturers offer custom printing on the fabric, so you can create a fully branded structure. The 20×20 size is large enough to be a destination on the show floor, but it’s still compact enough to fit in a standard freight elevator.
Semi-Permanent Installations
While inflatable tents are primarily designed for temporary use, some organizations use them as semi-permanent structures. A 20×20 inflatable tent can serve as a temporary warehouse, a covered workspace, or a seasonal retail space. The key is to use a heavy-duty model with a robust anchoring system.
For semi-permanent use, you need to think about the blower running continuously. That means access to reliable power and a backup blower system. You’ll also need to consider the fabric’s UV resistance, because extended sun exposure will degrade the material over time. In practitioners’ experience, a 20×20 inflatable tent can stay up for several months with proper maintenance, but it’s not a permanent building replacement.
Tailored Recommendations by Use Case
| Use Case | Recommended Features |
|---|---|
| Events/Parties | Clear vinyl walls, high print quality, aesthetic design |
| Car Detailing | High clearance, solid roof, easy water runoff |
| Emergency Shelter | Quick setup, durable fabric, compact packed size |
| Trade Shows | Custom branding, professional appearance, easy breakdown |
| Semi-Permanent | Heavy-duty fabric, robust anchoring, backup blower |
Setup & Anchoring: A Practical Guide
Setting up a 20×20 inflatable tent isn’t difficult, but it does require a systematic approach. I’ve seen enough botched setups to know where people go wrong. Let’s walk through the process step by step.
Step 1: Site Preparation
Before you even unpack the tent, you need to prepare the site. The ground should be relatively level and free of sharp objects, debris, and excessive slope. If you’re setting up on grass, mow it short and clear the area of rocks and sticks. If you’re setting up on pavement, check for loose gravel or debris that could damage the fabric.
Lay out the tent footprint and mark the corners. You’ll need a staging area of at least 22×22 feet to give yourself room to work. If you’re setting up in a high-traffic area, consider using traffic cones or barriers to keep people away from the work zone.
Step 2: Unpacking and Layout
Remove the tent from its carrying bag and lay it out flat, oriented in the direction you want the final structure to face. Untangle the air beams and position them so they’re not twisted. This is where having a crew of two to four people helps—you need people at the corners to hold the fabric in place while you connect the blower.
Step 3: Connecting the Blower
Attach the blower ducting to the inflation valve. Most 20×20 inflatable tents use a single-point inflation system, where one blower inflates all the beams through internal channels. Make sure the blower is positioned on a stable, dry surface and that the power cord reaches a reliable outlet. You’ll need a dedicated 110V or 220V circuit, depending on the blower’s power requirements.
Step 4: Inflation
Turn on the blower and let the tent inflate. This typically takes 5 to 10 minutes. As the tent inflates, you’ll need to guide the fabric and make sure the beams are seating correctly. Don’t walk away during this process—you need to be ready to adjust the tent as it expands. Once the tent is fully inflated, the pressure relief valves will start releasing excess air. That’s normal.
Step 5: Anchoring
Here’s where the safety-critical work happens. A 20×20 inflatable tent needs to be anchored at all corners and, ideally, along the side walls. The anchoring method depends on your surface:
- Grass or Soil: Use 12-inch or longer ground stakes, driven at a 45-degree angle through the anchor loops. Use at least 8 stakes for a 20×20 tent—two per corner, and additional stakes at the midpoints of each side.
- Pavement or Concrete: You’ll need ballast weights—typically 50 to 100 pounds per corner. Sandbags, concrete blocks, or water barrels all work. Some manufacturers sell dedicated weight plates that bolt to the anchor points.
- Mixed Surfaces: If you’re setting up on a surface that won’t accept stakes, you’ll need a combination of weights and straps. I’ve seen setups on wooden decks and rooftop terraces that used a combination of ratchet straps and weights to secure the tent.
Step 6: Final Adjustments
Once the tent is inflated and anchored, make final adjustments. Tighten any tension straps on the side walls. Check that the door flaps are properly configured. If you’re using the tent with side walls, install them now. Walk around the perimeter and verify that the tent is stable and the anchoring points are secure.
Deflation and Pack-Up
Deflating the tent is the reverse process. Turn off the blower, open the deflation valves, and let the air escape. This takes 10 to 20 minutes. Once the tent is deflated, fold it carefully, following the manufacturer’s folding pattern. Pack it into the carrying bag, making sure not to fold the fabric more than necessary—excessive creasing can weaken the material over time.
Anchoring Requirements: The Critical Details
I can’t stress this enough: anchoring is the difference between a tent that survives a storm and a tent that ends up in the next county. Here are the specific requirements you need to plan for:
- Stakes: 12-inch to 18-inch steel stakes, depending on soil conditions. For sandy or loose soil, you’ll need longer stakes or screw-in anchors.
- Ballast: 50 to 100 pounds per corner for hard surfaces. That’s 200 to 400 pounds of total ballast for a 20×20 tent. This isn’t optional.
- Tension Straps: Use ratchet straps to connect the tent’s anchor loops to fixed objects (fences, vehicles, etc.) in high-wind conditions. This provides redundant anchoring.
- Wind Monitoring: If winds are forecast to exceed 40 mph, consider taking the tent down. Even the best-anchored tent has limits.
Shipping, Storage & Maintenance
The logistics of owning a 20×20 inflatable tent go beyond the initial purchase. Let’s talk about the practical realities of getting the tent to your location, keeping it in good condition, and storing it when it’s not in use.
Shipping and Freight
A 20×20 inflatable tent is a large, heavy item that ships via freight carrier, not standard parcel delivery. The packed dimensions are roughly 4x2x2 feet, and the total package weight is typically 250 to 350 pounds. That means you’ll need a loading dock or a liftgate-equipped truck for delivery. Plan for this when scheduling your delivery.
Shipping costs vary significantly by distance and carrier. In my experience, expect to pay $200 to $500 for freight shipping within the continental US. Some manufacturers offer free shipping as a sales incentive. Custom Tent With Logo, for example, advertises free shipping on custom popup tents over $2,000. It’s worth asking about shipping costs before you commit to a purchase.
Delivery Planning
When your tent arrives, you’ll need to have a plan for getting it off the truck and into storage. The weight makes it a two-person job at minimum. If you don’t have a loading dock, make sure the freight carrier is equipped with a liftgate. You’ll also need a dolly or hand truck to move the package from the delivery point to your storage area.
Storage Considerations
Storing a 20×20 inflatable tent properly is essential for its longevity. The tent should be stored in a dry, climate-controlled environment. Extreme heat can degrade the PVC fabric, and extreme cold can make it brittle. The ideal storage temperature is between 50°F and 80°F.
Here’s a point that often gets overlooked: the tent should be stored unfolded 或 loosely rolled, not tightly compressed. If you store the tent folded in the same place for months, the creases can become permanent and weaken the fabric. If you have the space, hang the tent or lay it flat. If you must store it in the carrying bag, try to rotate the folds periodically.
Cleaning and Maintenance
Regular cleaning will extend the life of your inflatable tent. After each use, wipe down the fabric with a mild soap and water solution. Avoid harsh chemicals, which can degrade the PVC coating. For stubborn stains, use a soft brush and a specialized fabric cleaner.
Check the air beams for signs of wear, especially at the points where they connect to the fabric. Look for pinhole leaks, abrasions, and UV damage. The pressure relief valves should be checked periodically to ensure they’re functioning correctly. If you notice a leak, it’s usually repairable with a patch kit—most manufacturers sell repair kits for their tents.
Blower Maintenance
The blower is a mechanical device that needs regular maintenance. Clean or replace the air filter regularly, especially if you’re using the tent in dusty environments. Check the power cord for damage. Lubricate the motor bearings according to the manufacturer’s recommendations. A well-maintained blower should last for years.
Repair Considerations
Inevitably, your tent will sustain some damage over time. The good news is that most repairs are straightforward. Small punctures can be patched with a repair kit. Larger tears might require professional repair. The air beams can be replaced individually if they fail—this is where a manufacturer’s spare parts warranty becomes valuable. Aerise, for example, offers a 15-year spare parts warranty on their inflatable tents, which covers the replacement of individual components.
Lifespan Expectations
The lifespan of a 20×20 inflatable tent depends heavily on usage and maintenance. A tent used weekly for events might last 3 to 5 years. A tent used seasonally and stored properly might last 7 to 10 years. UV exposure is the biggest factor in fabric degradation—the sun’s rays break down the PVC coating over time. If you’re using the tent in a sunny climate, expect a shorter lifespan.
Cost Breakdown: What to Expect
Let’s talk money. The price of a 20×20 inflatable tent varies widely based on quality, features, and manufacturer. Here’s a realistic breakdown of what you can expect to pay.
Entry-Level/Budget Tier: $2,000 – $3,500
At this price point, you’re getting a basic inflatable tent that’s suitable for occasional use. The fabric is likely 650 GSM PVC, the blower is a standard 1 HP unit, and the design is simple. These tents are functional but may not have premium features like reinforced anchor points or high-quality zippers. They’re a good option if you’re on a tight budget and only need the tent a few times a year.
Mid-Range Tier: $3,500 – $6,000
This is the sweet spot for most buyers. You’re getting a commercial-grade tent with 750 to 900 GSM fabric, a more robust anchoring system, and better attention to detail. The blower is a continuous-duty unit that’s built to run for extended periods. You might get additional features like clear vinyl windows, custom printing, or a more refined aesthetic. Most of the tents I recommend to clients fall in this range.
Premium Tier: $6,000 – $12,000+
At the top end, you’re paying for the best materials, the most advanced engineering, and the most customization options. The fabric is heavy-duty 900+ GSM, the air beams are larger and more robust, and the design is optimized for frequent deployment and redeployment. You might get features like double-wall construction for better insulation, or custom printing on the entire structure. These tents are built for heavy commercial use and are designed to last a decade or more.
Hidden Costs to Factor In
The price of the tent itself is just the starting point. Here are the costs that often catch buyers off guard:
- 鼓风机: Most tents include a blower, but some budget models don’t. A replacement blower costs $200 to $500. I recommend buying a spare blower upfront—it’s the most likely component to fail.
- Anchoring Equipment: Stakes, sandbags, and weight plates are often sold separately. Budget $200 to $500 for a complete anchoring kit.
- Carrying Bags: The tent comes with a carrying bag, but it’s often a basic duffel. A heavy-duty wheeled bag costs $100 to $300.
- 运输: Freight shipping costs $200 to $500, depending on distance and carrier.
- Custom Printing: If you want your logo or branding on the tent, expect to pay an additional $500 to $2,000, depending on the complexity of the design.
- 修理套件: A basic repair kit costs $50 to $100. It’s a small investment that can save you from a major headache.
Rental vs. Purchase
If you only need a 20×20 inflatable tent for a single event, renting is often the smarter choice. Rental prices for a 20×20 inflatable tent typically range from $500 to $1,500 per event, depending on the rental company, location, and duration. For a one-time event, renting saves you the upfront cost and the hassle of storage and maintenance.
However, if you’re going to use the tent more than 3 to 4 times per year, purchasing is more cost-effective. At $1,000 per rental, four rentals equal the cost of a mid-range tent. After that, the tent pays for itself.
The “Under $1000” Question
You might be wondering: “Can I get a 20×20 inflatable tent for under $1,000?” The short answer is no, not a quality one. In my experience, tents in that price range are either significantly smaller (like the Aerise 13×13 model, which is a different size category) or they’re low-quality imports that won’t survive more than a few uses. Don’t waste your money on a tent that will fail you at the worst possible moment. The social media discussions about inflatable tents often mention the high cost—over $1000 plus shipping—as a barrier. That’s a legitimate concern, but it’s a case of “you get what you pay for.”
常见问题解答
Q: How many people will a 20×20 tent fit?
答: A 20×20 inflatable tent provides 400 square feet of covered space. For a standing cocktail reception, you can fit approximately 100 guests comfortably. For a seated dinner with banquet tables, plan for 60 to 70 people. If you’re using the space for vehicles, you can fit up to 8 cars in a tight configuration or 4 cars with room to move around.
问:充气帐篷值得购买吗?
答: In my experience, yes—if you use them regularly. The key advantages are rapid setup (under 30 minutes with a small crew), easy portability, and a clear-span interior with no center poles. The downsides are a shorter lifespan than frame tents (5-10 years vs. 10-15 years) and the need for a continuously running blower. For frequent event use, the labor savings justify the cost.
Q: How much does a 20×20 tent cost?
答: Expect to pay $2,000 to $6,000 for a quality 20×20 inflatable tent, with premium models reaching $12,000 or more. Additional costs include a spare blower ($200-$500), anchoring equipment ($200-$500), and freight shipping ($200-$500). If you only need the tent once, renting is more economical at $500 to $1,500 per event.
Q: What is the largest inflatable tent you can buy?
答: While 20×20 is a popular mid-size option, manufacturers offer inflatable tents up to 40×40 feet and larger. A 40×40 inflatable tent provides 1,600 square feet of space, but requires multiple blowers and a larger installation crew. Some manufacturers offer custom sizes beyond that for specialized applications like aircraft hangars or industrial storage.
Q: How do you anchor a 20×20 inflatable tent?
答: On grass or soil, use 12-inch or longer ground stakes driven at a 45-degree angle through the anchor loops—at least 8 stakes for a 20×20 tent. On pavement or concrete, use ballast weights of 50 to 100 pounds per corner. For high-wind conditions, add ratchet straps connecting the tent to fixed objects for redundant anchoring.
Q: How long does it take to inflate a 20×20 tent?
答: The actual inflation process takes 5 to 10 minutes with a standard 1 to 1.5 HP continuous-duty blower. Total setup time, including unpacking, laying out the fabric, connecting the blower, and anchoring, is realistically 15 to 30 minutes with a crew of two to four people. The first setup will take longer as you learn the process.
Q: Can a 20×20 inflatable tent withstand high winds?
答: A properly anchored 20×20 inflatable tent can withstand winds up to 40 to 60 mph. The inflatable air beams flex and absorb wind energy better than rigid frames in some conditions. However, the wind rating assumes all anchoring points are secured. If winds are forecast to exceed 40 mph, consider taking the tent down.
Q: How much does a 20×20 inflatable tent weigh?
答: The tent itself typically weighs 150 to 250 pounds, depending on fabric thickness and design. The total package, including the blower, stakes, and carrying bags, weighs 250 to 350 pounds. The packed size is approximately 4x2x2 feet. You’ll need a dolly or hand truck and at least two people to move it.
Wrapping Up
You now have every spec, cost, and setup detail you need to make an informed decision about a 20×20 inflatable tent. The bottom line: this is a versatile, practical investment for anyone who needs covered space on a regular basis. The quick setup, portability, and clear-span design make it ideal for events, car detailing, emergency shelter, and trade shows. Just don’t skip on anchoring, buy a spare blower, and store it properly.
Which use case fits your 20×20 needs best? If you’re leaning toward an inflatable tent for your next event or installation, I’d suggest comparing models from a few reputable manufacturers. And if you’re looking for a range of inflatable solutions—from 充气帐篷 to 充气家具 和 展示架—check out what KCCE has to offer. They’ve been in the inflatable products business for years, and their 充气造型 and custom options are worth a look if you need something beyond a standard tent. Their founder’s story gives some insight into the company’s history and design philosophy.
参考资料
1. 20’x20′ Custom Canopy Tents Event Pros Trust – tentcraft.com
2. 13×13 Inflatable Tent by Aerise – aerise-tents.com
3. 20×20 Frame Tent Sale: What To Look For? – economytent.com
4. Top 5 Reasons To Choose Inflatable Tent For Your Next Event – customtentwithlogo.com
5. Inflatable Tent Maintenance: Essential Tips for Longevity – eventtents.com







