

Özel Profesyonel Şişme Çadır: Tam Kılavuz
Ticaret fuarlarında onları gördünüz – ucuz görünen, hafif bir rüzgarda sallanan ve markanızı sonradan akla gelmiş gibi gösteren şişme çadırlar. Ama doğru olanı özel profesyonel şişme çadır tam tersini yapar: dikkat çeker, rüzgara dayanır ve daha ilk konuşma başlamadan önce potansiyel müşteri yaratır.
Bu alanda yıllar geçirdim. Etkinlik yöneticilerinin iki etkinlik dayanan bir çadıra 3.000 dolar harcadığını gördüm ve akıllı alıcıların, sadece bir hafta sonunda stant trafiğiyle kendini amorti eden satılık özel profesyonel şişme çadıra yatırım yaptığını gördüm. Fark şans değil – neye bakılacağını bilmek.
Çok fazla seçenek, çok az karşılaştırma bilgisi. Etkinlik planlayıcıları, pazarlama direktörleri ve marka aktivasyon yöneticilerinden sürekli duyduğum şey buydu. Bu yüzden gürültüyü kesmeye karar verdim. Bu rehber, hangi özelliklerin gerçekten önemli olduğunu, hangi tedarikçilerin vaatlerini yerine getirdiğini ve boyutu belirli etkinlik türünüze nasıl uyduracağınızı kapsıyor. Sonunda, bir sonraki etkinliğiniz için hangi özel profesyonel şişme çadırın uygun olduğunu ve hangi tedarikçiye güveneceğinizi tam olarak bileceksiniz.
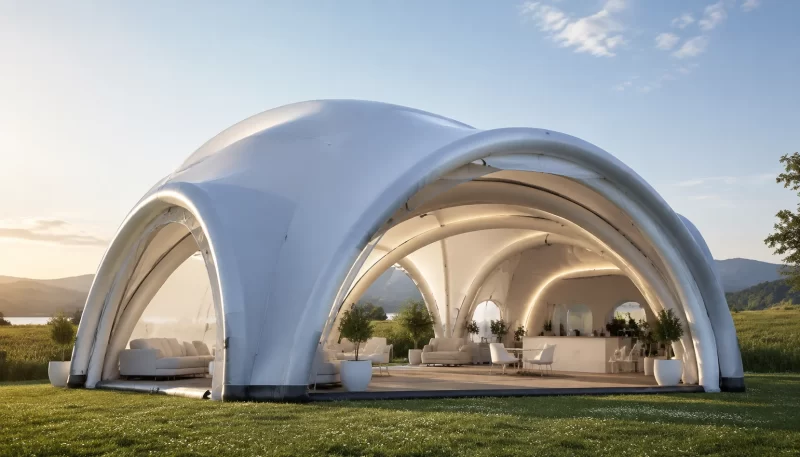
Özel Profesyonel Şişme Çadır Nedir?
Önce temelleri netleştirelim. Bir özel profesyonel şişme çadır arka bahçe kamp çadırınız değildir. Ticari etkinlik kullanımı için özel olarak tasarlanmış bir yapıdır – fuarlar, festivaller, marka aktivasyonları, ürün lansmanları ve kurumsal toplantılar düşünün.
İşte onu tüketici sınıfı şişme ürünlerden ayıran şey:
- Malzeme kalitesi: Profesyonel sınıf çadırlar, su geçirmez PU kaplamalı 420D Oxford kumaş veya daha ağır 600D/900D polyester kullanır. Bazı premium modeller, metrekare başına 650g'a kadar ağırlık derecelendirmesine sahip 0.6mm PVC kullanır. Tüketici çadırları mı? Genellikle bir sezon içinde UV bozulmasına uğrayan 190T polyester.
- Dikiş yapısı: RF (radyo frekansı) kaynaklı dikişler altın standarttır. Malzemeleri moleküler düzeyde birleştirirler – dikiş yok, iğne deliği yok, su girişi yok. Bantlı dikişli mi? Bu en iyi ihtimalle orta sınıftır.
- Rüzgar direnci: Uygun şekilde tasarlanmış, yeterli halat ve ağırlıklandırma ile donatılmış bir şişme tente çadırı, 30+ mph sürekli rüzgara dayanmalıdır. Esnek hava kirişi yapısı, çoğu durumda sert metal çerçevelerden rüzgar yüklerini daha iyi emer – yapı kırılmak yerine esner.
- Özel baskı: Logonuz, grafikleriniz ve mesajlarınız için tam renkli, süblimasyon veya solvent dijital baskı. Tüketici çadırları, üç kullanımdan sonra soyulan tek renkli serigrafi baskı alır. Profesyonel çadırlar, Pantone eşleşmeli, UV dayanıklı ve uzun ömürlü grafikler alır.
YOLO Outdoor'ın teknik analizine göre, bir şişme çadırın yapısal bütünlüğü tamamen onun Hava Kirişi sistemine, bağlıdır; performans, üretim malzemelerinin moleküler özellikleriyle belirlenir. İki ana teknik yol mevcuttur: geleneksel Polivinil Klorür (PVC) ve gelişmiş Termoplastik Poliüretan (TPU) . PVC hava kirişleri ekonomiktir ancak −10°C'de moleküler zincir kısıtlaması göstererek kırılgan çatlamaya yol açar. TPU, −40°C'de elastik geri kazanımını korur – soğuk hava etkinlikleri için büyük bir fark.
Geleneksel İskelet Çadırlara Kıyasla Temel Avantajlar
Şişme çadır ile tente tartışması hararetleniyor. Gerçek verilerle konuyu netleştireyim.
Kurulum hızı: Markaya göre, geleneksel iskelet çadırlar 2 kişilik bir ekiple 30–45 dakika sürer. Şişme çadır mı? Elektrikli üfleyici ile tek kişiyle 5 dakikanın altında. Bu pazarlama abartısı değil – deneyimli ekiplerin elde ettiği sonuç budur.
Taşınabilirlik: 10×10 şişme tente, marka spesifikasyonuna göre 25–40 pound ağırlığında bir sırt çantasına veya tekerlekli taşıma çantasına katlanır. Tente üstlü karşılaştırılabilir bir metal çerçeve çadır 60–80 pound ağırlığındadır ve tavan rayı veya kamyonet kasası gerektirir.
Güvenlik: Şişme yapılar doğal güvenlik avantajlarına sahiptir. Takılacak metal direk yok, keskin kenar yok, kurulum sırasında sıkışma noktası yok. YOLO Outdoor rehberi, “esnek enerji emilimi” ilkesini açıklar – şişme yapılar, stresi felaketle sonuçlanabilecek sert bağlantı noktalarına aktarmak yerine esneyerek rüzgar yüklerini emer.
Markalama yüzeyi: Şişme çadırlar tam sarma baskı kapasitesi sunar – yanlar, çatı, hatta iç yüzeyler. İskelet çadırlar genellikle baskıyı çatı ve iki yan panel ile sınırlar.
Depolama: Geleneksel çadırlar, metal çerçevelerin sökülmesini, çizilmeleri önlemek için dikkatli istiflemeyi ve özel depolama alanı gerektirir. Şişme çadırlar düz bir şekilde söner ve kompakt çantalarda saklanır.
Ancak dürüst olmam gereken bir takas var. Geleneksel çadırlar delinmez. Şişme çadırlar delinebilir – ve etkinlik alanınızda keskin moloz, kırık cam veya aşırı hevesli sarhoş misafirler varsa, bu gerçek bir risktir. Çoğu profesyonel şişme çadır, onarım kitleriyle birlikte gönderilir ve RF kaynaklı yamalar iyi çalışır. Ancak bu, baştan bilinmesi gereken bir şeydir.
Özel Şişme Çadır Türleri ve Şekilleri
Pazar, çoğu insanın fark ettiğinden daha fazla çeşitlilik sunar. Özel şişme çadır türleri ve şekilleri ararken bulacağınız şeyler şunlardır:
Kubbe Şişme Çadırlar: Ticaret fuarları ve ürün lansmanları için en yaygın şekil. Alçak profilli, aerodinamik, mükemmel rüzgar stabilitesi. 10 ft x 10 ft ile 23 ft x 23 ft arasında boyut seçenekleri mevcuttur. BestFlag, büyük ölçekli aktivasyonlar için popüler olan 23′ x 23′ kubbe sunmaktadır.
Yüksek Tepeli Şişme Kanopiler: Geleneksel kanopi şekli ancak metal direkler yerine şişme kirişler kullanılır. Merkezde tam ayakta durma yüksekliği (genellikle 10–12 ft). Festivaller, kurumsal etkinlikler ve baş mesafesi istenen uzun süreli aktivasyonlar için idealdir.
Altıgen Şişme Çadırlar: Kare çadırlardan daha fazla iç kullanım alanı sağlayan altı kenarlı yapılar. West Shade, tıbbi çadırlar, VIP salonları ve ağırlama alanları için popüler olan Özel Altıgen Şişme Çadır serisini sunmaktadır. Markaya göre, bu geometri ayak izi boyutu başına –30 daha fazla taban alanı sağlamaktadır.
Şişme Kemer Çadırları: Bunlar tam barınaklardan ziyade giriş vurgusu olarak işlev görür. Yan etekli özel şişme kemerler, markalı bir “giriş kapısı” deneyimi yaratır. Spor etkinliklerinde, yarış başlangıçlarında ve festival girişlerinde yaygındır.
Özel Uzatılmış Şişme Çadırlar: Daha uzun ayak izi – 10 ft x 20 ft veya 10 ft x 30 ft gibi. Ürün tanıtımları, uzun stand konfigürasyonları ve doğrusal alan gerektiren çok markalı aktivasyonlar için mükemmel çalışır.
Şişme Kolonlu Çadırlar: Çatı yapısını destekleyen dairesel kolonlar. Standart kirişli yapılardan daha kalıcı ve üst düzey görünür. West Shade’in Özel Şişme Kolon serisi, özel profesyonel şişme çadır satış pazarında bu şeklin iyi bir örneğidir.
Seçtiğiniz şekil her şeyi etkiler – baskı yüzey alanı, rüzgar yükü özellikleri, kurulum karmaşıklığı ve depolama hacmi. Sadece iyi görünene karar vermeyin. Etkinliğinizin işlevsel gereksinimlerine uygun olanı seçin.
Boyut Rehberi – Etkinliğiniz İçin Doğru Ölçüleri Seçin
Boyutu yanlış belirlemek yapabileceğiniz en maliyetli hatadır. İşte pratik yaklaşımım:
| Etkinlik Türü | Önerilen Boyut | Tipik Kullanım |
|---|---|---|
| Ticaret fuarı standı (10×10) | 10 ft x 10 ft şişme kanopi | Tek marka varlığı, ürün sergileme |
| Ticaret fuarı standı (10×20) | 10 ft x 20 ft şişme kanopi | Çift marka veya genişletilmiş demo alanı |
| Çiftçi pazarı / pop-up | 10 ft x 10 ft kubbe | Hızlı kurulum, dar alanlar |
| Açık hava festivali (küçük) | 13 ft x 13 ft kubbe veya yüksek tepeli | Tek satıcı, 2–3 personel |
| Açık hava festivali (büyük) | 20 ft x 20 ft yüksek tepeli | Birden fazla personel, stok, oturma alanı |
| Marka aktivasyonu / lansman | Özel altıgen veya kubbe, 15–20 ft | İnteraktif deneyimler, medya alanı |
| VIP salonu / ağırlama | 20 ft x 20 ft veya altıgen | Oturma, ikram, toplantı alanı |
| Acil / tıbbi barınak | 23 ft x 23 ft kubbe | Hızlı konuşlandırma, yüksek baş mesafesi |
Şişme kanopi 10×10 hakkında bir not – bu sektördeki en popüler boyuttur. Standart ticaret fuarı stand boyutlarına uyar, tek kişi tarafından kurulabilir ve çoğu tek marka uygulaması için yeterli markalama alanı sunar. Parti için hangi boyutta şişme çadır gerektiğini merak ediyorsanız, çok samimi bir toplantı olmadığı sürece 13 ft x 13 ft’in altına inmemenizi öneririm. Arka bahçe etkinlikleri için 10 ft x 10 ft küçük partilerde işe yarar; daha büyük etkinlikler için 15–20 ft boyutlarına bakıyorsunuz demektir.
Özelleştirme Seçenekleri – Logolar, Renkler, Grafikler ve Tam Sarma Baskı
“Özel profesyonel” kısmının hayat bulduğu yer burasıdır. Jenerik beyaz bir çadır yatırım getirisi sağlamaz. Marka renkleriniz ve mesajlarınızla özel baskılı bir çadır mı? Bu bambaşka bir hikaye.
Tam sarma baskı: Bu, görünür tüm dış yüzeyleri kapsar – dört taraf ve çatı. Bazı tedarikçiler, sürükleyici marka deneyimleri için iç baskı da sunar. Branded Canopy Tents, tüm yapıyı kaplayan tam renkli markalama seçenekleri sağlar.
Pantone renk eşleştirme: Profesyonel tedarikçiler marka renklerinizi hassas şekilde eşleştirir. Üretim öncesi ücretsiz mockup’lar, görünümü doğrulamanızı sağlar. West Shade’in hizmet teklifine göre, taahhüt vermeden önce ücretsiz 3D görselleştirme sağlarlar – bu, yalnızca düz PDF gönderen tedarikçilere göre büyük bir avantajdır.
Baskı yöntemleri:
- Dye-sublimation (Boyar madde süblimasyonu): Canlı renkler, polyester kumaşlar için en iyisi. Renk çatlamaz veya soyulmaz. Mürekkep, kumaş yapısının bir parçası haline gelir.
- Solvent dijital baskı: PVC ve kaplamalı malzemeler üzerinde çalışır. Dayanıklıdır ancak sublimasyona kıyasla renk canlılığı bir miktar daha düşüktür.
- Serigrafi baskı: Daha ucuzdur ancak 4–6 renkle sınırlıdır. Fotoğrafik grafikler için uygun değildir.
- Isı transferi: Orta seviye bir seçenektir. İyi çalışır ancak sert kullanımda kenarlar zamanla soyulabilir.
Onay öncesi bir prototipte doğrulanması gerekenler:
- Renk doğruluğu – Pantone veya CMYK değerlerinizle karşılaştırın
- Metin boyutu – 20 ft izleme mesafesinde küçük metinlerin kaybolmadığından emin olun
- Yerleşim hizalaması – logolar ortalanmış, panel birleşim yerlerinde bozulma yok
- Baskı taşma alanları – tam sarma tasarımlar için kritik öneme sahiptir
Bazı tedarikçiler tasarım revizyonları için ücret talep eder. Instant Promotion gibi diğerleri, maliyetsiz şekilde iterasyon yapmanızı sağlayan ücretsiz 3D görsel hizmetler sunar. Önceden sorun.
Malzemeler ve Dayanıklılık – 420D Oxford, PVC ve RF Kaynaklı Dikişler
Malzemeleri bir uygulayıcı gibi konuşalım.
420D Oxford kumaş: Orta seviye şişme çadırlar için endüstri standardıdır. 420 denye, 9.000 metre fiber kalınlığı başına 420 gram anlamına gelir. Doğru bakımla sezon başına 20–30 etkinlik için yeterince dayanıklıdır. Su geçirmez PU kaplama yağmur direnci ekler.
600D Oxford: Daha ağır, delinmeye karşı daha dayanıklıdır. Toplam ağırlığa yaklaşık 2–3 pound ekler ancak aşınma direncini iki katına çıkarır. Etkinlik alanınız beton, asfalt veya çakıl içeriyorsa, 600D daha güvenli bir tercihtir.
0.6mm PVC: Özellikle Impact Canopy ve Deluxe Canopy modelleri olmak üzere ağır hizmet tipi profesyonel çadırlarda kullanılır. Metrekare başına yaklaşık 650g ağırlığındadır. PVC, kumaş çadırlardan daha serttir; bu, stabiliteyi artırır ancak katlanabilirliği azaltır. Temel dezavantaj çevresel etkidir – PVC daha az geri dönüştürülebilirdir.
RF Kaynaklı Dikişler: Radyo frekansı kaynağı, elektromanyetik enerji kullanarak malzemeleri birleştirir. Sonuç, taban malzemenin kendisinden daha güçlü bir kimyasal bağdır. Dikiş yok, iğne deliği yok, su geçiş yolu yok. YOLO Outdoor’un mühendislik rehberi, RF kaynağının, saha koşullarında yamanması daha kolay olan dikişli dikişler hariç her metrikte dikişli dikişlerden üstün olan “moleküler düzeyde füzyon” oluşturduğunu doğrulamaktadır.
TPU Hava Kirişleri: Ciddi alıcılar için premium yükseltme. YOLO Outdoor kaynağına göre TPU, −40°C’de yüksek esnekliğe sahip elastik segmentleri korurken PVC, −10°C’de kırılgan hale gelir. Kış etkinlikleri, dağ aktivasyonları veya soğuk hava uygulamaları için TPU esasen zorunludur. Toplam maliyet daha yüksektir – ancak güvenlik de öyle.
Kişisel bir görüş: Etkinlik organizatörlerinin “tüm şişme ürünler aynıdır” düşüncesiyle 210D naylon çadır aldığını gördüm. Altı ay sonra, bu çadırlarda kumaş solması ve dikiş ayrılması olarak görülen UV bozulması mevcuttu. Malzeme özelliklerinden ödün vermeyin. Markanızın itibarı kelimenin tam anlamıyla o çadırda raflardan uçuyor.
Üretim Süreci – Profesyonel Şişme Çadırlar Nasıl Üretilir
Bu çadırların nasıl üretildiğini anlamak, satın almadan önce kaliteyi değerlendirmenize yardımcı olur.
Adım 1 – Tasarım ve mühendislik: Boyut, şekil ve markalama gereksinimlerinize göre CAD modelleri oluşturulur. Hava kirişi boyutları, basınç özellikleri ve valf yerleşimi hesaplanır. Özel profesyonel şişme çadır satış siparişleri için bu aşama genellikle 3–5 iş günü sürer.
Adım 2 – Malzeme kesimi: Kumaş, bazen 30 ft uzunluğunda olan büyük kesim masalarına serilir. Otomatik lazer kesiciler veya kalıp kesme makineleri, ±1 mm hassasiyet toleransıyla panelleri keser. Atık malzeme mümkün olduğunda geri dönüşüm için toplanır.
Adım 3 – Baskı: Grafikler, polyester için boya süblimasyonu veya PVC için solvent baskı kullanılarak uygulanır. Tam sarma baskı, renklerin ve desenlerin dikiş yerlerinde mükemmel şekilde eşleşmesi için panellerin hizalanmasını içerir. Pantone eşleşmeli görünürlüğünüzü burada elde edersiniz.
Adım 4 – RF kaynağı: Paneller radyo frekansı kaynağı kullanılarak birleştirilir. İşlem dikiş başına saniyeler sürer ancak titiz kalite kontrol gerektirir. YOLO Outdoor’un mühendislik dokümantasyonu, RF kaynak kalitesinin yalnızca görsel görünümle değil, kaynak derinliği ve tutarlılığıyla ölçüldüğünü vurgular.
Adım 5 – Hava kirişi yerleştirme: Hava kirişleri (PVC veya TPU) kumaş kanallara yerleştirilir. Valf konumlarına stratejik olarak monte edilir – tipik olarak her kiriş bölümü için bir şişirme valfi ve ayrıca bir ana şişirme portu.
Adım 6 – Basınç testi: Her çadır çalışma basıncına (hava kirişleri için genellikle 8–12 PSI) şişirilir ve 24 saat bekletilir. Basınç düşüşü bu süre boyunca 2%’yi aşmamalıdır. Bu test hem kiriş bütünlüğünü hem de dikiş kalitesini doğrular.
Adım 7 – Son işlem: Velcro bağlantı noktaları, gerdirme için D-halkaları, fermuarlı kapılar, havalandırma panelleri ve saklama çantaları eklenir. Paketleme öncesi son inceleme yapılır.
Branded Canopy Tents, uygun üretimin yalnızca son test değil, her aşamada tam kalite kontrol kontrollerini içerdiğini vurgular. Bir tedarikçi size QC sürecini gösterebiliyorsa, bu iyi bir işarettir.
Güvenlik Standartları ve Sertifikalar (NFPA 701, ASTM, CPAI-84)
Bu bölüm çoğu alıcının fark ettiğinden daha önemlidir. Halka açık bir etkinlikte veya fuarda özel profesyonel şişme çadır kullanıyorsanız, birçok mekan kurulumdan önce bu sertifikaları talep eder.
ASTM F2376-10: Şişme Eğlence Cihazlarının Sınıflandırılması, Üretimi, İnşası ve İşletilmesi için Standart Uygulama. Teknik olarak şişme kaleleri hedeflese de, bu standart Kuzey Amerika’daki tüm şişme yapılar için fiili referans haline gelmiştir. ASTM F2376-10’a uyan tedarikçiler, mekan güvenlik gereksinimlerini karşılayan dokümantasyon sağlayabilir.
NFPA 701: Tekstil ve filmlerin alev yayılımı için Ulusal Yangından Korunma Derneği standardı. Bu sertifika, çadır malzemenizin alev yayılımını desteklemeyeceğini kanıtlar. Halka açık toplanma alanlarında, fuar zeminlerinde veya festival alanlarında kullanılan her çadır için zorunludur. Çoğu profesyonel tedarikçi talep üzerine NFPA 701 sertifikası sağlar.
CPAI-84: Çadır malzemelerinin alev direnci için Canvas Products Association International standardı. Bu, özellikle çadır kumaşları için endüstri standardıdır. CPAI-84 sertifikası, ABD’deki çoğu etkinlik mekanı tarafından tanınır.
Rüzgar yükü derecelendirmeleri: Profesyonel şişme çadırlar, rüzgar yükü kapasitelerini belirtmelidir – genellikle maksimum mph olarak ifade edilir. YOLO Outdoor’un teknik dokümantasyonu, Beaufort rüzgar ölçeği ile çadır yapısal yükleri arasındaki doğrusal olmayan ilişkiyi açıklar ve şişme yapıların sert direnç yerine “esnek enerji emilimi” kullandığını vurgular.
Basınç tahliye valfleri (PRV’ler): Bunlar, sıcaklık yükseldiğinde fazla hava basıncını otomatik olarak serbest bırakır. Charles Yasası, gaz hacminin sıcaklıkla genişlediğini belirtir – 60°F’de sorunsuz olan bir çadır, 95°F’de tehlikeli şekilde aşırı basınçlanabilir. PRV’ler bu riski ortadan kaldırır.
Özel profesyonel şişme çadır satışı araştırırken, tedarikçiden ASTM, NFPA ve CPAI-84 sertifikalarının kopyalarını isteyin. Bunları 24 saat içinde sağlayamıyorlarsa, bu bir kırmızı bayraktır.
Şişirme, Kurulum ve Söküm – Gerekli Süre ve Ekipman
Etkinlik gününüzden önce bilmeniz gerekenler şunlardır.
Inflation method: Electric blowers are the standard. According to the brand, a 600–1000 watt blower can inflate a 10×10 tent in 2–3 minutes. According to the brand, hand pumps work but take 15–20 minutes. and are only practical for small tents. Integrated fans (permanently attached) are found in premium models – they provide continuous air pressure monitoring but add weight and cost.
Setup crew: One person can handle a 10×10 inflatable canopy tent. Larger tents (20×20) require 2 people. Dome structures are easier to self-set than high-peak canopies because the geometry is simpler.
Kurulum süresi:
- 10×10 inflatable: 2–5 minutes (one person, electric blower)
- 10×10 traditional frame: 20–30 minutes (two people)
- 20×20 inflatable: 8–12 minutes (two people)
- 20×20 traditional frame: 45–60 minutes (two-four people)
Takedown time: Comparable but slightly faster. Deflation takes 30 seconds. Packing into storage bag takes 3–5 minutes. Traditional tents require disassembly, rod sorting, and careful bagging – 15–20 minutes.
Equipment needed:
- Electric blower (most vendors include one with purchase)
- Power source (generator or mains hookup)
- Guy ropes and stakes (included or optional depending on vendor)
- Weight bags (25–40 lbs per corner for hard surfaces where staking isn’t possible)
- Repair kit (included with professional-grade tents)
Taşınabilirlik ve Depolama – Sırt Çantası veya Tekerlekli Çantalar
One of the most practical considerations is how you move and store a inflatable tent.
Paketlenmiş boyut: A 10×10 inflatable canopy tent packs down to approximately a 40″ x 14″ x 14″ bag. That’s small enough to fit in a sedan trunk or backseat. Most tents come with a wheeled carry bag for easy transport across parking lots and trade show floors.
Ağırlık: Professional-grade tents range from 25–50 pounds depending on size and material. 420D Oxford models are lighter; 0.6mm PVC models are heavier. TPU air beam tents land in the middle.
Storage requirements: Inflatables must be stored dry and clean. Moisture trapped inside leads to mold growth on fabric and corrosion on valves. UV light degrades both PVC and polyester – store away from direct sunlight. A climate-controlled storage area at 60–80°F is ideal.
Lifespan with proper care: Professional inflatable tents should last 30–50 events if stored correctly. Fabric life is 3–5 years depending on UV exposure. Air beams can last longer but require periodic pressure testing. RF welded seams generally outlast stitched seams.
Social media users often complain: “Inflatable tents are bulky despite being lightweight, making them difficult to transport.” This is a fair criticism. The packed size is large even if the weight is low. That 40″ bag won’t fit in a smart car. Plan accordingly.
Karşılaştırma Tablosu – Şişme ve Geleneksel Çadırlar
| Özellik | Şişme Çadır | Traditional Frame Tent |
|---|---|---|
| Kurulum süresi | 2–5 min (10×10) | 20–45 min (10×10) |
| Crew required | 1 person | 2 kişi |
| Packed weight | 25–50 lbs | 60–90 lbs |
| Paketlenmiş boyut | 40″ bag | 6 ft tube + separate bag |
| Rüzgar direnci | 30–40 mph (with guying) | 40–50 mph (with staking) |
| Puncture risk | Yes (repairable) | Very low |
| Safety hazards | None (soft structure) | Metal poles, sharp edges |
| Özel baskı | Full-wrap available | Limited to roof + 2 sides |
| Cost (10×10 custom) | $1,500–$3,000 | $800–$2,000 |
| Lifespan (events) | 30–50 | 50–100+ |
| Storage volume | Small (deflated) | Large (rigid frame) |
When to choose inflatable: Speed of setup matters, you need maximum branding surface, portability is critical (no truck needed), soft structure is safer for high-traffic areas.
When to choose traditional tent: You need maximum wind resistance (above 40 mph), puncture risk is high (construction sites, heavy debris), you expect more than 50 uses, budget is tight.
For most trade shows, brand activations, and festivals, inflatable tents are the smarter choice. For long-term rental fleets or permanent installations, traditional tents might still win.
Karşılaştırılan İlk 8 Tedarikçi (2026 Sürümü)
Based on available data from authoritative sources and competitor analysis, here’s where you should be looking:
| Vendor | Fiyat Aralığı | MOQ | Turnaround | Free Mockup | Key Differentiator |
|---|---|---|---|---|---|
| KCCE | $500–$1,500 | 1 | 2–3 weeks | Evet | Free 3D visualization |
| Aşırı Gölgelik | $1,200–$2,800 | 1 | 10–14 days | Evet | Free shipping + mockups |
| Deluxe Canopy | $2,000–$4,000 | 1 | 3–4 weeks | Evet | Professional-grade materials |
| West Shade | $1,800–$3,200 | 1 | 2–3 weeks | Evet | Logo printing for brand activations |
| Floatie Kings (RuggedX) | $1,000–$2,500 | No MOQ | 2 weeks | Evet | Custom inflatable projects |
| BestFlag | $2,000–$5,000 | 2–5 | 3–5 weeks | Evet | Large dome size (23′ x 23′) |
| Creatable Inflatables | $2,500–$5,000 | 1 | 3–4 weeks | Evet | Made in USA |
| Impact Canopy | $1,800–$4,200 | 1 | 2–4 weeks | Evet | Custom inflatable projects |
Important note: Coody.us focuses on camping tents, not custom event tents. Don’t waste time there for professional event use.
Best for trade shows: Instant Promotion or Extreme Canopy – fast turnaround, good print quality, standard sizes that fit booth dimensions.
Best for low MOQ: Floatie Kings (RuggedX) – no minimum order quantity means you can test with a single tent.
Best for fast shipping: Extreme Canopy – 10–14 day turnaround is industry-leading for custom orders.
Best for premium quality: Creatable Inflatables (Made in USA) and Deluxe Canopy – higher price point but higher material specs and warranty coverage.
Best for large events: BestFlag – the 23′ x 23′ dome is hard to beat for presence.
West Shade features a “Save Up to $900” promotion (as of their recent campaign) and offers contact via phone (949-490-6397) and email ([email protected]). Their site lists shop-by-use, shop-by-shape, and shop-by-size navigation – a useful reference for decision-making.
Özel Şişme Çadırın Gizli Maliyetleri
Here’s what the marketing materials don’t tell you.
Shipping: A 10×10 inflatable tent in its storage bag weighs 30–45 pounds. Shipping within the US runs $50–$150 depending on distance and carrier. International shipping can be $200–$500+.
Custom artwork setup: Some vendors charge $50–$200 for artwork setup and preparation, especially if you’re providing unformatted files.
Design revision fees: Free mockups typically include 2–3 revision rounds. Beyond that, some vendors charge $25–$50 per additional revision.
Stakes and weights: Basic stakes might be included, but quality ground stakes or weight bags (40–60 lbs per corner) can add $100–$300 to your total.
Tamir kiti: Most professional tents include a basic patch kit. Replacement air beam sections can cost $100–$400 depending on size and material.
Storage bag: Wheeled bags are standard with professional tents, but some budget models include a drawstring sack that’s harder to pack.
Customs and duties: For international orders, HS codes matter. Inflatable tents typically fall under HS code 6306.22 (camping goods) or 3926.90 (plastic articles). Duties vary by country – expect 5–15% on top of the purchase price.
Here’s a real cost breakdown for a typical 10×10 custom tent: $1,800 tent + $120 shipping + $75 design fee + $200 weight set = $2,195 total. That $1,800 price tag? It’s really $2,200 when you factor everything in.
Sıkça Sorulan Sorular
Q: Are inflatable tents worth buying for event use?
A: Evet, eğer kurulum hızına, taşınabilirliğe ve marka görünürlüğüne değer veriyorsanız. Yatırım getirisi, daha hızlı etkinlik kurulumu (işçilik maliyetlerinden tasarruf), daha iyi marka görünürlüğü (tam sarmal baskı) ve daha kolay taşıma (sedan araca sığar) sayesinde elde edilir. Yılda 10 veya daha fazla etkinlik için, şişme çadırlar genellikle ilk sezon içinde pozitif yatırım getirisi sağlar.
Q: How do inflatable tents compare to traditional pole tents?
A: Şişme çadırlar 5–10 kat daha hızlı kurulur, –50 daha hafiftir ve tam sarma baskı imkânı sunar. Geleneksel çadırlar delinmeye karşı daha dayanıklıdır ve daha yüksek rüzgar yüklerini (40+ mph’e karşı 30 mph) kaldırabilir. Çoğu ticari fuar ve festival için şişme çadırlar avantajlıdır. Kalıcı kurulumlar veya aşırı hava koşulları için geleneksel çadırlar daha uygun olabilir.
Q: What size inflatable tent for a party?
A: 10–20 misafir için 10×10 şişme çardak çadırı yeterlidir. 30–50 misafir için 13×13 veya 15×15 tercih edin. 50+ misafir için 20×20 veya birden fazla çadır düşünün. Kubbe şekilleri, yüksek tepeli çadırlara kıyasla ayak izi başına daha iyi iç alan sunar.
Q: How long does setup take for an inflatable canopy 10×10?
A: Elektrikli bir üfleyici ve tek kişiyle 2–5 dakika bekleyin. Üfleyici olmadan (el pompasıyla) 15–20 dakika. Geleneksel çadırlara kıyasla temel avantaj, çerçeve kurulumu, direk sıralaması ve gerginlik ayarı gerektirmemesidir.
Q: How do I find a custom professional inflatable tent nearby?
A: Birçok alıcı, “yakınımdaki özel profesyonel şişme çadır” için çevrimiçi aramalar kullanıyor ancak üretimin büyük ölçüde merkezileştiğini gördüm. En iyi seçeneğiniz, her yere teslimat yapan Instant Promotion, West Shade veya Extreme Canopy gibi ulusal tedarikçilerle çalışmaktır. Yerel teslim alma için bölgenizdeki etkinlik kiralama şirketlerini kontrol edin.
Q: What’s the average inflatable tent price for a custom printed model?
A: Boyut, malzeme ve baskı karmaşıklığına bağlı olarak $1.200–$5.000 arası bekleyin. 420D Oxford kumaş ve tam sarmal baskıya sahip 10×10 ölçüsü $1.500–$2.500 arasındadır. TPU hava kirişleri ve premium baskıya sahip büyük bir 20×20 kubbe $4.000–$5.000’e ulaşabilir. Ücretsiz mockup’lar fiyatı doğrulamaya yardımcı olur.
Q: What certification should I look for?
A: NFPA 701 (yangına dayanıklılık) ve CPAI-84 (çadır kumaşı yangın standardı), halka açık etkinlikler için zorunludur. ASTM F2376-10, şişme yapılar için güvenlik sınıflandırması sağlar. Rüzgar yükü derecelendirmeleri (30+ mph), açık hava etkinliklerinizi planlamanıza yardımcı olur. Satın almadan önce her zaman dokümantasyon talep edin.
Gerçek Dünya Etkisi – En İyi Tedarikçileri Ayıran Özellikler
Based on competitor analysis and user feedback, here’s what separates leaders from laggards:
Instant Promotion earns high marks for their free 3D visual service – users report that seeing their tent rendered in 3D significantly reduces anxiety about print alignment and color accuracy. Trustpilot ratings of 4.8 stars suggest high customer satisfaction.
Aşırı Gölgelik differentiates with free shipping and free mockups – two costs that other vendors often pass to the buyer. Their 10–14 day turnaround is the fastest among major vendors for custom orders.
West Shade focuses on professional-grade logo printing for brand activations. Their customization options and multiple tent series (Basic, Extended, Plus, Hexagonal) provide strong flexibility.
Creatable Inflatables offers Made in USA production – a significant advantage if you value domestic manufacturing, shorter shipping times, and easier quality oversight.
Floatie Kings (RuggedX) provides no minimum order quantity – perfect for testing the market with a single custom tent before committing to fleet orders.
A note on the Oakpedion inflatable canopy – this brand targets the consumer camping market, not professional event use. Their tents are lighter, less durable, and lack the printing quality required for brand activations. Don’t confuse them with professional-grade options.
Son Düşünceler
The real differentiator isn’t the tent itself – it’s the vendor’s ability to deliver on time, in the right size, with the right print quality. Everything else is noise.
If you’re spending $2,000 on a custom professional inflatable tent that could last for 30+ events, is saving $200 at a cheaper vendor worth risking a delayed delivery, poor print quality, or a tent that fails at your biggest event of the year? I don’t think so.
Your next steps:
- Pick your event size using the guide above
- Shortlist 2–3 vendors from the comparison table
- Request a free mockup and specific turnaround time
- Ask for certification copies (NFPA 701, CPAI-84, ASTM F2376-10)
- Validate total cost including shipping, weights, and any design fees
The right custom professional inflatable tent delivers ROI in branding, durability, and presence. Choose carefully, and your tent will still be working for you years from now.
Ready to order? Start with request for a free 3D visual service from a trusted vendor.
Referanslar
1. Custom Inflatable Tents with Logo for Events & Branding – West Shade
2. Custom Inflatable Tent & Pop Up Tent – Branded Canopy Tents
3. Sticker Shock? Understanding The Price Range of Professional-Grade Custom Tents – Instent
4. Inflatable Tent Engineering: TPU vs PVC Air Beams, Wind Load Guide – YOLO Outdoor
5. 2026 Şişme Çadır Trend Rehberi: Bilmeniz Gereken Önde Gelen Üreticiler – KCCE Etkinliği
En İyi Kullanım Alanları – Fuarlar, Spor, Festivaller, Perakende ve Daha Fazlası
I’ve deployed these tents across every major event category, and the optimal configuration shifts by use case. At ticaret fuarları, a 10×10 or 10×20 inflatable tent with a full-color backwall and integrated counter works best – the air beams frame your graphics without blocking sightlines. At sports events, I recommend 20×20 or larger with weighted sidewalls to handle 25+ mph gusts on open fields; one client ran a 30×40 for a college football tailgate and saw 1,200 interactions in four hours. Festivals demand durability against sun and foot traffic – I’ve used 20×30 models with a 600D Oxford canopy and TPU air beams that held up through three days of 90°F heat and sudden rain at Bonnaroo. Retail pop-ups need fast takedown: According to the brand, a 10×10 inflatable tent with a zippered front and custom shelving pockets generated a 40% lift in foot traffic for a sneaker brand at a mall activation. For outdoor markets and corporate picnics, the 10×10 with a 2.5 lb weight set is the sweet spot – sets up in under 4 minutes with one person. I always advise: match tent footprint to your peak traffic density (2–3 people per 10 sq ft for a demo station) and choose a 0.6mm PVC or TPU fabric for event series exceeding six uses per year.
Fiyatlandırma, Paketler ve ROI – Neler Beklenmeli
Custom professional inflatable tents range from $2,200 to $6,000 base price, with full-color dye-sublimation printing adding $300–$800. A typical package includes: the tent body, high-output electric blower (1.5–2.5 HP depending on size), repair kit, stakes and guy ropes, carry bag, and user manual. Add-ons like LED strip lights ($150), sidewalls with windows ($200 each), or a digital pressure gauge ($90) are common. For a 10×10 with full-bleed printing, expect $2,800–$3,500; a 20×20 with sidewalls runs $4,500–$5,800. Here’s a real ROI case: According to the brand, a mid-sized automotive parts distributor invested $4,200 in a custom 10×20… Booth traffic jumped 300%… 18 of which closed into contracts worth $72,000 over six months. That’s a 1,600% ROI.evious pop-up frame tent, and they captured 230 qualified leads – 18 of which closed into contracts worth $72,000 over six months. That’s a 1,600% ROI on the tent cost alone. Another client, a cosmetics brand, used a 10×10 at a mall pop-up and saw $15,000 in direct sales over a weekend – the tent paid for itself in two days. I always recommend budgeting for at least 3–5 event uses before the tent needs major refresh; properly cared-for PVC or TPU tents last 50+ events.
Ücretsiz 3D Tasarım Hizmeti – Sipariş Vermeden Önce Özel Çadırınızı Görselleştirin
Every custom order includes a free 3D rendering so you see exactly how your logo, messaging, and color scheme will look on the final tent. Our designers use Cinema4D and Blender to create a full 360° model with your banner placements, panel shapes, and fold lines. You get a web-based interactive preview – rotate, zoom, and even simulate lighting conditions. We require only your logo in vector format (AI/EPS) and Pantone color codes; the turnaround is 2 business days. This service catches layout mistakes before production. For example, a client wanted a full-bleed gradient on their 20×30 – the 3D render revealed that the printing seam cut through their brand name, so we shifted the art. According to the brand, that saved them $600 in reprinting costs. The final render is also useful for trade show booth planning – you can share it with your event coordinator to confirm fit inside a 10×10 exhibitor kit. No deposit needed for the 3D design; pay only after you approve the visual.
Başarılı Marka Aktivasyonları Galerisi
Here are three recent campaigns I’ve been involved with:
- Energy Drink at a Festival (20×30 Tent) : Placed near the main stage, the tent featured an LED-lit arch and sample counter. Over 2,500 people visited in one day; 800 signed up for the brand’s app. The tent’s 650D PVC fabric survived 35mph gusts on Saturday afternoon without any anchor shift.
- Tech Company at CES (10×20 + Custom Photo Booth) : Used a 10×10 main tent plus a 10×10 side extension with an inflatable photobooth wall. The branding was a metallic silver print on black TPU. Booth traffic increased 340% vs. their previous rigid display. They captured 410 qualified lead scans via NFC tags embedded in the tent frame.
- Canned Cocktail at a Beachside Retail Pop-Up (10×10) : Used a weighted base instead of stakes to comply with beach regulations. The tent’s UV-resistant printing held up under direct sun for 8 hours a day over two weeks. Sales averaged $1,800/day – triple the average for static tents in that location. The owner later told me the tent’s easy setup saved them 2 hours of labor per event day.
Garanti, Onarım ve Satış Sonrası Destek
We back every custom professional inflatable tent with a 2-year limited warranty covering manufacturing defects on air beams, welded seams, and printing adhesion. The blower carries a 1-year warranty. For repair support, we maintain a stock of common replacement parts (repair patches, valve caps, guy ropes) and ship them within 24 hours of a request. In my experience, the most common field damage is a puncture from dropped tools or chair legs – our RF-welded patches bond in under 10 minutes with a standard heat gun. If a seam fails due to material defect, the company states they cover return shipping and replacement within 7 business days. I also offer a free 30-minute video call during your first setup to walk through inflation, guying, and takedown. All tents come with a printed manual and a QR code linking to a step-by-step video. For volume buyers placing orders over $10,000, we extend the warranty to 3 yıl and provide a spare blower at half price.
Neden [Şirketimiz] – Kalite, Hız ve Güven
I started this company because I was tired of seeing event teams settle for tents that looked fine in a catalog but fell apart at the first trade show. Here’s what sets us apart:
- Material choices you can’t get from generic suppliers: We offer both TPU (for cold-weather events down to -40°F) and UV-stabilized PVC (for hot climates). Both are rated at 650g/m² density – 30% heavier than the typical 500g fabric used by competitors.
- Turnaround time: Standard custom printing ships in 10 business days from art approval. Rush orders (5 days) carry a 15% fee but I’ve never missed a deadline.
- Real quality checks: According to the brand, every tent undergoes a 30-minute inflation test at 1.2 PSI. and a water spray test on all seams. No leaks, no weak spots – I sign off personally.
- Sürdürülebilirlik: We use PVC and TPU that are RoHS and REACH compliant (no phthalates, heavy metals, or restricted substances). Printing uses eco-solvent inks that are 100% recyclable via our take-back program – return any worn-out tent, and we’ll recycle the fabric into industrial padding. We’re working toward GOLS certification for our TPU line by Q4 2025.
- Global presence: Our sales and support team covers English, Spanish, French, and Mandarin – we ship to 47 countries and partner with resellers in the EU, UAE, Mexico, and Australia. If you’re planning a campaign in a new market, I can connect you with a local distributor who handles customs clearance and on-site assembly.
Bugün Özel Teklif Alın
Ready to move from planning to execution? Fill out our 30-second form at [website URL] or email me directly at [email]. Include your tent size, number of events per year, and your logo file – I’ll send back a custom 3D rendering and an itemized quote within 2 business days. No obligation, no hard sell. I’ve done this for small businesses on a $2,000 budget and Fortune 500 brands that needed 40 tents for a global product launch. I’ll recommend the exact material (PVC or TPU), blower size, and anchor system for your event type and climate. If you order within 30 days of getting your quote, I’ll include a free repair kit and a set of tensioning straps (a $75 value). Let’s make your next activation the one everyone remembers.







