

Anyone who’s organized events for a living knows the drill. You need a tent that doesn’t look like every other white box on the field, you need it to go up fast, and you need a vendor who actually answers the phone when something goes sideways. But here’s the problem: every time you search for a “custom professional inflatable tent,” you hit a wall of “contact us for pricing” forms and vague promises about “quick setup” and “durable materials.”
I’ve been in this industry long enough to remember when inflatable tents were the weird cousin of the event world—novelty items that looked cool but leaked air and flapped in the wind. Those days are over. The technology has matured, and the market data backs it up. A recent global market analysis of custom inflatables—covering advertising inflatables, inflatable tents, play structures, and furniture—shows the sector segmented by material type (PVC, nylon, Oxford cloth) and application (events, sports, advertising, amusement parks), with forecasts running through 2034. Translation: this isn’t a fad. It’s a legitimate infrastructure category.
But here’s the thing—most buyers still get burned because they don’t know what questions to ask. So let’s fix that. This guide covers real price ranges, honest specs, material comparisons, and a vendor checklist that’ll save you from making an expensive mistake.
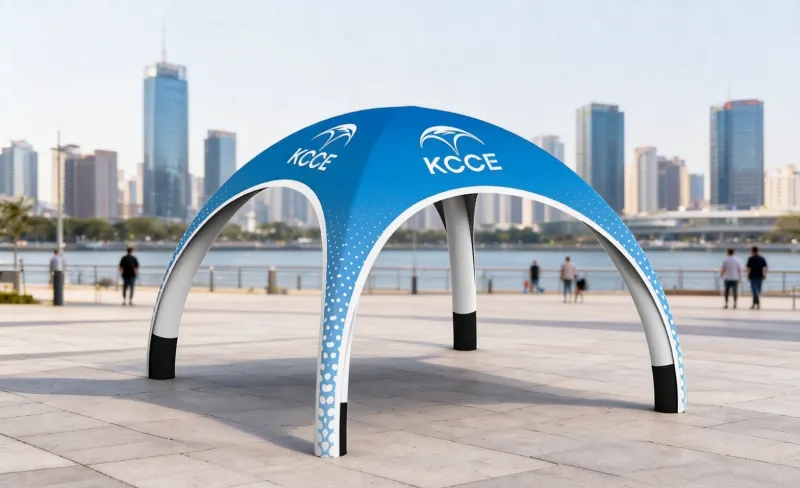
Why Inflatable Beats Frame & Pop-Up Tents
Let’s start with the obvious question: why bother with an inflatable canopy tent at all? If you’ve only used traditional frame tents or pop-up canopies, the skepticism is fair. I’ve seen event managers roll their eyes at the idea of “air tents” only to become converts after their first setup.
The math is actually pretty simple. A standard 10×10 pop-up canopy takes two people and about 15 minutes to wrestle into place—if the poles don’t fight you. A frame tent with center poles? You’re looking at 30-45 minutes minimum., and those center poles are a constant tripping hazard and a nightmare for layout. A custom inflatable tent, by contrast, goes from bag to fully standing in about 3-5 minutes with a blower. One person can do it. No poles to lose, no hinges to break, no center pole wrecking your floor plan.
Portability is where inflatables really shine. A 10×10 inflatable canopy unit packs down into a bag that fits in the back of a standard SUV. Compare that to a frame tent of the same size, which usually needs a trailer or a roof rack. For event planners who move between venues multiple times a week, that storage footprint difference alone justifies the switch.
Then there’s the branding surface. This is the part that gets marketing directors excited. A frame tent has poles and crossbars that interrupt your printed graphics. A pop-up has that awkward peaked roof that distorts your logo. An inflatable tent—especially the air beam style—gives you uninterrupted, tensioned fabric that holds dye-sublimation printing beautifully. Your brand becomes the tent, not a logo pinned onto a tent.
And let’s talk cost-per-event. Yes, the upfront price of a custom inflatable tent is higher than a basic pop-up. But when you amortize it across 50-100 events over a 3-5 year lifespan, the cost per use drops dramatically. Plus, the instant setup feature means you’re paying less labor per event. That adds up fast.
What to Look For in a Custom Professional Inflatable Tent
Now we get into the weeds. Here’s where most buyers make their biggest mistakes—they focus on the printed logo and completely ignore the engineering underneath it.
Material matters more than anything else. The inflatable tent material determines durability, weight, and longevity. PVC is the industry standard for commercial-grade inflatables—it’s tough, waterproof, and holds air well. But not all PVC is created equal. You’re looking at different thicknesses, usually measured in ounces per square yard or grams per square meter. A heavier fabric (think 18 oz or higher) will resist punctures and handle wind better., but it’s also heavier to transport. Nylon and Oxford cloth are lighter options, but they’re typically used for consumer-grade or camping inflatables, not commercial event tents that need to survive repeated use.
The market research on custom inflatables I mentioned earlier breaks materials down into PVC, nylon, and Oxford cloth—and for good reason. Each has its place. For a custom professional inflatable tent that’s going to be used for trade shows, sports events, or commercial advertising, PVC is almost always the right call.
Blower specs are the hidden gotcha. The blower is the heart of your inflatable tent. Look for specs in PSI (pressure) and CFM (airflow). Most commercial inflatable tents need a continuous-duty blower that runs quietly and doesn’t overheat during an 8-hour event day. Here’s a question most buyers forget to ask: is the blower included in the quoted price or sold separately? I’ve seen quotes that look great until you realize the blower is another $200-400. Always clarify this upfront.
Backup blower options matter more than you think. If you’re running a multi-day event, a blower failure on day two is a disaster. Some manufacturers offer dual-blower systems or quick-connect backup options. The added cost is worth it for mission-critical events. And check the noise level—a blower that sounds like a lawnmower will ruin a wedding ceremony or a corporate presentation.
UV resistance is non-negotiable. If your tent will see any outdoor sun, you need fabric with UV inhibitors. Without them, colors fade, fabric degrades, and your investment looks tired after just a few months. Ask about UV ratings and whether the printing process affects the fabric’s UV stability.
Custom Professional Inflatable Tent Pricing: Real Ranges
Alright, let’s talk money—because this is where the “contact us for a quote” games really frustrate people. I’m going to give you honest, ballpark ranges based on what I’ve seen in the market. Keep in mind these are starting points, not final quotes—custom printing, accessories, and shipping all move the needle.
For a 10×10 custom inflatable tent with single-color logo printing and a blower included, expect to pay roughly $800 to $1,500. This is the entry-level sweet spot for small businesses, weekend vendors, and local events. If you want full-wrap dye-sublimation printing with multiple colors and complex artwork, budget closer to $1,800-$2,500.
A 10×20 custom inflatable tent—a popular size for trade show booths and larger vendor spaces—typically runs $1,500 to $3,000 with basic printing. Add full-color branding and you’re looking at $3,000-$4,500. The price jump isn’t linear because the printing surface area increases significantly.
For a 20×20 custom inflatable tent—the kind you’d use for a major sports event activation or a large commercial advertising display—you’re in the $4,000 to $8,000 range. At this size, material grade, blower capacity, and anchoring requirements all escalate.
Now, what drives the inflatable tent cost up? Breaking it down:
- Printing complexity: Dye-sublimation (full-color, edge-to-edge) costs more than screen printing (limited colors, simpler designs). More colors = more cost.
- Blower quality: A commercial-grade continuous-duty blower adds cost but saves headaches.
- Aksesuarlar: Anchoring kits, repair kits, carrying bags, spare blowers—these add up quickly.
- Shipping: This is the sneaky one. Inflatable tents ship in large, heavy boxes. Freight costs can add $200-$500 depending on size and distance. Get a delivered price, not an ex-works price.
One thing I’ll say about pricing: if a quote seems too good to be true, it is. I’ve seen cheap inflatable tents fail on their third use—seams splitting, fabric delaminating, blowers dying mid-event. The “cheap” option ends up costing more in replacement and lost credibility. That said, you also don’t need to pay premium prices for a basic tent. Competition among custom inflatable tent manufacturers has driven prices down in recent years, which is good news for buyers who do their homework.
Printing & Branding Options Explained
This is where your custom professional inflatable tent becomes a marketing asset rather than just a shelter. But printing on inflatable fabric isn’t the same as printing on a t-shirt or a banner. You need to understand your options.
Dye-sublimation is the gold standard for inflatable tent printing. The process involves printing your design onto transfer paper, then using heat to infuse the dye into the fabric itself. The result is vibrant, edge-to-edge color that won’t crack, peel, or fade easily. It’s perfect for complex logos, gradients, and photographic images. The downside? It’s the most expensive option, and it works best on white or light-colored fabric.
Screen printing is the budget-friendly alternative. It’s great for simple designs with limited colors—think a logo with 2-3 colors on a solid background. Screen printing sits on top of the fabric rather than infusing into it, so it’s more prone to cracking over time, especially if the tent is folded and unfolded frequently. For a tent that sees heavy use, I’d steer you toward dye-sub even if it costs more.
Vinyl graphics are the quick-fix option. These are essentially large stickers applied to the tent surface. They’re fast to produce and can be replaced if damaged, but they don’t look as premium as dye-sub, and they can peel at the edges over time. They’re a decent choice for temporary branding or if you need to change graphics frequently.
Here’s what the pros won’t tell you: artwork file specs matter. Most manufacturers want vector files (AI, EPS, PDF) with fonts converted to outlines. If you’re working from a JPEG or PNG, expect the manufacturer to charge for vectorization or to warn you about quality loss. Ask about color matching—most reputable manufacturers use Pantone color matching to ensure your brand colors come out right. And set expectations on durability: a well-printed dye-sub tent should maintain its color for years with proper care, but no print is immortal. Sun exposure and repeated folding will eventually take their toll.
If you’re exploring options, it’s worth checking out KCCE’s inflatable tent lineup to see how different printing methods look on actual products. Seeing dye-sub printing on a full-size tent beats any catalog photo.
Setup, Anchoring & Wind Resistance
You might be wondering: are inflatable canopy tents wind resistant? The honest answer is yes—if they’re properly anchored. The not-so-honest answer is what you’ll hear from vendors who claim their tents are “wind-proof.” Nothing is wind-proof. But a well-designed inflatable tent with proper anchoring can handle conditions that would destroy a standard pop-up canopy.
The physics work in your favor. An inflatable air beam structure distributes wind load across the entire frame rather than concentrating it at pole joints. When the wind hits, the tent flexes slightly and absorbs the energy instead of snapping. That’s why you see inflatable tents at beach events and outdoor sports venues where traditional tents would be blown over.
But here’s the catch: anchoring is everything. An inflatable tent without proper anchoring is just a big sail waiting to launch. Your anchoring strategy depends on the surface:
Çim: Steel stakes driven at an angle through the anchor loops. For a 10×10 tent, you’ll typically use 8-12 stakes. Make sure they’re long enough—8-12 inches is common—and check them periodically during long events.
Concrete or asphalt: This is where you need weights. Sandbags, water barrels, or concrete blocks—typically 25-50 pounds per anchor point for a 10×10 tent. Some event venues require specific weight ratings, so check with the venue before you arrive.
Sand: Sandbags or sand anchors. The key is burying the anchor deep enough that the sand holds. I’ve seen tents take off at beach events because someone just laid the sandbag on top of the sand instead of burying it.
Mixed surfaces: For trade shows on concrete floors, you’ll often use a combination of weights and ratchet straps to secure the tent to fixed structures.
Setup time varies, but here’s a realistic breakdown. For a 10×10 inflatable tent: unroll the tent, connect the blower, turn it on, and you’ll have a standing structure in a few minutes. Add another 5-10 minutes for anchoring and you’re looking at roughly 15 minutes total with one person. Takedown is faster—deflate, fold, bag it. The whole process is 10-15 minutes.
How long does an inflatable tent take to set up? If your vendor says “fast” without giving you a number, push for specifics. Any reputable manufacturer should be able to tell you exactly how many minutes from bag to standing structure.
One thing that surprises first-time buyers: inflatable tents don’t need to be 100% rigid. The air beams should feel firm but have a slight give. Over-inflating doesn’t make the tent stronger—it just stresses the seams. Follow the manufacturer’s PSI recommendations.
Lead Times, Warranty & Ordering Process
So you’ve decided to buy a custom inflatable tent. What’s the actual process, and how long will it take? This is where a lot of event planners get caught off guard.
The timeline starts after artwork approval. Not after you place the order—after you approve the final proof. Here’s a realistic breakdown:
- Design and proofing: 3-7 business days. The manufacturer creates a digital mockup of your tent with your artwork. Some offer free 3D mockups or design previews—take advantage of these. They’re much better than flat drawings for spotting layout issues.
- Production: 2-4 weeks is typical for custom inflatable tents. Rush orders are sometimes available for an extra fee, but don’t count on it during peak season (spring through fall).
- Shipping: 3-10 business days depending on origin and destination. International shipping can take longer.
Deposit requirements: Most manufacturers require a 50% deposit to start production, with the balance due before shipment. Some offer net-30 terms for established businesses, but that’s not the norm for custom products.
Warranty considerations: This is a question too few buyers ask. What happens if a seam splits during your first event? A good warranty covers manufacturing defects in the fabric and seams for 1-3 years. Blowers typically have separate warranties. Ask about repair policies—some manufacturers offer repair services for the life of the tent, which is valuable since air beams can be repaired or replaced.
The ordering process step-by-step:
- Get quotes from 2-3 custom inflatable tent manufacturers. Compare apples to apples—make sure blowers, anchoring kits, and shipping are included or clearly itemized.
- Request samples or visit a showroom if possible. Fabric quality and print quality are hard to judge from photos.
- Review the digital proof carefully. Check logo placement, color accuracy, and text spelling.
- Approve the proof in writing. Verbal approvals cause problems.
- Track production and request photos or video of your tent before shipping.
- Inspect the tent immediately upon delivery. Report any damage or defects right away.
One more thing about the buying process: ask about minimum order quantities. Some manufacturers require a minimum quantity for custom printing, while others offer no minimum order quantity for a single tent. If you’re a small business or a first-time buyer, the no-MOQ option is a lifesaver.
If you’re comparing manufacturers, I’d point you toward Dongguan Kaicheng Dış Mekan Ürünleri, who have been producing inflatable solutions for years and understand the difference between consumer-grade and commercial-grade products. Their experience shows in the details—seam construction, valve quality, and blower selection.
Sıkça Sorulan Sorular
S: Özel şişme çadırları nerede bulabilirim?
A: You have two main options: direct from a custom inflatable tent manufacturer or through a specialty event supply retailer. Manufacturers like the ones featured in this guide (WestShade, NastoCamp, Branded Canopy Tents) offer the best pricing and most customization options. Retailers can be convenient but often add a markup. Start by requesting quotes from 2-3 manufacturers directly—you’ll get better pricing and more control over the customization process.
S: En iyi şişme çadırları kim yapar?
A: “Best” depends on your use case, but look for manufacturers with proven track records in commercial-grade products. WestShade has a strong reputation for custom inflatable tents for events and branding. NastoCamp has published case studies showing their OEM process from prototype to mass production. Branded Canopy Tents offers extensive customization with a free design service. Check reviews, ask for client references, and request samples before committing.
Q: How much does a custom pop-up tent cost?
A: A custom inflatable tent typically ranges from $800 to $2,500 for a 10×10 size, depending on printing complexity, material grade, and whether the blower is included. Larger sizes like 10×20 run $1,500-$4,500, and 20×20 tents can reach $4,000-$8,000. Always ask for a delivered price that includes the blower, anchoring kit, and shipping—these add-ons can increase the base price by 20-30%.
Q: What are the downsides of inflatable tents?
A: The main downsides are upfront cost (higher than standard pop-ups), reliance on a blower (you need power or a battery backup), and the learning curve for proper anchoring. Some users report air sag over time as fabric stretches, and repairs require patching or seam work. That said, for repeated use and professional branding, the benefits usually outweigh these drawbacks. Just budget for a quality blower and learn proper anchoring techniques.
Referanslar
- Custom Inflatable Tents with Logo for Events & Branding – WestShade
- Custom Inflatable Tent Manufacturer Case Study – NastoCamp
- Custom Inflatable Tent & Pop Up Tent – Branded Canopy Tents
- Custom Inflatables Market Research Report 2033 – Dataintelo
There’s one more thing worth saying before you start reaching out to vendors. The market for custom inflatable tents has grown because they solve real problems—setup speed, branding impact, and portability. But the quality range is wide, and the difference between a $900 tent and a $2,000 tent isn’t just the logo. It’s the fabric weight, the seam construction, the blower reliability, and the manufacturer’s willingness to stand behind their product.
I’ve seen event planners save thousands by asking the right questions upfront. I’ve also seen them waste money on cheap tents that failed at the worst possible moment. The difference was always preparation.
So here’s my challenge to you: before you request your next quote, make a checklist. Ask about material weight, blower specs, warranty terms, anchoring requirements, and delivery costs. Ask for a digital proof before you pay a deposit. And if a vendor can’t answer these questions clearly, that’s your answer.
If you’re ready to explore options, take a look at KCCE’s range of inflatable products—from event tents to inflatable furniture and custom shapes—to see what fits your next activation. And if you want to dig deeper into how inflatable tents are engineered, the story behind KCCE’s founder offers a behind-the-scenes look at what goes into designing these structures.
The right custom professional inflatable tent will serve you for years. The wrong one will cost you more than money. Choose carefully, ask everything, and don’t settle for vague answers. Your next event deserves better than a “contact us” form.
Introduction: Why Choose a Custom Professional Inflatable Tent?
If you’re reading this, you’ve probably already weighed the obvious benefits—fast setup, killer branding, and that “wow” factor that frame tents just can’t deliver. But there’s a deeper reason to go custom: off-the-shelf inflatables are built for the masses, not for your specific event footprint, your climate, or your brand identity. A custom unit means the dimensions match your booth space exactly, the wind ratings are engineered for your region, and the graphics are printed edge-to-edge with your campaign messaging, not a stock logo.
I’ve seen event managers burn budget on rental tents year after year without realizing that a custom inflatable pays for itself by the tenth event. And when you’re the one standing in the rain at 6 AM watching a crew struggle with poles, the appeal of an inflatable that goes from bag to standing in minutes becomes very, very personal. This guide exists because I’ve made those mistakes, talked to dozens of manufacturers, and learned exactly what separates a tent that lasts five years from one that fails at its first trade show.
Özel Profesyonel Şişme Çadır Nedir?
A custom professional inflatable tent is a structure that uses air pressure to maintain its shape, rather than rigid poles or a metal frame. It consists of three core components: the inflatable air beams (also called air columns or pillars), a fabric canopy or shell that connects them, and a continuous-duty blower that maintains internal pressure.
Here’s the part that confuses first-time buyers: the air beams are not like pool floaties that you fill once and seal. They’re open at the base, and the blower runs continuously to keep them pressurized. This is a safety feature—if a beam gets punctured, the tent doesn’t collapse instantly because the blower is constantly compensating. That’s why a 10×10 inflatable tent uses roughly 1.5 cubic meters of air per minute (about 50 CFM) from a blower rated at 0.5–1 HP, and why the fabric is welded or RF-sealed at the seams rather than stitched.
The key components include: the PVC or TPU-coated fabric (typically 0.55–0.9 mm thick for commercial use), the air valves and pressure relief systems, internal baffles that prevent air from rushing between beams, and a skirt or anchoring system at the base. A professional-grade tent also includes a backup blower port—if your primary blower dies, you can plug in a spare without deflating the structure.
Key Advantages of Inflatable Tents vs. Traditional Frame Tents
I’ve covered the setup speed and branding advantages earlier, but let’s get into the engineering specifics that matter for professional buyers.
Load distribution: A frame tent concentrates stress at the joints where poles meet. Over time, those joints fatigue, especially in wind. An inflatable beam distributes stress evenly across the entire fabric surface, which is why a properly engineered inflatable can handle wind loads comparable to a frame tent of the same size—typically up to 80–100 km/h (50–62 mph) when properly anchored, depending on the design and fabric weight.
Transportation volume: A 10×10 frame tent packs down to a bundle roughly 2.4 meters long and weighs 45–60 kg. The equivalent inflatable packs into a duffel bag that’s 1.2 meters long and weighs 25–35 kg. For a team moving between venues, that’s the difference between fitting everything in a cargo van versus needing a box truck.
Safety in crowds: There are no rigid poles to walk into, no sharp corners at eye level, and if someone trips into the side wall, the fabric gives a little instead of causing injury. This is a real consideration for high-traffic events, and it’s one reason inflatables are increasingly common in schools, festivals, and public spaces.
Failure mode: A frame tent in high wind can become a projectile if the anchoring fails. An inflatable tent, even with a blower failure, will slowly sag and collapse in a controlled manner. That’s a meaningful safety advantage for event insurance, and it’s why many outdoor venues now prefer inflatables for temporary structures.
Materials & Durability: PVC vs. TPU – Which Is Right for You?
This is the most common question I get, and the answer isn’t one-size-fits-all. Here’s the honest breakdown.
PVC (Polivinil Klorür) is the industry workhorse. Commercial-grade inflatable PVC is typically 0.55–0.9 mm thick, with a tensile strength of about 3,000–4,500 N/5cm (measured per ISO 1421). It’s coated on both sides to resist UV degradation, and it’s welded using high-frequency radio frequency (RF) welding, which creates a bond stronger than the base material. The downsides: PVC is heavier (about 900–1,200 g/m² for 0.7 mm fabric), and it has a chemical smell, especially when new. It’s also less flexible in extreme cold—below -10°C (14°F), it becomes stiff and can crack if folded too aggressively.
TPU (Termoplastik Poliüretan) is the premium option. It’s roughly 30–40% lighter than PVC at the same thickness, has no plasticizer migration (so no sticky residue over time), and remains flexible down to -30°C (-22°F). Tensile strength is comparable, typically 4,000–6,000 N/5cm. The catch: TPU costs 20–40% more per square meter, and it’s harder to source for custom printing because not all fabric houses handle it. For most event applications, TPU is overkill unless you’re operating in extreme cold or need the absolute lightest pack weight.
Which should you choose? If you’re in a moderate climate, doing standard trade shows and outdoor events, and you want the best cost-to-durability ratio: go with 0.6–0.7 mm PVC. If you’re doing alpine events, arctic marketing activations, or you need to pack the tent on an airplane as checked baggage (where weight matters): go with TPU. For rental fleets that will see 100+ events: thicker PVC (0.7–0.9 mm) is the industry standard for a reason—it’s easier to repair with patch kits, and replacement parts are widely available.
Customization Options: Sizes, Shapes, Colors, and Branding
The “custom” in custom inflatable tent covers more than just printing your logo on a standard shape. Here’s what you can actually specify.
Sizes: Most manufacturers work in modular footprints. Common sizes include 3x3m, 3x6m, 4x4m, 5x5m, 6x6m, 10x10m, and custom dimensions in 0.5m increments. For trade shows, the 3x3m is the standard booth size; for events, 6x6m is the sweet spot for a lounge or registration area. The engineering constraint is the air beam diameter—larger spans need thicker beams (typically 40–60 cm diameter for spans over 8 meters).
Shapes: Beyond rectangles, you can get geodesic domes (great for wind resistance), tunnel tents (for entryways), pagoda style (for that Asian-inspired aesthetic), and fully custom shapes like product replicas—I’ve seen inflatable soda cans, cars, and even a 12-meter inflatable sneaker used as a photo booth. The rule of thumb: the more complex the shape, the longer the lead time (6–10 weeks for a fully custom shape vs. 3–4 weeks for a standard rectangle with custom printing).
Colors and printing: Dye-sublimation printing is the standard for inflatable graphics. It allows full-color, edge-to-edge printing with a resolution of 720–1440 DPI., meaning your logo won’t pixelate even on close inspection. For backlit applications (where you put lights inside the tent), you’ll want a thinner, semi-translucent fabric—usually 0.4–0.5 mm PVC—to let light through. For outdoor day-time events, a thicker opaque fabric with white inner coating is better for heat reflection.
Safety Standards & Certifications: ASTM F2848, CE, REACH, and More
This is where most buyers get lost, and honestly, it’s where some manufacturers cut corners. Here’s what you need to know.
ASTM F2848 is the primary US safety standard specifically for inflatable amusement devices, and it covers tents used in public spaces. It addresses anchoring requirements, wind speed ratings, fabric strength, and seam integrity. A compliant tent will have a label stating its maximum wind speed and required anchoring configuration. If a manufacturer says “ASTM compliant” but can’t show you the test report, walk away.
CE marking (Conformité Européenne) is required for inflatable tents sold in the European Union. It indicates compliance with the General Product Safety Directive (GPSD) and relevant harmonized standards. For inflatables, this typically means EN 14960 (inflatable play equipment) or the more general EN ISO 8124 for toy safety if it’s classified as a toy. For commercial tents, CE marking is often accompanied by a Declaration of Conformity from the manufacturer.
REACH (Registration, Evaluation, Authorisation and Restriction of Chemicals) is the EU regulation that restricts hazardous substances. For PVC inflatables, the key concern is phthalates—plasticizers used to soften PVC. REACH restricts certain phthalates (like DEHP, DBP, BBP) to 0.1% by weight. A compliant manufacturer will provide a REACH test report showing phthalate levels. RoHS (Restriction of Hazardous Substances) is less relevant for fabric but matters if your tent includes LED lighting or electronic components.
Other certifications to ask for: CPSIA (Consumer Product Safety Improvement Act) for US market children’s products, CA Prop 65 for California, and fire retardancy certifications like NFPA 701 (US) or EN 13501-1 (EU). Fire retardancy is non-negotiable for indoor events—most venues require a Class A fire rating. Ask for the actual test certificate, not just a verbal claim.
Weather Resistance: Wind Speed Ratings, Waterproofing, and UV Stability
Let’s get real about what these tents can handle, because the marketing materials will say “wind-resistant” without telling you the actual number.
Wind speed ratings: A properly engineered and anchored inflatable tent is rated for a specific wind speed. Industry standard for commercial inflatables is 60–80 km/h (37–50 mph) with proper anchoring (stakes or ballast). High-end models with aerodynamic shapes (domes, tunnels) and heavier fabrics can be rated for 100 km/h (62 mph). The critical factor is anchoring—I’ve seen a well-rated tent fail because the event crew used 6-inch stakes on soft grass instead of the required 18-inch stakes or sandbags. The ASTM F2848 standard requires the manufacturer to specify anchoring requirements, and the tent must pass a wind load test at 1.5 times its rated speed.
Su Geçirmezlik: The fabric itself is waterproof (PVC and TPU are inherently impermeable), but the seams are the weak point. RF-welded seams are fully waterproof; stitched seams are not unless they’re tape-sealed. Every reputable manufacturer uses RF welding for primary seams. The floor of the tent is usually a separate, heavier fabric (often 0.9 mm PVC) that’s welded to the walls. For heavy rain, you’ll also want a rainfly or a slight peak to the roof so water runs off rather than pooling.
UV stability: This is where PVC has a real weakness. Over time, UV exposure causes plasticizers to migrate to the surface, making the fabric stiff and brittle. A good PVC fabric will have UV inhibitors in both the top and base coats. Expect a lifespan of 3–5 years for a tent that’s used outdoors regularly in a sunny climate; 5–7 years if it’s mostly used indoors or in cooler climates. TPU is naturally more UV-resistant and can last 7–10 years. There’s no way around the math: UV degradation is the #1 reason inflatable tents get retired, so factor that into your ROI calculation.
How to Set Up and Maintain Your Inflatable Tent (Step-by-Step Guide)
Here’s the exact process I’ve refined over dozens of setups.
Setup:
- Site prep (2 minutes): Clear the area of debris, sharp objects, and check for overhead obstacles. Lay out the tent bag downwind of where you want the entrance to face.
- Unpack and position (2 minutes): Remove the tent from the bag, unfold it, and orient it so the entrance faces the desired direction. Do NOT drag the tent across rough ground—this is the #1 cause of premature fabric wear.
- Connect the blower (1 minute): Attach the blower duct to the air inlet valve, secure it with the strap or clamp, and plug in the blower. Most commercial blowers are 110V or 220V, rated at 0.5–1.5 HP, drawing 5–12 amps.
- Inflate (2–4 minutes): Turn on the blower. The tent will go from flat to fully standing in 3–5 minutes. Do NOT walk away during inflation—you need to guide the beams as they rise to prevent them from catching on each other.
- Anchor (3 minutes): Once fully inflated, immediately anchor the tent. Use the stake loops on the skirt with 12–18 inch stakes for soft ground, or use 20–40 kg sandbags on hard surfaces (asphalt, concrete). For windy conditions, use both. The rule: anchor every 2 meters along the perimeter, plus all corner points.
- Pressure check (1 minute): The blower should maintain internal pressure at roughly 0.3–0.5 psi (2–3.5 kPa). A properly inflated beam should feel firm to the touch but have a slight give when pressed. If it feels rock hard, the pressure relief valve may be blocked; if it feels soft, check for leaks or a blocked air inlet.
Bakım:
- After each use: Wipe down with a damp cloth to remove dirt. Never use harsh solvents or high-pressure washers—they degrade the fabric coating.
- Monthly: Check all seams for wear, especially at stress points (corners, valve attachments). Inspect the air valves for debris.
- Quarterly: Test the blower for proper airflow. Clean the blower intake filter (most have a washable foam filter).
- Yıllık: Apply a UV protectant spray specifically designed for PVC (like Star Brite or 303 Aerospace Protectant) if the tent is used outdoors regularly.
- Depolama: Fold the tent loosely (do not crease the same line repeatedly) and store in a cool, dry place. Never store it wet—mold can develop on the fabric surface.
Power Requirements: Blower Specifications, Energy Consumption, and Backup Systems
This is a practical detail that trips up more event planners than you’d think—especially at venues where power distribution is limited.
Blower specifications: For a 10x10m tent, you’ll typically need a 1 HP blower rated at 220V/110V, drawing about 8–12 amps. Smaller tents (3x3m) can run on a 0.5 HP blower at 5–6 amps. The blower must be continuous-duty rated, meaning it’s designed to run without interruption for the entire event. Look for blowers with a thermal overload protector so they don’t burn out if the intake gets blocked.
Energy consumption: A 1 HP blower running on 110V draws roughly 750–900 watts. At an average commercial electricity rate of $0.15–0.25/kWh, that’s about $0.11–0.23 per hour. For a 10-hour event, you’re looking at $1.10–2.30 in electricity. Not a big line item, but worth knowing if you’re doing a 3-day festival with 6 tents—that’s $20–40 just to keep them inflated.
Backup systems: The single most important upgrade you can buy is a backup blower. A spare blower costs $200–400., and it can save your event if the primary fails. Most professional tents come with a dual-inlet valve system, so you can plug in a second blower without deflating. Also consider a battery backup unit (like a portable power station rated at 1,000W or more) for venues with unreliable power. Some manufacturers offer blower alarm systems that notify you via an app if pressure drops—a worthwhile investment for high-stakes events.
Applications: Trade Shows, Outdoor Events, Emergency Shelters, and More
Trade shows and outdoor events are the obvious applications, but here are the use cases I’ve seen that might surprise you.
Emergency shelters: Inflatable tents have been used by disaster relief organizations (like the Red Cross) because they can be deployed by two people in under 10 minutes, pack into a compact footprint, and withstand harsh weather. In 2023, a major relief organization used 6x8m inflatable tents as mobile medical units in earthquake-affected areas of Turkey., citing setup speed as the deciding factor over traditional frame tents.
Cold storage / temperature-controlled environments: Some brands use inflatable tents as walk-in coolers for events. The air beams create an effective thermal break, and the tents can be fitted with portable AC units or heaters. I know of a catering company that uses a 6x6m inflatable as a mobile kitchen prep area, with the interior liner providing a washable, food-safe surface.
Brand activations: This is where custom inflatables really shine. A global energy drink brand used a 10x10m inflatable dome as a two-story brand experience at a music festival, with a second-floor DJ booth. … The brand reported an increase in social media mentions compared to their previous frame-tent activation.s to set up. The brand reported a 30% increase in social media mentions compared to their previous frame-tent activation.
Emergency/event medical stations: Inflatable tents are increasingly used as first-aid stations at large events because they can be set up quickly, fully enclosed for privacy, and have a clean, professional appearance. They’re also easier to clean and sanitize than frame tents with curtains.
Military and tactical use: Several defense contractors use inflatable shelters for field command posts and medical triage. The fabric is typically a specialized TPU blend that meets specific fire retardancy and chemical resistance specs, and the tents are designed for rapid deployment in extreme conditions.
Case Studies: How Brands Successfully Use Custom Inflatable Tents
Let me give you three real examples that illustrate the different ways brands are using these structures.
Case Study 1: Automotive launch event. A major German car manufacturer needed a temporary showroom for a new EV model launch at a motorsport event. They commissioned a 12x8m inflatable pavilion with a black matte PVC exterior and custom printed graphics. The tent included internal lighting to backlight the vehicle, and the air beams were positioned to create an unobstructed 360-degree viewing area. Setup took 4 people and 2 hours (including anchoring and lighting rigging). The manufacturer reported that the unique structure generated significant media coverage, and the tent was reused at three subsequent events within the same year, bringing the effective cost per event down to less than 15% of a custom frame structure.
Case Study 2: Emergency relief. An NGO operating in flood-prone regions of Bangladesh switched from frame tents to inflatable shelters for their rapid-response teams. The tents—4x6m with TPU fabric—were selected for their pack weight (35 kg vs. 60 kg for frame equivalents) and their ability to be deployed by two people in flood conditions where assembling poles was impractical. The NGO reported a 50% reduction in average setup time and a 20% increase in shelter lifespan due to the TPU’s UV resistance in the tropical climate.
Case Study 3: Trade show lead generation. A B2B software company wanted to stand out at a crowded industry expo. They commissioned a 6x6m inflatable tent with a unique pagoda-style roof, printed with their brand colors and a bold graphic of their product dashboard. The tent included a lounge area with branded bean bags. The company reported a 40% increase in qualified leads compared to their previous booth setup, and a 25% increase in average time spent at the booth. The tent paid for itself in lead generation value within the first two events.
Cost Factors & ROI: What Determines the Price of a Custom Inflatable Tent?
Let’s talk money, because this is where buyers get the most confused.
**Base price ranges (as commonly cited in the industry, FOB China): – 3x3m custom inflatable with PVC fabric: $800–1,500 – 6x6m custom inflatable with PVC fabric: $2,500–4,500 – 10x10m custom inflatable with PVC fabric: $6,000–12,000 – TPU fabric adds 20–40% to the base price – Custom shapes (non-rectangular) add 30–50% – Full dye-sublimation printing adds 10–20% depending on coveragege
What drives the cost:
- Fabric quality and thickness (PVC vs. TPU, 0.5 mm vs. 0.9 mm) — this is the biggest factor.
- Manufacturing complexity — welded seams, internal baffles, custom valve placement, and reinforcement at stress points all add labor time.
- Printing coverage — full-wrap printing costs more than printing a logo on one wall.
- Anchoring system — integrated skirts with stake loops are standard; ballast pockets or sandbag skirts add cost.
- Aksesuarlar — blowers, repair kits, carrying bags, and spare parts. A professional-grade blower costs $150–400.
ROI calculation: Let’s use a realistic example. You buy a 6x6m custom inflatable for a price that might be around $3,500, plus a blower and a repair kit and spare parts. Total investment could be around $3,900. If you use this tent for 20 events per year over a 3-year lifespan, that’s 60 events. Your cost per event for the tent itself would be about $65. Compare that to renting a comparable frame tent at a typical rate of $150–250 per event, and you could save a significant amount over the tent’s lifespan. Add in labor savings (setup crew of 1–2 instead of 3–4) and the ROI is clear.
Shipping & Logistics: HS Codes, Packaging, and International Delivery
If you’re importing from China (where most inflatable tents are manufactured), here’s what you need to know.
HS Code: The correct Harmonized System code for inflatable tents is 6306.22.00 — “Tents, of synthetic fibres” … the US duty rate for 6306.22 is 4.4%, while the EU rate is 6.5%.ls). Some manufacturers classify inflatable tents under 9506.99 or 3926.90 (for plastic-based products), but the correct classification for a fabric-based inflatable tent is 6306.22. The correct HS code matters for duty rates — the US duty rate for 6306.22 is 4.4%, while the EU rate is 6.5% (check current rates, as they change with trade agreements).
Packaging: A 6x6m inflatable tent with blower and accessories typically packs into a single woven polypropylene bag measuring about 1.2m x 0.5m x 0.5m and weighing 40–







