

Most inflatable arches don’t die from wear and tear. They die from neglect. That’s the honest truth after spending years in this industry, watching people drop serious money on a custom arch and then treat it like a garden decoration. The maintenance tips I’m about to share aren’t just a checklist to skim—they’re a system that separates the pros from the folks who are basically throwing cash away.
You might be wondering why I get so worked up about this. Here’s the thing: I’ve watched a $3,000 inflatable arch turn into a $300 pile of worthless PVC in under two years, simply because nobody cleaned it properly or stored it right. Meanwhile, I’ve seen budget arches last five-plus years because the owner actually understood basic upkeep. That difference isn’t luck. It’s maintenance.
Snel antwoord
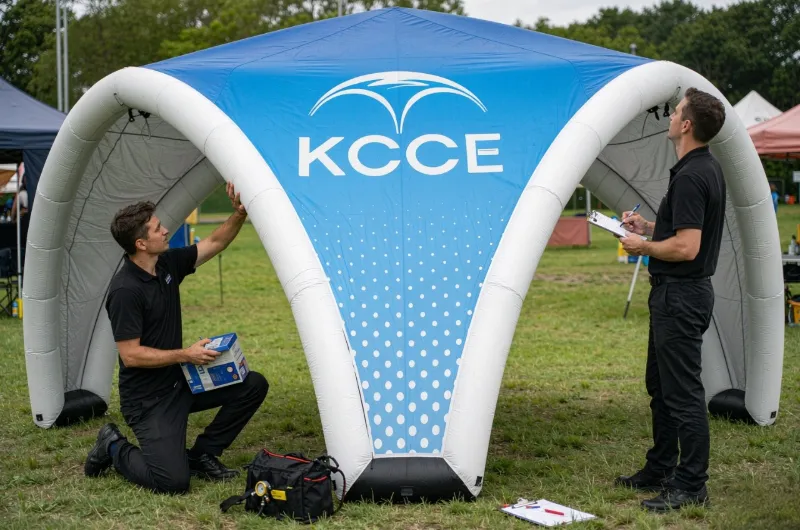
The single most important thing you can do for your inflatable arch is dry the fabric completely before folding and storing it. After that, keep the blower’s air filter clean and inspect every seam for micro-tears after each event. Skip those three steps and you’re cutting your arch’s lifespan in half, maybe worse.
Why This Stuff Matters More Than You Think
Let’s talk about money first, because that’s what actually changes behavior. A quality commercial-grade inflatable arch typically lasts several years with proper care, though the exact lifespan can vary. Neglect the maintenance and you might get a shorter lifespan. Do everything right and you could extend it.
For rental businesses, the math gets even more interesting. Your inflatable arch is an investment that generates revenue every time it goes out the door. Every week it’s sitting in your warehouse with a leak you haven’t patched is a week it’s not making you money. And when a rental arch fails mid-event—say, twenty minutes before the first runner crosses the finish line at a 5K—that’s not just a repair cost. That’s a brand disaster.
I remember reading about an organizer in Chicago whose entire finish line setup toppled right before their race started. They had to drag a table and chairs across the road as a makeshift finish. That story stuck with me because it’s so preventable. A properly maintained arch with correctly rated anchors doesn’t just fall over. It fails because someone skipped the pre-event inspection or ignored the wind rating warnings.
There’s also a safety liability angle that too many people gloss over. An inflatable arch weakened by UV damage or improper storage can fail catastrophically. If it collapses on a participant or falls on a child, you’re not just looking at a ruined event—you’re looking at potential legal action. The International Association of Shell and Spatial Structures published comparative research on inflatable arch behavior, and the structural integrity findings are clear: these structures behave predictably when maintained, but degrade unpredictably when neglected.
Let me put the cost comparison in plain numbers. A basic patch kit costs a modest amount. A replacement blower runs more depending on the size. A full replacement arch? It can be a significant investment for a quality custom piece. Looking at it that way, spending fifteen minutes after each event on proper cleaning and inspection is the highest-ROI activity you can possibly do for your equipment.
Cleaning Your Inflatable Arch: Step-by-Step Care Routine
Now let’s get into the actual work. Cleaning isn’t glamorous, but it’s the foundation of everything else. The good news is you don’t need fancy inflatable arch cleaning supplies—just mild soap, water, and a soft cloth or sponge.
What to use: A mild dish soap mixed with lukewarm water is perfect. Think Dawn or something similar. You want something that cuts grease and dirt without being aggressive.
What to avoid: Harsh chemicals, solvents, bleach, and abrasive cleaners. These will break down the PVC coating over time and accelerate UV damage. And whatever you do, don’t use a pressure washer. I can’t stress this enough. A pressure washer might leave your arch looking clean in two minutes, but it’s also forcing water into seams and weakening the fabric’s coating. I’ve seen arches that looked great from ten feet away but were actually delaminating from the inside out because of pressure washer damage.
The cleaning process itself is straightforward:
- Set up the arch fully inflated
- Hose down with plain water to remove loose dirt
- Mix your mild soap solution
- Wipe down with a soft cloth or sponge, working from top to bottom
- Pay special attention to seams and printed areas where dirt accumulates
- Rinse thoroughly with clean water
- Dry completely (this is critical—more on that in the next section)
For rental businesses, you should be doing this after every single event. No exceptions. When an arch comes back from a weekend festival covered in dust, pollen, and who-knows-what, that’s not just cosmetic dirt. Those particles can embed in the fabric and act as abrasives during folding and storage. For occasional personal use—say, a graduation party or backyard event—cleaning after every use is still ideal, but at minimum clean it thoroughly at the end of each season.
One question I get constantly is whether you can use specialized vinyl cleaners. The answer is yes, but you don’t need to spend the money. A mild soap solution works just as well for 95% of situations. Save the specialty products for stubborn stains like grease or permanent marker.
Drying and Storage: The Most Critical Tips
If I had to pick the single most common cause of premature inflatable arch failure, it would be improper drying and storage. This is where the maintenance tips become truly critical.
Here’s the problem: PVC fabric is essentially impermeable. When you fold up a damp arch, you’re trapping moisture inside the folds. Over days or weeks in storage, that trapped moisture creates the perfect environment for mold and mildew growth. And once mold gets into PVC fabric, it’s nearly impossible to remove completely. The arch starts to smell, the fabric weakens, and eventually you’re buying a replacement.
The drying process:
- After cleaning, let the arch air dry completely. This means fully inflated and left to sit until there’s zero moisture on any surface.
- In sunny weather, this might take 2-3 hours.
- In humid conditions, it could take most of a day.
- Never skip this step, even if you’re in a hurry.
The folding technique:
Here’s where most people go wrong. They grab the arch and start rolling it up like a sleeping bag. That’s a mistake. The proper technique is to fold the arch in sections, creating gentle folds rather than tight creases. Tight creases create stress points in the fabric that eventually crack and split.
The process looks like this:
- Deflate the arch completely
- Lay it flat on a clean surface
- Fold it in thirds lengthwise, like folding a letter
- Then fold it in sections from each end toward the middle
- Avoid folding at the same spots every time—vary your fold points to distribute stress
Climate-controlled storage is non-negotiable. Your inflatable arch should be stored in a cool, dry place away from direct sunlight. Temperature extremes are bad. Heat accelerates PVC degradation, and freezing can make the fabric brittle. A garage or shed might work in moderate climates, but for real protection, a climate-controlled space is ideal.
Pest protection is another overlooked issue. Rodents love chewing on PVC fabric, especially if there’s any residual food or drink residue on the surface. I’ve heard horror stories of arches stored in barns coming out with holes chewed through the fabric. If you’re storing in a space that might have pests, consider using sealed storage containers or adding rodent repellent to the area.
Before your first use after storage, do a full inspection:
- Unfold and visually check the entire surface
- Look for any signs of mold, mildew, or pest damage
- Check all seams and print areas
- Test inflate to verify the arch holds air properly
- Check the zipper and valve mechanisms
Blower Maintenance and Air Pressure: The Overlooked Killer
Here’s the thing most people don’t realize: your blower is the most important piece of equipment in your entire setup. The fabric can be perfect, the seams can be flawless, but if your blower dies mid-event, your arch is just a fancy pile of PVC.
Blower maintenance is the gap that almost every competitor guide misses, and it’s honestly the most common cause of field failures I see.
Filter cleaning schedule:
Your blower has an air intake filter, and it’s there for a reason. It keeps dust, debris, and moisture out of the motor. When that filter gets clogged, your blower has to work harder, which means it runs hotter, which means the motor burns out faster.
The cleaning schedule depends on your usage:
- For rental businesses with weekly events: clean the filter after every event
- For occasional use: clean the filter at the start of each season and after any dusty event
Cleaning is simple—remove the filter, tap out loose dust, and wash with mild soap and water if it’s really dirty. Let it dry completely before reinstalling.
Motor overheating signs:
Your blower is telling you when it’s struggling. You just need to listen:
- Unusual noises (grinding, whining, rattling)
- Reduced airflow output
- The blower casing feeling excessively hot to the touch
- The arch not maintaining full inflation
If you notice any of these, shut down the blower immediately and investigate. Running a struggling blower is the fastest way to kill it.
Airflow calibration:
Different arches need different airflow rates. A small arch might only need a relatively low CFM blower, while a large tunnel or arch could need a higher CFM. Using a blower that’s too small means your arch will sag and look pathetic. Using one that’s too large creates excessive pressure that stresses the seams.
Check your manufacturer’s specifications for the correct blower size and pressure rating. And here’s a pro tip: feel the fabric when the arch is fully inflated. It should be firm but not rock-hard. If it feels like it’s going to pop, your pressure is too high.
When to replace vs. repair:
Blowers are relatively simple machines, and many issues are fixable:
- Worn power cords: replace
- Dirty filters: clean or replace
- Bad bearings: replace
- Burned-out motor: replace the blower
For rental businesses, I strongly recommend having at least one spare blower on hand. Blowers fail at the worst possible moments, and having a backup means your event goes on while you deal with the repair later.
Leak Detection and Repair: Fix It Before It Ruins Your Event
Leaks are inevitable. Every inflatable arch will eventually develop one. The question isn’t whether you’ll need to fix a leak—it’s whether you’ll catch it before it ruins an event.
The soapy water test method:
This is the classic, foolproof way to find leaks:
- Inflate the arch fully
- Mix a solution of water and a few drops of dish soap
- Apply the solution to suspect areas using a spray bottle or sponge
- Watch for bubbles—they’ll form at the leak point
- Mark any leaks you find with a piece of chalk or tape
Pay special attention to:
- Seams and welded joints
- The area around the zipper or valve
- Where the blower tube connects
- Any printed areas (printing can sometimes create weak spots)
Patch kit selection:
You don’t need anything fancy for most repairs. A basic inflatable repair kit with PVC patches and adhesive will handle the majority of leaks. The key is making sure the patch material is compatible with your arch’s fabric—most arches use PVC, but some use nylon or other materials.
Surface preparation is everything:
This is where most DIY repairs fail. You can’t just slap a patch on a dirty surface and expect it to hold. The process is:
- Clean the area around the leak with alcohol or acetone
- Let it dry completely
- Rough up the surface slightly with fine sandpaper
- Clean again
- Apply the adhesive to both the patch and the repair area
- Press the patch firmly into place
- Apply pressure (a heavy book or roller works well)
- Let it cure fully
Adhesive curing time:
This is the step everyone skips, and it’s why so many patches fail. Most PVC adhesives need time to fully cure, often around a day. Not 30 minutes. Not “until it feels dry.” Twenty-four hours. If you inflate the arch before the adhesive has cured, you’re putting stress on the patch that will likely cause it to fail.
Seam vs. fabric tears:
The type of damage matters for your repair approach:
- Small punctures or pinholes: simple patch repair works fine
- Fabric tears: need a larger patch and possibly reinforcement on both sides
- Seam separation: this is more serious and may need professional repair
- Zipper damage: often needs replacement, which is a job for a professional
When to call a professional:
If the damage is extensive, if the material is delaminating (layers separating), or if the arch has significant UV damage, it’s time to call in the experts. Attempting a complicated repair on a structurally compromised arch is a waste of time and money. Many manufacturers and suppliers offer inflatable arch maintenance service, and it’s often worth the cost for major repairs.
UV Damage Prevention and Fabric Protection
UV damage is the silent killer of inflatable arches. It’s not dramatic—no sudden failure or obvious sign—but over time, the sun’s ultraviolet rays break down the PVC fabric’s molecular structure. The result is fabric that becomes brittle, discolored, and eventually cracks.
This is why the typical inflatable arch lifespan is only 3-5 years, even with good care. The sun is constantly working against you.
UV inhibitors:
Most quality inflatable arches are manufactured with UV inhibitors in the PVC coating. These additives help slow the degradation process, but they don’t stop it. And here’s the thing: they also deplete over time. After a few years of sun exposure, the UV protection in your fabric is significantly reduced.
Checking for micro-tears:
UV-damaged fabric often develops micro-tears that are invisible to the naked eye. These tiny cracks weaken the fabric structure and can suddenly open up under pressure. That’s why it’s so important to regularly inspect your arch, especially if it’s been in service for a couple of years.
One way to check: run your hand across the fabric surface. UV-damaged PVC feels different—rougher, less smooth, sometimes slightly sticky or chalky. If you feel any of these changes, your fabric is degrading.
Canopy and shade strategies:
The simplest UV protection strategy is to minimize sun exposure. That sounds obvious, but think about it:
- Store your arch indoors or under cover when not in use
- If you’re setting up early for an afternoon event, consider setting up as late as possible
- For long events, position the arch to minimize direct sun exposure during peak UV hours
- When storing outdoors temporarily, use a tarp or canopy
Retirement criteria:
At some point, the fabric is beyond saving. Here are the signs that your arch needs to be retired:
- Extensive cracking or crazing on the surface
- Fabric that’s become stiff and brittle
- Discoloration that looks like fading or yellowing
- Patches that won’t hold even after proper preparation
- Seams that keep separating despite repairs
When you reach this point, stop spending money on repairs. It’s time for a replacement. As you’re shopping, you’ll want to look for high-quality materials and construction—and if you’re exploring options, our opblaasbare tenten and related structures are built with durable PVC that responds well to the maintenance routine outlined here. Companies like Promo Bears USA, who’ve been in the inflatable business for over 16 years, emphasize that custom inflatable arches are “made to last”—but even the best-made arch needs proper care to reach its full lifespan.
For those interested in the structural side of things, the comparative research on inflatable arch behavior published by the International Association of Shell and Spatial Structures provides fascinating insights into how these structures handle loads and why material degradation matters.
Troubleshooting Quick Reference: Symptom → Cause → Fix
You’re at an event, the arch is up, and something’s wrong. Here’s your quick reference guide to common issues and their fixes.
| Symptom | Likely Cause | Quick Fix |
|---|---|---|
| Arch deflating slowly | Small leak in fabric or seam | Locate with soapy water test, patch |
| Arch deflating rapidly | Large tear or blower failure | Check blower first, then inspect for tears |
| Arch sagging in middle | Insufficient air pressure | Check blower output, clean filter |
| Blower making loud noise | Dirty filter or worn bearings | Clean filter, check for vibration |
| Fabric looking wrinkled | Incorrect fold pattern from storage | Reposition arch, ensure full inflation |
| Arch leaning to one side | Anchor point failure | Reset anchors, check wind conditions |
| Zipper stuck or broken | Debris in track or worn zipper | Clean track, apply lubricant, or replace |
| Valve leaking air | Worn valve seal | Replace valve or seal mechanism |
Anchor point checks:
Your arch is only as stable as its anchor system. Before every event:
- Check that all anchor points are in good condition
- Verify your anchor method matches the surface (stakes for grass, sandbags for pavement, weights for indoor)
- Always use the manufacturer’s recommended anchor configuration
- In windy conditions, add extra anchoring or consider taking the arch down
Seam stress points:
Pay attention to areas where the arch transitions from horizontal to vertical. These are the stress points where the fabric is under the most tension. During your pre-event inspection, give these areas extra attention.
Zipper and valve issues:
Zippers on inflatable arches are prone to problems because they’re constantly flexed as the arch inflates and deflates. Keep the zipper track clean and lubricated with a silicone-based lubricant. If the zipper is damaged, replace it before it becomes a bigger problem.
Seasonal Storage and Pre-Event Inspection Checklist
For those who use their arches seasonally—and for rental businesses managing a fleet—here’s your complete maintenance structure.
End-of-season deep clean:
- Fully inflate the arch
- Clean thoroughly with mild soap and water
- Rinse completely
- Dry fully (this takes time—don’t rush it)
- Inspect for any damage sustained during the season
- Repair any leaks or tears
- Clean and inspect the blower
- Service the blower (clean filter, check cord, test run)
Off-season storage conditions:
- Climate-controlled space is ideal
- Temperature range between 50-80°F (10-27°C)
- Low humidity
- Away from direct sunlight
- Protected from pests
- Store in a container that allows airflow (avoid airtight bags that trap moisture)
Pre-event 15-point check:
Before every event, run through this checklist:
- Visual inspection of entire fabric surface
- Check all seams and welds
- Inspect printed areas for cracking
- Test the zipper
- Check the valve mechanism
- Inspect the blower and power cord
- Clean or replace the blower filter
- Test inflate the arch
- Verify full inflation pressure
- Check all anchor points and hardware
- Verify the anchor method matches the event surface
- Confirm wind ratings for the venue
- Check the storage bag for damage
- Verify all accessories are present
- Review the setup plan for the specific venue
Rotation schedules for rental fleets:
If you’re running a rental business, don’t use the same arch every single time. Rotate your inventory so wear is distributed evenly. This extends the life of your entire fleet and ensures you always have a backup option if one arch needs repair.
Inspection log templates:
Keep records for each arch in your fleet. A simple log should include:
- Date of each use
- Event type and location
- Weather conditions
- Any issues noted during setup or teardown
- Maintenance performed
- Repairs made
- Hours of blower operation
This documentation isn’t just good practice—it’s also valuable if you ever need to make an insurance claim or warranty request.
Veelgestelde Vragen
Q: Can you leave outdoor inflatables on all the time?
A: Generally, no. Leaving an inflatable arch running continuously accelerates wear on both the fabric and the blower. The blower motor will overheat with extended operation, and constant pressure stresses the seams. For multi-day events, run the blower during active hours and deflate overnight. If you must run it continuously, ensure the blower is rated for continuous duty and check it regularly for overheating.
Q: How do I keep my inflatable water slide clean?
A: The same principles apply as for inflatable arches. Use mild soap and water, never harsh chemicals or pressure washers. Rinse thoroughly and dry completely before storage. Pay extra attention to areas where water pools, as standing water can accelerate fabric degradation. For water slides specifically, check drainage regularly and treat the surface with a UV protectant designed for PVC to extend its lifespan.
Q: How to care for inflatables?
A: The core care routine is consistent across all inflatable products—whether it’s an arch, a tunnel, or a bounce house. Clean with mild soap after every use, dry completely before storage, store in a climate-controlled space away from sunlight, inspect for damage regularly, and maintain the blower with regular filter cleaning. If you’re dealing with custom pieces like inflatable shapes or branded displays, the same rules apply to keep them looking sharp event after event. Following these steps will significantly extend the lifespan of any inflatable product.
Q: How to tie down an inflatable arch?
A: Use the manufacturer’s recommended anchor points and method for your surface. For grass, use heavy-duty stakes at every anchor point. For pavement, use sandbags or water weights. For indoor events, use sandbags or weighted bases. Always check weather forecasts—if winds exceed the arch’s rating, take it down. Never compromise on anchoring; a properly anchored arch is your primary safety measure.
Referenties
- How to Clean and Care for Your Custom Inflatable Arch – MVP Visuals
- Opblaasbare topbogen om uw evenement naar een hoger niveau te tillen | Deskundige gids – KCCE Event
- Comparative study about the behaviour of inflatable and Tensairity arches – International Association of Shell and Spatial Structures
- Custom Inflatable Arches – Promo Bears USA
- Comparison of the transportation and after-sales service quality of inflatable arch suppliers – YOLLOY Blog
Q: How do I repair a small tear or puncture in my inflatable arch?
A: Most inflatable arches come with a repair kit containing adhesive and patch material. Clean the area around the tear with alcohol, let it dry, apply the adhesive to both the patch and the inflatable surface, press firmly, and allow it to cure for the time specified by the manufacturer. For larger tears, contact the supplier for professional repair or replacement parts.
Q: Can I use an inflatable arch indoors?
A: Yes, inflatable arches work well indoors for trade shows, conferences, weddings, and corporate events. Ensure you have adequate ceiling height and use sandbags or weighted bases for anchoring, as stakes are not suitable for indoor flooring. Also, verify that the blower can be positioned safely away from foot traffic.
Q: How long does it take to set up an inflatable arch?
A: Setup typically takes 10 to 20 minutes, depending on the size and the number of anchor points. Inflation itself is fast, but anchoring properly takes the bulk of the time. Always allow extra time for unexpected issues like wind or uneven surfaces.
Q: What is the lifespan of a quality inflatable arch?
A: With proper care, storage, and maintenance, a high-quality inflatable arch can last anywhere from 3 to 5 years or more, even with regular use. UV exposure and improper storage are the biggest factors that shorten lifespan.
Q: Are inflatable arches weather-resistant?
A: Most commercial-grade inflatable arches are made from heavy-duty PVC or nylon and are designed to withstand light rain and moderate wind. However, they should not be used in severe weather conditions such as thunderstorms, high winds (typically above 20-25 mph), or extreme heat. Prolonged exposure to direct sunlight can cause fading and material degradation, so it’s best to use them in shaded areas or limit UV exposure. Always check the manufacturer’s wind rating and take the arch down if conditions become unsafe.
Q: Do I need a permit to use an inflatable arch in a public space?
A: Permit requirements vary by city and venue. For private events on your own property, permits are usually not needed. However, for public events, parades, or commercial advertising on sidewalks or streets, you may need a permit from your local municipality. Contact your city’s events or permits office early to avoid delays. Some venues also have their own rules about inflatable structures, so check with the venue coordinator as well.
Q: How do I clean and store my inflatable arch?
A: After each use, wipe down the arch with a mild soap and water solution to remove dirt, dust, and debris. Avoid harsh chemicals or abrasive cleaners. Make sure the arch is completely dry before deflating and folding to prevent mold and mildew growth. Store it in a cool, dry place away from direct sunlight and sharp objects. Use the included storage bag to keep it protected, and avoid folding it in the same creases every time to prevent wear.
Q: Can I customize the design or logo on an inflatable arch?
A: Yes, most manufacturers offer full customization, including custom colors, logos, text, and even custom shapes. The design is typically printed or welded onto the material using dye-sublimation or vinyl graphics. When ordering a custom arch, provide high-resolution artwork (vector files like AI or EPS are preferred) to ensure crisp, professional results. Custom designs may add to the production time and cost, so plan ahead for your event date.
Q: What blower size do I need for my inflatable arch?
A: The blower size depends on the arch’s dimensions and material. Most arches come with a compatible blower included in the package. If you’re purchasing a blower separately, check the CFM (cubic feet per minute) rating—larger arches require higher CFM to maintain proper inflation. A continuous-duty blower is recommended for extended use, and always have a spare blower on hand for emergencies, as blower failure will cause the arch to deflate quickly.
Q: Are there safety concerns I should be aware of?
A: Yes, always secure the arch with stakes, sandbags, or water weights to prevent it from tipping over. Keep the blower and power cords away from water and foot traffic, and use a GFCI-protected outlet. Never allow children to climb or play on the arch. If you’re using the arch near roadways, ensure it’s positioned safely and doesn’t obstruct visibility. Regularly inspect the arch for wear and tear, and replace any damaged parts immediately.
Q: How much does a quality inflatable arch cost?
A: Prices vary widely based on size, material, and customization. Basic stock sizes start around $200–$400, while larger, custom-designed arches can range from $500 to over $2,000. High-end commercial-grade arches with reinforced seams and advanced printing tend to be more expensive but offer better durability and longevity. Consider renting for one-time events if you don’t need a permanent solution.
Q: Can I rent an inflatable arch instead of buying one?
A: Absolutely. Many party rental companies and event supply businesses offer inflatable arches for rent, often at a fraction of the purchase price. Rental is a great option for one-off events or if you want to test different styles before committing to a purchase. Rental packages typically include setup, takedown, and the blower, which can save you time and effort.
Q: What should I look for when choosing a supplier?
A: Look for a supplier with a solid reputation, positive customer reviews, and a clear warranty policy. Check that they offer the size and customization options you need, and ask about their lead times and shipping costs. Good customer support is crucial—you want a supplier who responds quickly to questions and provides clear instructions. Also, compare prices across multiple suppliers, but be wary of extremely low prices, as they may indicate inferior materials or poor craftsmanship.







