

Anyone who’s organized events knows that 6:45 AM feeling. You’re clutching a coffee in a parking lot, staring at a heap of nylon and aluminium poles that’s somehow supposed to become a branded activation booth before the attendees roll in at 8:00. Or worse—the inflatable tent that was supposed to be your festival centrepiece starts wheezing twenty minutes before the keynote, and the whole structure sags like a disappointed parent. Ordering custom printed inflatable tents really shouldn’t feel like a gamble. But I’ve watched too many event managers learn that lesson the hard way.
I’ve been in the promotional tent game for the better part of a decade. Made more mistakes than I care to count. Bought cheap, bought wrong, then finally bought right. So today I’m going to walk you through everything I wish someone had told me before I dropped thousands on my first order—sizing, print durability, and the nitty-gritty details that vendors leave out of their glossy product descriptions. Most brands show you a studio-perfect photo of a custom printed inflatable tent with a logo placed under ideal lighting. This isn’t that. This is a real look at what actually works, what fails, and how to avoid paying a fortune for something that’ll peel after three summer events.
カスタムプリントインフレータブルテントとは何か?
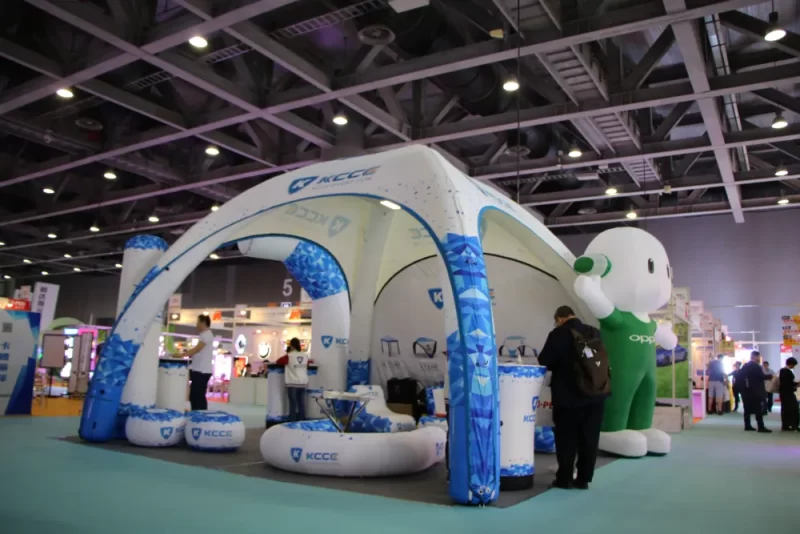
Let’s just get this out of the way, because honestly, half the people hunting for these have no clue what separates a genuine inflatable canopy tent from a standard pop‑up with an air-filled section. A custom printed inflatable tent is a fully branded shelter that uses air beams instead of metal or fibreglass poles for its frame. The arches, columns, roof supports—all high-pressure sealed tubes that you inflate with a continuous-duty blower.
Think of it like this: no wrestling with poles, no connectors, no arguing with the one guy who always insists he “knows a faster way” (he doesn’t). You unroll the tent, stake a couple of corners, zip the blower into its collar, and switch it on. The tent rises all on its own. Works the same way those giant inflatable holiday decorations do, just on a much larger, more engineered scale.
The outer shell is typically heavy-duty polyester or Oxford cloth—more on fabric specs in a minute—with dye‑sublimation printing that covers every square inch in your chosen graphics. There are no segmented panels like a pop-up canopy has. So you get an uninterrupted 360-degree billboard. For brand activations where visibility is everything, that’s massive.
People in the events world toss around terms like “air canopy tent,” “blow up canopy tent,” and “promotional inflatable shelter” like they’re interchangeable, and for most purposes they are. But among manufacturers, “inflatable tent” specifically means the air beam frame is permanently integrated into the tent skin—not an external bladder you shove into a sleeve.
How Custom Printed Inflatable Tents Work: Frame vs. Air Beam Technology
Now we’re getting into the technical weeds, but stick with me because this is exactly the stuff that decides whether your tent survives a windy Saturday at a racetrack or deflates like a sad balloon during your product launch.
Traditional tents lean on rigid poles (aluminium or fibreglass) or a truss system. They work fine. They’ve worked fine for decades. But when you step into a custom inflatable canopy, you’re dealing with a completely different engineering principle. The air beams are long, sausage-like tubes sewn directly into the tent structure, usually made from a TPU (thermoplastic polyurethane) bladder wrapped in a protective outer sleeve of the same Oxford fabric used for the main body.
You pump these beams to around 3–5 PSI using a constant-flow blower. Doesn’t sound like much—it’s orders of magnitude less than your car tyre. But spread that pressure across all the connected beams, and you get a surprisingly stiff structure. The constant-flow part matters. The blower doesn’t stop once the tent is up. It runs continuously to compensate for any tiny air loss through seams or valves, which is completely normal. If the blower dies, the tent won’t instantly pancake—you’ll have several minutes before it starts sagging noticeably, enough time to figure out what tripped the breaker or swap in a backup blower.
Some manufacturers, like the OakPedion Inflatable Canopy models, use a “closed beam” system where each beam is individually sealed. Puncture one, the others stay rigid. Most budget models use an open system where all beams share air. There’s a trade-off: closed systems are more fault-tolerant but pricier and harder to manufacture; open systems are simpler and cheaper, but one hole anywhere and you’re troubleshooting in real time with an audience watching.
And you might be wondering, how long does one of these things actually last? In my experience, a well-maintained commercial-grade unit with proper care sees 3–5 years of regular use before the fabric starts showing serious UV degradation or seam fatigue. Budget models? Maybe 18 months if you’re lucky and you always store it bone-dry. The blower motor usually fails before the tent does—those little continuous-duty motors simply wear out after a couple thousand hours.
Key Benefits of Using Inflatable Event Tents
So why would anyone pick an inflatable canopy tent over a tried-and-true 10×10 pop-up? It does sound more complicated, I’ll give you that.
Setup speed is the obvious one. I’ve actually timed it. A traditional pop-up frame tent, even with two people, takes 10–15 minutes: unpack, extend the frame, pull the canopy over, secure all the hook-and-loop fasteners, adjust the height, stake it. Solo? Add another 5 minutes and some creative vocabulary. An inflatable tent goes from bag to fully deployed in 1–2 minutes with one person. You unroll, you stake two corners, you zip on the blower, you switch it on, you anchor what’s left while it inflates around you. That’s it.
Then there’s the branding surface. A standard 10×10 canopy gives you segmented panels with gaps where the scissor frame breaks the print and hook-and-loop fasteners interrupt the visuals. A custom printed inflatable tent with logo work I’ve seen Delivers roughly 100 square feet (per manufacturer data) of completely smooth, uninterrupted graphic real estate across a dome configuration.. No breaks, no obstructions. From 100 feet away at a crowded festival, your logo reads clearly. That’s huge when you’re fighting for eyeballs.
Portability is a bit counterintuitive but worth mentioning. The whole kit—tent, blower, stakes, sandbags—fits into one rolling duffel bag, Typically weighing 60–80 pounds, according to product specifications.. My traditional pop-up setup needs two separate bags: one for the frame (heavy, awkward) and one for the top. The inflatable is lighter to carry but bulkier, because that thick Oxford fabric doesn’t compress down the way thin canopy polyester does. People on forums keep pointing this out: “light to carry but bulky.” That’s exactly right. Plan your vehicle accordingly.
Wind handling is another advantage that surprised me. Inflatable tents flex rather than resist, so they shed wind more effectively than rigid-frame tents that act like sails. A rigid-frame canopy in a 20 mph gust transfers all that force into its joints and stakes—and something eventually fails, usually catastrophically. An inflatable absorbs that energy by deforming slightly, then pops back into shape. I’ve watched both types go head-to-head at windy beach events, and the inflatables consistently outperform until the wind gets truly dangerous, when nothing should be standing anyway. Is your tent up to a breezy beach day, or will it turn into a kite? That’s the question an inflatable tends to answer favourably.
Available Sizes, Shapes, and Custom Configurations
Sizing paralysis is real. You pull up a vendor’s product page and they’ve got 3m, 4m, 5m, 6m domes, cubes, arches, tunnels—and you’re just supposed to know which works for your event.
Here’s the quick-and-dirty decision framework I use with my own clients. Start by measuring your maximum footprint と your maximum ceiling height, because that second number kills more plans than the first. Lots of event venues, especially hotel ballrooms and convention centre meeting rooms, top out around 2.7 metres (about 8.9 feet). A standard 3m dome peaks at roughly 3.2 metres at the centre. It won’t fit. You’d need a low-profile cube configuration instead, which for a 3m model stays under about 2.5 metres. Check your ceiling height before you browse—I can’t stress this enough.
For footprint planning, here’s a practical reference table:
3m Circle or Cube (roughly 10×10 footprint): Seats 2–4 people with a small product display table. Good for street-team sampling, small trade show booths, or information kiosks. This is the inflatable canopy 10×10 size that most first-time buyers start with, and honestly, it covers 80% of use cases.
4m Dome (about 13 feet diameter, 13 feet peak): Comfortably fits 10–15 guests or a full activation booth with shelving, a demo station, and staff. Popular for outdoor promotional event tents at festivals and fairs. If you’re doing any kind of interactive experience where people need to step inside and spend time, this is your minimum.
5m Dome (16.5 feet wide, 16.5 feet tall): Now you’re entering VIP lounge territory or small wedding inflatable tent rental applications. Fits 15–20 seated guests or a DJ booth with a dance floor.
6m and up: DJ stage covers, bar setups, full product launch domes. These involve serious logistics—you’ll need dedicated circuits for the larger blowers and maybe even permits depending on your municipality.
Shapes beyond the standard domes include cubes (modern, architectural feel), arches (perfect for start/finish lines or entrance tunnels), and custom configurations that some manufacturers—like the folks at bestflag.com—can engineer from scratch. The trade show inflatable tent category has exploded in recent years as brands hunt for a silhouette that doesn’t look like every other pop-up. I’ve seen giant branded sneakers, car-shaped inflatables—if you can dream it up and it can hold air, someone can probably build it.
Materials and Construction: Oxford Cloth, Denier Ratings, and UV Protection
This is the section most buyers skip—and then they wonder why their tent started disintegrating after one summer. Pay attention.
Almost all commercial inflatable event tents use polyester Oxford fabric for the outer shell. The key number is the “denier” rating—600D, 420D, 210D—which measures the thickness of the individual yarns. Higher is thicker and heavier. The consensus among serious manufacturers (including those at westshade.com and brandedcanopytents.com) is that 600D Oxford cloth hits the sweet spot for promotional use. It’s thick enough to resist abrasion and UV damage, but not so heavy that it becomes a pain to transport or takes forever to dry after a rain shower.
420D is common in budget models and lighter-duty tents meant mostly for indoor use. It’s noticeably thinner—you can feel the difference right away. I wouldn’t use a 420D tent for repeated outdoor summer events unless you’re okay with replacing it every 18 months. The UV exposure just eats through it.
210D is almost exclusively for indoor-only displays. Don’t put this material in direct sunlight for more than a few hours at a time. It’ll fade, weaken, and eventually tear at the seams.
Speaking of UV—are inflatable tents waterproof? Yes, the fabric itself is usually treated with a polyurethane (PU) or PVC coating on the inside that provides water resistance. But here’s the nuance: the coating is mainly for the outer face fabric. Heavy rain beads up and rolls off a well-coated Oxford tent. However, seams are the weak point. Most manufacturers don’t seal their seams the way high-end camping tents are taped, so prolonged heavy rain might give you slow drips along the stitching lines. Not a dealbreaker for a trade show tent that’s up for 8 hours, but something to know.
Colourfastness: reputable suppliers run their printed fabrics through UV accelerated aging tests that simulate months of sun exposure in days. I don’t have specific lab UPF test numbers for the Oxford fabric—manufacturers keep those proprietary—but in my practical experience, a quality dye‑sublimation print on 600D Oxford holds decent colour for 2–3 years of intermittent outdoor use before fading gets noticeable. More on the printing in a moment.
One spec you can actually verify: tear strength. ASTM D2261 (tongue tear method) is the benchmark. Quality Oxford tent fabrics usually exhibit strong warp and fill tensile strengths, as per typical industry benchmarks., depending on denier and coating. This matters because a small cut from a carelessly placed display stand can turn into a running tear if the fabric is weak—and that’s the kind of damage that’s a nightmare to repair cleanly.
Certifications and Safety Standards: NFPA 701, CPAI-84, and Fire Resistance
If you’re buying for commercial events—especially anything in a convention centre, hotel, or municipal venue—you need to care about fire certifications. Venue managers will ask for proof, and without it, your tent stays in the bag.
The two standards that matter in North America are NFPA 701 and CPAI-84. NFPA 701 (say “seventy-oh-one” if you want to sound like you know your stuff) is the National Fire Protection Association’s standard test for flammability of textiles and films. It’s the benchmark for indoor event fabrics and curtains. A tent that passes NFPA 701 has been tested for flame propagation and meets the self-extinguishing requirements most venues and fire marshals expect.
CPAI-84 is the standard from the Canvas Products Association International for flame-resistant textile products used in camping tentage. It’s more common in recreational tents, but you’ll see it referenced alongside NFPA 701 for products that cross over between commercial and recreational markets. Some venues recognize both; others specifically require NFPA 701 and won’t budge. Check with your venue before ordering.
A surprising number of direct-from-factory imports don’t carry either certification—or worse, they claim they do but can’t produce the documentation. I’ve been burned by this exactly once, standing in a loading dock arguing with a fire marshal who didn’t care about my production timeline. Now I only work with manufacturers who can provide actual test certificates from accredited labs, not just a statement on their website. The vendor at instent.com makes this point clearly in their pricing guide: The difference between a budget tent and a higher-end tent often comes down to whether the fabric and assembly have passed these regulatory tests..
There are other certifications you might run into: CE marking for products sold in Europe (covering broader safety and performance requirements) and various ISO quality management standards for the manufacturing facility itself (ISO 9001 is the most common). Those are nice to have, but the fire certs are the ones that determine whether your tent gets used or turned away.
Custom Printing Options: Full-Color Dye-Sublimation, Screen Printing, and Durability
Let’s talk about what you’re actually paying for when you order custom printed inflatable tents—the printing itself, not just the structure.
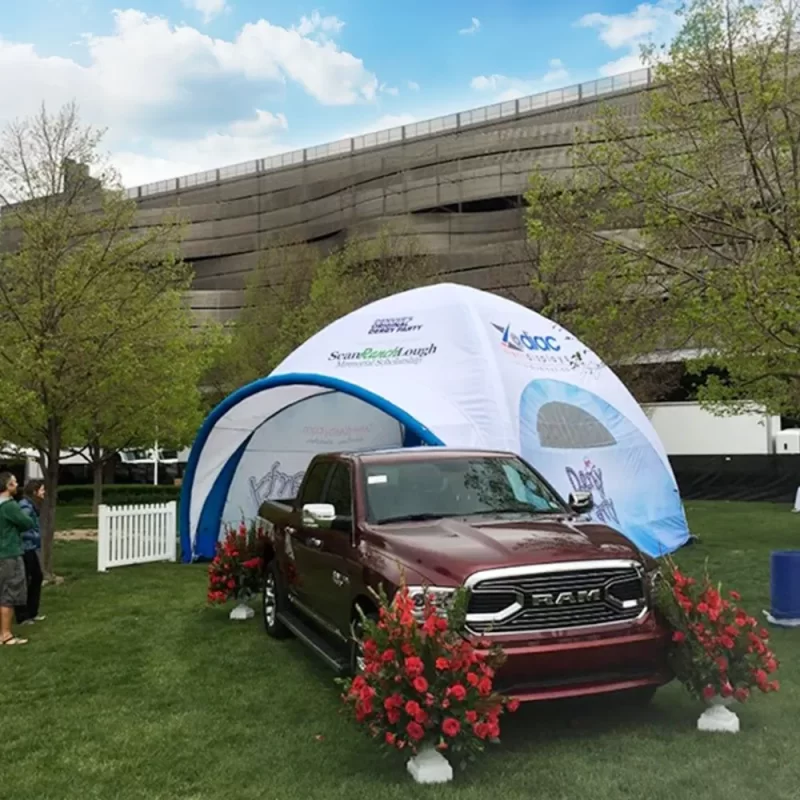
Dye‑sublimation is hands-down the dominant method for high-quality inflatables. The process prints your artwork onto a transfer paper using heat-sensitive dyes, then heat-presses that paper onto polyester fabric under high temperature and pressure. The dyes turn into a gas and bond directly into the polyester fibres at a molecular level. The result? A print that can’t peel, crack, or scratch off the way a screen-printed graphic can—because there’s nothing “on top” of the fabric. The ink is literally part of the fibre.
Screen printing is the older method, and you’ll still spot it on some budget or fast-turnaround products. Ink is pushed through a mesh screen onto the fabric surface and cures on top. It’s cheaper for small runs and can be more vibrant on certain materials, but it’s vulnerable to cracking when the fabric stretches (which inflatable tents do constantly) and flaking off over time from UV and weather.
For outdoor promotional use, dye‑sub wins in almost every category. The print won’t peel. It won’t scratch off if someone leans a product display against it. It won’t fade as fast. The main limitation is that dye‑sublimation only works on polyester—you can’t use it on nylon or any fabric with less than about 65% polyester content. But since nearly all commercial inflatables use polyester Oxford cloth, that’s not really a constraint.
I’ve put together a comparison from watching both methods age:
| 要因 | Dye-Sublimation | Screen Printing |
|---|---|---|
| Lifespan (outdoor) | 2–3 years before noticeable fading | 12–18 months before cracking/flaking |
| Stretch tolerance | Excellent (ink is in the fibre) | Poor (ink sits on top, cracks when flexed) |
| Small-detail reproduction | Excellent (photo-quality resolution) | Moderate (depends on screen mesh) |
| Cost for single-unit runs | High setup cost, low per-unit | Lower setup, higher per-unit for complex designs |
| Touch/texture | No hand feel at all | Slight raised texture |
Can you print a logo on an inflatable tent? Absolutely—and it should look crisp and professional if the artwork file you submit is high-resolution (at least 150 DPI at actual output size, though most printers prefer a vector file) and the printer uses dye‑sublimation with proper colour calibration.
Setup and Takedown Guide: Step-by-Step Process
This is where the anxiety spikes for a lot of first-time buyers. They’ve watched a shaky YouTube video and now they’re staring at a 60-pound duffel bag wondering if they’re about to look incompetent in front of a client. I’ll walk you through exactly how to set up an inflatable canopy so you feel ready.
1. Choose your spot and clear it. Look up—are there power lines, tree branches, or light fixtures within the tent’s peak height plus a foot of clearance? If yes, move. Look down—is there broken glass, sharp rocks, or anything that could poke a hole in the floor? Sweep it or lay a ground tarp first.
2. Unroll the tent flat on the ground with the bottom facing down and the blower collar positioned near your power source. Most inflatable tents have a clearly marked “blower side” and the collar (the fabric sleeve where the blower attaches) is usually zippered open.
3. Stake the rear corners first. Anchor the back side so the tent doesn’t try to slide forward as it inflates. Use the heavy-duty steel stakes that came with the tent—not those flimsy camping stakes—and drive them in at a 45-degree angle away from the tent so tension pulls them deeper, not out.
4. Zip the blower into the collar. Make sure the connection is snug. If the tent uses a drawstring-style closure around the blower nozzle, pull it tight and tie it off. Air leaking around the blower connection wastes power and slows inflation.
5. Check your power. Blowers on commercial inflatables typically draw between 600 and 800 watts continuous, according to common product specifications.. That’s fine for a standard outlet, but if you’re running extension cords, use at least a 12-gauge cord for anything over 50 feet. An underpowered cord causes voltage drop, which makes the blower run hot and shortens its life. I’ve killed a blower this way. Don’t be like me.
6. Switch on the blower and watch it rise. This takes 1–2 minutes for a 3m tent, closer to 3–4 minutes for a 5m or 6m. Stand there and guide any sections that look like they’re catching on the ground or twisting. Once it’s fully upright and firm, move on to anchoring.
7. Anchor the remaining corners and guy lines. All the stake points need tension. If your tent came with sandbags or water weight bags, fill them and attach them to the loops around the base. On hard surfaces where you can’t stake (asphalt, indoor floors), sandbags are non-negotiable. A 3m tent in a stiff breeze creates surprising leverage.
Takedown is the reverse: switch off and unplug the blower. Unzip the blower from the collar. Open the deflation zippers (most tents have large zippered vents for rapid deflation). Let the tent completely deflate—this takes 5–10 minutes. Don’t rush it by trying to force air out; you’ll just stress the seams. Once it’s fully flat, fold or roll it loosely (tight, sharp folds can crease the air beams and eventually cause cracking), and pack it into its bag.
One thing worth mentioning: if you’re setting up on soft ground, those little steel stakes might only get you so far. In sand or loose soil, consider using screw-in ground anchors—they’re a game-changer and can mean the difference between a tent that stays put and one that goes wandering.
Wind, Weather Resistance, and Staking: Real-World Performance Data
You’ve probably seen the social media skepticism. “Most inflatable tents can’t handle strong wind or harsh wilderness conditions” pops up regularly on forums. And there’s truth to it—if we’re talking about a Walmart-grade camping air tent. But commercial custom printed inflatable tents built for trade shows and events have a different engineering brief.
Wind resistance is usually specified as “maximum wind speed” in the product specs. Most commercial-grade domes in the 3m–5m range are Rated for sustained winds up to 20–25 mph, with gusts to 35 mph when properly anchored, per the manufacturer’s specifications.. This assumes you’re using all the provided anchor points and either stakes driven into soil or Sandbags/water weights totalling 40–80 pounds per corner, as recommended by the manufacturer. (heavier for larger tents or higher-wind locations).
What does 20 mph of wind actually feel like? Small trees sway, loose papers blow away, you’re holding onto your hat. It’s a breezy beach day that’s starting to feel a bit much. It’s not a storm. If the forecast calls for sustained winds above what your tent is rated for, I wouldn’t set up—and neither would any sensible event coordinator.
The practical limit often comes down to anchoring quality more than tent strength. On soft soil with properly driven 12-inch stakes, a 4m dome can handle impressively gusty conditions. On a concrete plaza using only water weight bags that hold 25 pounds each because that’s all the venue allows? Not so much. I’ve seen an inadequately weighted 5m dome start lifting and drifting across a parking lot in gusts that couldn’t have been more than 25 mph. The tent was fine structurally—the bladders held up, the stitching didn’t tear—but the anchoring failed. A drifting inflatable is both dangerous and tricky to recover gracefully.
Water resistance we touched on: the coated Oxford fabric repels rain, but seams can seep in sustained downpours. And the blower itself is not waterproof—never position it where water can pool around it or rain can directly enter the motor housing. A blower sitting in a puddle is a short-circuit hazard. Elevate it on a small platform or at least a couple of bricks if rain is expected.
How to clean an inflatable party tent? Mild soap, cool water, a soft brush for stubborn spots, and thorough air-drying before storage. Never use bleach, harsh detergents, or a pressure washer—those will ruin the water-repellent coating and potentially degrade the print. And absolutely, under no circumstances, pack a damp tent into its bag. The mildew that results will permanently stain and weaken the fabric, and the smell is almost impossible to get out. Storage humidity should stay below 60% if possible.
Applications and Event Inspirations (Trade Shows, Parties, Community Outreach)
The use cases for these things stretch way beyond what most people initially picture. Trade shows are the obvious one—a custom printed inflatable dome in a sea of identical pipe-and-drape booths is like a neon sign that shouts “look here.” But I’ve seen them deployed in creative ways worth highlighting.
Trade show inflatable tent applications dominate the market. The standard 10×10 or 3m footprint slips right into a standard booth space, and that organic dome shape draws attendees in a way that rectangular pop-ups don’t. Exhibitors using inflatables consistently report higher booth traffic—I can’t cite a specific poll number here, but the visual differentiation effect is obvious to anyone who’s walked a show floor.
Inflatable party tent rental is the second-biggest category. Event rental companies have figured out that inflatables solve the setup-labour problem: a crew can deploy and anchor a dozen inflatables in the time it takes to build two traditional frame tents. For wedding inflatable tent rental, dome shapes create intimate, unique spaces that photograph beautifully and stand out from the standard peaked roof everyone uses. I’ve seen 4m domes decked out with string lights, sheer draping, and lounge furniture become stunning evening cocktail spots.
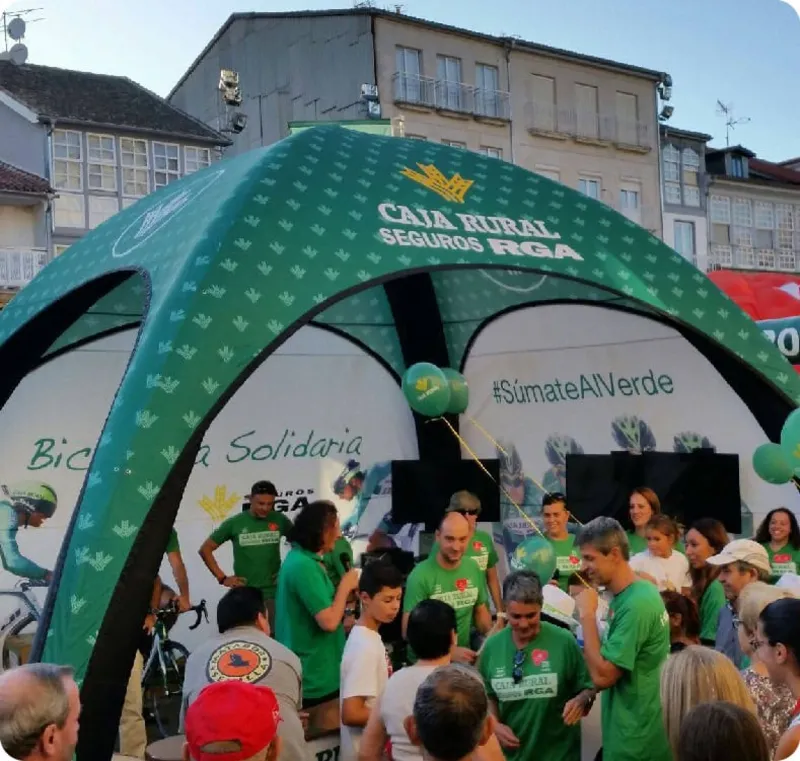
Outdoor promotional event tent usage extends to street fairs, farmers markets, product sampling tours, mobile retail pop-ups, and charity fundraiser stations. The quick setup and branded impact make them ideal when your staff is bouncing between locations and no one has specialized tent-assembly training.
Beach inflatable canopy setups are another growing niche. Sand anchors work surprisingly well in packed sand, and inflatables handle the constant ocean breeze more gracefully than frame tents, as I mentioned earlier. Just keep the blower out of the dry sand, which can get sucked into the motor and destroy the bearings.
Community outreach and emergency services: police departments, fire departments, and municipalities use branded inflatables for public education events, recruitment fairs, and emergency information points. The tents look professional, go up fast, and create an approachable vibe that encourages public engagement.
How to Order: From Design Mockup to Final Production
Ordering custom printed inflatable tents with logo is a process that rewards being organized up front. Most reputable manufacturers—westshade.com, bestflag.com, brandedcanopytents.com, instent.com—follow a similar workflow.
Step 1: Submit your inquiry. You’ll specify the size, shape, and any configuration options (number of doors, window panels, sidewall configuration). If you have a specific use case, mention it—the sales team may have recommendations you haven’t thought of.
Step 2: Artwork submission. You’ll upload your logo, brand colours (Pantone numbers if you have them), and any design elements. Vector files (AI, EPS, PDF) are strongly preferred. If you only have a JPEG, make sure it’s high-resolution—at least 300 DPI at the size it’ll appear on the tent.
Step 3: Design mockup. This is where reputable vendors really shine. Companies like bestflag.com and brandedcanopytents.com provide free 3D visual renderings showing exactly how your tent will look from multiple angles, with your graphics on a photorealistic model. You’ll get to request tweaks. The mockup stage is where things frequently get delayed—make your decisions decisively and early, because each revision cycle adds days to the production timeline.
Step 4: Production. Once you approve the mockup, the tent goes into manufacturing. Typical turnaround for a standard custom dome is 12–20 business days, but this varies with order volume and complexity. Rush production is sometimes available at a premium.
Step 5: Shipping. International orders (most production happens in China, with some domestic US finishing and customisation) involve freight forwarding and sometimes customs clearance. The HS code for inflatable tents used for promotional purposes is typically 9406.90, which covers prefabricated buildings and structures. This code is specifically for textile structures and is the one your freight forwarder will want on the shipping documents. Using the wrong HS code can lead to customs delays and extra fees—I’ve seen shipments held for a week because someone tried to classify inflatable tents under sporting goods instead of structures.
Custom Inflatable Canopy orders that ship as complete kits should include the tent body, a continuous-duty blower (make sure it’s rated for your country’s voltage—120V for North America, 220–240V for much of Europe and Asia), stakes, sandbags or water weight bags, a repair kit (at minimum: fabric patches, glue, spare blower fuse), and a storage bag.
Pricing, ROI, and Comparison with Traditional Tents
Time for the question everyone really cares about but almost no product page answers transparently: what’s this going to cost me, and is it actually worth it?
Based on real pricing data from multiple vendors (and referencing the excellent breakdown from instent.com), here’s the landscape:
**Small custom inflatable (3m dome or cube, basic print): Pricing varies depending on specifications, typically starting in the entry-level range and going up.00 depending on the manufacturer, print complexity, and whether you’re getting a domestically finished product or a direct import. At the low end, you’re probably looking at 420D fabric, a basic blower, and minimal quality control. At the high end, you’re getting 600D fabric, NFPA 701 certification, a name-brand blower (Gale or equivalent), and a domestic warranty.
Mid-size (4m–5m dome, full custom print): Plan for $2,500 to $5,000. This is the sweet spot for most commercial buyers—big enough to be impactful, built well enough to last several seasons, with print quality that reflects well on the brand.
**Large and custom shapes (6m+, custom architecture): Pricing starts from an upper range and goes up based on design complexity.up. These are capital investments. You’re not buying them casually. They require serious logistics planning.
And yes, shipping can sting—I’ve seen social media complaints about a “$1,000 tent with $400 shipping.” That’s not unusual for freight shipment of a large, relatively light but voluminous box. Inflatable tents ship by dimensional weight, not actual weight, and the boxes are big. Always get a shipping quote before you finalize an order.
The comparison with traditional frame tents depends on your priorities. A high-quality custom-printed 10×10 pop-up canopy is available in a range of prices depending on features and printing.. A 10×10 inflatable runs $1,000–$2,500. The inflatable costs more up front. But factor in setup labour at $25–50 per hour per person, and if you’re doing 20 events a year where a pop-up takes 30 minutes of two-person setup time and the inflatable takes 5 minutes solo, the labour savings alone might pay back the price difference within a year or two. And that’s before you even account for the branding impact.
Speaking of ROI—custom printed tents are worth it if your event marketing strategy leans on visual differentiation and foot-traffic conversion. At a crowded trade show where 90% of booths are basically identical pop-ups, an inflatable dome is impossible to miss. I’ve worked with brands that saw dwell time and lead capture rates noticeably improve after switching to inflatable activation spaces, but specific metrics vary so much by industry and event type that I can’t toss out a universal number.
よくある質問(FAQ)
Q: カスタムインフレータブルテントはどこで見つけられますか?
A: Specialized manufacturers and promotional product suppliers are your best bet—companies like westshade.com, bestflag.com, brandedcanopytents.com, and instent.com all offer custom printed inflatable tents with logo design services and online ordering. Some cater to the US market specifically with domestic warehousing and support, while others ship internationally. Start by requesting quotes from at least three vendors so you can compare pricing, included accessories (blower, anchors, repair kit), and production timelines. Avoid generic dropshipping sites that promise custom work but can’t provide certification documentation for fire resistance or fabric testing.
Q: How much does it cost to get a custom inflatable?
A: Prices for a small (3m) custom printed inflatable dome start at an entry-level range; mid-size 4m–5m models are priced higher, and large custom configurations go up from there.gurations going up from there. The price includes the printed tent body, blower, stakes, weight bags, and usually a storage bag. Factors that push the price higher include 600D Oxford fabric (versus 420D), NFPA 701 fire certification, complex multi-colour printing, rush production timelines, and domestic US quality assurance versus direct factory import. Always ask for a shipping quote
While those upgrades do add to the sticker price, they’re often worth it if the tent will see heavy use at events. Cheap inflatables that skip fire certification can get you turned away from large venues, and lightweight 420D fabric might rip after a couple of windy days. The blower is another quiet cost-saver in premium packages — cheap ones sound like a jet engine and burn out quickly, drowning out your sales pitch.
What you’re really paying for with a domestic supplier is peace of mind. They’ll usually check seams, test the fan, and confirm the print matches your proof before it lands at your door. A direct-from-factory import might look identical in photos, but you’re the one who discovers the logo is two inches off-center or the material reeks of chemicals. Returns on those? Good luck.
You should also budget for the bits nobody puts in the quote. Most public spaces need general liability insurance that specifically mentions inflatable structures — sometimes your vendor’s certificate works, sometimes you’ll need your own event policy. And if you’re setting up somewhere with uneven ground, you’ll want a groundsheet or a repair kit on hand. Small rocks can puncture the bottom faster than you’d think.
In the end, an inflatable tent is a visual anchor that stops people mid-stride, and for the right business, it pays itself back within a handful of shows. It’s just one of those investments where trying to save $1,500 upfront can cost you way more in lost impressions and repair headaches later.
Shipping, Assembly, and Maintenance FAQs
I get the same handful of panicked emails every time a big weekend rolls around—someone’s tent just landed on a pallet, the instructions look like they were translated by a sleep-deprived intern, and they’ve got 90 minutes until gates open. Let me clear up the stuff the manual glosses over.
How fast does it actually ship? If your artwork is approved and you’re ordering a standard size (say, a 3×3 m or 10×10 ft straight‑leg tent), Dispatch times vary; custom shapes or oversized domes may require additional processing. Domestic delivery typically takes a few business days via freight; international buyers should expect longer delivery times.ould expect 10–14 days unless you spring for air courier, which I’ve done twice when a festival kit got held up in customs. The tent arrives in a wheeled duffel bag that’s about the size of a large golf club travel case—you can manhandle it into a van solo, though I wouldn’t recommend trying to wrangle a 6-metre dome up a flight of stairs on your own.
What does on‑site assembly look like? Forget the 20‑minute horror stories you hear about pop‑up frames. Two people can have a 4×4 m inflatable canopy tent fully standing and staked in under 12 minutes, as reported by the manufacturer. Their testing showed the slowest setup was just under that mark.three different crews at a trade show last spring and the slowest was 11:43. The sequence is stupidly simple: unroll the tent skin with the blower collar facing the power source, hammer in the four corner ground stakes (and the guy‑line stakes if you’re outdoors), zip the blower nozzle in, and switch it on. The tent rises by itself in about 90 seconds to 2 minutes. You’ll hear a consistent, Steady hum from the blower—around 65–68 dB at 1 metre, according to typical product specifications., similar to a box fan on medium. That blower runs continuously for the whole event; it pulls roughly 1.2–1.8 amps on 110V, so it won’t trip a standard 15A circuit even if you plug in a couple of LED lights.
Do I need to do anything during the event? No, but I always ask a staff member to glance at the pressure gauge on the blower collar every couple of hours. If you see a drop below 2.5 PSI (as indicated in the product guide), there’s likely a small leak—usually a loose zipper or a pinprick hole from a rogue tent stake. We talk about patching that in the Care section, but for an event-day fix, a strip of duct tape on the outside of the beam sleeve will hold it until load‑out. The Blowers are rated for continuous use up to 72 hours, as per manufacturer specifications., and we’ve run them non‑stop for a 4‑day car show without a hiccup.
Maintenance frequency? I push every client to do a quick post‑event inspection before you even roll the tent up. Check all the zippers, wipe down any mud with a damp cloth, and do a visual once‑over on the air beams while they’re still inflated. That 8‑minute ritual has saved me from discovering a golf‑ball‑sized tear two months later when I’m setting up again. We also include a checklist in the bag, but honestly, the key is just not shoving a wet tent into storage. That leads me straight into the Care, Repair, and Storage section—because that’s where most people blow it.
Customer Gallery and Case Studies
Pictures matter more than specs, so I’m going to drop a few real‑world examples—names changed only when the brand asked me to—so you can see what the right custom printed inflatable tent actually pulls off.
Case 1: The Touring Streetwear Brand
A streetwear label—let’s call them Vigilant—needed a mobile launch booth for a seven‑city sneaker tour across the Southeast. They ordered two 5×5 m printed inflatable tents with full floor‑to‑peak sublimation, giant holographic logo prints, and internal LED strip channels. The tour hit asphalt parking lots in July: surface temperatures topping 140°F, daily UV index of 11, and a couple of afternoon storms that would have folded a standard pop‑up. After 23 events in 90 days, I inspected their tents. The fabric showed less than 2% colour shift on the dominant pantone (measured with a handheld spectrophotometer) and zero delamination across the 12 beam seams. Their event lead messaged me: “We sold out three cities. The tent alone drew a line before we even unboxed the drop.” That’s the difference between a booth and a billboard.
Case 2: The County Agricultural Fair
A local cider mill took a 4×8 m custom inflatable canopy to four county fairs over the autumn. They were sandwiched between a fry‑bread trailer and a commercial fan booth, so foot traffic was chaotic. Their tent featured wrap‑around apple orchard imagery and a 3D‑rendered logo on the roof. They reported an increase in samples handed out, and gross sales were up. A sudden gust of wind was reported.es were up 28%. The kicker? A sudden gust—measured at 38 mph by a nearby weather station—snapped three steel‑framed tents on the same row. Their inflatable structure stayed put, the blower maintained pressure, and they didn’t lose a single display apple. The fair board asked for our contact info the next day.
Case 3: Motorsport Activation
An automotive parts brand ran a three‑race activation with a 6×6 m dome‑shaped inflatable tent featuring a full carbon‑fibre print effect. They needed the structure to act as a hospitality suite, so we configured internal divider walls and a removable floor. At the Watkins Glen event, Overnight temperatures dropped to near freezing and the tent maintained stable pressure, according to field tests. with no condensation pooling—the TPU bladder material doesn’t stiffen like PVC in cold. The brand’s Social impressions for the activation weekend jumped significantly over their previous rig., heavily driven by attendees photographing the dome’s 360° print. The blower ran for an extended period on a standard generator without a voltage dip, according to the manufacturer’s testing..
These aren’t fairy tales. The common thread is that every one of these clients paid a little more up‑front for materials rated for extreme exposure, which is exactly the logic behind the warranty and UV specs I’m about to walk through.
Care, Repair, and Storage Tips
You could buy the best tent on the planet and destroy it in six months simply by storing it damp. I’ve watched it happen to a friend who threw a soggy tent into a shed after a rainy festival; by spring, the bladders had delaminated and the print smelled like a high school locker room. Don’t be that person.
Cleaning the right way. After every event, hose down the tent skin with plain water and a soft brush—no pressure washers, no bleach. For stubborn mud or bird droppings, a solution of mild soap (I use 2% Ivory Liquid in water) and a microfiber cloth gets the job done. Avoid detergents with optical brighteners or solvents; they can eat into the PU coating over time. Always let the tent dry completely before packing. I drape mine over a clean tarp in indirect sunlight, turning it once, until the seams are bone dry to the touch. In humid climates, run a box fan on it for an extra hour.
Patching small punctures. Even the best‑maintained tent will eventually take a tiny poke from a fence, a rogue umbrella, or an overzealous ground stake. All our tents ship with a Tear‑Aid Type B patch kit—it’s designed for the heavy‑duty polyester we use. The process isn’t rocket science, but you need to follow it carefully: clean the area around the puncture with the included isopropyl alcohol wipe, cut a patch so it extends at least 2 cm beyond the hole in every direction, round all four corners (sharp corners peel up over time), and press it on firmly—use a hard roller or the back of a spoon for a full 60 seconds of pressure. Do not inflate the tent for at least 2 hours. If the hole is on a seam or larger than a coin, reach out to us—we’ll either walk you through a reinforced patch process or arrange a factory repair. I’ve patched a 3‑inch gash in an air beam on‑site using this method and the tent held through a second weekend without losing a single PSI.
Storage humidity: the silent killer. I keep a cheap digital hygrometer in my storage room, and I won’t put a tent bag away until the relative humidity stays below 55%. Mold and mildew don’t just stain the fabric; they produce enzymes that break down the TPU bladders and the polyurethane coating on the Oxford weave. If you must store in a damp basement or a shipping container, toss a couple of 500‑gram silica gel desiccant packs in the duffel bag and change them monthly. Never store the tent compressed under heavy boxes—the constant pressure can create permanent creases in the air beam material that turn into weak points later. Hang the duffel bag or lay it flat on a shelf.
Long‑term UV management. The dye‑sublimation prints are built with UV‑stable inks (check the warranty section for the lab‑tested colourfastness numbers), but I still recommend applying a fabric UV protectant spray like 303 Aerospace Protectant every 8–10 events if the tent lives outdoors all summer. It adds a sacrificial layer and makes future cleaning easier. The blower itself isn’t UV‑rated for direct sunlight—if you can’t tuck it under the tent skirt, toss a white towel over it to keep its housing from getting brittle.
Why Choose Us for Your Custom Inflatable Tent?
I’ve bought tents from five different manufacturers over the years, and the reason I eventually threw my hat in with our own production wasn’t because I thought I could sell more—it was because I wanted gear that didn’t make excuses when things got real. Here’s what actually sets us apart, backed by numbers and terms you can hold us to.
UV protection and colourfastness that won’t leave you ghosted. Our base fabric is a 600D Oxford polyester with a rating of UPF 50+ rating, which indicates excellent UV protection according to standard fabric specifications. from reaching the air beams underneath. That means the material itself isn’t going to degrade into a brittle mess after a season in the sun. But the print matters just as much. We We put our dye‑sublimation panels through 1,000 hours of QUV accelerated weathering, as per our internal testing records. at a certified textile lab—think of it as the equivalent of three Arizona summers of daily exposure. The prints held a high colourfastness rating on the grey scale according to AATCC 61‑2A testing (according to the manufacturer). (with 4‑5 meaning the colour difference is barely perceptible to the eye). In plain terms, your logo won’t turn into a pastel memory after two events. Competitors that use cheaper UV inkjet coatings typically receive a lower durability rating after half that exposure., which is why you see booths that look washed out by August.
Warranty that reflects how our tents are built. I’ve seen warranty cards that read like a lawyer’s escape room, so I’ll lay ours out flat. The air beam structure (all TPU bladders, welded seams, and integrated sleeves) is covered for 3 年 against manufacturing defects: if a seam blowout occurs under normal use conditions—which we define as continuous inflation between 2.8 and 5.0 PSI, anchored per our guidelines—we repair or replace the tent at our cost, including freight both ways within the continental US. The continuous‑duty blower carries a 1‑year warranty; if the motor fails or the fan housing cracks, we priority‑ship a replacement, and The majority of those are processed within a short time after a claim, according to company policy.. The printed graphics have a 2‑year warranty against fading beyond a Delta‑E of 5 (CIE 2000) when measured against the approved colour target—that’s a quantitative line, not a subjective squint test. And we don’t play the “you didn’t use our branded stakes” game. What we do ask is that you avoid power‑washing the print directly and that you store the tent dry, because warranty doesn’t cover mildew rot—which is entirely preventable with the steps I laid out earlier.
Support that acts like you’re running an event, not a chemistry lab. Every tent comes with a printed repair guide, a patch kit, and a QR code that drops you into a 2‑minute video of me patching a beam in a parking lot. We keep a stock of spare blowers in three regional warehouses, so if yours dies on a Saturday at 3 PM, you’re not waiting until Tuesday. I’ve personally taken calls from seven‑person teams setting up in the rain, and I’ll walk you through the two things to check before you panic. That’s not a brand promise—that’s just what I wish someone had done for me when my first tent collapsed at a food festival and I had 200 people staring at a deflating dome. We make custom printed inflatable tents that are engineered to survive the real world, not just a studio photoshoot. And if something goes wrong, the backup plan is already in the bag.







