
Custom Inflatable Tent for Trade Show: Booth Planning & Exhibit Workflow
A buyer-side guide to specifying a custom-printed inflatable booth — air-frame selection, venue checklist, artwork prep and the teardown routine that keeps your exhibit tour moving. KCCE has 20 years of manufacturing experience.

A custom inflatable tent for trade show use is a printed air-frame booth that inflates in place on the hall floor: an Oxford-cloth canopy over welded TPU air tubes, specified to your stand dimensions with the walls, entrances and artwork your exhibit plan needs. KCCE builds to order from a single unit, with OEM/ODM and private-label packing.
Why Inflatables Own the Show Floor
A trade show booth has three jobs: be the first stand visitors recognise, host them comfortably once they walk in, and pack down fast enough to make the next city. A custom inflatable tent does all three because the structure itself is the branding — the canopy is the printed surface, and the air frame that holds it up replaces the aluminium skeleton of a conventional stand.
For exhibit tours the economics sit in reuse. The tent bag travels with the crew, the same inflation sequence repeats at every venue, and the air-tight platforms hold pressure with the valves closed, so the booth keeps its shape through the whole open period without booth-level power. When the show closes, the teardown is the setup in reverse — no scaffold to strip, no rental frame to return.
Customisation is where the booth earns its keep. Wall panels, entrances and print coverage are chosen per order, so the same platform can be an open-front traffic magnet at one show and a closed meeting suite at the next.
Air-Frame Choice for Halls
The first booth decision is not size — it is how the tent stays upright, because that decides your power booking and staffing.
| Decision factor | Air-tight (sealed) | Continuous blower (XIC) |
|---|---|---|
| Power at the stand | None after inflation — valves closed. | A running blower for the whole open period. |
| Unattended display | Holds shape on its own. | Needs someone with the booth. |
| KCCE platform(s) | AI, AII, U, VI, VII, F, N, X, X6, XII, XL-A, XL-B | Inflatable XIC |
| Best show type | Multi-day halls, regional tours, venues without booth power. | Short indoor shows with booked power and staff on stand. |
Most exhibit buyers choose an air-tight platform: the booth stands by itself all day and the crew is free to work the stand. The XIC suits shorter indoor slots where power is already booked and staff are on hand — never leave its blower running unattended.
Booth Layout & Wall Zones
The platform sets the footprint; the wall plan turns it into a working booth.
The open front
- Canopy-only layouts keep all sides open for maximum walk-in traffic.
- A printed valance or roof field carries the brand while sightlines stay clear.
- Counters and displays sit inside the shadow line, not outside it.
The closed meeting bay
- Lateral side walls close one or more sides for a private conversation area.
- Door walls add a proper entrance; window walls keep the bay light.
- Reversible double-sided walls show one design outside and another inside.
Zoning the footprint
- Split the stand into a welcome zone under the open canopy and a demo or meeting zone behind a wall line.
- Keep the printed faces on the aisle-facing sides — visitors read from distance first.
- Leave a crew path to the valves and the accessories bag; teardown starts at the far end.
Connecting into a larger frontage
- Modular aluminium connectors join X, X6, XL-A and XL-B tents of the same size.
- Connecting cloth closes canopy gaps; the XL-A has both a wide and a narrow version.
- Awnings and banners extend cover and print area beyond the frame.
Platform & Size Mapping
All figures come from the printed manuals. “Installers” is the crew needed to inflate the tent — not a visitor capacity. Send your stand dimensions and we map them to the closest platform.
| シリーズ | Documented sizes | Installers to inflate | Valves | Booth note |
|---|---|---|---|---|
| AI | 2.5M, 3M | 1 | 4 (reducible to 1) | Compact entry booth; hook-and-loop canopy |
| AII | 3M, 4M | 1 | 1 | Smallest footprint; iron block ballast supplied |
| U | 3M, 4M, 5M | 1 to 1-2 | 2 | Bar bag supplied for hall-floor ballast |
| F | 3×3M, 4×4M | 2-3 | 2 | Square footprint with reversible back wall options |
| N | 3×3M to 5×10M | 3 to 3-4 | 2 | Widest documented size ladder |
| X | 3M to 8M | 2 to 4-5 | Multiple | Modular connectors, awnings, banners |
| X6 | 5M to 8M | 2-4 to 3-4 | 6 | Mid-large span with connectors |
| XII | 4M, 6M, 8M, 10M | 1-2 to 4-6 | 9 (numbered order) | Largest documented sizes |
| XL-A | 4.5×3M to 7.5×4.8M | 1-2 to 2-3 | 5 (reducible) | Wide frontage; two connecting-cloth widths |
| XL-B | 8×4.5M, 9.4×5.5M | 2-3 | 7 (reducible) | Large rectangular exhibit halls |
| Inflatable XIC | Confirmed with your quote | — | Continuous blower | Blower-driven; needs booked power |
Print & Artwork Prep
The print is why buyers choose inflatable over frame — prepare it like media, not like decoration.
What heat-transfer printing carries
- Logos, colour fields, sponsors and photographic artwork reproduce across the canopy.
- Coverage runs from a single logo panel to a full branded wrap, walls included.
- The canopy attaches with a hook-and-loop connection on the AI and AII, so a canopy swap does not mean a new frame.
Preparing the artwork
- Send vector files at final size; re-created logos are the usual source of proof delays.
- Approve the print proof against your brand book before production — colours read differently on curved surfaces.
- Plan one message per sightline: the roof for wayfinding, walls for the detail.
For the printing process in depth, see カスタムプリントインフレータブルテント.
Venue & Ordering Checklist
Work this list in order and the booth spec writes itself.
Before you request the quote
- Stand dimensions and orientation in the hall plan.
- Venue floor type — grass, sand or finished hall floor.
- Wall preference: open front, closed bay, or a mix.
- Artwork status: final vector or pending design.
Confirming with the venue
- Maximum stand height and any rigging rules.
- Power booking at the stand (decides air-tight vs XIC).
- Freight and storage arrangements for the tent bag and accessories bag.
Before the show opens
- Inflate on a clean floor and anchor before branding goes up.
- Sand bags, water bags or barrels on hard floors — nothing is drilled.
- Check the proof against the finished print; photograph the finished booth.
Exhibit-Day Workflow
The same three phases repeat at every stop of the tour.
Quote to approval
- Send stand dimensions, floor type, wall plan and artwork.
- We map the request to the closest documented platform and return a written quote.
- Approve the print proof; production starts after design approval.
Hall setup
- Lay the tent out, identify the inflation valves, and keep the tubes straight as they fill.
- Inflate the chambers — on the XII, follow the numbered valve order.
- Stop when the safety valve releases its small hiss, then close the square valve cap.
- Anchor with ballast on hard floors, then mount walls and branding.
Teardown and move
- Open the deflation valves from the far end and roll the air out cleanly.
- Dry and wipe the canopy before bagging; a damp bag ruins a season.
- Log repair needs per unit and restock the accessories bag the same evening.
Show-Season Care
A booth that tours needs a routine, not a repair bench.
Between shows
- Store bags off concrete on pallets so the fabric stays dry.
- Keep the accessories bag — stakes, ropes, patches, spare valves — with the crew, not in deep storage.
- Inspect valves and seams at every repack; log anything that needs attention.
Spares and service
- Two TPU repair patches ship in the accessories bag on every air-tight series.
- Spare inflation and safety valves are included, matched to the model's valve count.
- Replacement canopy sections and cloth covers are available as spares.
Custom Tents in Action
Deployment scenes showing how KCCE platforms work as exhibition booths, launch stages and activation hubs.
Modular Booth for an Exhibition Hall
A grey modular inflatable event tent configured as a self-contained exhibition booth, combining open canopy and enclosed bays in one footprint.
- Modular layout
- Open + enclosed bays
- Hall floor deployment
Stage Frame for a Product Launch
An inflatable event tent used as the stage backdrop for an indoor product launch, with the printed canopy carrying the launch artwork.
- Stage framing
- Launch artwork
- Indoor venue

Sports Sponsorship Activation
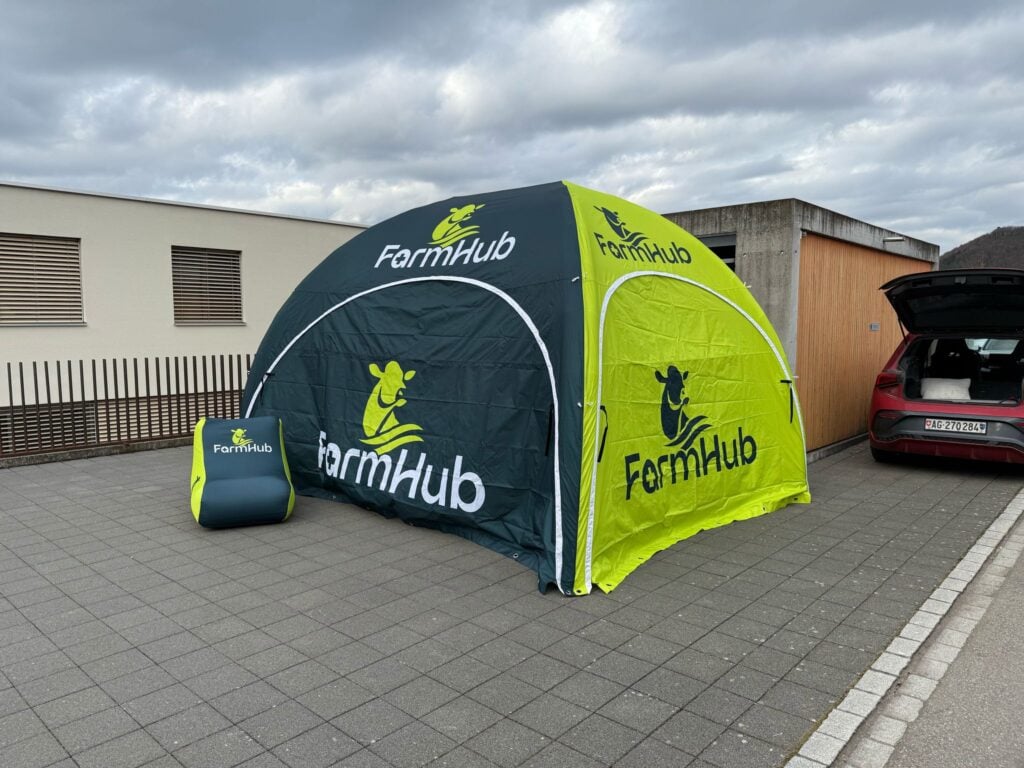
A dark inflatable event tent pitched on a sports field as the sponsor activation hub during a match-day event.
- Field deployment
- Sponsor hub
- Match-day crowd
A: Yes — that is the usual buying pattern for exhibit tours. The air-tight series are inflated once, the valves are closed, and the tent holds its shape with no power on site, so the same booth moves from hall to hall on one schedule. Detachable legs and the packed tent bag keep the bundle manageable between venues, and spare valves plus two TPU repair patches ship in the accessories bag so a minor fault never ends a show.
A: Pick air-tight when the booth must stand unattended for the full open period or the hall has no booth-level power. Pick the Inflatable XIC — the continuous-blower platform — only when reliable power is booked at the stand and someone stays with the booth, because its blower runs the whole time the tent is up.
A: Send vector artwork with the logo, colour fields and any sponsor marks at full size. Heat-transfer printing carries the design across the canopy, and coverage can run from a single logo panel to a full wrap. We return a print proof for approval before production, so check the proof against your brand book — especially colours on curved surfaces — before you confirm.
A: Three things decide the booth spec: the stand's floor dimensions and shape, the hall's maximum height or rigging rules, and the floor type — because anchoring on grass uses wind ropes and ground nails, while finished hall floors need ballast such as sand bags, water bags or barrels so nothing is drilled or damaged. Send us the venue facts with your enquiry and we map them to the closest platform.
A: Square and round platforms are quoted as a single span (3M, 4M, 5M and up), while rectangular platforms such as the XL-A and XL-B cover wide frontages. Walls decide how the booth works: lateral side walls close the stand, window walls add light, door walls add a working entrance, and reversible double-sided walls show two designs from one panel. On the X, X6, XL-A and XL-B series, modular aluminium connectors join tents of the same size into a larger frontage.
A: The standard package separates into a tent bag (canopy, detachable legs, valves and connectors) and an accessories bag (eight ground stakes, eight guy ropes, two TPU repair patches, spare inflation and safety valves, and the printed manual). Keep the accessories bag with the crew rather than in storage, log any repair needs per unit after each show, and store bags off concrete so the fabric stays dry between events.
A: It depends on the series and size. The documentation lists one installer for the AI, AII and smallest U sizes, rising to four to six for the XII at its largest size. Valve counts are documented per model — from one on AII up to nine on the XII, which inflates in numbered order. All figures come from the printed product manuals.
A: Send your stand dimensions, venue floor type, wall preference and artwork to [email protected] or via WhatsApp. We confirm the closest platform, the wall set and the print coverage, then quote the project in writing. Pricing is quoted per project and confirmed after design approval.

Tell Us Your Layout — Get the Quote in Writing
Ready to Plan Your Trade Show Booth?
Send your stand dimensions, venue floor type and artwork — we will map them to the closest platform and quote the project in writing.

