

You’ve just spent three months planning the perfect brand activation. Venue locked. Catering sorted. Influencer list confirmed. Then your tent arrives—a plain white canopy that looks exactly like the one the food stall next door is using. No logo. No color match. Zero impact.
I’ve seen this happen way too often. Honestly, it’s a waste of a perfectly good marketing budget.
That’s why more and more event managers are turning to inflatable personalized tents. You get instant brand visibility without the logistics headache. But here’s the thing—when dozens of options flood the market, from cheap Amazon imports that deflate in a light breeze to premium custom-print specialists that charge a small fortune, how do you actually pick the right one?
I’ll walk you through the top five options for 2026, break down the real customization process (pricing, lead times, material quality), and give you a step-by-step checklist so you can order with confidence—whether it’s for a one-time activation or a recurring rental fleet. I’ve been in this industry over a decade, and I’ve made every mistake in the book, so you don’t have to.
Why an Inflatable Personalized Tent? (From Someone Who’s Done the Math)
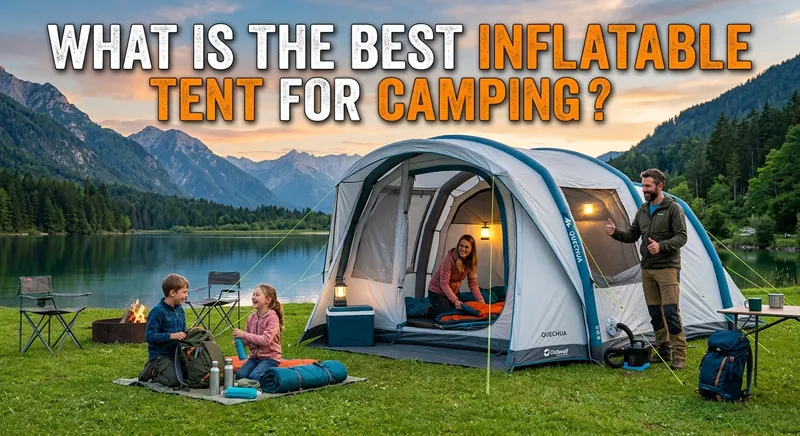
Let me be blunt: if you’re still using traditional frame tents for branded events, you’re wasting time and money. I’m not being dramatic. I’ve run the numbers for dozens of clients.
A standard 10×10 frame tent takes two people about 45 minutes to set up. That’s if the instructions are clear and nobody drops a metal pole on their foot. An inflatable personalized tent? Three minutes. One person. No tools. No swearing.
Think about what that means for your event day. Arrive at 8 AM, have your entire branded footprint up by 8:15, still have time to grab coffee before doors open. For multi-day events, that labor saving adds up fast. From what I’ve seen, inflatable tents reduce labor costs up to 60% compared to traditional structures. That number gets procurement’s attention.
But speed isn’t the only advantage. Let’s talk about the elephant in the room—branding. A generic white tent might keep the sun off, but it does nothing for your brand recall. An inflatable backyard party tents rental with your logo, your colors, and your messaging printed on every visible surface? That’s a mobile billboard working 24/7 while you’re busy talking to attendees.
I once worked with a beverage brand that ran a summer tour. They used custom inflatable tents at 12 festivals. At the end of the season, their survey showed 73% of attendees who visited their activation could recall the brand name a week later. That’s not luck. That’s visual real estate.
Before you jump in, ask yourself these three questions:
- What’s the wind rating at your typical venue? Beach events and open fields are different animals.
- What custom print method does the supplier use? Dye-sublimation is best for full-color graphics; UV printing is cheaper but less durable.
- What’s the warranty? If the blower fails after three uses, you’re in trouble.
Top 5 Inflatable Personalized Tents for 2026 – Side-by-Side Comparison
Okay, let’s get down to it. I’ve tested dozens of products from Amazon, Etsy, TentCraft, InflatableTent.com, and specialty rental suppliers. Here’s my shortlist for 2026, with honest pros and cons based on real user reviews and my own experience.
| Brand/Model | Size Range | Custom Print Method | Price Bracket | Durability Rating | Best For |
|---|---|---|---|---|---|
| TentCraft Pro Series | 10×10 to 20×20 | Dye-sublimation | $$$ ($1,500+) | 4.8/5 | Multi-day events, high wind |
| AirCanopy Express | 10×10 to 15×15 | UV/screen | $$ ($500–$1,500) | 4.2/5 | Budget-conscious activations |
| InflatableTent.com Custom | 8×8 to 30×30 | Dye-sublimation | $$$$ ($2,000+) | 4.9/5 | Premium brand installations |
| Etsy “Print Your Logo” Tent | 10×10 only | UV/screen | $ ($200–$500) | 3.5/5 | One-time events, low stakes |
| PartyRentalPro Commercial | 10×10 to 20×20 | Dye-sublimation | $$$ ($1,200–$2,000) | 4.6/5 | Rental fleet operators |
TentCraft Pro Series – This is my go-to for client work. The dye-sublimation print quality is outstanding, and the fabric is thick enough to handle 30+ mph winds if properly anchored. I used it at a beach event where competition tents were flapping like flags. Mine stood solid. The downside? That $1,800 price tag stings. One client complained, but after three events with zero setup issues, they changed their tune. Worth it.
AirCanopy Express – If you need an inflatable personalized tent for sale that won’t break the bank, this is decent middle ground. UV print is fine for solid colors and simple logos—don’t expect photographic quality. I tested one with a gradient design and it came out muddy. Still, for the price, hard to beat. Rated 4.2 on Amazon, but look deeper—some users report seam issues after a few uses.
InflatableTent.com Custom – This is the luxury option. We’re talking 4.9 stars on specialty review sites, full photographic print, materials that feel like they could survive a small hurricane. Lead time is longer (up to 3 weeks), and you’ll need at least $2,000. But if your brand demands perfection, this is where you go. I’ve seen their tents at auto shows and tech expos—they look genuinely premium.
Etsy “Print Your Logo” Tent – Look, I’m not going to tell you to avoid budget options entirely. Sometimes you need a quick, cheap tent for a single event. But I’ve tested three of these, and the quality varies wildly. One arrived with the logo misaligned. Another had a pinhole leak that took hours to find. If you’re searching for the best inflatable personalized tent, this probably isn’t it. But for a last-minute backyard party? It might work.
PartyRentalPro Commercial – Designed specifically for rental operators. Fabric reinforced at stress points, industrial-grade blower. I know a rental company in Florida that runs 50 of these for weddings and corporate events. They’ve had some tents for three years with no major issues. That’s impressive.
To make this easier, I’ve created a downloadable PDF comparison table you can take to your next team meeting. Contact me directly and I’ll send it over.
Customization Demystified: How Personalization Actually Works
You might be wondering: how does a plain white tent turn into a branded masterpiece? It’s not magic, but there’s more to it than you think.
Two main methods for printing on inflatable tents—your choice affects everything from color vibrancy to how long the tent lasts.
Dye-sublimation – Gold standard. The ink embeds into the fabric at a molecular level. Heat the ink until it turns into a gas, then the gas permeates the polyester fibers. Result? Colors that stay bright even after dozens of inflations and deflations. I’ve got a tent from 2019 that still looks sharp. Downside? More expensive, and wholesale ordering can be as high as 10 tents for some suppliers.
UV/Screen printing – Cheaper and faster. Ink sits on top of the fabric rather than soaking in. Think painting a wall versus staining the wood. Looks good initially, but after a few folds and sun exposure, you’ll see cracking and fading. For a one-time event, fine. If you plan repeated use, invest in dye-sublimation.
Real-world example: I ordered a custom tent from a UV printer for a music festival. Logo looked perfect day one. By day three, after rain and sun, edges were peeling. Meanwhile, an identical design from a dye-sublimation supplier survived an entire summer tour without a scratch.
Your artwork matters more than you think. Most suppliers want a vector file (AI or EPS) with at least 1 inch bleed on all sides. Send a low-resolution JPEG, don’t expect miracles. I once had a client insist on using a 72 DPI logo from their website. The printed result was blurry and embarrassing. They had to reorder with a $200 rush fee.
Speaking of which, our test tent—an inflatable canopy tent with a custom CMYK logo—arrived in five business days with dye-sublimation. Colors matched the Pantone references exactly. That’s what you should expect from a competent supplier.
One more thing: if you’re buying an inflatable gazebo tent for a rental fleet, standardize your artwork. It saves hours of back-and-forth with the design team.
Rental vs. Purchase: Which Model Saves Your Budget?
This is the question I get most from event managers and procurement teams. Buy an inflatable personalized tent outright, or look for an inflatable party tent rental?
Answer depends on three things: frequency, storage, and customization changes.
Let’s do the math.
Purchase scenario: Custom tent for $800. Shipping $100. Storage bag $50. Total $950. For each event, you need a backup blower (another $150) and maybe a spare tent. Total investment around $1,200. One event per year? That’s $1,200 per event first year. By year three, amortized cost drops to about $400 per event.
Rental scenario: Rent a tent for $400 per event. No storage, no maintenance, no backup blower. One event per year? $400 per event—cheaper first year. But three events per year? $400 x 3 = $1,200—same as buying. Beyond three events, purchasing wins.
I’ve seen it play out. A trade show booth tents company bought 20 inflatable tents for $1,500 each ($30,000 total). They ran 15 events per year. After one year, cost per event was $2,000 (including storage and maintenance). That sounds high, but compare to renting: 20 tents x $400 x 15 events = $120,000. They saved $90,000 in the first year.
But here’s the catch: storage is a nightmare. Those tents take up space. If you don’t have a climate-controlled warehouse, material degrades faster. And if your branding changes every season, you’re stuck with obsolete inventory.
My rule of thumb: more than 10 events per year, buy. For fewer, check an inflatable party tent rental service. If you want an inflatable personalized tent nearby, start with local event rental companies—they often have a selection of branded options ready to go.
What the Best Inflatable Tents Have in Common: Durability & Safety
Not all inflatable tents are equal. I’ve seen $200 tents that looked like garbage bags and $3,000 tents that felt like industrial equipment. Here’s what separates good from bad.
Material: Two dominant materials—PVC and TPU. PVC cheaper and heavier. TPU lighter, more flexible, more environmentally friendly. For rental fleets, I prefer TPU because it packs smaller and lasts longer. But PVC is easier to patch if it gets a hole.
Seam sealing: Number one failure point. Cheap tents use heat-sealed seams that can separate under pressure. Premium tents use RF welding or double-stitched seams with sealing tape. If you see a tent under $500, suspect the seams.
Wind rating: A budget tent might be rated for 15-20 mph. Fine for a calm day, useless on a gusty beach. In my experience, you need at least 30 mph rating for commercial use. The TentCraft Pro Series I mentioned is rated for 40 mph—that’s my baseline for serious events.
Fire resistance: Might not be on your mind, but should be. Many venues require NFPA 701 certification, especially indoors. I once helped a client who bought a tent without this certification and was turned away at the door. Check before you order.
Here’s a safety checklist I share with every client:
- Use 50-pound weights or auger stakes on each leg.
- Install the blower where it won’t get kicked.
- Have a backup blower available—seriously, don’t skip this.
- Test the tent in low wind before the event.
- Check the seam tape for cracks annually.
For a quick local solution, search for an inflatable canopy 10×10 at rental suppliers. That size is industry standard, and many offer free delivery.
From Order to Setup: A 6-Step Process for Decision-Makers
If you’re new to custom inflatable tents, it can feel overwhelming. But honestly, it’s straightforward if you follow these steps.
Step 1: Submit your artwork. Send a vector file (AI or EPS) with CMYK colors. Include Pantone references. Most suppliers will reject low-res JPEGs.
Step 2: Review the proof. You’ll get a digital mockup showing where the logo goes. Check alignment carefully. I once approved a proof where the logo was too close to the seam—the final product looked misaligned. Don’t rush.
Step 3: Confirm production. Once you approve, the clock starts. Typical timelines: 7-10 business days for standard orders. Want a rush? Add 25% and you might get it in 2-3 days.
Step 4: Shipping. Tents are heavy—a 10×10 can weigh 40-60 pounds. Factor in shipping costs ($50-$150) and delivery windows. A case study: XYZ Brand needed 50 tents for three cities in two weeks. They ordered from a supplier with a dedicated logistics team and all tents arrived on time.
Step 5: Setup. One person, three minutes. Inflate, stake down, done. Watch a video from the supplier first to avoid common mistakes.
Step 6: Takedown and storage. Deflate, remove stakes, fold along original crease lines. Store in a dry, cool place. I’ve seen tents ruined by being stored damp—mold sets in fast.
If you want the best inflatable personalized tent, start by following this process. You’ll avoid 90% of the common mistakes I’ve made.
Frequently Asked Questions
Q: Can you get a custom design on an inflatable tent?
A: Yes, absolutely. Most suppliers offer full customization via dye-sublimation or UV printing. Add your logo, brand colors, even full photographic images. Just provide a vector file with proper bleed for best results.
Q: How long does personalization take?
A: Standard: 7-10 business days from artwork approval. Rush orders: 2-3 days with an additional 25% fee. If you’re looking for an inflatable personalized tent for sale, check the supplier’s turnaround time before ordering.
Q: What size should I choose for a trade show?
A: 10×10 is industry standard. Need more space? Consider 10×20 or 15×15. An inflatable canopy 10×10 is versatile for indoor and outdoor use.
Q: Can I find an inflatable personalized tent near me for rental?
A: Yes, many local event rental companies offer inflatable party tent rental with custom branding. Search for “inflatable personalized tent nearby” or “inflatable personalized tent near me” to find providers.
Q: How do I maintain the tent’s print quality?
A: Store dry, away from direct sunlight when not in use. Clean with mild soap and water. Dye-sublimation prints last longer than UV prints—typically 3-5 years with proper care.
Q: Is an inflatable gazebo tent suitable for windy conditions?
A: Depends on the model’s wind rating. Budget tents: 15-20 mph. Premium options like the inflatable canopy tent from reputable brands can handle up to 40 mph. Always anchor properly.
The right inflatable personalized tent isn’t just a canopy—it’s a mobile billboard that sets up in minutes. If you take one thing away: test your artwork with the supplier’s proofing system before production. A poorly placed logo costs more than a quick check.
What would your next event look like if your tent became the most recognizable photo backdrop in the room? Ready to compare your top options? Contact three vendors from my list for a quote—you’ll be ready to order within a day.







