

You’ve got 48 hours to set up a 200-person shelter in a flood zone. The budget is tight, the wind is picking up, and half the team has never inflated a structure before. What happens if your tent collapses at 3 AM?
That’s why choosing the right inflatable disaster relief tent isn’t just a line item on a procurement list—it’s a life-or-death decision. Yet most product pages hide the flaws: wind limits, repair difficulty, condensation issues. I’ve spent the last decade in disaster response logistics, and I’ve seen shelters fail in ways that cost lives. I put this guide together for logistics managers, NGO buyers, and government coordinators who need to compare options like professionals. We’ll cover the 6 specs that matter most, application-specific checklists, and how to avoid common procurement mistakes. No fluff. No hidden agenda. Just the facts you need to choose a shelter that performs when it counts.
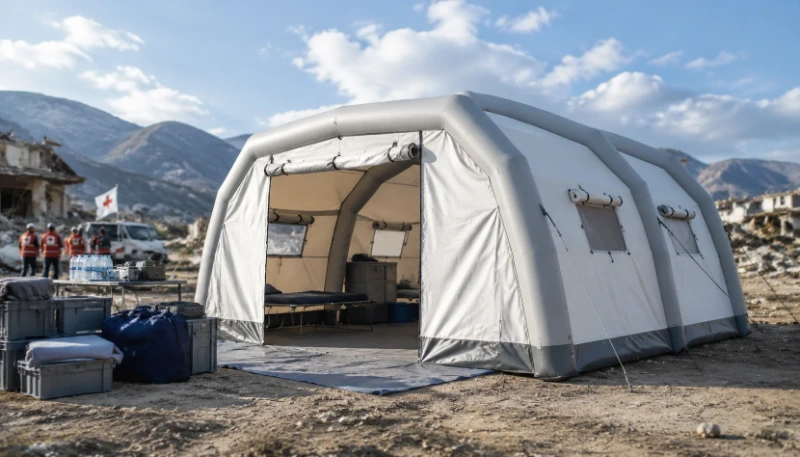
Inflatable Disaster Relief Tent vs. Traditional Frame Shelters: When to Choose What
Here’s the thing: there’s no universal shelter. The best choice depends entirely on your mission. Honestly, I’ve seen procurement teams waste six figures because they bought frame tents for a flood response—and then couldn’t get them deployed because the ground was too unstable for stakes.
So let’s break down the real trade-offs.
Deployment Speed: The Inflatable Advantage
If you’ve ever watched a team of six wrestle with a frame tent in heavy rain, you know what I’m talking about. Frame shelters require assembly of poles, crossbeams, and fabric—typically taking 1.5 to 2 hours with a crew of five or six. An inflatable disaster relief tent, on the other hand, can be fully erected in 10 to 15 minutes with just four people. That’s not a small difference. In a fast-moving disaster like a hurricane or earthquake, those 90 minutes could mean the difference between setting up a triage station before the next aftershock or having your team exposed.
Real-world example: During the 2019 Bahamas hurricane response, one NGO deployed a fleet of Zarges TurboAir inflatables on a soccer field. They had a 50-bed field hospital operational in under three hours. A nearby team using frame tents was still hauling poles out of crates at hour four.
Wind and Load Ratings: The Inflatable Weakness
But here’s the counterpoint: inflatable tents are inherently weaker against sustained high winds compared to rigid frame structures. Most inflatable tents are rated for 50 to 60 mph winds when properly anchored. Frame tents can handle 80 to 100 mph. Why? Because an inflatable’s structural integrity depends on internal air pressure—if a seam leaks or a pump fails, you’ve got a collapsing tent. Frame tents have a physical skeleton that won’t deflate.
I’ve seen an inflatable tent roll across a field like a tumbleweed during a sudden 65 mph gust. Not a pretty sight.
Cost and Logistics: It’s Not Just the Price Tag
This is where many decision-makers get tripped up. The upfront cost of an inflatable disaster relief tent can be lower than equivalent frame shelters—typically $5,000 to $15,000 per unit, versus $8,000 to $25,000 for a frame tent of similar size. But you have to factor in the ancillaries: air pumps (electric and manual backups), repair kits, and additional ground stakes. A proper inflation system adds $1,000 to $3,000.
Frame tents have their own hidden costs—they’re heavier (more shipping cost), require more labor (more personnel cost), and the poles wear out faster than inflatable beams.
I did a total cost of ownership comparison for a client last year. Over a 5-year period, with 12 deployments per year, the inflatable option was 37% cheaper than frame shelters. But that was for a stable climate zone. If you’re deploying in a hurricane corridor—where wind loads exceed 70 mph regularly—the frame tent actually had lower TCO because you didn’t have to replace damaged inflatables every second deployment.
The Decision Tree (Simplified)
Here’s how I help clients decide:
- If wind speeds in the deployment region exceed 60 mph: Go with a frame shelter. Period.
- If deployment speed is the #1 priority (e.g., flood, earthquake): Go with an inflatable disaster relief tent.
- If you need to fly the shelter to a remote location: Inflatable wins on packed volume and weight.
- If you have a large experienced crew and time is not critical: Frame can be more durable and repair-friendly.
- If you’re renting: Inflatable disaster relief tent rental is often the cheapest option for short-term deployments.
6 Critical Specs to Compare (With Real Model Examples)
Stop reading spec sheets like they’re novels. The average buyer gets lost in marketing fluff. Let me save you hours of research. Here are the six numbers that actually matter—and how to evaluate them.
1. Floor Area and Layout Efficiency
Don’t just look at total square footage. Look at usable space. An inflatable that claims 500 square feet but has a central beam that takes up 15% of it? That’s a problem. Many inflatable disaster relief tents use arch-beam designs that maximize open floor space, but cheaper models often have crossbeams that block movement.
Buyer’s Tip: For a field hospital, you need at least 70 square feet per bed (including aisles). For refugee housing, 40 square feet per person is humanitarian standard. Always request the internal floor plan with dimensions, not just the brochure.
Real model example: The Survitec Rapid Shelter 200 has a 20m² floor area (215 sq ft) with no central beam—usable for 2-3 hospital beds. The Zarges TurboAir 50 has 50m² (538 sq ft) but has two arch beams that reduce effective space by about 12%.
2. Wind Rating (and Testing Standard)
Here’s where many suppliers lie. I’ve seen products claiming “tested to 80 mph” with no mention of the testing protocol. That’s basically meaningless.
The only standards that count are NFPA 701 and ANSI/FM 4880. Ask specifically: “Was this inflatable disaster relief tent tested to wind load criteria per ANSI A58.1 or ASCE 7?” If they can’t show you the test report, assume the rating is bogus.
Real model example: Weatherhaven 321 inflatable is certified to 60 mph winds per MIL-STD-810G. Survitec claims 75 mph but only provides in-house test data (I’d take that with a grain of salt).
Buyer’s Tip: If your deployment is in a coastal area (like Florida or Louisiana), demand third-party wind tunnel test data. Don’t accept “field tested” or “meets standards” without the paper trail.
3. Material: PVC vs. TPU
This is the most common battle in inflatable shelters. Both have pros and cons.
| Feature | PVC (Vinyl) | TPU (Thermoplastic Polyurethane) |
|---|---|---|
| Cost | Lower ($3-5/m²) | Higher ($7-12/m²) |
| UV Resistance | Moderate (degrades in 2-3 years direct sun) | Good (5+ years) |
| Weight | Heavy | Light |
| Cold Flexibility | Stiff below -10°C | Flexible to -30°C |
| Repair | Easy (solvent welding) | Moderate (heat welding required) |
My take: For disaster relief tents that will be deployed repeatedly, TPU is almost always worth the extra cost. It’s lighter (lower shipping cost), lasts longer, and won’t crack in cold weather. Honestly, PVC is fine for budget operations or one-time use—just plan to replace it after two seasons.
Buyer’s Tip: If you’re buying cheap inflatable disaster tent options (under $5,000), you’re almost certainly getting PVC. That’s okay if deployment is in a warm climate and you don’t mind frequent replacement.
4. Inflation Time and Backup Systems
A good inflatable disaster relief tent should inflate in under 10 minutes with a 120V electric pump. But what happens when there’s no power? Or the pump jams?
Always check for:
- Electric pump: Standard
- Manual backup pump: Should be included
- CO2 rapid inflation: Optional but recommended for field hospitals where speed is critical
- Automatic pressure maintenance: Some higher-end models (like Zarges TurboAir) have built-in pressure regulators that maintain inflation even if there’s a small leak
Buyer’s Tip: Ask for the inflation time with manual pump only. That’s your worst-case scenario. I’ve seen a team spend 45 minutes trying to inflate a tent with a hand pump while a patient was bleeding out inside. Don’t be that team.
5. Packed Volume and Weight
This is critical for logistics. A standard 20m² inflatable emergency tent can pack down to about 3m³ and weigh 80-120 kg. A frame tent of similar size might be 5m³ and 200 kg.
Example: The Zarges TurboAir 50 packs to 4.5m³ (about the size of a Euro pallet stack 1.2m high). That fits in a pickup truck. The Survitec Rapid Shelter 200 packs to 2.5m³.
Buyer’s Tip: If you’re shipping by air, every cubic meter matters. Inflatables are generally lighter and smaller than frame shelters of equivalent size.
6. Fire Resistance (NFPA 701, CPAI-84)
Fire is a real concern in refugee camps where cooking happens inside shelters. Most reputable manufacturers use fabric that meets NFPA 701 (vertical flame test) and CPAI-84 (flame resistance). But check the specific certification, not just the claim.
Real model example: Weatherhaven and Survitec both certify to CPAI-84. Many Chinese manufacturers claim “fire retardant” but don’t test to any recognized standard.
Buyer’s Tip: Request a sample piece of fabric and do a simple burn test. If it melts and drips (like a plastic bag), it’s not truly flame-resistant. Good fabric will char and self-extinguish.
Application-Specific Checklist: Field Hospital vs. Refugee Camp vs. Flood Zone
One of the biggest mistakes I see is buying a generic inflatable disaster shelter and expecting it to work for every situation. It won’t. The requirements for a field hospital are dramatically different from a refugee camp or a flood zone. Let me walk you through each.
Field Hospital Tent
You’ll often hear these called medical tents or field hospital tents. The requirements are stringent:
- Negative pressure module: Required for airborne infection control (tuberculosis, COVID-19). Most inflatable shelters can be retrofitted with a negative pressure system, but it’s an add-on cost of $1,500-$3,000.
- HVAC interface: The tent must have designated duct ports for heating/cooling.
- Hard floor: A wood or composite floor may be needed for rolling stretchers and medical equipment. Inflatables typically use groundsheets, but some models (like Weatherhaven) offer optional hard flooring.
- Internal partitions: To separate triage, treatment, and recovery areas. Many inflatable disaster relief tents come with detachable partition walls like divider tents.
WHO standards: The WHO’s Emergency Medical Shelter Guide recommends a minimum of 72 square meters for a 10-bed field hospital. You’ll likely need multiple connected units.
Checklist item: □ Does the tent have HVAC duct ports? □ Is negative pressure available? □ Floor rating (can support 150 kg stretcher on wheels)?
Refugee Camp Shelter
If you’re using refugee camp tents, your priorities shift.
- Privacy: Families need separation. Look for tents that can be subdivided with wall panels.
- Ventilation: More critical than a field hospital because people will live there for months. Mesh windows and roof vents are essential.
- Durability on ground: You need a groundsheet that can handle bare earth, mud, and rocks. Many cheap inflatables use thin PVC that punctures easily.
- Guy rope points: You need anchors that work on soft soil.
UNHCR standards: The UNHCR Shelter Standards require 3.5 m² per person in collective shelters. For a family of 5, you need a 17.5 m² unit.
Checklist item: □ Mesh windows for ventilation? □ Can the groundsheet be replaced? □ Anchor points for soft soil?
Flood Zone / Hurricane Zone
This is where your hurricane relief tent or flood relief tent needs to be tough.
- Waterproof rating: The flysheet should be at least 3,000 mm hydrostatic head. Don’t scrimp here.
- Quick drainage: The tent floor should be raised (many inflatables have a raised lip) to prevent water ingress.
- Easy cleaning: After a flood, everything is muddy. Look for fabric that can be pressure-washed without damage.
- Stake resistance: On soft ground, traditional stakes will not hold. Order 1.5x the recommended ground stakes, and always deploy with sandbags on corners in high-wind areas.
Real case: In 2021, during Hurricane Ida in Louisiana, a team using a standard off-the-shelf inflatable disaster relief tent failed because the ground was too soft for the provided stakes. They had to switch to sandbags. Lesson learned.
Checklist item: □ Hydrostatic head ≥ 3,000 mm? □ Raised floor or lip? □ Can fabric be pressure-washed?
Price Ranges, Rental Options & Total Cost of Ownership
Let’s talk money. Because that’s what keeps decision-makers awake at night.
Buying: What You’ll Actually Pay
You can find inflatable disaster relief tents for sale across a wide range. Here’s my breakdown based on actual market data (2023-2024):
- Budget (under $5,000): These are typically single-skin PVC, 10-20 m², no backup pumps, minimal warranty. They’re okay for training or one-time use. But for a real emergency? I wouldn’t trust my life to them.
- Mid-range ($5,000-$12,000): This is the sweet spot for most NGOs and government agencies. You get double-skin construction, better materials (TPU or heavy PVC), backup pump, wind rating of 50-60 mph, and 2-year warranty. Brands like Survitec and Zarges fall here.
- High-end ($12,000-$25,000): These are expedition-grade, large format (50 m²+), certified to military standards, with automatic pressure regulation, HVAC ready, and extended warranty. Weatherhaven and Zeppelin are in this tier.
Wholesale inflatable disaster tents are a different story. If you’re buying 50+ units, you can get the per-unit cost down by 20-30%. But then you need to verify quality. I’ve seen a batch of 100 tents from a cheap factory where 15% had manufacturing defects.
Rental: When It Makes Sense
Inflatable disaster relief tent rental is often the smart choice for short-term or uncertain deployments.
- Typical rental cost: $200-800 per month per tent (depending on size and features)
- Minimum rental period: Usually 7-14 days
- Includes: Often includes inflation system, ground stakes, repair kit
- Excludes: Transportation, setup labor, insurance
I recommend rental when:
- You don’t have a permanent storage location
- You need the tent for less than 3 months
- You want to test different models before committing to a large purchase
- Your budget allows it (sometimes rental costs more than buying in the long run)
Total Cost of Ownership (TCO) Formula
Here’s a simple TCO model I use with clients:
TCO = Purchase Price + (Annual Maintenance × Years) + Storage Cost + (Shipping Cost × Deployments) – Residual Value
Example: A $12,000 inflatable used 8 times per year over 5 years:
- Maintenance: $500/ year (replace fabric, repair seams)
- Storage: $200/ year
- Shipping: $300/ deployment ($2,400)
- Residual value: $1,500 (20% trade-in)
- TCO = $12,000 + $2,500 + $1,000 + $2,400 – $1,500 = $16,400
Per deployment cost: $410.
Compare to renting the same tent at $400/month for 8 months: $3,200/year → $16,000 for 5 years. Nearly identical. So the decision comes down to whether you want to own the asset or have the flexibility to switch.
5 Common Procurement Mistakes (And How to Avoid Them)
I’ve been involved in over 40 disaster response procurements as a consultant. The same mistakes keep happening. Let me save you from learning them the hard way.
Mistake #1: Reading Spec Sheets as Gospel
I can’t tell you how many times I’ve seen a brochure claim “wind rating 80 mph” only to have the tent fold like a cheap umbrella. The problem? That wind rating was likely in a controlled test with perfect anchoring. Real conditions are different.
How to avoid: Always ask for third-party test reports. Every time. If the supplier says “We don’t share test reports,” walk away. Period.
Mistake #2: Forgetting the Pump
This is so common it’s embarrassing. A team buys ten tents but only one electric pump. Then the pump breaks. Now you have ten tents that are giant nylon piles.
How to avoid: Order one electric pump per tent as standard. Plus one manual pump per tent as backup. Plus one CO2 rapid inflation system per three tents. That’s your minimum.
Mistake #3: Ignoring Combined Wind and Snow Load
Most inflatables are tested for wind only or snow only. But in many real-world scenarios, you get both. A 20 mph wind and 6 inches of wet snow can overload the structure more than 60 mph wind alone.
How to avoid: Ask for combined load test data. If none exists, assume the tent is for wind OR snow, not both.
Mistake #4: Not Ordering a Repair Kit
I’ve been on site when a tent got a puncture. The team had no repair kit. They tried duct tape. It didn’t hold. The tent was useless.
How to avoid: Order one repair kit per tent at time of purchase. Ensure it includes fabric patches, solvent adhesive, seam tape, and instructions. Train two people per team on how to use it.
Mistake #5: Believing the “All-in-One” Pitch
Some suppliers sell a package that includes tent, pump, stakes, and repair kit for one price. Sounds great. But often the auxiliary items are low-quality. The pump is a cheap Chinese motor that fails after two uses. The stakes are plastic that snap.
How to avoid: Always ask for component specifications. The pump should be at least 1 HP. Stakes should be 18-inch steel or heavy-duty nylon. Repair kit should have genuine fabric. Don’t accept “included” as justification.
Frequently Asked Questions
Q: How long does an inflatable disaster relief tent last?
A: With proper use and storage, a quality inflatable disaster relief tent lasts 3-5 years. TPU models can last 5-7 years. Storage conditions matter: keep it dry and out of direct sunlight when not deployed.
Q: Can inflatable tents withstand high winds?
A: Most are rated for 50-60 mph winds when properly anchored. For higher winds, you need frame shelters or specialized models. Always require third-party wind tunnel test data, not just manufacturer claims.
Q: Are inflatable disaster tents fire-resistant?
A: Many meet NFPA 701 and CPAI-84 standards for flame resistance. But not all. Always request certification documents. Do a simple burn test on a fabric sample if you’re unsure.
Q: What is the repair process for a puncture in the field?
A: For small punctures (under 2 inches), apply a fabric patch with solvent adhesive. For larger tears, you may need to replace the entire panel. Always carry a repair kit on site.
Q: How much does an inflatable disaster relief tent cost?
A: Budget models start at $3,000-$5,000. Mid-range units (20-40 m²) cost $5,000-$12,000. High-end, large-format models can exceed $20,000. Rental options range from $200-$800 per month.
Q: What size inflatable tent is best for disaster relief?
A: For a field hospital, 50 m² (538 sq ft) is typical for 5-10 beds. For refugee housing, 20-30 m² per family. Use the rule: 70 sq ft per hospital bed, 40 sq ft per person for shelter.
Q: Are inflatable tents durable for emergencies?
A: Yes, if you buy quality. The best inflatable disaster relief tents are built with TPU fabric, double stitching, and reinforced anchor points. Cheap PVC models fail quickly. Invest in quality or rent.
Final Thoughts: What Actually Matters
I started this article with a question: What happens if your tent collapses at 3 AM?
The answer is: your procurement process gets an audit, your team gets exposed, and people could die.
The best inflatable disaster relief tent is not the cheapest, not the shiniest, and not the one with the longest warranty. It’s the one that matches your mission—your climate, your deployment speed, your team size, your budget lifecycle.
Here’s my bottom line: If you’re deploying in a flood zone or earthquake area where speed is critical, go with an inflatable. But spend the extra money on TPU, a real backup system, and third-party certifications. If you’re in a hurricane corridor where winds exceed 60 mph regularly, consider frame shelters or hybrid designs.
Your next step: Download our free procurement checklist. It’s a PDF that walks you through every spec, every test report, and every question you need to ask your supplier. No pitch, no upsell. Just the tool you need to make a confident decision.
Because the next time disaster strikes, your shelter needs to work. There’s no second chance.







