

Respuesta rápida
Mixing inflatable tent sizes and designs means pairing a large hub tent with smaller sleeping pods, or combining dome, cabin, and tunnel models into one modular camp. The goal: match each piece to a specific job — sleeping, cooking, storage, or gathering — instead of forcing one tent to do everything.
If you’ve shopped for an inflatable tent lately, you know the feeling. You see a 4-person dome, then a 10-person cabin, then some modular setup that looks like a spaceship landed in a field, and suddenly you’re wondering whether you should just buy one big tent and be done with it.
Here’s the thing most buyers get wrong: they assume one tent equals one size equals one job. That’s the old way of thinking. The people getting the most out of their gear right now are the ones who mix different sizes and designs of inflatable tent — a big one for hanging out, smaller ones for sleeping, maybe a tunnel connector in between. It’s not complicated once you see how the pieces fit together.
I’ve spent years around inflatable structures, from event marquees to family camping setups, and I’ll be straight with you: there’s no single “best” tent. There’s only the right combination for your situation. So let’s break down sizes, designs, and how to actually combine them — no brand cheerleading, just what works.
What Does “Mixing” Inflatable Tents Actually Mean?
When I say mix different sizes and designs of inflatable tent, I’m talking about three real scenarios:
Modular setups. One brand sells a base tent plus add-on pods, porches, or connector tunnels. You buy the core and expand as needed. Think of it like Lego — the base is your starting block.
Connected tents. Two separate tents joined by a shared vestibule or a tube-style connector. This is where a large inflatable tent camping setup really shines — you get a central social space with private sleeping wings.
Mixed-brand configurations. You buy a big cabin from one maker and a small dome from another, then pitch them side by side. No physical connection, but you treat them as one camp. Honestly, this is what most families actually do, and there’s nothing wrong with it.
The reason this matters: inflatable tents are bulky and expensive per unit. If you’re spending real money, you want each piece earning its keep. A single 12-person tent that you only fill twice a year is worse value than a 6-person hub plus a 3-person dome you use constantly.
Inflatable Tent Sizes Compared: 2-Person to 12-Person
Size tiers aren’t just about headcount. Footprint, standing height, and packed weight all shift as you go up. Here’s how the tiers generally break down:
| Size Tier | Typical Capacity | Footprint (approx.) | Standing Height | Mejor Caso de Uso |
|---|---|---|---|---|
| 2-person | 2 sleepers | Small, backpack-friendly | Low, sit-up only | Solo trips, couples, quick overnights |
| 3–4 person | 3–4 sleepers | Compacto | Moderada | Weekend camping, small families |
| 5–6 person | 5–6 sleepers | Mid-size | Near-full standing | Family camping, base camp |
| 8-person | 8 sleepers | Large | Full standing | Group trips, glamping |
| 10–12 person | 10–12 sleepers | Very large | Full standing + room to move | Events, large families, inflatable tent House setups |
A few honest notes here. Capacity numbers are optimistic — a “6-person” tent comfortably sleeps four adults with gear. And standing height is the spec people underestimate most. If you’re over six feet, anything under full standing height gets old fast on a rainy day.
For large inflatable tent camping, the 8-person tier is usually the sweet spot. Big enough for a family, not so big that setup becomes a two-person job.
Inflatable Tent Design Types Explained
Size is half the story. Design is the other half, and it’s where most buyers get lost. Here are the main inflatable tent designs you’ll run into:
Dome. Classic shape, good wind resistance, quick to inflate. Downside: sloped walls eat into usable floor space. Great as a sleeping pod.
Cabin. Near-vertical walls, lots of headroom, feels like a room. This is your inflatable tent House category — the ones that look like actual living spaces. Heavier and pricier, but the comfort is real.
Tunnel. Long and segmented, often with multiple rooms. Excellent for family camping because you can divide sleeping and living zones. Not the easiest to pitch on uneven ground.
Modular hub. A central structure with attachable pods. This is the design that makes mixing genuinely practical — you’re not improvising, the connectors are built in.
Stove-ready. Any of the above with a stove jack. More on this below, because it changes the whole calculation.
My take: if you’re mixing sizes, pair a cabin or hub as your main structure with dome pods for sleeping. That combo covers 90% of real-world needs.
Can You Connect or Combine Inflatable Tents?
This is the question competitors skip, so let’s actually answer it.
Yes, you can combine inflatable tents — but how you do it depends on the design. Three approaches:
- Purpose-built connectors. Some modular systems include zippered tunnels or vestibules that join two tents into one sealed unit. Cleanest option, but you’re locked into one brand’s ecosystem.
- Shared vestibules. Two tents that each have a matching porch can be pitched facing each other, sharing the covered space between them. Works across some brands if the dimensions line up.
- Side-by-side camping. No physical link, just a deliberate layout. Cheapest and most flexible, and honestly what I’d recommend for most people starting out.
Brand compatibility is the sticking point. Connector zippers and tube diameters aren’t standardized, so cross-brand joining is hit-or-miss. If connecting matters to you, buy the connector and the tents from the same line.
You might be wondering: is connecting even worth it? For event organizers and glamping operators, absolutely — a connected multi-room setup reads as one premium structure. For a weekend family trip? Side-by-side is fine. Don’t over-engineer it.
Stove-Ready and Four-Season Inflatable Tents
Can you put a stove in an inflatable tent? Yes — if it’s designed for it. A stove-ready tent has a heat-resistant jack, usually in the roof or a side wall, where the chimney pipe exits. No jack, no stove. Simple as that.
If you want to mix different sizes and designs of inflatable tent with stove capability, here’s what to check:
- Material rating. Four-season inflatable tents use heavier fabrics and reinforced seams. Don’t assume a summer dome can take winter use.
- Jack placement. Roof jacks work for most stoves; side jacks suit certain pipe angles. Match it to your stove.
- Ventilation. You need airflow beyond the stove pipe. Sealed tents without vents are a carbon monoxide risk — this isn’t negotiable.
- Clearance. Keep the stove well away from walls and the ceiling. Follow the tent maker’s stated clearances exactly.
Safety note, and I mean this: never run a stove in a tent without a proper jack and ventilation, and never leave it burning while you sleep unless the setup is specifically rated for it. Field Mag’s inflatable tent guide covers the basics of matching gear to conditions, and it’s worth a read before you commit to a winter setup.
How to Choose: Size + Design Decision Framework
Forget trends. Match the tent to the job. Here’s how I’d think it through:
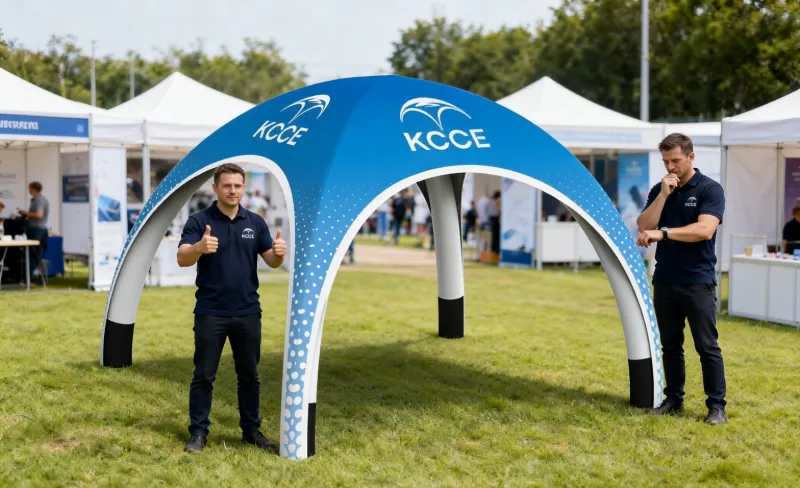
Glamping and events. You want presence and headroom. Cabin or hub designs, 8-person and up. This is also where custom structures come in — for brand activations and outdoor events, a custom inflatable tent gives you a distinctive silhouette that a standard camping tent can’t touch. If you’re sourcing for events, KCCE’s inflatable tents are built for exactly this — event and promotional use, with custom sizing and branding available.
Family camping. A 6-person hub plus a 3-person dome. The hub handles cooking and hanging out, the dome handles sleeping. This mix keeps the big tent from becoming a bedroom.
Solo or couple. One 2–3 person dome. Don’t overbuy. A big tent for one person is a pain to pitch and a pain to pack.
Four-season use. Stove-ready cabin, heavier fabric, and budget for the weight that comes with it.
On budget: price tiers track size and material closely. Entry-level 2–4 person inflatables sit at the low end; 8–12 person four-season cabins with stove jacks sit at the top. Custom event structures are priced per project. If you’re buying inflatable furniture to go inside — beds, sofas — KCCE also makes muebles inflables that pairs with their tent range, which is a nice touch if you’re outfitting a glamping unit rather than a campsite.
Now, the honest downsides, because nobody talks about these enough:
- Packed size is large. Inflatable tents don’t pack down as small as pole tents of similar capacity. This is the number one complaint I hear.
- The pump takes up space. And it’s one more thing to carry. Some people switch to a smaller electric pump to save room.
- Cost is higher. You’re paying for convenience and standing height.
- Viento. Inflatables handle wind well when properly guyed, but you have to actually stake and guy them. Skip that and a gust will humble you.
Inflatable Tent Brands and Design Case Studies
A few brands are worth naming because their design language shows up in real mixing scenarios. Heimplanet’s Cave (now the “Motion” series) uses a geodesic, multi-beam frame — no separate poles — which makes it genuinely stable in gusts and easy to pair side-by-side with a second unit. Vango’s AirBeam line (the Odyssey and Rome models) uses a single-point inflation valve system, so one pump fills the whole structure quickly.; that matters when you’re pitching three tents in a row. Outwell’s Air tents use their “Outtex” fabrics and a rigid air tube frame, which is why event crews often default to them. On the design side, look at the “tunnel + hub” pattern: a central dome or cabin with two tunnel wings — that’s the geometry most modular systems copy. Decathlon’s Quechua Air Seconds range is the budget entry point, and its 4.1 and 6.3 models are popular as the “small sleeping pod” in a mixed camp because they inflate quickly with a hand pump.
How to Pitch and Use an Inflatable Tent
Setup is where inflatable tents either win you over or frustrate you. The sequence that works: lay the footprint flat, stake the four corners antes inflating, then inflate to the pressure printed on the valve cap — usually 0.5–0.8 bar (7–12 psi) for camping models, and up to 1.0 bar for event-grade structures. Over-inflating is the number-one cause of blown seams; a cheap gauge pump pays for itself. Use a two-stage pump (low-volume/high-pressure) instead of a shop vac — the volume stage fills the beams fast, the pressure stage firms them. In cold weather, inflate slowly and top up after 20 minutes as air contracts. Deflation: open all valves, fold from the far end toward the valves so air pushes out rather than getting trapped. Never store wet — mildew kills the PU coating, and a tent stored damp for a season can lose its waterproof rating permanently. One practical tip: mark your valve caps with a paint pen so you know which is which when you’re doing a multi-tent setup in the dark.
Where Inflatable Tents Work Best: Camping, Events, and Festivals
The use case determines which sizes and designs you mix. For family camping, the proven pattern is one 5–6 person hub plus one or two 3–4 person pods — the hub handles cooking and socializing, the pods handle sleeping and privacy. For events, you’re looking at 8–12 person cabins as breakout rooms and a large tunnel or marquee as the main space; the key spec here is standing height (you want full 2m+ clearance for foot traffic) and door count, since a single-door event tent creates bottlenecks. At festivals, the winning combo is a small 2–3 person dome for sleeping (easy to move if you get a bad pitch) plus a shared 4–6 person canopy for the group. Fire regulations matter at organized events: most venues require tents to meet CPAI-84 (US) or EN 5912 / BS 7837 (UK/EU) flame-retardancy standards, and inflatable structures are no exception. Check before you buy if you plan to use it at a licensed event — a non-compliant tent can get you turned away at the gate.
Durability and Weather Performance
Be honest about what inflatable tents can and can’t take. The air beams themselves are tough — most are TPU or PVC bladders inside a ripstop polyester sleeve — but the failure points are the seams and the valves. A well-made inflatable tent handles sustained wind better than a pole tent of the same size because the frame flexes instead of snapping; Outwell rates some models to Beaufort 7–8. Rain is fine if the hydrostatic head is 3,000mm or higher; below 2,000mm you’ll get misting in heavy downpours. The real enemy is UV. Polyester and nylon degrade under prolonged sun exposure, and after a few full summers a cheap tent’s fabric can lose a noticeable amount of its tear strength. Store it dry, out of direct sun, and re-proof the fly with a spray-on DWR every couple of seasons. Also: never leave an inflated tent pitched in a storm if you can deflate it — a partially deflated beam is more likely to whip and tear than a fully firm one.
Layout and Space Planning
Space planning for a mixed inflatable camp comes down to three numbers: sleeping area per person (you want 2.5–3 m² minimum for a comfortable adult, 1.5 m² if you’re packed in), circulation space (at least 60cm between tent walls and the next structure so you’re not tripping over guy lines), and door orientation (doors should face away from the prevailing wind, and ideally not face each other directly, or you create a wind tunnel between tents). For a hub-and-pod setup, place the hub in the center and pods around it in a rough arc, leaving one side open as the entry path. If you’re connecting tents with a tunnel, the connector needs a slight slack — a taut connector pulls the two tents together in wind and stresses the seams. For a family of four, a realistic layout is: one 5–6 person hub (10–12 m²), one 3–4 person pod (6–8 m²), and a 2-person annex for gear. That’s roughly 20–25 m² of covered space — more usable than a single 12-person tent, and it packs into three bags instead of one unmanageable one.
Buying Advice and What to Look For
Here’s what actually matters when you’re buying, in order of importance. Valve quality: cheap plastic valves leak; look for metal or reinforced valves with a locking cap. Beam count and diameter: more beams and larger diameter (10cm+) means more stability, but more weight and longer inflation time. Hydrostatic head: 3,000mm minimum for three-season use, 5,000mm if you camp in sustained rain. Fabric denier: 70D is the practical minimum for a tent you’ll use more than a few times a year; 150D+ for event or rental use. Repairability: does the brand sell replacement bladders and valve kits? If not, a punctured beam means a dead tent. Packed weight and bag size: a 6-person inflatable tent is typically heavy when packed; if you’re car camping that’s fine, if you’re carrying it any distance, it isn’t. Finally, buy the pump separately — the included ones are usually junk, and a good dual-action pump with a gauge is typically affordable and lasts years.
Mixing Sizes and Designs: Practical Combination Strategies
The most useful combinations aren’t random — they follow a logic. The family base camp: a 6-person cabin as the hub, two 3-person domes as sleeping pods, connected by a 2m tunnel vestibule. This gives you a central space that stays warm and dry, with private sleeping areas that can be pitched separately if you move sites. The festival setup: a 4-person dome for sleeping plus a 3x3m inflatable canopy for shade and socializing — the canopy doubles as a rain shelter and can be moved independently. The event breakout: two 8-person cabins side by side, each with its own entrance, sharing an open-sided 10x5m inflatable marquee as a central circulation space. The solo-plus-guest: a 2-person dome for you, a 3-person tunnel tent as a guest room and gear store. The rule: never mix more than three sizes, or you end up with a camp that’s hard to pitch, hard to pack, and hard to remember which bag goes where.
Connecting and Modular Systems
If you want physical connection rather than just side-by-side pitching, you’re looking at three systems. Proprietary modular systems: brands like Heimplanet and some event-structure makers sell connector tunnels with matching zip interfaces — you zip the tunnel to the door of tent A and the door of tent B. The zip pitch must match; a 10mm and an 8mm zip won’t join, and adapter kits are rare. Universal tunnel connectors: a standalone inflatable or pole tunnel with adjustable straps that you peg over two adjacent doors. These work across brands but are less weathertight — expect some draught and rain ingress at the joins unless you seal with a tarp. Shared vestibules: some tents have a removable side panel that converts into a connector; this is the cleanest option but locks you into one brand. Practical note: any physical connection between two tents creates a single wind load, so both tents need to be staked and guyed as if they were one structure. If one fails in a gust, it takes the other with it.
Real-World Layout Examples for Large Events
At a 500-person festival, a typical inflatable tent layout uses a grid: a central 15x10m inflatable marquee as the main stage or bar, with 8–10 person cabins arranged in two rows behind it as crew or vendor spaces, each spaced 1.5m apart to allow access and airflow. For a corporate event, the pattern is often a 10x5m reception marquee with two 6-person cabins as meeting rooms flanking it, connected by short tunnels so guests move between spaces without going outside. At a wedding or community festival, you’ll see a “hub and spoke” layout: a large central dome (12–15m diameter) for dining, with smaller 4–6 person tents radiating out as cloakrooms, catering prep, and quiet rooms. The numbers that matter at this scale: allow 1.5 m² per seated guest in a dining marquee, 2.5 m² per person for standing reception, and always leave a 3m clear fire lane between tent clusters — it’s a legal requirement in most jurisdictions and it’s also just good practice when you’ve got hundreds of people and a lot of fabric.
Preguntas Frecuentes
Q: What’s the best inflatable tent on the market?
R: There’s no universal winner — it depends on your use case. For family camping, a 6 to 8-person cabin or hub design gives the best balance of space and setup ease. For events and brand activations, custom structures outperform camping models. The best inflatable tents for camping are the ones that match your real capacity needs, not the biggest number on the box.
Q: What are the drawbacks of inflatable tents?
R: The main ones: large packed size, higher cost than equivalent pole tents, the pump taking up extra space, and wind sensitivity if you don’t guy them properly. They also take longer to deflate and fold than you’d expect the first few times. None of these are dealbreakers, but go in with clear eyes.
P: ¿Cuánto tiempo suelen durar las tiendas de campaña inflables?
R: With reasonable care — proper storage, avoiding sharp ground, not over-inflating — a quality inflatable tent should give you many seasons of use. Longevity depends heavily on material and how you treat the seams and valves. Store it dry and folded loosely, and it’ll outlast a cheap pole tent.
Q: What are the different types of inflatable tents?
R: The main designs are dome, cabin, tunnel, and modular hub, plus stove-ready variants of each. Dome tents suit sleeping; cabins and hubs suit living space; tunnels suit multi-room family setups. If you plan to mix different sizes and designs of inflatable tent, a hub plus dome pods is the most flexible combination.
Q: Are inflatable tents good for camping?
R: Yes, for the right kind of camping. They excel at base camping, family trips, glamping, and events where space and standing height matter. They’re less suited to backpacking, where packed size and weight rule them out. Match the tent to the trip and they’re excellent.
Q: What’s the best inflatable tent for camping with a stove?
R: A four-season, stove-ready cabin or tunnel with a proper heat-resistant jack and good ventilation. Never run a stove in a tent without a jack. Check material ratings and follow the manufacturer’s clearance specs exactly — this is a safety issue, not a preference.
Q: How much do inflatable tents cost?
R: Pricing scales with size, material, and design. Small dome tents sit at the entry level; large four-season cabins with stove jacks sit at the top of the range. Custom event structures are quoted per project. For a fair comparison, price per usable square foot, not per tent.
Q: Can you mix different sizes and designs of inflatable tent from different brands?
R: You can camp them side by side, but physically connecting them across brands is unreliable because connectors and zippers aren’t standardized. If connecting matters, buy the tents and connector from the same product line. Otherwise, plan your layout instead of forcing a join.
Conclusión
The whole game comes down to one idea: match the configuration to the use case, not to whatever’s trending. A big tent isn’t better than a small one — it’s just better for a different job. Shortlist two sizes and one design before you buy, and you’ll avoid the classic mistake of buying one giant tent that never quite fits anything.
If you’re outfitting for events or glamping rather than a weekend campsite, KCCE’s inflatable structures are worth a look — they’ve been building event-grade inflatables for many years, and custom sizing is standard rather than an upsell.
Referencias
1. 9 Branded Inflatable Tent Designs That Will Inspire Your Next Outdoor Event Activation – tentcraft.com
2. Inflatable Tents Market Size, Share, Industry Report, 2035 – businessresearchinsights.com
3. Inflatable Tent Guide: How to Use & Which to Buy – fieldmag.com
4. 20 Best Inflatable Tents for Family Camping – youtube.com
5. KCCE / Dacheng outdoor products LTD. — Company Profile and Product Range – kcceinflatable.en.made-in-china.com







