

Your sketch won’t survive contact with a heat sealer. I’ve watched it happen a dozen times—a client walks in with a beautiful, hand-drawn rendering of a giant gorilla wearing sunglasses, and within ten minutes the production team is shaking their heads. The ears are too thin. The text is too small. The angle of the arm creates a pocket that will trap air and balloon out like a tumor. And suddenly the “simple” custom inflatable toy they imagined has turned into a two-month engineering project with a price tag that makes their eyes water.
So let’s talk about how to design your own inflatable the right way. Not the DIY-craft version you see on Pinterest with a sewing machine and a hairdryer. The real version—the one that gets you a durable, professional-grade inflatable that actually survives its first windy day at a grand opening or a weekend in a lake.
I’ve spent years in this industry, and I’ve seen the same five mistakes kill more projects than any manufacturing defect. This guide is everything I wish every client knew before they sent me their first file.
إجابة سريعة
To design your own inflatable successfully, you need a vector graphics file (AI, PDF, or EPS) with large, bold graphics, minimal thin protrusions, and a clear understanding of material types, manufacturing constraints, realistic costs (roughly $1,000 to $10,000+ depending on size), and a 4–8 week production timeline.
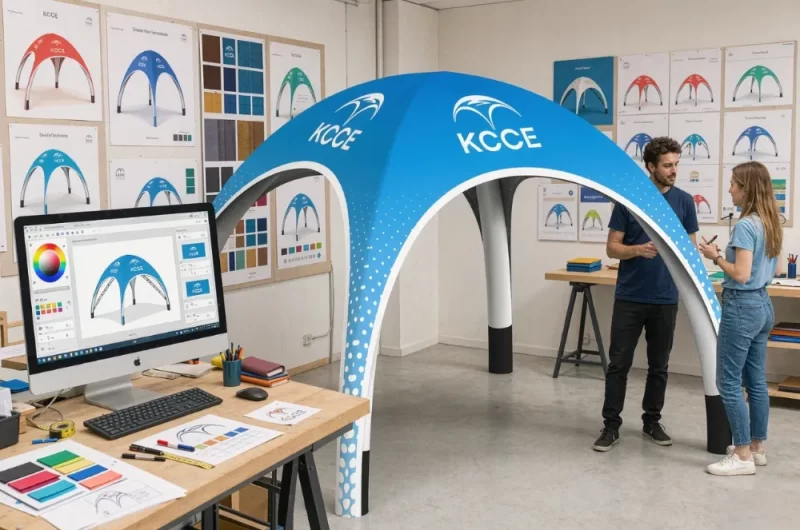
How to Design Your Own Inflatable: Start with the Right File
Here’s the uncomfortable truth: your napkin sketch is not a design file. It’s a starting point, sure, but it’s not something a factory can build from. When you ask how to design your own inflatable costumes or a giant mascot, the answer almost always begins with vector graphics.
Vector files—Adobe Illustrator (AI), PDF, or EPS—are the industry standard. Why? Because they scale infinitely without losing quality. A raster image (JPEG, PNG) that looks sharp on your laptop screen will turn into a pixelated mess when it’s stretched across a 20-foot inflatable wall. The factory needs to trace every line, every curve, and every color boundary, and they need that geometry to be mathematically clean.
If you’ve ever wondered what materials are used for custom inflatables, the file format matters because it determines how the artwork gets translated onto the fabric. The factory uses the vector file to create cutting patterns, print layers, and seam placements. If your file is a low-resolution screenshot from Canva, the production team has to redraw everything manually—which costs you time and money.
Now, you might be thinking, “But I’m not a designer. I can’t use Illustrator.” That’s fine. Most reputable manufacturers offer free design services that convert your concept into a proper vector file. You send them a sketch, a reference photo, or even just a description, and their in-house designers do the heavy lifting. This is standard practice in the industry, and it’s one of the hidden values of working with a full-service vendor rather than a print-on-demand shop.
The 3D Proof Process: What to Expect
Once your artwork is digitized, the vendor will typically produce a 3D proof—a rendered digital model that shows your inflatable from every angle. This is your chance to catch problems before a single yard of fabric gets cut.
Here’s what a good 3D proof includes:
- Color accuracy and shading
- Proportional scaling of graphics vs. physical dimensions
- Seam line placement (visible as subtle lines on the render)
- Air intake and exhaust valve locations
- Tether points and anchoring systems
Don’t rush this step. I’ve seen clients approve a proof in five minutes and then spend three weeks in email hell trying to fix a logo that was stretched. The proof is your safety net. Use it.
One thing that surprises most first-timers: the 3D proof is not a suggestion. It’s a contract. Once you approve it, the factory builds to that spec. If you decide you want the eyes bigger after production starts, you’re paying for a redesign and a new proof. From what I’ve seen, this is where most budget overruns happen.
Choosing the Right Material for Your Inflatable
The inflatable fabric types you choose will determine everything from durability to cost to whether your product survives its intended use case. And honestly, this is the area where I see the most confusion among buyers.
PVC (كلوريد البولي فينيل)
This is the workhorse of the industry. PVC-coated polyester is what most commercial inflatables are made from—bounce houses, advertising inflatables, arches, and yard decorations. It’s durable, waterproof, and available in a range of thicknesses measured in ounces per square yard.
- Lightweight PVC (14–16 oz): Good for indoor displays and short-term events
- Standard PVC (18–22 oz): The sweet spot for most outdoor applications
- Heavy-duty PVC (24 oz+): For permanent installations or high-traffic commercial use
PVC is also the material of choice for الخيام الإعلانية القابلة للنفخ because it holds vibrant colors well and can be printed with high-resolution graphics.
Vinyl
Honestly, “vinyl” and “PVC” are often used interchangeably in this industry, which causes no end of confusion. Technically, vinyl is a broader category, but when a manufacturer says “vinyl inflatable,” they usually mean PVC-coated fabric. The key difference is in the coating weight and the manufacturing process. For the purposes of this guide, treat them as the same family.
Nylon and Polyester (for costumes)
If you’re looking into how to design your own inflatable costumes, the material game changes completely. Costumes need to be lightweight, flexible, and often battery-powered with a built-in fan. Nylon and ripstop polyester are the go-to fabrics here because they’re light enough to wear for hours without exhausting the wearer.
The trade-off is durability. A nylon costume won’t survive the same abuse as a PVC yard inflatable. But it doesn’t need to—it needs to let someone walk around, see through a mesh panel, and not overheat.
Matching Material to Use Case
Here’s a quick framework I use with clients:
- Yard inflatables (think Christmas decorations): Standard PVC, 18 oz. They need to handle wind, rain, and temperature swings.
- Water-based inflatables (bounce houses with slides, floating platforms): Heavy-duty PVC with reinforced seams and UV-resistant coatings. Water is brutal on fabric.
- Indoor displays (trade shows, retail): Lighter PVC is fine. You’re not fighting the elements.
- Parade and event costumes: Nylon or light polyester with internal fan systems.
بالنسبة لـ custom yard inflatables, you also need to think about the blower. Most residential inflatables use a continuous-duty blower that runs 24/7. Commercial-grade blowers are quieter and more efficient, but they cost more. Don’t skimp here—a cheap blower will burn out in a season and potentially damage your inflatable.
Design Constraints That Make or Break Your Build
This is the part that nobody tells you about when you’re dreaming up a custom inflatable toy. The physics of inflatables are unforgiving. If you don’t respect the manufacturing limitations, you’ll end up with a product that looks nothing like your vision—or worse, one that fails on its first day.
Thin Protrusions Are the Enemy
Arms, legs, antennae, ears—any narrow extension of your design is a structural weakness. Here’s why: inflatables work by maintaining internal air pressure. The air pushes outward equally in all directions. A thin protrusion has a high surface-area-to-volume ratio, which means it requires higher pressure to maintain its shape, and it’s more susceptible to deformation.
If you want a 40-foot gorilla with skinny arms, you’re going to need internal baffles, additional seams, or even structural webbing inside the arms to keep them from collapsing. All of that adds cost and complexity.
In my experience, the rule of thumb is: If a protrusion is relatively small compared to the overall height of the inflatable, it may cause issues.. You can design around it, but you should expect a complexity multiplier on the price.
Small Text and Fine Details Disappear
This is the most common mistake I see. Clients design a 30-foot inflatable with a phone number in 6-point font and expect it to be readable from across the street. It won’t be.
Text on an inflatable needs to be massively oversized compared to print design. A general guideline often cited in the industry is that minimum letter height should be about one-tenth of the total height of the inflatable for readable text. So on a 20-foot inflatable, your letters need to be at least 2 feet tall. And even then, you need to account for the slight distortion that happens when fabric curves and billows.
Small details like logos, intricate patterns, and fine lines also get lost in the printing process and the physical inflation. The fabric stretches, the seams interrupt the surface, and what looked crisp in your vector file becomes a blurry mess in real life.
Undercuts and Negative Space
An undercut is any part of the design that creates a concave shape or an internal cavity. Think of a donut shape or a letter “C.” These are manufacturing nightmares because the internal air pressure naturally pushes everything to a round, convex shape.
If your design has significant negative space, the factory will need to add internal tethers—small fabric straps that pull the walls inward to maintain the shape. This is doable, but it adds labor and material costs.
Seam Placement and Airflow
Every inflatable is made from panels of fabric that are welded or sewn together. The seams are the weakest points. A good designer places seams strategically to minimize stress and maximize visual continuity.
You also need to think about airflow. The blower forces air in through an intake port, and the air needs to circulate throughout the entire structure. If you have a design with a narrow neck connecting two large chambers, the airflow might not be sufficient to keep the far chamber fully inflated. This is a common issue with character inflatables that have large heads and small bodies.
Weight Distribution and Anchoring
A 40-foot inflatable is essentially a giant sail. If you’re planning to use it outdoors, you need to account for wind load. The anchoring system—tether points, sandbags, stakes, or water barrels—needs to be designed into the product from the start, not as an afterthought.
Manufacturers use a formula based on the surface area of the inflatable and the expected wind speed to determine how many anchor points you need. Don’t skip this. I’ve seen a 30-foot inflatable take off in a moderate breeze and end up on the roof of a neighboring building. It’s not a pretty sight, and it’s a liability nightmare.
The Real Cost of Custom Inflatables
Let’s talk money, because this is where most decision-makers get sticker shock. The cost of a custom inflatable depends on size, complexity, and material selection. There’s no way around it: custom inflatables are an investment.
Ballpark Pricing by Size
These are rough figures based on common industry practice, and they’ll vary by vendor and region:
- Small custom inflatables (up to 10 feet tall): $1,000–$3,000. Think mascots, small yard decorations, or promotional pieces.
- Mid-size inflatables (10–20 feet): $3,000–$8,000. This covers most advertising inflatables, arches, and larger yard displays.
- Large inflatables (20–40 feet): $8,000–$20,000+. This is the range for giant product replicas, massive arches, and custom bounce houses.
If you’re looking for a custom inflatable bounce house with slides, obstacles, or themed designs, expect to be at the higher end of these ranges. The engineering required for safe, kid-friendly inflatables is significant, and the safety certifications add cost.
Complexity Multipliers
The base price assumes a relatively simple shape—a cube, a rectangle, a basic character silhouette. The moment you add complexity, the price climbs:
- Custom shapes: +20–40% over standard shapes
- Multiple chambers: +15–30% per additional chamber
- Internal tethers: +10–25%
- Complex printing (full-color gradients, photographic images): +10–20%
- Reinforced seams for high-traffic use: +15–25%
MOQ and Setup Fees
Here’s a critical point for decision-makers: most manufacturers have a minimum order quantity (MOQ). For custom designs, the MOQ is often around 1 to 5 units., but the per-unit price drops significantly as you order more. If you’re only buying one, you’re paying for the full design and tooling costs amortized over that single unit.
Setup fees are another hidden cost. These cover the creation of cutting patterns, the initial printing setup, and the design work. They can range from $200 to $1,000+ depending on the complexity of your design.
بالنسبة لـ بالونات قابلة للنفخ مخصصة للأعمال التجارية, the economics usually work out better if you’re planning to use the inflatable repeatedly—trade shows, grand openings, seasonal promotions. The cost per use drops dramatically over time, making it a smart investment compared to renting.
How Long Does Manufacturing Actually Take?
تُعتبر inflatable production timeline is another area where client expectations clash with reality. Everyone wants their inflatable yesterday, but the process takes time—especially for custom designs.
Phase 1: Design and Proofing (1–2 weeks)
This includes converting your concept to a vector file, creating the 3D proof, and iterating on revisions. If you’re responsive and your design is straightforward, this can happen in as little as 3–5 days. If you go back and forth on colors and proportions, it can stretch to two weeks or more.
Phase 2: Sampling (1–2 weeks)
Some manufacturers will produce a physical sample before full production. This is optional but highly recommended for complex designs. The sample lets you verify the actual look, feel, and inflation behavior. It costs extra, but it’s cheaper than discovering a flaw in the final product.
Phase 3: Production (2–4 weeks)
This depends on the size and complexity of your inflatable, as well as the factory’s current workload. Simple designs in standard sizes can be produced in 7–10 days. Large, complex builds can take a month or more.
Phase 4: Shipping (1–4 weeks)
This is the most variable part of the timeline. Domestic shipping within the US typically takes 3–7 days for freight. International shipping from manufacturing hubs can take 2–4 weeks, depending on the shipping method and customs clearance.
Rush Options and Red Flags
Most manufacturers offer rush production for an additional fee—typically 15–30% of the production cost. This can compress the production timeline by a week or two, but it doesn’t magically make a 4-week build happen in 3 days.
Red flags to watch for:
- A vendor promising delivery in under 2 weeks for a fully custom design (unless they’re doing something very simple)
- Quotes that are dramatically lower than the market average (you’re probably getting inferior materials or hidden fees will appear later)
- Vague answers about the production timeline (“it’ll be ready soon” is not a date)
How to Design Your Own Inflatable vs. Hiring a Pro
There’s a version of this project where you genuinely do it yourself—and I’m not talking about the professional manufacturing process. I’m talking about the DIY route: buying fabric, a sewing machine, and a blower, and attempting to build your own inflatable from scratch.
When DIY Makes Sense
If you’re making a one-off costume for a school event, a Halloween decoration, or a small personal project, DIY can work. The MIT PLIX program, for instance, has published step-by-step instructions for making inflatable examples designed to inspire participants to start creating. Their guidance emphasizes that it takes a few tries to get it right and that the best way to learn is to keep creating. For educational settings, tinkering, or prototyping a concept, DIY is a legitimate path.
You’ll need:
- Heat-sealable fabric (typically nylon or light PVC)
- A heat sealer or iron
- A blower (hairdryer for small items, continuous-duty blower for larger ones)
- Pattern-making skills
- Patience
When DIY Fails
DIY fails when you apply it to commercial use. A hand-sewn inflatable won’t have the structural integrity, the airtight seams, or the safety certifications required for public use. If you’re planning a custom inflatable person for a grand opening, a bounce house for a commercial event, or any advertising inflatable that will be seen by large crowds, DIY is a liability.
The difference comes down to engineering. Professional manufacturers use:
- RF welding أو hot air welding for seams (stronger than sewing)
- Pressure testing to ensure airtight integrity
- Safety certifications (like ASTM standards for inflatable play equipment)
- Reinforced anchor points and structural baffles
Vendor Comparison: What to Look For
When you’re evaluating inflatable design services, here’s what matters:
| Criterion | Good Vendor | Red Flag |
|---|---|---|
| Design services | Free 3D proof included | Charges extra for basic proof |
| Material options | Multiple PVC weights, nylon options | Only offers one material |
| الحد الأدنى للطلب | Flexible (1–5 units for custom) | Insists on 10+ units |
| Timeline transparency | Gives specific dates per phase | Vague “it’ll take a while” |
| Safety certifications | Provides documentation | No mention of standards |
| Communication | Responsive, answers technical questions | Sales-focused, avoids details |
If a vendor offers free design services, that’s a significant value-add. It means they have in-house designers who understand inflatable manufacturing limitations and can guide you away from designs that won’t work. This is worth far more than the $200–500 they might otherwise charge for design work.
المراجع
1. How-to: Make Examples for Inflatables – MIT PLIX
2. الخيام القابلة للنفخ – KCCE
3. الأثاث القابل للنفخ – KCCE
4. أشكال قابلة للنفخ – KCCE
5. Custom Inflatables – KCCE
6. Inflatable Design & Manufacturing Guide – IDG
7. How to Select Fabric for Inflatables – Sailrite
أفكار ختامية
Custom inflatables offer a unique blend of practicality and spectacle, whether you’re marketing a brand, decorating an event, or engineering a functional product. By understanding the materials, design constraints, and manufacturing processes, you can avoid common pitfalls and ensure your project stays on budget and on time. Always start with a clear vector design, choose the right fabric for your use case, and communicate openly with your manufacturer about airflow, seams, and safety standards. With these foundations, your inflatable will not only look impressive but also perform reliably for years to come.
Before you start sourcing quotes, take a moment to sketch out a realistic timeline. A typical custom inflatable project takes 3–6 weeks from design approval to delivery, depending on complexity, size, and the manufacturer’s current workload. Rush orders are often possible but come with a premium—usually 20–50% above standard pricing. Plan ahead for seasonal peaks (spring and early summer are busiest for event inflatables), and always factor in a week of buffer for unexpected revisions or shipping delays.
Common Mistakes to Avoid
Even experienced buyers stumble on a few recurring issues. Here’s what to watch out for:
- Ignoring wind load – A large inflatable without proper anchoring or venting can become a safety hazard. Discuss wind ratings with your manufacturer and invest in heavy-duty stakes or sandbags.
- Skipping the prototype – For complex shapes or branded characters, a small-scale prototype is worth the extra cost. It reveals proportion issues and seam problems before you commit to full production.
- Choosing the wrong fabric – PVC is durable and affordable, but it’s heavy and less breathable. Nylon or polyester with a urethane coating is lighter and better for indoor or temporary installations. Match the material to your environment.
- Forgetting about repair kits – Inflatables will eventually get punctured. Ask your manufacturer for a patch kit and spare seam tape. Store them with the inflatable so they’re never misplaced.
- Overlooking safety certifications – If your inflatable will be used in public spaces, check local fire codes and safety standards (like ASTM F2374 for amusement rides). A reputable manufacturer can provide documentation.
Maintenance and Longevity
With proper care, a well-made custom inflatable can last 5–10 years. Here’s how to extend its life:
- Clean after every use – Wipe down with mild soap and water, and let it dry completely before folding to prevent mold and mildew.
- Store indoors – Keep it in a cool, dry place away from direct sunlight and rodents. UV exposure is the #1 cause of fabric degradation.
- Inspect seams and valves – Before each use, check for loose threads, cracked seams, or leaking valves. Address small issues immediately.
- Use a blower with a filter – Debris sucked into the blower can damage the fabric from the inside. A simple filter or mesh cover helps.
- Rotate folding patterns – Folding the same way every time creates stress lines. Alternate the fold direction to distribute wear.
الأسئلة الشائعة
Q: Can you make a custom inflatable?
١. ج: Yes, absolutely. Custom inflatables are manufactured regularly for advertising, events, and personal use. The process involves creating a vector design file, producing a 3D proof for approval, and then manufacturing the inflatable using PVC or nylon fabric. Most professional manufacturers offer in-house design services to help you refine your concept into a production-ready file.
Q: How much does it cost to get a custom inflatable?
١. ج: Pricing depends on size and complexity. Small custom inflatables under 10 feet typically cost $1,000–$3,000. Mid-size inflatables (10–20 feet) run $3,000–$8,000, while large builds (20–40 feet) can reach $8,000–$20,000 or more. Complexity multipliers for custom shapes, multiple chambers, and detailed printing add 10–40% to the base price.
Q: How to create an inflatable?
١. ج: Start with a vector graphics file (AI, PDF, or EPS) that defines your design’s shapes and colors. The manufacturer will convert this into cutting patterns, produce a 3D proof for your approval, and then weld or sew the fabric panels together. The final step is pressure testing and quality inspection before shipping.
Q: How do I make a DIY inflatable costume?
١. ج: DIY inflatable costumes require lightweight nylon or ripstop polyester fabric, a small battery-powered blower fan, and a heat sealer or sewing machine. Create a simple pattern with a body cavity and limb channels, seal all seams airtight, and install the fan in a pocket at the waist or back. Expect to iterate several times before getting a good fit.
Q: How long does it take to ship a custom inflatable?
١. ج: The full process—design, proofing, production, and shipping—typically takes 4–8 weeks. Design and proofing take 1–2 weeks, production takes 2–4 weeks, and shipping adds 1–4 weeks depending on origin and destination. Rush production is available from most vendors for an additional fee of 15–30%.
Q: What materials are used for custom inflatables?
١. ج: The most common material is PVC-coated polyester, available in weights from 14 oz to 24 oz per square yard. Lighter PVC is used for indoor displays, while heavy-duty PVC is standard for outdoor and water-based inflatables. Nylon and ripstop polyester are preferred for wearable costumes due to their light weight and flexibility.
Q: What are the minimum order quantities for custom inflatables?
١. ج: For fully custom designs, most manufacturers have an MOQ of 1–5 units. However, the per-unit price drops significantly with larger orders because design and tooling costs are spread across more units. If you’re buying a single custom inflatable, expect to pay the full design cost amortized over that one unit.
Q: Can I use my own artwork for a custom inflatable?
١. ج: Yes, but it must be converted to a vector format (AI, PDF, or EPS) for manufacturing. If you only have a raster image or a sketch, most vendors offer free design services to redraw your artwork as a vector file. Keep in mind that small text and fine details may not translate well to the inflatable’s surface.







