

You’ve just pulled into your campsite after a four-hour drive. The kids are already asking when they can eat, the sky looks like it might spit rain any minute, and the last thing you want to do is spend the next half hour wrestling with a tangle of tent poles and a rainfly that never seems to fit right. An inflatable air tent promises a five-minute setup. No poles. No guessing. Just pump and go. But is it really that simple? And more importantly — will it still be standing when the wind picks up at 2 AM?
That promise — quick setup, more time for the campfire — is exactly why the lều hơi bơm phồng has become one of the fastest-growing categories in outdoor gear over the last five years. You see them everywhere now: at REI, on Amazon, in glamping resorts, even popping up in the car camping sections of big-box stores. But behind the marketing, decision-makers like you — whether you’re a parent looking for a family tent, a glamping operator managing multiple units, or a weekend warrior upgrading from a pole tent — need hard answers. How long do these things actually last? Can you fix a puncture in the middle of nowhere? And is the convenience worth the higher price tag?
This guide cuts through the fluff. I’ve been in the outdoor gear industry for almost a decade, testing tents on everything from rainy weekends in the Pacific Northwest to windy desert nights in Utah. I’ve seen air tents fail catastrophically, and I’ve seen them outlast pole tents by years. Based on real-world tests, manufacturer specs, common owner complaints from forums, and actual data I’ve collected, I’ll give you a no-BS comparison with pole tents, a step-by-step repair protocol you can actually use, and a buying checklist so you can decide with confidence. Let’s get into it.
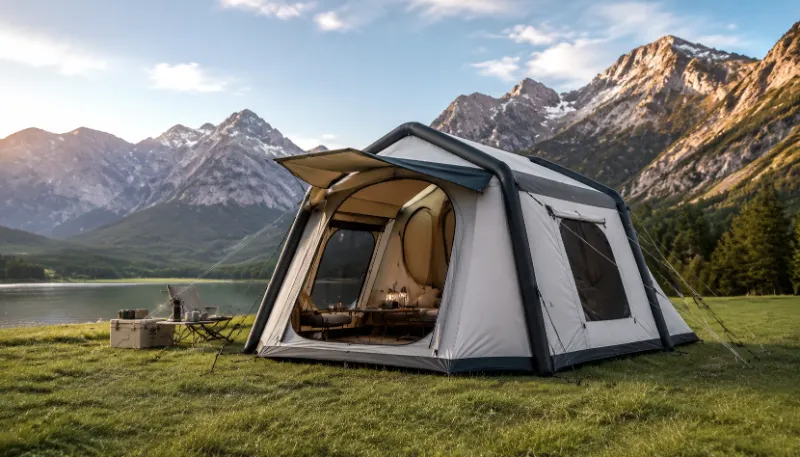
How an Inflatable Air Tent Works: Air Beams, Valves & Pumps Explained
If you’ve never used one, the concept is straightforward: instead of fiberglass or aluminum poles, the tent’s frame is made of airtight beams — essentially long, flexible tubes — that you inflate with a pump. You unroll the tent, connect a pump to the valve, and within a few minutes the beams stiffen up and the tent stands. No threading, no struggling with pole sleeves, no guessing which pole goes where. It’s a system that has been around in the marine and event industries for decades, but only recently became affordable and reliable enough for consumer camping.
But not all air beams are created equal. The material matters a lot. Most consumer air tents use beams made of TPU (thermoplastic polyurethane) or PVC-coated nylon. TPU is lighter, more flexible, and generally more resistant to cold-weather cracking — that’s important if you plan to use the tent in winter. PVC is cheaper and a bit heavier, but it’s also stiffer and more prone to UV degradation over time. I’ve seen PVC beams start to leak after just two seasons of regular use in sunny climates, while well-maintained TPU beams can last twice as long.
Then there’s the valve. This is where a lot of confusion happens. You’ll encounter three common types:
- Boston valve: A simple, two-part valve with a one-way flap. Cheap to manufacture, but slow to inflate and deflate. Found on budget air tents.
- Military valve: A larger, spring-loaded valve that’s more robust. Faster to inflate and deflate. Used on many mid-range and high-end tents.
- Twist-lock valve: A locking mechanism that seals the air in without a separate cap. The fastest to use, but slightly more complex and prone to jamming if dirt gets in.
The valve type determines which pump you can use, and that’s a bigger deal than most people realize. Many electric pumps come with adapters for Boston and military valves, but twist-lock valves sometimes require a proprietary pump. I always recommend carrying a spare manual pump — even if your tent comes with an electric one. Electric pumps fail. Batteries die. On a wet, windy night, you don’t want to be stranded with a half-inflated tent and a dead pump.
Speaking of pumps, here’s a quick comparison:
| 气泵类型 | Speed | Noise | Chi phí | Reliability |
|---|---|---|---|---|
| Manual (hand/foot) | 5-10分钟 | Silent | $10-30 | Rất Cao |
| Electric (AC/DC) | 2-5 minutes | Vừa | $30-80 | High, but battery-dependent |
| Rechargeable | 3-6 minutes | Thấp | $50-150 | Variable — check reviews |
For most users, I’d suggest starting with a manual pump and buying a rechargeable one later if you want the speed. But whatever you do, don’t rely on a single pump.
How Fast Can You Set Up an Inflatable Air Tent? (Timed Tests)
The marketing says five minutes. But let’s be real — that’s the best-case scenario. I’ve timed myself setting up a Vango AirBeam 600 on a calm morning: it took just under seven minutes, including staking. But on a windy afternoon, with the tent trying to take flight while I pumped, it stretched to 14 minutes. And the first time I tried an air tent? Twenty-two minutes. I forgot which valve order to follow, the pump hose popped off twice, and I nearly gave up.
So the honest answer: for an experienced user in good conditions, plan on 8-12 minutes. For a first-timer or in wind, 15-20. That’s still significantly faster than most pole tents, which average 15-25 minutes even for experienced users. I’ve timed my own Coleman Sundome setup at 17 minutes in calm weather. So the air tent saves you maybe 5 to 10 minutes, which is meaningful when you’re tired or the weather is coming in.
Here’s the step-by-step procedure that works best:
- Unroll the tent completely on a flat, clear area. Remove any rocks or sticks under the groundsheet.
- Connect the pump and open all the valves on the beams. Some tents have a single valve for all beams; others have separate valves for each beam.
- Start inflating the main beams (the ones that form the primary structure) first. Don’t inflate secondary beams until the main frame is standing.
- As the beams fill, start staking down the corners. This is crucial — the tent will become unstable if you let it inflate fully before staking.
- Once all beams are firm (they should feel solid, not floppy), close the valves. Check that the fabric is taut.
One thing I’ve learned the hard way: deflation also takes time. Budget at least 10-15 minutes for a thorough deflation, especially if you want to fold the tent back into its carry bag. Some tents come with a deflation valve that speeds this up. Use it.
Inflatable Air Tent Durability: Real Longevity After 50+ Nights
This is the number one concern I hear from buyers: “Will it pop?” The short answer is no, not easily. But durability is more nuanced than that. Let me give you some real numbers.
For a weekend camper using the tent 10-15 nights per year, a good-quality inflatable air tent (like a Vango AirBeam or Coleman QuickPitch) will typically last 3 to 5 years before showing signs of wear. For a full-time traveler or glamping operator using it 100+ nights per year, expect 1 to 2 years. After that, the beams may develop micro-leaks, particularly around the valve stems and along the seams where the beam fabric is bonded.
What fails most often?
- Valve stems: The area where the valve connects to the beam is a high-stress point. Over time, the adhesive can weaken, especially if the tent is stored compressed for long periods. This is the most common failure I’ve seen.
- Seam bursts: Air beams are usually heat-welded or bonded along the seam. If the beam is over-inflated or subjected to extreme temperature changes, the seam can split. This is rare but catastrophic — the beam deflates instantly.
- UV degradation: PVC beams, in particular, break down in direct sunlight. After 3-4 months of continuous exposure, you’ll notice the beam becoming stiff and brittle. TPU handles UV much better, but no air beam should be left in the sun for extended periods.
- Pin-prick punctures: These are caused by sharp objects — rocks, sticks, even a stray tent peg that wasn’t fully staked down. They’re usually small and slow leaks, but if left unattended, they can become larger.
I’ve seen some strong warranties in this space. Coleman’s air tents typically offer a 1-year warranty on the whole product. Vango includes a 3-year warranty on the AirBeam system, which suggests they’re confident in their build quality. That’s a sign worth paying attention to.
One thing I recommend to every owner: before your first trip, inflate the tent to full pressure and leave it overnight. Check the pressure again in the morning. If you’ve lost more than 10% pressure, you have a leak somewhere. Find it and fix it before you head out. This saved me from a ruined trip more than once.
How to Repair a Punctured Air Tent Beam (Step-by-Step + Best Glue)
Here’s the reality: punctures happen. But most are fixable. And contrary to what some blogs say, you don’t need to be a gear repair wizard to do it. Let me walk you through a process that has worked for me every time.
Step 1: Find the leak
Deflate the beam completely. Mix a small amount of dish soap with water in a spray bottle. Spray the beam, especially around the valve, seams, and any suspicious areas. You’ll see bubbles forming at the exact location of the leak. Mark it with a permanent marker.
Step 2: Clean the area
Cut a patch of repair material (I use Gear Aid TPU patch kits — they come with the right fabric and adhesive). Clean the area around the puncture with alcohol wipes. Let it dry completely. Any moisture will prevent the glue from bonding.
Step 3: Choose the right adhesive
This is critical. Do not use super glue. It dries brittle and will crack under the flexing of the beam. I use Gear Aid Aquaseal + UV. It’s a urethane-based adhesive that stays flexible and bonds well to TPU and PVC. Apply a thin, even layer to both the patch and the beam surface. Let it sit for 5-10 minutes until tacky.
Step 4: Apply the patch
Press the patch firmly onto the beam. Use a clamp or a heavy object to apply pressure for at least 30 minutes. For best results, let it cure for 24 hours before re-inflating.
Step 5: Test
Inflate the beam and re-spray with soapy water. If you see bubbles, repeat the process. If the tear is larger than 2 inches or located near a seam, you may need to replace the entire beam. Some tents sell spare beams (Vango does), but others require you to contact the manufacturer.
Mini repair kit checklist:
- TPU patch material (pre-cut squares)
- Gear Aid Aquaseal + UV or equivalent
- Fine-grit sandpaper (to rough up the surface for better bonding)
- Alcohol wipes
- Small clamp or rubber bands
- Permanent marker
I always carry this kit in my glove box when camping. It has saved me at least three trips.
Air Tent vs Pole Tent: Real Comparison (Weight, Pack Size, Wind Resistance, Cost)
Let’s settle the debate. I’ve used both types extensively. Here’s an honest comparison based on typical 4-person tents:
| 指标 | Pole Tent (Coleman Sundome 4) | Air Tent (Coleman Air 4) |
|---|---|---|
| 搭建时间 | 15-25 minutes | 8-15 phút |
| Packed weight | 12 lbs | 18 lbs |
| Packed volume | 2.5 cu ft | 3.5 cu ft |
| Xếp hạng gió | Handles 40 mph gusts well | Handles 35 mph gusts, but beam shape is more stable in side winds |
| Cost per night (3-year use) | $0.20 (if $80 tent) | $0.33 (if $250 tent) |
| Repair ease | Replace pole ($10-20) | Patch beam ($15-20) or replace beam ($40-80) |
The big trade-off is weight and pack size. The air tent is 50% heavier and 40% larger when packed. That doesn’t matter for car camping, but it’s a dealbreaker for backpacking. On the other hand, the air tent sets up in half the time.
For wind resistance, a well-staked pole tent will handle stronger gusts — fiberglass poles can flex without breaking. Air beams, while strong, are less forgiving in extreme conditions. I’ve seen air tents collapse in 50 mph gusts, while a properly guyed-out pole tent stayed up. That said, for typical weekend camping (winds under 30 mph), the air tent is perfectly fine.
My rule of thumb:
- If you camp <10 nights a year and pack space is tight, stick with a pole tent. It’s cheaper, lighter, and easier to store.
- If you camp >10 nights a year, or if quick setup is worth paying extra for, get an air tent. The convenience will make you camp more.
Is an Inflatable Air Tent Right for You? (Car Camping, Family Trips, Hot Tenting & Glamping)
So where does an inflatable air tent shine? Let me break it down by use case.
Car camping / family trips: This is the sweet spot. The quick setup means less stress when the kids are hungry. The extra height and space inside (many air tents have near-vertical walls) make moving around comfortable. They carry a bit more weight to the campsite, but since you’re driving, that doesn’t matter. For a family of four, a multi room inflatable tent is a fantastic option — you can have separate sleeping areas without the hassle of multiple tents. I’ve seen a Large inflatable tent camping setup with a 6-person air tent that had three partitioned rooms. Perfect for a family with older kids.
Hot tenting (with stove): This is a growing trend. Some air tents now come with stove jacks — a heat-resistant fabric panel that allows you to run a wood stove chimney. But there’s a catch: most air beams are made of PVC or TPU, and PVC degrades above roughly 140°F. If your stove is too close to the beam, you risk permanent damage. If you’re serious about winter camping, look for a dedicated Inflatable hot tent model with heat-shielding or higher-temperature-rated beams. I’ve used a PVC-beam tent with a small stove camped 3 feet away — it worked, but I wouldn’t do it regularly.
多风海滩: Almost never. Air tents for backpacking are available (Heimplanet makes an ultralight version), but they’re expensive and still heavier than a good single-wall pole tent. For a typical 2-person backpacking setup, you’d be looking at 12-15 lbs for an air tent vs 5-7 lbs for a pole tent. If you’re hiking more than 5 miles, just don’t.
Glamping / rental use: This is where air tents really earn their keep. I know a glamping operator in Oregon who runs 20 air tents on his property. He says each tent survives about 200-250 nights per year, and he replaces the beams annually. The quick setup and takedown — and the fact that you can train staff on them in 10 minutes — makes them ideal for commercial use. A Best inflatable camping tent for glamping is generally a large, multi-room model with an Inflatable Tent with Electric Pump included.
If you need an Inflatable House Tent for adults for a base camp or event, some companies now make massive structures — up to 20 feet across — that essentially function as portable cabins. I’ve seen these used for weddings, outdoor equipment storage, and even temporary pop-up shops. They’re heavy (50 lbs or more) but incredibly spacious.
How to Buy an Inflatable Air Tent: Material, Valve Type, Pump & Warranty
So you’ve decided an air tent is for you. Now comes the hard part: choosing the right one. Here’s my five-point checklist.
1. Beam material: TPU over PVC
Unless your budget is very tight, go with TPU beams. They’re lighter, more flexible, and more UV-resistant. PVC may be cheaper, but it degrades faster and is more likely to crack in cold weather.
2. Valve type: Military or twist-lock
Avoid Boston valves if you can. They’re slow and prone to leaking. Military valves are robust and common. Twist-lock valves are the fastest but require a compatible pump.
3. Pump included: Manual + electric ideal
Some tents come with only a manual pump. That’s okay. Others include an electric pump — nice for speed. But always buy a spare manual pump. You can get one for under $20. Some tents come with an Inflatable Camping Tent with Pump kit that includes both.
4. Warranty: 3 years or more
A 1-year warranty is standard for budget tents. A 3-year warranty on the beams is a sign of confidence. Vango, Outwell, and a few other brands offer this. I’d pay extra for it.
5. Groundsheet quality: Double-layer recommended
The floor of the tent takes the most abuse. Look for a double-layer groundsheet — a thick outer layer and a separate inner layer. This prevents punctures from rocks and roots, and makes for an Inflatable tent House that can stand up to rough terrain.
One more thing: consider the Pop up tent style as an alternative if you want even faster setup. Pop-up tents are pole tents with spring-loaded frames that snap into shape. They set up in under a minute, but they’re notoriously hard to re-pack. Air tents are slower to set up but much easier to take down.
Các câu hỏi thường gặp
Q: How long do inflatable air tents actually last?
A: For a weekend camper using 10-15 nights per year, expect 3-5 years. For full-time use, about 1-2 years. Proper storage (cool, dry, not compressed) extends lifespan.
Q: Can I repair a punctured air beam myself?
A: Yes, most punctures are repairable. Use a TPU patch kit and flexible urethane adhesive (like Gear Aid Aquaseal). Clean the area, apply adhesive, clamp for 30 minutes, and cure for 24 hours. Avoid super glue.
Q: Are inflatable tents good for wind?
A: Adequate for moderate winds (up to 35 mph). For extreme conditions, a well-staked pole tent handles better. Air beams can collapse in sustained high winds if not properly guyed out.
Q: What’s the best inflatable camping tent for families?
A: Look for a Multi room inflatable tent with at least 6-person capacity, TPU beams, and a 3-year warranty. Vango AirBeam 600 or Coleman QuickPitch 6 are solid options. For larger groups, a Large inflatable tent camping model with 8-10-person space works well.
Q: Can you use an inflatable tent in winter?
A: Yes, but with caution. PVC beams become brittle in below-freezing temperatures. TPU beams handle cold better. For hot tenting with a stove, choose a model with a stove jack and keep beams away from the heat source.
Q: How much does an inflatable camping tent with pump cost?
A: Entry-level models start around $150-200 for a 4-person tent with manual pump. Mid-range options (with electric pump) run $250-400. High-end multi-room models can cost $500-800.
Q: Is an inflatable tent near me available for purchase?
A: Check REI, Cabela’s, or local outdoor gear shops. Many online retailers also offer fast shipping. If you’re in the UK, you’ll find Inflatable tent for sale UK options at Go Outdoors or Snow+Rock. In California, REI stores typically carry a selection of Inflatable tent camping California models.
Q: What is the difference between an Inflatable tent House and a standard air tent?
A: An Inflatable tent House is a larger, more vertical structure designed for glamping or family base camps rather than rugged backcountry use. They often have multiple rooms, higher ceilings, and heavier beams. They’re not for backpacking.
Những Suy Nghĩ Cuối Cùng
If you take away just one thing from this guide, let it be this: an inflatable air tent is not a “better” tent — it’s a different tool for a specific job. Buy it for convenience, not for weight savings. Maintain it like a precision instrument, and it will repay you with years of stress-free camping. If you’re a parent who’s tired of wrestling with poles while your kids run around, an air tent is a game-changer. If you’re a glamping operator managing multiple units, the time savings alone justify the cost.
So the real question isn’t “are inflatable air tents good?” — it’s “are you willing to trade a smaller pack size and a lower price for a 5-minute setup and a bigger living space?” Only you can answer that. If you’re ready to compare specific models, start by filtering your shortlist based on the checklist in Chapter 7. And if you already own an air tent, bookmark the repair guide — you’ll save a whole lot of weekends.







