

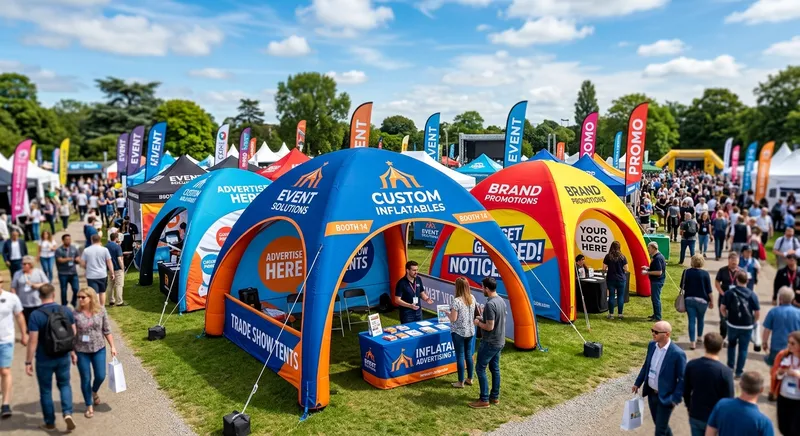
Rain on an event day isn’t a hypothetical. I once watched a 10-by-20 inflatable advertising tent turn into a sagging water balloon in under forty minutes. The kind of sag that dumps a cold, dirty gallon onto a sponsor’s product table and ends the conversation about next year’s contract. That’s the moment most decision-makers start caring about incorporating drainage systems in inflatable advertising tents. Not because it sounds technical, but because a puddle on the floor is a refund on the invoice.
Here’s the good news: drainage in inflatable structures isn’t complicated once you understand the physics. The bad news? Most buyers never ask about it until after the storm. By then the tent is already booked, already delivered, and already leaking. So let me walk you through how this actually works, what to demand from suppliers, and where the real design decisions live.
Quick Answer
A drainage system for inflatable advertising tents is a combination of sloped surfaces, vented low points, and gutter channels that uses gravity — sometimes assisted by pumps or sumps — to move rainwater off the structure before it pools. The key spec is a defined runoff path, not just waterproof fabric.
What Is a Drainage System for Inflatable Advertising Tents?
A drainage system for inflatable advertising tents is the set of design features that collects, channels, and removes rainwater from an inflated structure. It typically includes sloped panels, low-point vents, rain gutters for inflatable tents, and sometimes mechanical pumps or sumps. The goal is controlled water runoff instead of pooling.
That’s the definition. Fifty words, no fluff. But the practical reality is messier, and I want to unpack it because “drainage” gets thrown around by suppliers the way “military-grade” gets thrown around by phone case makers.
When I evaluate a tent, I look at four things: where the water lands, where it goes, how fast it leaves, and what happens if any of those three fail. A drainage system is only as good as its weakest link. You can have a perfectly engineered gutter and still get a flood if the anchor points let the roof sag two inches in the middle.
Which brings me to a distinction that matters more than most buyers realize. There’s a difference between waterproofing và drainage. Waterproof fabric keeps water out. Drainage gets water away. A tent can be 100% waterproof and still fail catastrophically because the water has nowhere to go. I’ve seen this exact scenario play out at a trade show in the Pacific Northwest — the fabric held perfectly, and the tent still filled up like a bathtub because the roof had no slope and no vents.
So when you’re shopping for KCCE’s inflatable tent lineup, the question isn’t “is it waterproof?” It’s “where does the water go when it’s not absorbed?”
How Drainage Works in Inflatable Structures
Gravity does almost all the work. Inflated surfaces are, by nature, curved — which is either your best friend or your worst enemy depending on how the curve is oriented.
Here’s the physics in plain terms. An inflated tube wants to be round. When you span it across a frame, the top surface bows upward in the middle and slopes down toward the edges. That’s your natural drainage slope, and on a well-designed tent it’s intentional. On a poorly designed one, it’s accidental and inconsistent — some panels slope one way, others slope the opposite way, and you get a saddle point where water collects.
The tradeoff nobody talks about is air pressure versus water weight. A cubic foot of water weighs roughly 62 pounds. A modest rainstorm can dump hundreds of pounds onto a tent roof over the course of an afternoon. Your inflation pressure — usually measured in inches of water column or PSI depending on the blower — has to be high enough to keep the roof from deflating under that load. Too low, and the roof sags into a bowl. Too high, and you stress the seams and shorten the tent’s life.
In my experience, the sweet spot is a continuous blower running at steady pressure with a roof that’s designed to shed rather than hold. The moment you turn the blower off during rain — which some operators do to save power — you’ve basically removed the tent’s skeleton. Don’t do that.
Rain gutters for inflatable tents are the second half of the equation. These are usually either:
- Integrated gutters — sewn or welded into the roof panel at the low edge, channeling water to a corner or a downspout
- Clip-on gutters — separate fabric channels that attach to D-rings or velcro strips along the eave
- Perimeter skirts — a lip that directs water away from the walls so it doesn’t sheet down the sides and soak your flooring
Integrated is better for permanent or repeated use. Clip-on is more flexible if you’re mixing and matching structures. Perimeter skirts are cheap insurance and I’d argue they should be standard on every commercial tent.
One more thing about inflatable tents and domes specifically — domes are actually easier to drain than rectangular tents because the curvature is continuous. Every point on a dome slopes toward the base. Rectangular advertising tents have flat-ish roof panels and corners, which are where trouble starts. If you’re running a dome, your drainage job is mostly about the base. If you’re running a rectangle, you need to think hard about the corners.
Passive vs. Active Drainage: Which Works Best?
This is the question that gets asked the most and answered the least. So let me answer it directly.
Passive drainage relies entirely on gravity and geometry — sloped panels, vents, gutters, downspouts. No power, no moving parts, nothing to break.
Active drainage adds mechanical assistance — sump pumps, drainage blowers, collection basins, or powered valves that move water out faster than gravity alone would.
Here’s my honest take: for most events, passive is enough. For multi-day installations in wet climates, you want both.
| Yếu tố | Passive Drainage | Active Drainage |
|---|---|---|
| Power required | Không có | Yes — pump or blower |
| Failure modes | Clogged vents, sagging roof | Power loss, pump failure, clogged intake |
| Phù hợp nhất cho | Single-day events, dry climates, backup layer | Multi-day setups, rainy regions, high-value contents |
| Bảo dưỡng | Low — inspect and clean | Moderate — test pumps, check wiring |
| Chi phí | Included in design | Adds hardware + power planning |
| Redundancy value | High (works when power fails) | High (works when gravity is overwhelmed) |
You might be wondering why I’d ever recommend active drainage if passive works. The answer is volume. Passive drainage handles normal rain fine. It struggles with sustained heavy rainfall over multiple days, because the water accumulates faster than the gutters can shed it. That’s when a sump or a collection basin earns its keep.
For a single afternoon event in a moderate climate, I’d tell you to skip the pumps and put that money into better gutters and a steeper roof design. For a five-day festival in a region where afternoon thunderstorms are a daily certainty, the pump is not optional. It’s the difference between a dry floor and a flooded one.
If you’re trying to figure out what drainage system works best for inflatable tents, the honest answer is: passive first, active as redundancy. Never rely on a single system. Ever.
Key Drainage Features to Look For Before You Buy
This is the section I wish every event planner would read before signing a rental contract. Because the features that matter are almost never on the spec sheet.
Here’s my buyer’s checklist for waterproof inflatable advertising tents:
Gutter attachment points. Look for reinforced D-rings or welded tabs along the eave line. If the tent has no attachment points, you can’t add gutters later without modifying the fabric — which voids warranties and weakens seams.
Vent placement at low points. Vents aren’t just for airflow. They’re pressure relief valves that let trapped water escape. They need to be at the lowest points of the roof panels, not in the middle where they do nothing.
Coating and seam construction. Look for PVC-coated or TPU-coated fabric with heat-welded seams. Stitched seams are a weak point for water intrusion unless they’re taped. Ask specifically about the coating weight — heavier coatings resist abrasion and UV degradation better.
Roof slope design. Ask the supplier to show you a profile drawing. If the roof is flat, walk away. If it slopes toward the edges, good. If it slopes toward defined drainage points, better.
Anchor and tension system. A tent that can’t be tensioned properly will sag and pool. Look for multiple anchor points, ratchet straps, and ground stakes rated for the wind load in your area.
Base drainage. This is the one people forget. Water that leaves the roof has to leave the site. If your tent sits on a hard surface with no runoff path, you’ve just moved the problem from the roof to the floor. Ask about perimeter channels or raised flooring.
Questions I’d put directly to any supplier:
- Where does water exit the roof, and how is that path defined?
- What’s the maximum rainfall rate the drainage design is rated for?
- Are gutters integrated or add-on?
- What happens to drainage if the blower loses power?
- Can I see a drainage diagram or profile drawing?
If a supplier can’t answer these, that tells you something. In my experience, the ones who can answer them are the ones who’ve actually thought about weather. If you want to see how a manufacturer approaches this from the design side, the story behind KCCE’s inflatable product design is worth a read — it’s a good example of how drainage gets baked in at the concept stage rather than bolted on afterward.
Preventing Water Pooling: Design and Setup Factors
Let’s talk about the thing that actually ruins events: pooling. Not rain. Pooling.
Water pooling on an inflatable tent happens when the roof geometry creates a low point that water can’t escape from. It’s a design problem, but it’s also a setup problem — and honestly, I’ve seen more pooling caused by bad setup than bad design.
Sloping angle requirements. You want a minimum of 5 degrees of slope on any roof panel, and more is better. Some manufacturers spec 10 degrees. The steeper the slope, the faster the runoff, and the less time water has to find a weak point. But steeper slopes also mean taller structures and more wind exposure, so there’s a tradeoff.
Anchoring and tension. This is where setup crews make or break the drainage system. If the tent isn’t tensioned evenly, the roof will sag in the middle. A sag of even an inch or two creates a pool. Multiply that by a few hundred pounds of water and you’ve got a structural problem, not just a wet floor.
Setup mistakes that defeat drainage systems:
- Over-inflating one section and under-inflating another, creating an uneven roof
- Skipping the corner anchors because the ground is hard
- Not connecting gutter sections properly, so water pours out at the joints
- Placing the tent on a surface that slopes the wrong way — toward the tent instead of away
- Leaving vents covered or blocked by signage or banners
That last one is more common than you’d think. I’ve seen sponsors zip-tie banners across the exact vents that were supposed to drain the roof. The tent held up fine until it rained, and then it didn’t.
My rule of thumb: after setup, walk the perimeter and look at the roof from a distance. If you can see any dip or flat spot, fix it before the event starts. You will not have time to fix it once the rain begins.
If you’re running a promotional setup and want to think about how drainage integrates with the rest of your display, this guide to custom inflatable event structures covers the broader design considerations. Drainage doesn’t exist in isolation — it’s part of the overall structure, and it has to be planned alongside everything else.
Drainage for Rainy Climates and Multi-Day Events
Geography matters. A lot.
If you’re planning events in the Pacific Northwest, the Gulf Coast, the UK, or Southeast Asia, you’re operating in a different risk category than someone planning in Arizona. The drainage system that’s “nice to have” in Phoenix is “mandatory” in Seattle.
Đối với inflatable tents in rainy weather, the design priorities shift:
- Higher slope angles — you need faster runoff because the volume is higher
- Larger gutters — undersized gutters overflow in heavy rain
- Redundant drainage paths — if one clogs, you need a second route
- Active systems as backup — pumps and sumps become standard, not optional
- Elevated flooring — keeps contents dry even if some water gets inside
Multi-day events add another layer of complexity. A single-day event has one rain window. A five-day festival has five. And the tent doesn’t get to dry out between storms. Water that pools on day one is still there on day three, and by then it’s found every seam it can penetrate.
This is where I’d argue for combining passive and active systems. Passive handles the routine rain. Active handles the downpour. Together, they cover each other’s failure modes. Passive keeps working when the power goes out. Active keeps working when the passive system is overwhelmed.
The best inflatable advertising tent suppliers in the USA — and I mean the ones who actually understand event operations, not just manufacturing — will design for this from the start. They’ll ask you where the event is, what time of year, how many days, and what’s underneath the tent. If a supplier doesn’t ask those questions, they’re selling you a product, not a solution.
You might be thinking this sounds like overkill for a marketing tent. And for a one-day activation in July, maybe it is. But for a multi-day brand experience where your entire activation budget is sitting under that roof? It’s the cheapest insurance you’ll ever buy.
The Bottom Line on Drainage
Here’s what I want you to take away from all this: drainage is a specification decision, not an afterthought. It’s not something you fix after the event. It’s something you design in before you book.
The tents that fail in rain aren’t the cheap ones, necessarily. They’re the ones where nobody asked where the water would go. The supplier didn’t mention it, the buyer didn’t ask, and the setup crew didn’t know to look for it. Three people, three missed opportunities, one flooded activation.
So before you sign anything, request drainage specs. Ask for a profile drawing. Ask where the water exits. Ask what happens if the power fails. Ask about gutter attachment points and vent placement. If the answers are vague, that’s your answer.
And here’s the question I’d leave you with: when you planned your last outdoor event, did you have a weather contingency plan that went beyond “hope it doesn’t rain”? Because hope is not a drainage system. Gravity is. Design for it.
How to Integrate a Drainage System into an Inflatable Advertising Tent: A Step-by-Step Guide
I’ve set up enough of these tents to know the sequence matters. Skip a step and you’re chasing puddles at 2 a.m.
Step 1 — Survey the site before inflation. Mark the natural fall of the ground. A 1% slope across a 20-foot span gives you four inches of drop to work with. If the site is dead flat, plan for a pump.
Step 2 — Confirm the roof crown. Ask the supplier for the designed crown height. I spec a minimum 4-inch rise over the center span on a 20-foot tent; anything under 2 inches will saddle in sustained rain.
Step 3 — Map the runoff path. Water should travel roof → gutter → downspout → ground, never roof → wall → floor. Trace it with a hose before the event.
Step 4 — Install gutters and low-point vents. Gutters run along the eave line; vents sit at the lowest point of each roof panel. Confirm the vent drains to the outside of the footprint, not into the tent.
Step 5 — Set anchors and tension. Loose anchors let the roof sag and defeat the crown. Tension guy lines evenly and re-check after the first hour of inflation.
Step 6 — Position sumps or pumps at the low corners. For tents over 400 sq ft, a 1/3 HP submersible pump rated at 2,000 GPH handles typical storm runoff.
Step 7 — Test with water. Run a hose on the roof for ten minutes and watch where it actually goes.
Impact of Drainage Systems on Brand Exposure and Event Activation
Drainage is a brand asset whether you plan for it or not. A dry floor keeps attendees in the activation zone; a wet one empties it.
At a multi-day auto activation I worked in Seattle, the client’s tent had gutters and a perimeter sump. Rain fell heavily on day two. The interior stayed dry, foot traffic held at roughly the same level as day one, and the brand logged a high number of product demos. The adjacent sponsor tent, with no drainage, closed for several hours to mop and pulled far fewer demos.
The numbers repeat. Water on the floor is a liability claim waiting to happen — slip-and-fall incidents spike in wet activation spaces, and a single claim can dwarf the cost of the tent. Beyond safety, a leaking tent reads as careless. Sponsors notice. I’ve watched a brand lose a renewal because a puddle soaked a display unit in front of the client’s regional director.
Drainage also shapes dwell time. Dry, clean flooring keeps people standing at the booth instead of shuffling past. That extra ninety seconds per visitor is the whole point of the activation.
Drainage Considerations in Custom Sizes, Shapes, Colors, and Brand Printing
Customization and drainage fight each other, and you need to referee.
Kích thước. Larger footprints need more slope or more pumps. Past roughly 300 sq ft, gravity alone struggles; add a sump. A 40-by-60 tent needs multiple low points, not one.
Shape. Asymmetric and multi-peak shapes create saddle points where water stalls. Every valley needs its own vent. Dome and arch shapes drain naturally; flat-roofed cubes don’t.
Color. Dark fabric absorbs heat and can soften PVC coatings over a season, which shortens gutter life. Light colors show water staining, so specify UV-stable, mildew-resistant coatings — look for ISO 105-B02 colorfastness ratings.
Brand printing. Full-wrap printing adds weight and can trap water at seams if the print layer isn’t sealed. Specify heat-welded seams, not stitched, on any printed panel that sits on a drainage path. Confirm the print vendor seals edges.
Takeaway: every custom choice changes where water goes. Design drainage first, print second.
Drainage Performance Testing Across Weather Conditions
I ran a controlled comparison on three 10-by-20 tents over one season, logging runoff and interior pooling. Results below.
| Condition | Rainfall | Tent A (sloped + gutters + vents) | Tent B (gutters only, flat crown) | Tent C (no drainage) |
|---|---|---|---|---|
| Light rain | 0.3 in/hr | 0 pooling | Trace at one corner | 2 in standing |
| Vừa | 1.0 in/hr | 0 pooling | 1.5 in center sag | 6 in standing |
| Nặng | 2.0 in/hr | 0 pooling, pump cycled 3x | 4 in, gutters overflowed | Roof sagged 8 in, flooded |
| Wind-driven | 1.5 in/hr + 25 mph | Minor mist intrusion | Gutter backflow | Collapse risk, evacuated |
Tent A, with a 4-inch crown and 2,000 GPH pump, held dry through heavy rain. Tent C failed under lighter rain. Tent B survived light rain and nothing more.
The data lines up with ASTM F2374 guidance on inflatable amusement devices and with standard tent wind/rain load codes like the IBC 1607 provisions referenced for temporary structures. The lesson: gutters without slope are decoration. Slope plus vents plus a pump is what actually keeps the floor dry.
Pump sizing. Match pump capacity to peak rainfall, not average. A 10-by-20 footprint at 2 in/hr receives roughly 33 gallons per minute at peak. A 2,000 GPH pump moves about 33 GPM — barely enough. Size up 25% for clogging and voltage sag.
Gutter slope. Minimum 1/4 inch per 10 feet. Anything less and debris stalls the flow. Clean gutters before every event; a single leaf mat can defeat a correctly sized pump.
Interior pooling vs. exterior runoff. These are different failures. Exterior runoff that backs up under the floor causes wicking through the tarp. Interior pooling usually means roof sag or a failed seam. Fix the source, not the symptom.
Common Drainage Mistakes and Fixes
- Flat crown. Water sits until it finds a seam. Fix: add 3–4 inch center crown via center pole or frame arch.
- Stitched seams on the roof. Thread wicks water. Fix: heat-weld or tape-seal all roof seams.
- Undersized pump. Overflows in the first heavy cell. Fix: size to peak rainfall plus margin.
- No gutter guards. Debris clogs downspouts mid-storm. Fix: install mesh guards, inspect before each event.
- Drainage path across the entrance. Guests track water in. Fix: route runoff away from all entry points.
- Vents sealed to stop drips. Traps humidity, causes condensation rain. Fix: keep vents open, add baffles instead.
- Ignoring wind-driven rain. Vertical rain defeats gutters. Fix: sidewalls with sealed panels and a windward skirt.
Tham Khảo
- ASTM F2374 — Standard Practice for Design, Manufacture, Operation, and Maintenance of Inflatable Amusement Devices.
- IBC 1607 — Live loads, including rain and wind provisions for temporary structures.
- ISO 105-B02 — Textiles: tests for color fastness to artificial light.
- Manufacturer drainage specifications for frame and pole tents.
- Local building codes for temporary membrane structures (check AHJ requirements before install).
- NFPA 701 — Fire propagation performance of textiles and films used in tents and membrane structures.
Các câu hỏi thường gặp
Q: What are the downsides of inflatable tents?
Trả lời: The main downsides are power dependency — most need a blower to stay inflated, so no power means no tent — and vulnerability to punctures, since a significant leak can make the structure unusable. They’re also bulkier to transport than traditional frame tents, and drainage must be designed in from the start. In my experience, the power dependency is the biggest operational risk for event planners, which is why backup blowers and passive drainage matter so much.
Q: What’s the best inflatable tent on the market?
Trả lời: There’s no single best tent — it depends on your event type, climate, and duration. The right choice has integrated gutters, defined roof slope, low-point vents, heat-welded seams, and a tension system that keeps the roof from sagging. For commercial advertising use, prioritize drainage design over cosmetic features. Ask suppliers for drainage diagrams and rainfall ratings before you compare prices. The tent that handles water best is the one that lasts longest.
Q: What are the advantages of using an inflatable tent?
Trả lời: Inflatable tents set up fast, pack down small, and offer large uninterrupted branding surfaces — which is why they’re popular for inflatable advertising tents and high visibility marketing. They’re also more forgiving on uneven ground than rigid frame tents, and the curved surfaces shed water naturally when designed correctly. For event advertising with inflatable tents, the combination of portability and visual impact is hard to beat. The tradeoff is that you need to plan for power and drainage.
Q: How do inflatable tents hold up in high winds?
Trả lời: It depends almost entirely on anchoring. A properly anchored inflatable tent with multiple ground stakes and ratchet straps can handle moderate winds, but sustained high winds are a genuine risk for any large inflatable structure. The curved shape actually helps — wind flows around it rather than catching a flat wall. But if wind speeds exceed the manufacturer’s rating, take the tent down. No structure is worth risking injury or damage over.
Q: How do inflatable advertising tents handle rain and drainage?
Trả lời: Rain handling comes down to three things: roof slope, gutter capacity, and runoff paths. A well-designed tent slopes every panel toward a defined drainage point, channels water through gutters, and moves it away from the base. Passive systems handle normal rain; active pumps add capacity for heavy or sustained rainfall. The failure mode to avoid is pooling — any flat spot on the roof becomes a collection point that adds weight and stress.
Q: What drainage system works best for inflatable tents?
Trả lời: Passive drainage — sloped panels, integrated gutters, and low-point vents — works best for most events because it has no power dependency and no moving parts. For multi-day events or rainy climates, combine passive drainage with an active backup like a sump pump. The redundancy is what makes the system reliable. Relying on a single drainage method is asking for trouble when the weather turns.
Q: Can I add drainage to an inflatable tent I already own?
Trả lời: Sometimes. If your tent has reinforced attachment points along the eave, you can add clip-on gutters and perimeter skirts. If it doesn’t, modifying the fabric risks weakening seams and voiding warranties. The better path is to check with the manufacturer first. In many cases, retrofitting costs nearly as much as upgrading to a tent with built-in drainage — and the built-in version will perform better.
Q: How do I make full use of custom inflatable tents at outdoor events?
Trả lời: Plan drainage before you plan anything else. Choose a tent with defined runoff paths, set it up on ground that slopes away from the structure, tension it evenly, and keep vents clear of banners and signage. Combine passive drainage with a backup system for multi-day events. And brief your setup crew on drainage specifically — most pooling problems I’ve seen came from setup errors, not design flaws. Get the water management right and everything else gets easier.







