

You’re about to overpay for a custom logo tent. I see it happen all the time — event managers, marketing directors, and small business owners walk into the buying process with zero frame knowledge, get dazzled by a glossy fabric swatch, and end up with a tent that wobbles in a light breeze and disintegrates after a season of weekend markets.
The thing is, the industry doesn’t want you to know what actually matters. Vendors love to talk print quality and color matching because that’s where the emotional buy happens. Nobody gets goosebumps talking about extrusion thickness or truss geometry. But here’s the hard truth: the frame is what determines whether your custom logo tent survives its second year, and the fabric is what determines whether it survives its second event.
I’ve spent years in this space — sourcing, spec’ing, and watching buyers make the same costly mistakes. This guide is the objective breakdown you won’t get from a sales rep. We’re covering frame construction, size selection, fabric science, printing methods, real pricing, turnaround times, file prep, and accessories. No fluff, no corporate speak. Just what I’d tell a friend who’s about to drop serious money on a branded shelter.
Quick Answer
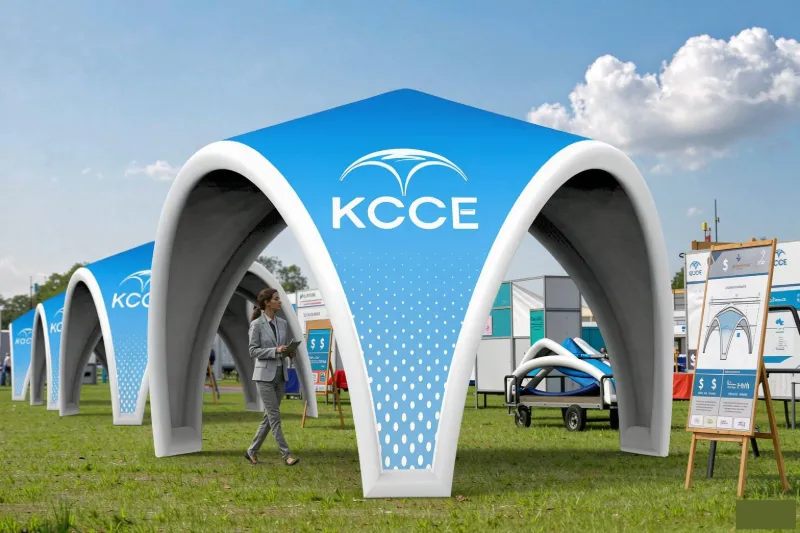
A custom logo tent is a branded, portable shelter typically ranging from 10×10 to 10×20 feet, priced between $900–$1,500 for a quality 10×10 unit. The frame quality — not the fabric — determines long-term durability, and dye-sublimation printing delivers the best color accuracy and fade resistance for your logo.
Why Your Custom Logo Tent Frame Matters More Than the Fabric
Let’s start with a controversial take: the fabric on your custom logo tent is replaceable. The frame is not. When a tent fails at an event — and I’ve seen it happen at a crowded craft fair in Ohio — it’s almost always the frame that gives out, not the canopy top.
Frame Gauge vs. Weight Tradeoff
Here’s the engineering tension nobody explains clearly: thicker frame components make the tent stronger but heavier. A 10×10 custom tent with heavy-duty steel legs might weigh 60+ pounds. and feel like you’re hauling a small safe to every event. An aluminum frame with the same footprint could be 20 pounds lighter — but if the manufacturer skimped on wall thickness, you’ll feel it flex in the wind.
In my experience, the sweet spot for most event professionals is a mid-gauge aluminum frame. It gives you the strength-to-weight ratio that makes sense for frequent setup and teardown. But if your tent stays in one place for weeks at a time — say, a seasonal outdoor retail setup — the extra weight of steel is a non-issue, and the durability payoff is real.
Wind Rating Differences Between Brands
This is where the marketing gets slippery. Every manufacturer claims their tent handles wind, but the actual ratings vary wildly. Some brands test their frames at 30 mph and call it a day. Others engineer for 50+ mph gusts with proper anchoring.
The honest advice? Whatever wind rating a vendor quotes, halve it for real-world conditions. A tent rated for 40 mph with sandbags on every leg is not the same as one rated for 40 mph with auger stakes driven into the ground. The rating is only part of the equation — the anchoring system and your setup discipline matter just as much.
Aluminum vs. Steel Frame Pros and Cons
Let me break this down simply:
- Aluminum frames: Lighter, easier to transport, no rust issues. The downside is cost — quality aluminum frames command a premium. They’re also more prone to bending if mishandled during setup.
- Steel frames: Heavier, more durable against impact, and generally cheaper. But they rust if the powder coating chips, and you’ll feel every pound when loading the van at 6 AM.
For a custom canopy tent that sees weekly use, I lean aluminum. For a semi-permanent installation, steel makes sense. Your call depends on your logistics.
One more thing on frames: check the warranty. A manufacturer confident in their frame will back it with a multi-year warranty. A one-year warranty on the frame is a red flag — it tells you they expect it to fail. According to industry leaders like TentCraft, who manufacture in the USA, a well-built frame should last “years” with proper care — that’s the expectation you should hold any vendor to.
10×10 vs 12×12 vs 10×20: Choosing the Right Custom Tent Size
Size selection is where most buyers make their second-biggest mistake (right after ignoring the frame). They pick the size that looks good in a catalog photo instead of the size that fits their actual event layout.
Event Type-to-Size Matching Logic
The logic is straightforward once you think through your use case:
- 10×10 custom tent: The industry standard for craft fairs, farmers markets, and vendor booths. If you’re shopping for a Custom canopy tent 10×10, you’re in good company — it’s the most common size for a reason. It fits one standard 6-foot table plus a second table or display rack.
- 12×12 custom tent: A bit more breathing room. This size works well for food vendors who need space for prep equipment, or for businesses running interactive demos where customers step inside the footprint.
- 10×20 custom tent: The rectangle that changes everything. A Custom tents with logo 10×20 gives you double the linear frontage of a 10×10, which is huge for product displays. You can run two 8-foot tables end-to-end with room for a demo area behind.
Table Layout Inside Each Dimension
Let’s get specific about what fits:
- 10×10: One 8-foot table against the back wall, plus a small display table near the front. You’ll have about 3 feet of walkway — enough for one person to browse comfortably, but tight for two.
- 12×12: Two 6-foot tables along the back, or one 8-foot table with a 4-foot side table. The extra 2 feet on each side makes a noticeable difference in how open the space feels.
- 10×20: Two 8-foot tables along one side, two along the other, with a center aisle. This is the configuration for serious retail operations — you can actually run a checkout station and still have display space.
Sidewall Compatibility Per Size
Sidewalls change everything about how your tent functions. A Custom Canopy Tent with sidewalls transforms an open canopy into an enclosed space — which matters for weather protection, branding surface area, and that “professional storefront” look.
The compatibility issue: not all sidewalls fit all frames. Some manufacturers use a zipper system that’s proprietary to their frame design. Others use a universal clip system. Before you buy, confirm that sidewalls for your specific tent size are available as a separate purchase — and check whether they attach to the frame or require additional poles.
For a 10×10, you typically get four individual sidewalls. For a 10×20, sidewalls come in panels — usually four per long side and two per short side. The more panels, the more setup time, but also more flexibility in opening up specific sections.
Fabric Face-Off: Polyester, Vinyl, and Canvas for Custom Canopy Tents
The fabric is what people see, what they touch, and what carries your brand. But fabric choice involves tradeoffs that most buyers don’t consider until it’s too late.
Denier Weight: 300D vs 500D vs 600D
Denier measures the thickness of the fabric threads. Higher denier generally means heavier, more durable fabric — but also more weight to carry and more cost.
- 300D polyester: Entry-level. Fine for indoor use or light outdoor duty. It’ll print well, but it’s thin — sunlight will fade it faster, and a stray gust can stress the seams.
- Polyester 500D: The workhorse. This is what most professional custom canopy tents use. Good balance of durability, print quality, and weight.
- 600D and up: Heavy-duty territory. This fabric feels substantial — almost like canvas. It handles wind better and resists punctures, but it’s noticeably heavier and more expensive.
Here’s what vendors don’t tell you: the denier number alone doesn’t tell the whole story. A 500D fabric with a tight weave and quality coating can outperform a 600D fabric with loose construction. Ask for the fabric’s full spec sheet, not just the denier number.
Waterproofing vs. Fire Retardancy Ratings
Two ratings matter, and they’re not the same thing:
- 防水处理: Usually measured in millimeters of water column pressure. A rating of 1500mm is adequate for light rain. 3000mm+ is genuinely waterproof. Many budget tents claim waterproof but only have a water-repellent coating — fine for dew, useless in a downpour.
- Fire retardancy: In many jurisdictions, event tents must meet fire safety standards. The fabric treatment that provides fire retardancy can degrade over time and with washing. If you’re using the tent at public events, verify the current certification, not just the original spec.
Print Clarity Differences by Fabric
This is where the visual payoff happens. A custom canopy tent with a complex, multi-color logo needs a smooth fabric surface for crisp printing. Here’s the hierarchy:
- 聚酯纤维: Best print clarity. The smooth surface takes dye-sublimation beautifully, producing vibrant, photo-quality results.
- Vinyl: Good clarity, but heavier and less breathable. It’s more durable for long-term outdoor use but can feel stiff.
- Canvas: The worst print clarity of the three. The textured weave breaks up fine details. If your logo has small text or intricate elements, canvas is the wrong choice.
For most branded applications, 500D polyester with dye-sublimation printing is the industry gold standard. It gives you the best combination of durability, weight, and print quality.
Custom Logo Tent Printing: Dye-Sublimation vs. Screen Printing
The printing method determines how your logo looks on day one — and how it looks after a year of sun exposure. This is not a minor detail.
Resolution Limits for Each Method
- 热转印: This is the premium method. The dye is infused into the fabric fibers, not printed on top of them. Resolution is essentially photo-quality — you can print gradients, shadows, and fine text without issues. The result looks like the logo was woven into the fabric.
- Screen printing: Each color requires a separate screen, so the process is limited to solid colors. You can’t do gradients or photo-realistic images. It works for simple logos with 2-3 colors, but anything complex will look compromised.
Color Accuracy and Fading Resistance
Dye-sublimation wins on both counts. Because the dye penetrates the fabric, it’s far more resistant to fading from UV exposure. A dye-sublimated logo on a custom logo tent should look vibrant for years with reasonable care.
Screen printing sits on the surface of the fabric, which means it’s exposed to abrasion and UV degradation. It’ll fade faster, and in extreme cases, crack and peel.
The social media chatter I’ve seen — on forums and Reddit threads about craft fair tents — consistently shows buyers regretting screen-printed tents that faded after a single summer season. Dye-sublimation costs more upfront, but the longevity math works out in your favor.
Minimum Order Quantities Per Method
Here’s a practical consideration that catches people off guard:
- 热转印: Typically requires a minimum order, often starting around 10-25 units depending on the manufacturer. The setup cost for the digital printing process is high, so single-unit orders are rare.
- Screen printing: Lower minimums are possible — sometimes even single units — because the incremental cost per screen is manageable. But you’re trading away print quality.
If you only need one tent, expect to pay a premium. If you’re ordering a fleet for a sales team or multi-location events, both methods become more economical per unit.
How Much Does a Custom Logo Tent Cost? Breaking Down the Price
Let’s talk real numbers, because the sticker shock is real. Some social media users report price differences of $900 or more between fully printed and stock tents. — and that gap is justified, but only if you understand what you’re paying for.
Price Range by Size and Fabric Tier
Based on industry pricing patterns and the data from manufacturers like InStent, here’s what you should expect to pay for a professional-grade custom logo tent:
- 10×10 custom tent: $900–$1,500 for a quality unit with dye-sublimation printing. The Custom canopy tent 10×10 price varies based on fabric quality, frame construction, and print coverage. Anything below $900 should raise questions about what’s being sacrificed.
- 12×12 custom tent: $1,200–$1,800. The larger footprint and additional fabric drive the cost up.
- 10×20 custom tent: $1,800–$2,800. Double the footprint means nearly double the material — and the frame needs to be beefier to handle the larger span.
These are ballpark figures for mid-tier professional equipment. Budget tents exist for half the price, but they’re a different product category — thinner fabric, weaker frames, and print quality that degrades quickly.
Hidden Costs: Shipping, Setup, Storage Bags
The quoted price is never the final price. Here’s what vendors don’t always make clear:
- Shipping: A 10×10 tent in its carry bag is bulky and heavy. Freight costs can run $50–$150 depending on your location. Oversized items sometimes incur special handling fees.
- Setup: Pop-up style tents take 5-10 minutes with two people. Tension-style tents with separate frames and tops can take 30-45 minutes. If you’re paying event staff to set up, that time is a real cost.
- Storage bags: Quality tents come with a wheeled carry bag — but not always. A cheap bag that tears after five uses means you’re buying a replacement.
Sidewall and Accessory Add-On Pricing
Sidewalls are almost always a separate purchase — and this surprises many first-time buyers. Expect to pay:
- Sidewalls for a 10×10: $150–$300 for a set of four, depending on fabric and attachment system.
- Sidewalls for a 10×20: $300–$600, given the larger panel count.
- Weight bags: $20–$50 each, and you’ll want at least four for a 10×10.
- Printed peak flags: $50–$150, depending on size and print method.
The social media discussions I’ve followed consistently show that buyers underestimate accessory costs. Budget 20-30% above the tent price for a complete setup with sidewalls, weights, and lighting.
Turnaround Time: How Long Until Your Custom Tent Ships
You’ve approved the design, sent the deposit, and now you’re watching the calendar — because the event is six weeks out and you’re starting to sweat.
Production Timeline by Printing Method
- 热转印: 2-4 weeks is typical for production. The process involves printing the design onto transfer paper, then heat-pressing it into the fabric, then cutting and sewing the panels. It’s a genuine manufacturing process, not a quick print job.
- Screen printing: 1-3 weeks, depending on the number of colors and the manufacturer’s workload. Fewer colors mean faster turnaround.
Add 3-7 days for shipping, and you’re looking at 3-6 weeks from order approval to delivery. Plan accordingly.
Rush Order Options and Fees
Most manufacturers offer rush production for an additional fee — typically 15-30% of the order value. Rush service usually cuts production time in half, so a 3-week dye-sublimation job becomes 1.5 weeks.
Here’s the catch: rush orders are only as fast as the manufacturer’s current workload. If they’re slammed with orders, your “rush” might only shave off a few days. Always ask for a guaranteed ship date in writing before paying the rush fee.
Logo File Preparation to Avoid Delays
The most common cause of production delays isn’t the factory — it’s the customer’s artwork. Every day you spend going back and forth on file revisions is a day of production time lost.
Before you submit your logo, verify:
- It’s a vector file (AI, EPS, PDF) or a high-resolution raster (300 DPI minimum at final print size)
- All fonts are converted to outlines
- All colors are specified in CMYK, not RGB
- Your file includes any required bleed
Get these right the first time, and you’ll save a week or more in the production schedule.
Logo File Setup: Preparing Artwork for Your Custom Tent
This section might save you more money than any other part of this guide. File rejection is the #1 cause of delays and frustration in the custom tent buying process.
Vector vs. Raster File Requirements
- Vector files (AI, EPS, SVG, PDF): These are resolution-independent — they scale to any size without quality loss. This is what professional print shops prefer.
- Raster files (JPG, PNG, TIFF): These are pixel-based. They work if the resolution is high enough, but “high enough” is subjective. A logo that looks fine on your website at 500 pixels wide will look terrible blown up to 10 feet wide.
The rule of thumb: if your logo was designed in a program like Photoshop and saved as a JPG, it’s probably not suitable for large-format printing. You need the original vector artwork from your designer.
Bleed Area and Safe Zone Rules
- Bleed: This is extra print area beyond the edge of the tent panel. It ensures that no unprinted white edges appear after the fabric is cut and sewn. Standard bleed is 1/8 to 1/4 inch, but your manufacturer may specify more.
- Safe zone: This is the area inside the panel edge where critical design elements must stay. If your logo extends too close to the seam, it may get lost in the stitching or distorted by the tension of the frame.
Think of it this way: the safe zone is where your logo must fit, and the bleed is what gets cut away. Don’t design right up to the edge of the panel.
Common Mistakes That Cause Print Rejection
In my experience, these are the top five reasons print files get rejected:
- Low resolution: The file looks fine on screen but is actually 72 DPI — internet resolution, not print resolution.
- RGB color space: Your bright screen colors will look different when converted to CMYK for printing. What looks vibrant on your monitor might come out muddy.
- Missing fonts: You used a custom font that the print shop doesn’t have. They either substitute a different font or reject the file.
- Incorrect dimensions: You designed for a 10×10 tent but the actual printable area is smaller due to seams and hems.
- Unflattened layers: Your design has hidden layers or effects that don’t export correctly.
Avoid these, and your file will sail through the approval process.
Custom Logo Tent Accessories: Sidewalls, Weights, and Lighting
You’ve got the tent, the logo looks incredible, and the frame is solid. Now let’s talk about what makes the tent actually functional at an event — because a bare tent is only half the solution.
Sidewall Attachment Systems and Wind Performance
The attachment system matters more than you’d think. There are two main approaches:
- Zipper systems: The sidewalls zip directly onto the frame. This creates a tight seal that handles wind better, but it’s more time-consuming to install and remove.
- Clip systems: The sidewalls clip onto the frame at intervals. Faster to install, but the gaps between clips allow more wind penetration.
For a Custom Canopy Tent with sidewalls that you’ll use outdoors, zipper systems are worth the extra setup time. The wind performance difference is noticeable — a clipped sidewall can flap and stress the attachment points in gusty conditions, while a zippered sidewall stays taut.
Weight Bag Requirements for Outdoor Use
Here’s a safety issue that gets ignored too often: a tent without proper anchoring is a projectile waiting to happen.
For a 10×10 tent in moderate wind, you need at least 40 pounds of weight per leg — that’s 160 pounds total. For a 10×20, double it. Weight bags filled with sand are the standard solution, but they’re only effective if you actually use them.
I’ve seen event organizers skip the weights because they’re heavy and awkward to transport. That’s how tents end up airborne. Don’t be that person.
Lighting Options for Evening Events
A tent that looks great during the day can become a black hole at night. Lighting options range from simple to sophisticated:
- Battery-powered LED string lights: Cheap, easy to install, and good for ambient illumination.
- Freestanding LED light stands: Provide brighter, more even lighting but take up floor space.
- Frame-mounted light kits: These attach to the tent frame and provide overhead illumination without taking up floor space.
The right choice depends on your event type. A farmers market that closes at 2 PM doesn’t need lighting. An evening festival or a late-night food vendor absolutely does.
For those running events that need even faster setup and a different footprint, some operators pair their branded canopy with lều hơi for secondary spaces — a trend I’m seeing more of in the event industry, especially for entry arches and registration areas.
Frame Warranty Comparison: What to Look For
Since we’ve established that the frame is the most critical component, let’s talk about what the warranty tells you.
Warranty Length as a Quality Signal
Manufacturers who build quality frames back them with longer warranties. Here’s what the warranty length tells you:
- 1 年: The manufacturer expects possible failure within the first year. This is a red flag.
- 2-3 years: Standard for mid-tier equipment. The manufacturer is reasonably confident in their product.
- 5 years or lifetime: Premium territory. The manufacturer is making a statement about their quality.
What the Warranty Covers
Read the fine print. Some warranties cover only the frame, not the fabric. Others cover manufacturing defects but not damage from wind, improper setup, or normal wear and tear.
The best warranties are transferable — if you sell the tent, the new owner gets the coverage. That’s a sign of genuine confidence.
Replacement Part Availability
Even the best frame can bend if someone backs a car into it. When that happens, you need replacement parts — not a whole new tent.
Ask about part availability before you buy. Some manufacturers stock replacement legs, trusses, and connectors for years after the original sale. Others treat each tent as a one-time product. The former is worth paying a premium for.
Setup Time Differences: Pop-Up vs. Tension
Let’s talk about the two main frame designs and how they affect your event-day logistics:
- Pop-up frames: These expand from a collapsed position using a scissor mechanism. Setup takes 5-10 minutes with two people. They’re the standard for most event vendors because of the speed.
- Tension frames: These require assembling the frame piece by piece, then stretching the fabric top over it. Setup takes 30-45 minutes, but the result is a tauter, more professional-looking tent with better wind resistance.
The tradeoff is clear: speed vs. stability. If you’re setting up multiple tents at different locations in one day, pop-up frames win. If you’re doing a multi-day event and want the best-looking setup, tension frames are worth the extra time.
Các câu hỏi thường gặp
Q: What is the difference between a custom canopy tent and a stock tent?
A: A custom canopy tent features your logo and branding printed directly onto the fabric, typically using dye-sublimation for vibrant, durable results. A stock tent comes in standard colors with no branding. The price difference is significant — some social media users report that fully printed tents can cost around $900 more than equivalent stock models. — but the branding value for events and promotions usually justifies the investment.
Q: How long does a custom logo tent last with regular use?
A: With proper care, a quality custom logo tent should last 3-5 years of regular event use. The frame typically outlasts the fabric — which is why frame quality is so important. Dye-sublimated prints are highly fade-resistant, but UV exposure will eventually affect any fabric. Replacing the canopy top on a good frame is far more economical than buying a new tent.
Q: Can I get a custom 10×10 canopy tent with company logo for under $1,000?
A: Yes, but you’ll be making tradeoffs. The Custom canopy tent 10×10 price range of $900–$1,500 reflects professional-grade equipment with quality frames and dye-sublimation printing. Below $900, expect thinner fabric, lighter frames, and potentially screen-printed logos that fade faster. For a single event, a budget tent might work. For ongoing use, the investment in quality pays off.
Q: Are sidewalls worth the extra cost for my custom tent?
A: If you’re using the tent for more than a few hours at a time, yes. A Custom Canopy Tent with sidewalls provides sun protection, weather resistance, and additional branding surface. Sidewalls also make your setup look more professional and permanent. The main downside is setup time — installing sidewalls adds 10-15 minutes per tent.
Q: What’s the best printing method for a custom canopy tent with a complex logo?
A: Dye-sublimation, without question. It produces photo-quality results with smooth gradients and fine details, and the dye is infused into the fabric fibers for maximum fade resistance. Screen printing is limited to solid colors and sits on the fabric surface, making it more susceptible to fading and cracking over time.
Q: How far in advance should I order a custom tent with logo for an event?
A: Order at least 6-8 weeks before your event. Production takes 2-4 weeks for dye-sublimation, plus 3-7 days for shipping. Rushing the process adds 15-30% to the cost and increases the risk of errors. If you have a tight deadline, ask about rush options and confirm the guaranteed ship date in writing.
Q: What file format does my logo need to be in for custom tent printing?
A: Vector files (AI, EPS, PDF) are ideal because they scale to any size without quality loss. If you only have raster files, they must be at least 300 DPI at the final print size. RGB color files will be converted to CMYK, which can shift colors — request a printed proof if color accuracy is critical.
Q: How much weight do I need to anchor a 10×20 custom tent outdoors?
A: For a 10×20 tent, you need a minimum of 40 pounds per leg — 160 pounds total — for moderate wind conditions. Use weight bags filled with sand, or auger stakes if the ground permits. Never rely on the tent’s own weight or the carry bag for anchoring. An unanchored tent is a safety hazard.
Tham Khảo
1. Custom Pop Up Canopy Tents | Print Your Logo – brandedcanopytents.com
2. Custom Canopy Tents for Events & Promotions – tentdepot.ca
3. Sticker Shock? Understanding The Price Range of Professional-Grade Custom Tents – instent.com
4. Custom Tents & Structures for Colleges & Universities – tentcraft.com







