

I’ve been in the inflatable events industry for over a decade, and I still remember the first arch I ever bought. It was a $2,000 mistake that took about ten minutes to destroy. A gust of wind hit the side of it, the sandbags I’d skimped on slid across the pavement, and the whole thing folded over like a cheap lawn chair. The race director wasn’t happy. The sponsor wasn’t happy. And I definitely wasn’t happy.
That experience taught me a lesson that no brochure will ever tell you: how to choose the right inflatable arch isn’t about picking the prettiest one. It’s about wind math, material weight, and sizing that actually fits your event. Most guides skip the hard parts. This one won’t.
クイックアンサー
The right inflatable arch is one that is sized at least 3–4 feet wider than your path or doorway, made from 18oz or heavier vinyl, anchored with enough sandbag weight to counter the wind load at your venue, and powered by a continuous blower with backup power—because the cheapest arch is the one that survives its first event.
Sizing: How to Choose the Right Inflatable Arch Dimensions
Let’s talk about the thing that gets more events wrong than anything else: size. I don’t mean the pretty picture on the website. I mean the actual physical dimensions you need to cover your space.
The Width Formula That Actually Works
Here’s a rule of thumb I’ve used on hundreds of events. Take the width of your path, doorway, or finish line. Add 3 to 4 feet of clearance on each side. That’s your minimum arch width. If your finish line is 10 feet wide, you need at least a 16-foot arch. Maybe 18. Why so much extra? Because inflatable arches aren’t rigid. They flex. They bow. When the wind hits them, they sway. If you buy an arch that’s exactly the width of your path, you’ll have athletes clipping the sides of it before the first heat finishes.
Height Matters More Than You Think
Height is the other half of the equation. A lot of buyers focus on width and completely forget about clearance. If you’re using the arch for a marathon finish line, you need to think about the tallest person who’s going to cross it—plus a safety margin. I’ve seen arches that looked great in photos but were too low for a six-foot-five runner to pass under without ducking. That’s not just embarrassing. It’s a safety hazard.
Tunnel vs. Single-Leg Arch
Now, here’s a fork in the road that confuses a lot of first-time buyers. Do you need a single-leg arch or a tunnel? A single-leg arch is exactly what it sounds like—one arch, supported on both sides, no floor. It’s great for start lines, finish lines, and photo backdrops. A tunnel is a full enclosure that athletes run through. It’s heavier, needs a bigger blower, and takes more time to set up. But for events where you want to control the flow of people, or where you need a dramatic entrance, a tunnel is the better choice. The trade-off is cost and setup complexity.
Speaking of setup complexity, if you’re planning a multi-sport event that also needs shelter and seating areas, you might want to look at how our inflatable tents integrate with arch systems. A lot of event planners build a complete inflatable village, and the arch is just the entry point.
Material & Durability: Vinyl vs. Nylon
Here’s where the marketing gets slippery. Every manufacturer will tell you their material is “heavy-duty.” But heavy-duty isn’t a specification. It’s a vibe. Let’s get into the actual numbers.
Vinyl Weight: 18oz vs. 40oz
The industry standard for inflatable arches is PVC vinyl, and the weight is measured in ounces per square yard. A light arch might be 18oz. A heavy-duty arch is 40oz or more. The difference is night and day.
An 18oz arch is fine for indoor use, or for a single outdoor event on a calm day. It’s cheaper, easier to ship, and sets up faster. But it’s not going to survive a season of weekend events. The material fatigues, the seams stress, and after ten or twenty uses, you start seeing pinhole leaks that are impossible to patch permanently.
A 40oz arch is a different beast. It’s the kind of material that Promo Bears USA talks about when they mention their promise of custom inflatable arches “made to last.” Their team has over 16 years of experience in inflatable design and creation, and they emphasize that affordable doesn’t have to mean disposable. In my experience, that’s the right mindset. A 40oz arch will cost more upfront, but it’ll last three to five times longer.
UV Resistance and Waterproofing
Here’s something that almost no first-time buyer thinks about: the sun is your arch’s worst enemy. UV radiation breaks down PVC over time. It makes the material brittle, fades the colors, and eventually causes cracking along the creases. If you’re buying an arch for a series of summer events, ask about UV resistance. Some manufacturers add UV inhibitors to the vinyl. Others don’t. The difference in lifespan can be a full season.
Waterproofing is less of a concern with vinyl—it’s inherently waterproof. But you need to think about how the arch handles rain. Does water pool on the top? Does it drain properly? A well-designed arch will have a slight crown so water runs off. A poorly designed one will sag in the middle and collect a pond on your finish line.
When you’re evaluating inflatable arch material, also look at the stitching. Double-stitched seams are the minimum I’d accept. Triple-stitched is better. And the thread should be UV-resistant, not just the vinyl. Cheap thread will rot in a season and your seams will fail even though the material is fine.
Wind Resistance: The Math Competitors Ignore
This is the section that separates the professionals from the amateurs. And honestly, it’s the section that would’ve saved me $2,000 all those years ago.
The Wind Load Reality
Every inflatable arch has a wind rating. Most manufacturers will tell you something like “safe up to 25 mph.” But that number is meaningless without context. What’s the gust factor? What’s the terrain? Is the arch in an open field or a sheltered courtyard? In my experience, the real-world safe limit is lower than the theoretical rating, especially for tall arches.
Here’s the physics. Wind load increases with the square of wind speed. That means a 20 mph wind doesn’t push twice as hard as a 10 mph wind—it pushes four times as hard. And a 30 mph wind pushes nine times as hard as a 10 mph wind. This is why an arch that’s fine in a light breeze can become a sail in a moderate wind.
Sandbag Weight: How Much Is Enough?
The standard anchoring advice is to use sandbags on both sides of the arch. But how much weight? This is where most guides go vague. Let me be specific. For a standard 16-foot arch in up to 20 mph winds, I’d want at least 50 pounds of sandbag weight per side. For a 25-foot arch, 75 pounds per side. And if you’re expecting winds above 25 mph, you’re in the danger zone. At that point, you need to either add more weight, use ground stakes, or switch to a truss arch.
The math is simple. The taller the arch, the more leverage the wind has. A 20-foot-tall arch catches more wind than a 10-foot arch, and the force is applied at the top, which means it has more leverage to tip the base. This is why you can’t just look at the width of the arch. You have to consider the height and the surface area.
When to Switch to a Truss Arch
Here’s the honest truth that inflatable companies don’t want to tell you: there’s a threshold where inflatable arches stop being the right choice. That threshold is around 25 mph sustained winds. Above that, the sandbag weight required to keep the arch stable becomes impractical. You’d need hundreds of pounds per side, and even then, the material is going to stress and fatigue.
A truss arch is a rigid metal structure that’s covered with a printed fabric skin. It’s more expensive to rent, heavier to transport, and takes longer to set up. But it doesn’t care about wind. If you’re planning an outdoor event in an area known for strong winds, or if your event date is in a season where gusts are common, a truss arch is the safer choice. I’ve seen too many event planners gamble on an inflatable arch in questionable weather and lose.
This is also where the research gets interesting. A comparative study by Roberto Maffei, Cédric Galliot, Rolf Luchsinger, and Alessandra Zanelli—published through Ingenta Connect—looked at the behavior of inflatable arches versus Tensairity arches. Tensairity is a hybrid system that uses a low-pressure air beam with a mechanical structure. The study found that the Tensairity principle significantly improves load-bearing behavior compared to standard segmented arches. It’s worth knowing that the technology exists, even if it’s not yet common in event applications.
Inflation Systems: Continuous Blower vs. Self-Inflating
You might be wondering why I’m spending a whole section on something as mundane as the blower. But trust me, the blower is where events go wrong in the most spectacular ways.
Continuous Blower: Non-Negotiable
An inflatable arch needs a continuous blower. There’s no way around this. The arch is a positive-pressure structure. It stays upright because air is constantly being pushed into it. If the blower stops, the arch deflates. It’s that simple.
The blower size is measured in CFM—cubic feet per minute. The bigger the arch, the higher the CFM you need. A small 12-foot arch might only need a 1 HP blower. A 30-foot tunnel could need 2 HP or more. The manufacturer should give you a recommended blower size. If they don’t, that’s a red flag.
Noise Levels and Power Requirements
Here’s a detail that nobody thinks about until it’s too late: blowers are loud. A 1 HP continuous blower is often rated at around 80 decibels. That’s loud enough to interfere with a PA system, a starting gun, or a conversation at the finish line. If you’re using the arch for a marathon, you need to position the blower carefully, or use a quieter model.
And then there’s the power question. This is one of the most common questions I see on social media: “What generator size do I need for an inflatable arch blower?” The answer depends on the starting wattage. A blower draws more power when it starts up than when it’s running. A 1 HP blower might run at around 1,000 watts but can draw more at startup, according to typical specifications. If you’re running multiple blowers on one generator, you need to add up the starting wattage, not the running wattage. This is a mistake I see constantly.
Backup Power: The Insurance Policy
Here’s my non-negotiable rule: if the arch is critical to your event, you need backup power. A generator can fail. A power cord can be tripped over and unplugged. A breaker can trip. And when the blower stops, your arch deflates in under a minute. I’ve seen a deflated arch mid-race. It’s not just embarrassing—it’s dangerous. Runners trip on the fabric. The structure collapses on people.
A simple UPS—uninterruptible power supply—can cover you for the few minutes it takes to swap to a backup generator. It’s a small investment that can save your event.
Self-Inflating Frames: The Premium Option
There’s a newer category of inflatable arches that don’t need a continuous blower. These use a self-inflating frame, which is essentially a foam-filled structure that holds its shape without constant air pressure. The advantage is obvious: no blower, no power, no noise. You just unfold it and it’s ready.
The downside is cost and size. A self-inflating arch is significantly more expensive than a blower-powered arch. And because the foam frame takes up space, the arch is bulkier to transport and store. For a one-off event, the cost premium is hard to justify. But for a recurring event where you’re setting up and tearing down every weekend, the convenience might be worth it.
Branding & Print Quality: Make It Worth the Investment
You’re not buying an inflatable arch because you love the shape. You’re buying it because it’s a billboard. So the print quality matters more than you might think.
Dye-Sublimation vs. Screen Printing
There are two main ways to print on inflatable arches: dye-sublimation and screen printing. Dye-sublimation infuses the ink into the material. The colors are vibrant, they don’t crack, and they last the life of the arch. Screen printing lays ink on top of the material. It’s cheaper, but the ink can crack and fade over time, especially on material that flexes as much as an inflatable arch does.
For a custom inflatable arch that you’re going to use more than once, dye-sublimation is the only choice I’d recommend. The upfront cost is higher, but the print will still look good after a season of events. Screen printing looks great in the warehouse and terrible after a few uses.
Double-Sided Printing and Custom Shapes
Here’s a question I get a lot: “Do I need double-sided printing?” The answer depends on your event. If the arch is at a start line, people are approaching from both sides. They’ll see the front and the back. If the arch is against a wall or a backdrop, single-sided is fine.
Custom shapes are where things get fun. A standard arch is a semicircle. But you can get custom inflatable arches in any shape you can imagine—a sports car for a car show, a giant shoe for a running event, a mascot holding the arch. The design team at Promo Bears USA, for example, offers original designs in your desired colors and shapes, with optional lights and mascot integration. If you have a brand that needs to stand out, a custom shape is worth the investment.
When you’re planning your branding, think about the viewing angles. An arch is tall and narrow. Text across the top needs to be large enough to read from a distance. Logos on the legs need to be sized for close-up viewing. A good design team will help you with this, but it’s worth thinking about before you brief them.
Buy vs. Rent: The Decision No Guide Addresses
Here’s the question that every event planner asks but no guide seems to answer directly: should I buy or rent? The answer isn’t as simple as “buy if you’ll use it more than once.” There’s math involved.
Break-Even Analysis
Let’s do the math. A quality custom inflatable arch—say, a 16-foot arch with dye-sublimation printing—will typically cost in the range of $1,500 to $3,500, according to industry estimates. A rental for a single event often costs between $300 and $600. depending on the arch size and your location. Do the division and you’ll find the break-even point is around four to six uses.
If you’re planning fewer than four events, renting is the smart play. You don’t have to worry about storage, maintenance, or transportation. The rental company handles all of that. If you’re planning more than six events, buying starts to make sense. And if you’re planning a full season—ten or more events—buying is a no-brainer.
The Hidden Costs of Buying
But here’s what the break-even analysis doesn’t capture: the hidden costs of ownership. You need a place to store the arch. It needs to be dry and climate-controlled. A vinyl arch stored in a hot garage will degrade. You need to transport it to each event, which means you need a vehicle big enough. And you need to maintain it—patching small tears, replacing sandbags, servicing the blower.
When I talk to event planners who are deciding between buying and renting, I always ask them to factor in their time. How much is your time worth? If you’re spending four hours per event on setup, teardown, and maintenance, that’s a real cost. A rental company handles all of that for you.
The Recurring Event Exception
There’s one exception to the break-even rule. If you’re planning a recurring event—a monthly race series, a weekly market, a seasonal festival—buying is almost always the right choice. The setup becomes routine. The arch becomes part of your brand. And the cost per event drops dramatically over time.
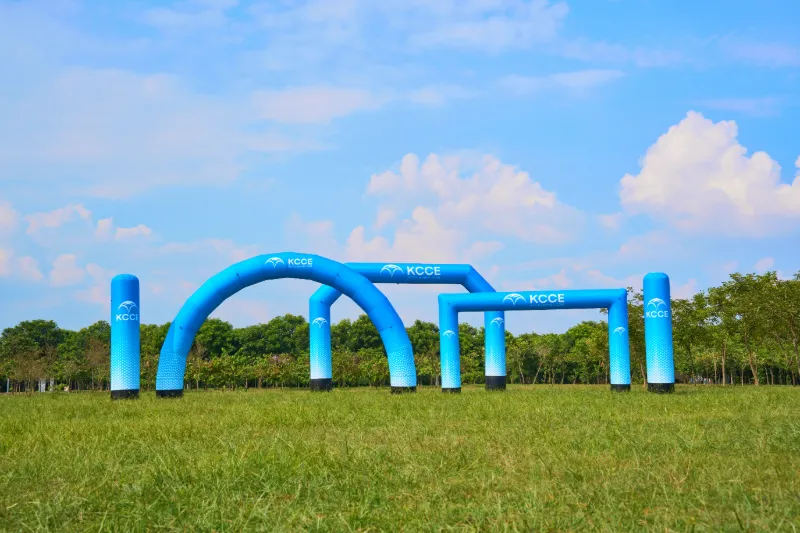
If you decide to buy, make sure you’re working with a manufacturer that understands the event industry. Companies like Promo Bears USA and MVP Visuals have been doing this for years. They’ll help you avoid the rookie mistakes. And if you’re looking at the broader inflatable ecosystem, KCCE’s inflatable product range can give you ideas for complementary pieces—shapes, furniture, and displays that extend your brand presence beyond just the arch.
Setup, Maintenance & Lifespan
Let’s talk about what happens after the arch arrives. Because this is where the romance ends and the reality begins.
Setup Time and Crew Size
A standard inflatable arch—say, 16 feet wide—takes about 15 to 20 minutes to set up with a crew of two. You lay it out flat, connect the blower, and let it inflate. While it’s inflating, you position the sandbags. That’s it. The setup is genuinely simple.
But there are nuances. The arch needs to be oriented correctly for the wind direction. The blower needs to be positioned so it’s not a tripping hazard. The power cord needs to be routed safely. And the sandbags need to be placed on the base of the arch, not just next to it. A sandbag that’s next to an arch doesn’t help. It needs to be on the fabric.
Storage Requirements
Here’s something that surprises a lot of first-time buyers: an inflatable arch takes up a lot of space when it’s deflated. A 16-foot arch folds down into a bundle that’s about the size of a large suitcase, but it can be heavy—often 50 to 80 pounds depending on the material weight. You need a dry, cool place to store it. Sunlight and heat are the enemies of vinyl.
Repair Kits and Maintenance
Every inflatable arch comes with a repair kit. It should include patches and adhesive for fixing small tears. The key is to catch damage early. A small tear that’s patched immediately is a non-issue. A small tear that’s ignored becomes a large tear that’s beyond repair.
In my experience, the expected lifespan of a quality inflatable arch is three to five years with regular use, and longer with careful storage and maintenance. The blower will need more frequent attention. Blowers have bearings and brushes that wear out. A good blower should last several seasons, but it’s worth having a spare on hand.
Making the Final Decision
So, how to choose the right inflatable arch for your event? Let me give you a decision framework that I wish someone had given me.
First, measure your space. Width, height, and clearance. Add the 3 to 4 feet of margin on each side. This is non-negotiable.
Second, assess your wind risk. What’s the typical weather at your event location and time of year? If sustained winds above 25 mph are a real possibility, you need to either budget for extra sandbag weight, plan for ground stakes, or consider a truss arch instead.
Third, decide on material. For outdoor use, 18oz vinyl is the bare minimum. 40oz is the professional choice. If you’re planning more than a handful of events, the heavier material pays for itself in lifespan.
Fourth, think about power. You need a continuous blower with the right CFM, a generator with enough starting wattage, and backup power. This is the infrastructure that makes or breaks your event.
Fifth, consider branding. Dye-sublimation printing is worth the extra cost. Double-sided printing is worth it if people will see both sides. Custom shapes are worth it if you want to stand out.
Finally, do the buy vs. rent math. Under four uses, rent. Over six, buy. In between, weigh the hidden costs of ownership.
I’ll leave you with one question: will your arch survive the worst conditions, not just the best? Because an arch that works on a calm, sunny day but collapses in a gust of wind isn’t a good arch. It’s a liability. The right arch is the one that’s still standing when the wind picks up, the rain starts, and the event goes on.
If you’re planning a custom inflatable arch for your event and want to work with a team that understands the engineering as well as the branding, reach out for a quote. And if you’re building out a complete inflatable event setup, take a look at the full range of inflatable solutions available from Dongguan Kaicheng Outdoor Products. They’ve been in this business for decades, and they know what it takes to keep an event standing.
よくある質問(FAQ)
Q: How to get an inflatable arch to stay up?
A: The arch stays up through continuous air pressure from a blower. To keep it stable, you need proper anchoring. Use sandbags on both sides, positioned directly on the base fabric. For winds above 20 mph, add more weight per side. Ground stakes can help on soft surfaces. Always use a continuous blower running at the correct CFM for your arch size.
Q: How tall should an arch be?
A: Your arch height should clear the tallest person or object that will pass under it, plus a safety margin. For most events, 10 to 12 feet is sufficient. For marathon finish lines with timing equipment, add extra clearance. Measure the actual path width and add 3 to 4 feet per side when choosing arch dimensions.
Q: Where can I find inflatable arches for races?
A: Race-specific inflatable arches are available from specialty event suppliers like MVP Visuals and Promo Bears USA. Look for suppliers that offer custom printing and race-specific features like timing equipment integration. You can also rent from local event companies if you need an arch for a one-time race.
Q: How to measure arch size?
A: Measure the width of your path, doorway, or finish line. Add 3 to 4 feet of clearance on each side. This gives you the minimum arch width. For height, measure from the ground to the highest point that needs to pass under the arch, then add at least 1 to 2 feet of safety margin. Always round up, never down.
参考文献
1. 11 Insider Tips to Consider When Choosing an Inflatable Arch – MVP Visuals
2. Custom Inflatable Arches – Promo Bears USA
3. Comparative study about the behaviour of inflatable and Tensairity arches – Ingenta Connect
4. Bending performance of highly pressured inflatable structures – ScienceDirect
5. Inflatable Arch Review for Branded Events – Deluxe Canopy







