

Bought a canopy, then blew $200 on parts that don’t fit? I see it constantly. Someone grabs a 10×10 pop-up, hauls it home, and only then realizes the sidewalls they ordered won’t snap onto the frame, the weights are useless in a light breeze, and the banner looks off. It’s the classic “buy the tent first, figure out the accessories later” trap. And that’s exactly why I put this guide together — because the details matter, and getting them wrong costs you money and patience.
I’ve been in the outdoor event business for years, watching vendors, campers, and weekend warriors trip over the same mistakes. This isn’t some generic listicle. It’s a straight-talking breakdown sorted by frame type, use case, and budget. By the time you’re done reading, you’ll know what to buy, what to skip, and how to make your canopy earn its keep.
クイックアンサー
The right 10×10 tent accessories depend on your frame type (straight-leg vs. slant-leg), your primary use case (vending, camping, or commercial), and your local weather — so prioritize frame-compatible sidewalls, the right anchors for your surface, and a replacement top that matches your exact pole setup before spending on anything else.
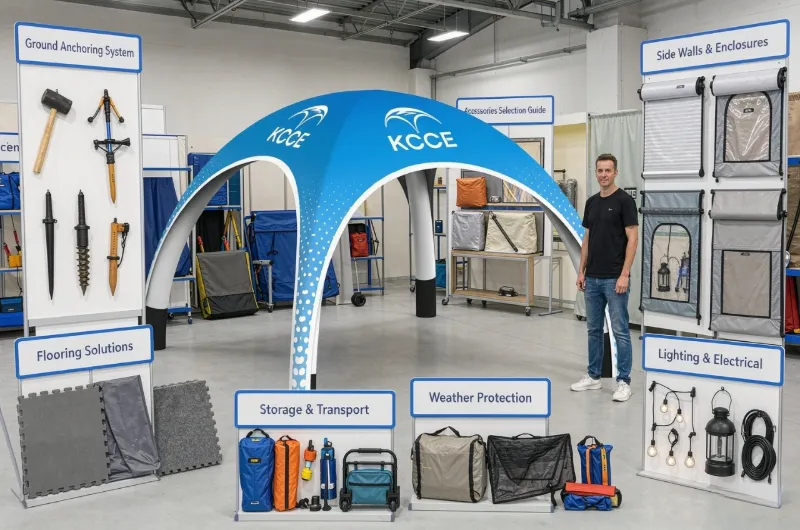
Start With Your Frame: Straight-Leg vs. Slant-Leg
Here’s the thing most people get backwards: they assume all 10×10 canopies are basically the same. They’re not. The frame is the foundation for everything you’ll attach, and if you don’t know which kind you have, you’re working blind.
Straight-leg frames are the workhorses of the vendor world. They’re heavier, sturdier, and maximize usable space because the legs run straight down. Slant-leg frames taper inward at the top. They’re lighter and cheaper, but you sacrifice real square footage at the base. I’ve watched vendors set up slant-leg canopies at markets and scratch their heads over why their tables don’t fit right. The footprint shrinks as you go up — that’s why.
Now, here’s where 10×10 canopy tent attachment issues come in. Sidewalls and tops attach to frames two main ways: snap-button or hook-loop. Snap-button systems are standard on most commercial-grade canopies. There’s a metal button on the frame, and the sidewall has a matching hole or grommet. It clicks in place, and it’s solid. Hook-loop — you probably call it Velcro — is cheaper and more common on budget models. It’s easier to attach, but it wears out, especially if you’re setting up and tearing down every weekend.
“Wait,” you might be thinking, “can’t I just buy any sidewall and make it work?” No. And this is the mistake that drives me up a wall. I’ve watched people buy generic sidewalls at a discount, only to find they don’t align with the frame’s attachment points. The grommets don’t line up. The snaps don’t catch. You’re left with a flapping mess and a hardware store run for zip ties.
In my experience, the best 10×10 canopy brands — the ones that last — use snap-button systems on their straight-leg frames. If you’re shopping for a heavy duty 10×10 canopy with sides, check the attachment mechanism before you commit. Ask the seller directly. Read the reviews. Because once you’ve invested in a frame, your accessory options are locked in.
Let’s talk about the 10 x 10 canopy heavy duty segment specifically. These are the canopies that weigh 40, 50, even 60 pounds. They’re not fun to carry, but they don’t budge in the wind. If you’re a professional vendor, this is where you belong. If you’re a weekend camper, you’ll hate lugging one around. Know your frame, know your needs, and the accessory puzzle gets a whole lot simpler.
The Wind Test: Weights, Stakes, and Anchors
You can buy the most expensive canopy on the market, but if you don’t anchor it properly, it’s a kite waiting to happen. I’ve seen it firsthand: a beautiful 10×10 canopy tent with sidewalls, fully branded, lifted off the ground by a gust and tumbling across a parking lot. It’s not just embarrassing — it’s dangerous.
So let’s talk anchoring, and specifically, how to anchor a 10×10 canopy tent based on your surface.
Hard surfaces (concrete, asphalt, pavement): You need weights. Sandbags are the classic choice, and for good reason. They’re cheap, they work, and you can fill them with whatever’s available — sand, gravel, even water in a pinch. But here’s the key: weight capacity matters. I’m talking about 40 pounds per leg on the low end, and in windy areas, it’s common to need 50-70 pounds per leg. I’ve seen vendors try to get away with 10-pound weights and wonder why their canopy is dancing around. That’s not anchoring; that’s decorating.
Soft surfaces (grass, dirt, sand): Auger stakes are your best friend. These screw into the ground and provide serious holding power. You twist them in with a wrench or a drill attachment, and they grip the soil like a corkscrew. For sandy conditions, you might need longer stakes or even specialized sand anchors. And if you’re on grass, a set of heavy-duty stakes with a mallet can work, but they’re not as secure as augers.
Now, you might be asking, “Which 10×10 canopy is best for wind?” It’s not really about the canopy — it’s about the system. A mid-range canopy with 40-pound weights per leg will outperform a top-tier canopy with no weights at all. Every single time.
Here’s a practical tip from years in the field: buy your weights first. Before you even think about sidewalls or lighting or branding, get your anchoring sorted. It’s the difference between a canopy that lasts for years and one that ends up in a dumpster after its first storm. And if you’re shopping for 10×10 tent weights, look for ones with a low profile so people don’t trip over them. Trust me, you don’t want to be the vendor who’s known for the ankle-breaking weights.
Rain and Sun: Sidewalls and Tops
Alright, let’s get into the part that actually makes your canopy useful: the walls and the roof. This is where the 10×10 canopy sidewalls decision really matters, and it’s also where a lot of people overspend or underspend.
Solid sidewalls are your rain protection. They’re made of waterproof fabric — usually polyester or vinyl — and they keep the elements out. If you’re a vendor at an outdoor market and a storm rolls through, solid walls are the difference between selling your goods and packing up wet. They also provide privacy and wind protection, which is huge if you’re setting up in a breezy spot.
Mesh sidewalls are the opposite. They let air flow through, which is fantastic on a hot day. You get shade without the greenhouse effect. But they do absolutely nothing against rain. I’ve seen vendors use mesh walls in the summer and then scramble to find solid walls when the forecast changes. My advice? If you can only afford one set, get solid. You can always roll them up halfway for airflow, but you can’t make mesh waterproof.
Windowed sidewalls are the compromise. They’re solid on the bottom, which blocks wind and provides some privacy, but they have clear vinyl windows at the top so you can see out and customers can see in. These are fantastic for vendor events where you’re selling products that need to be visible. They’re also great for tailgating, because you can keep an eye on the game while staying sheltered.
Now, about tops. There’s a big difference between a replacement top and an upgrade top, and understanding this distinction will save you from a costly mistake.
A replacement top is exactly what it sounds like — a new top that matches your existing frame. If your canopy’s original top ripped in a storm or faded from years of sun exposure, you buy a replacement. The key here is compatibility. You need to match the frame size (10×10, obviously) and the pole configuration. A 10×10 canopy replacement top for a straight-leg frame won’t fit a slant-leg frame. The measurements are different, and the attachment points are different. Measure your frame before you order. I can’t stress this enough.
インフレータブル広告テント upgrade top is a different beast. It’s designed to offer better performance than your original — higher waterproofing ratings, better UV protection, or a more durable fabric. TentCraft, for example, notes that the majority of their custom tent sales are for a 10’x10′ footprint, making it the most popular size in the industry. They offer this size across their entire product line, from pop-ups to frame tents to inflatable structures. That’s worth keeping in mind when you’re looking for a serious upgrade. If you’re considering a more permanent or weather-proof option, our インフレータブルテント offer a different approach to the same footprint.
And if you’re wondering, “Are 10×10 canopy tents waterproof?” — the answer is: it depends on the one you buy. Most quality canopies come with a waterproof rating, usually measured in millimeters of water column pressure. A rating of 2000mm or higher is generally considered good for rain protection. But here’s the catch: even a waterproof top will leak if water pools on top. You need a frame with a peak or slope that allows water to run off. If your canopy has a flat top, you’re going to have problems in heavy rain, no matter how high the waterproofing rating is.
Visibility and Branding: Signs and Banners
If you’re using your canopy for business — and a lot of you are — branding is non-negotiable. You’ve spent money on a 10×10 canopy for outdoor markets or vendor events, and you need people to know you’re there. But how you brand matters, and there are two main approaches.
Printed tops are the premium option. The graphics are directly printed onto the canopy fabric, which means they’re sharp, durable, and can’t fall off. TentCraft, which I mentioned earlier, specializes in this. They make custom 10×10 pop-up tents with your logo, your colors, your messaging — all printed right on the top. The downside? Price. A printed top is significantly more expensive than a plain one, and if your branding changes (new logo, new phone number), you’re buying a whole new top.
Attachable banner systems are the budget-friendly alternative. You buy a banner — either a standard rectangle or a custom shape — and attach it to the front or sides of your canopy using bungee cords, clips, or hook-and-loop fasteners. The advantage is flexibility. You can change your banner for different events, seasons, or promotions. The disadvantage is that it adds setup time. You’re looking at an extra 5-10 minutes to attach and align everything, and if the wind picks up, you need to make sure the banner is secure. For a clean, professional look, consider using ディスプレイフレーム to mount your banners — they keep everything taut and prevent flapping.
Now, what’s the best size banner for a 10×10 tent? In my experience, a banner that’s about 8 feet wide fits perfectly across the front of a 10×10 frame. You want it to be visible but not so wide that it sags or catches the wind. A 2-foot tall banner is a good starting point — it’s readable from a distance without overwhelming the tent.
Here’s the thing about branding that most people overlook: it’s not just about the top or the front banner. It’s about the whole package. Sidewalls with your logo. A table cover that matches. Even your weights can be branded. I’ve seen vendors who put their logo on everything, and they’re the ones who get remembered. When you’re buying 10×10 canopy accessories, think about how each piece contributes to your overall brand presence.
And don’t forget the practical side. A printed top is heavier and takes longer to set up because you have to be careful not to scratch the print. An attachable banner system is lighter and faster to set up, but it’s one more thing to pack and one more thing that can get lost. Weigh the trade-offs based on how often you’re setting up and how much time you have.
Lighting and Comfort: Interior Upgrades
Once you’ve got the shelter and the branding sorted, it’s time to think about the experience inside the canopy. This is where a lot of people stop, thinking they’re done. But the right lighting can transform your canopy from a basic shelter into a welcoming space that keeps people around.
LED kits are the modern standard. You can find clip-on LED lights that attach directly to the frame, or you can go with string lights that drape across the top. The advantage of LED is efficiency — they run cool, they last a long time, and they’re bright enough to light up a 10×10 space effectively. For vendors, this is crucial. If you’re selling at an evening market or a night event, you need your products to be visible. A couple of LED strips along the top frame can make a huge difference.
String lights are the aesthetic choice. They’re not as bright as LED strips, but they create a warmer, more inviting atmosphere. For backyard parties or tailgating, string lights are perfect. They add ambiance without being harsh. I’ve seen vendors use them too, especially those selling crafts or handmade goods, because the softer light makes products look more appealing.
Fan attachments are the comfort upgrade. Canopies trap heat — it’s a greenhouse effect, and on a hot day, it can be unbearable. A clip-on fan attached to the frame can create a cross-breeze that makes the space much more comfortable. Some fans are battery-powered, which is great for portability, but they don’t last as long as you’d hope. If you’re setting up for a full day, you’re going to need spare batteries or a way to recharge.
Which brings me to the power question: battery or plug-in? This is a decision you need to make before you buy. Battery-powered accessories are portable and convenient, but they require a steady supply of batteries or a rechargeable power bank. Plug-in accessories are more powerful and don’t require battery management, but they need access to an electrical outlet. For outdoor markets, outlets are often available but not always conveniently located. You might need an extension cord. For camping, battery is usually the only option.
In my experience, the best approach is a hybrid. Get a few battery-powered LED lights for general illumination, and if you have access to power, add a plug-in fan or a more powerful light. This gives you flexibility without locking you into one power source.
And here’s a tip that took me years to learn: test your lighting setup before you arrive at the event. There’s nothing worse than arriving at a market, setting up your canopy, and realizing your lights don’t work because you forgot to charge the battery pack. Make a checklist. Pack spare batteries. Check everything the night before.
The Accessory Matrix: Priority by Use Case
So, what are the best 10×10 canopy accessories for you? The answer depends entirely on what you’re using the canopy for. Let me break it down by use case, because the priorities are wildly different.
Vendor events and outdoor markets: Your priorities are anchoring, sidewalls, and branding. You need solid sidewalls for weather protection, weights or stakes for stability, and a branded top or banner to attract customers. Lighting is secondary but important if you’re selling at evening events. A 10×10 canopy for vendor events is an investment, and it should be treated like one.
キャンプ: Your priorities flip completely. Portability is king. You don’t want heavy weights or bulky sidewalls. You want a lightweight canopy that packs down small. Mesh sidewalls are great for airflow, and a set of lightweight stakes is usually sufficient. Lighting is important for evening activities, but battery-powered string lights are usually enough. A 10×10 canopy tent for camping should be easy to set up and easy to pack.
Tailgating: This is the fun category. Your priorities are comfort and entertainment. You want sidewalls for shade and wind protection, lighting for the evening, and maybe a fan for hot days. Anchoring is still important — tailgating lots can be windy — but you’re not as concerned about branding. A 10×10 canopy for tailgating is about creating a comfortable base camp for the day.
Backyard parties: This is the most casual use case. You need basic anchoring (weights are fine), maybe some lighting for evening events, and that’s about it. Sidewalls are optional unless it’s windy or rainy. A 10×10 canopy for backyard parties doesn’t need to be heavy-duty. It just needs to provide shade and shelter.
Commercial use: This is the heavy-duty category. If you’re using a canopy for commercial purposes — renting them out, using them for recurring events — you need the most durable equipment available. A heavy duty 10×10 canopy for commercial use should have a straight-leg frame, high-quality fabric, and accessories that can withstand frequent setup and teardown. You’re also more likely to need custom branding, which means printed tops and branded sidewalls. For high-traffic commercial applications, you might also consider KCCE’s インフレータブル家具 as a durable, eye-catching alternative to traditional tables and chairs.
Here’s a quick priority table to help you decide:
| アクセサリー | Vendor | キャンプ | Tailgate | Commercial |
|---|---|---|---|---|
| Weights/Stakes | 高い | 中 | 高い | 高い |
| Solid Sidewalls | 高い | 低 | 中 | 高い |
| Mesh Sidewalls | 中 | 高い | 高い | 中 |
| Branding/Banner | 高い | 低 | 低 | 高い |
| Lighting | 中 | 中 | 高い | 中 |
| Fan/Cooling | 低 | 低 | 高い | 低 |
Now, the essential canopy accessories for any use case are: anchoring, a top in good condition, and some form of sidewall protection. Everything else is situational. Don’t let anyone convince you that you need every accessory on the market. You don’t. You need the ones that match your use case.
Budgeting and Bundling: Buy Once, Buy Right
Let’s talk money. Canopy accessories can add up fast, and if you’re not careful, you’ll spend more on accessories than you did on the canopy itself. I’ve seen it happen. Someone buys a $200 canopy, then spends $400 on sidewalls, weights, lighting, and a banner. That’s not smart shopping; that’s impulse buying.
Here’s my advice: buy in bundles when you can. Many manufacturers offer canopy accessory kits that include the essentials — sidewalls, weights, and a carry bag — at a discount compared to buying each item separately. A 10×10 canopy accessories bundle can save you about 10-20% compared to buying items separately, as often advertised. That’s real money.
But here’s the warning: cheap generic parts are a trap. I’ve seen people buy “universal” sidewalls or “universal” weights, and they almost never fit right. The sidewalls have the wrong attachment system. The weights are too light. The stakes are too short. You end up with a pile of useless gear and a bigger hole in your wallet. When it comes to 10×10 canopy tent replacement parts, stick with the manufacturer’s own products. They’re designed to fit your specific frame, and they’re guaranteed to work.
Now, let’s talk about the cost of buying separately. A single sidewall can cost around $50-80, a set of four sandbags might be $30-40, a decent LED light kit is $25-50, and a custom banner is $50-100, according to typical product listings. It adds up quickly. But if you buy a bundle that includes the essentials, you can often get the whole package for $150-250. That’s a significant saving.
My rule of thumb: never buy accessories at the same time as the canopy. Take the canopy home, set it up, and figure out what you actually need. You might discover that you don’t need sidewalls at all because you’re only using it on sunny days. Or you might realize that the weights you were planning to buy are overkill because you’re always on grass. Give yourself a week or two to live with the canopy before you start spending on accessories.
And when you do buy, think about longevity. A cheap sidewall might last a season. A quality sidewall from a reputable brand can last five years or more. That’s the difference between buying once and buying twice. In my experience, paying a little more upfront for quality is always the right call. You’ll thank yourself in two years when your canopy is still going strong.
Maintenance and Storage: Protect Your Investment
You’ve spent good money on your canopy and accessories. Now, how do you make them last? The answer is maintenance and proper storage. It’s not glamorous, but it’s essential.
清掃: After every event, give your canopy a quick once-over. Wipe down the frame with a damp cloth to remove dirt and grime. Brush off the top and sidewalls to remove debris. If you’re dealing with bird droppings or tree sap, use a mild soap and water solution. Avoid harsh chemicals, which can degrade the fabric and the waterproof coating. And never machine-wash a canopy top — the agitation can damage the seams and the waterproofing.
Drying: This is the step everyone skips, and it’s the most important one. Never store a wet canopy. Moisture leads to mold and mildew, which can ruin the fabric and create a musty smell that’s nearly impossible to remove. After a rainy event, set up your canopy in the garage or backyard and let it dry completely before packing it away. Yes, it’s a pain. Yes, it’s worth it.
保管: A quality canopy storage bag is worth its weight in gold. The original box or bag that came with your canopy is fine, but it’s not designed for long-term storage. Look for a wheeled bag if you’re carrying the canopy long distances — your back will thank you. The bag should be roomy enough that you’re not forcing the canopy in, which can damage the frame.
Frame care: Check the frame regularly for loose bolts, bent poles, or worn-out attachment points. Tighten anything that’s loose. If a snap-button is sticking, a drop of lubricant can fix it. If a pole is bent, replace it before it causes bigger problems. 10×10 canopy repair kits are available, and they’re a smart investment for anyone who uses their canopy frequently.
Top and sidewall care: Store tops and sidewalls folded neatly, not wadded up. Folding them the same way every time creates creases, which can weaken the fabric over time. If you have a printed top, avoid folding it with the print facing inward — the ink can crack and fade. Instead, roll it if possible, or fold it with the print facing outward.
Here’s the thing about canopy care: it’s not complicated, but it requires consistency. If you take care of your equipment, it will take care of you. I’ve seen canopies that are ten years old and still going strong, and I’ve seen canopies that fell apart after one season. The difference is almost always maintenance.
よくある質問(FAQ)
Q: What accessories are needed for a 10×10 canopy tent?
A: At minimum, you need anchoring (weights or stakes), sidewalls for weather protection, and a carrying bag for transport. Depending on your use case, you might also want lighting, a fan, or a branding banner. Always prioritize frame compatibility first — not all accessories fit all 10×10 frames.
Q: How to choose the right 10×10 canopy?
A: Start with your frame type. Straight-leg frames are sturdier and offer more usable space, while slant-leg frames are lighter and cheaper. Then consider your primary use case — vendor events need heavy-duty construction, while camping prioritizes portability. Check the waterproof rating and wind resistance before buying.
Q: What is the best size banner for a 10×10 tent?
A: A banner around 8 feet wide by 2 feet tall is commonly used to fit across the front of a 10×10 frame. You want it to be readable from a distance without being so wide that it sags or catches the wind. For a printed top, the entire canopy surface is your canvas.
Q: How many people will fit in a 10×10 tent?
A: A 10×10 canopy provides 100 square feet of space, which typically fits about 8-10 people standing or 4-6 people seated at tables. For vendors, it typically accommodates one or two tables with space for customers to browse.
Q: Are 10×10 canopy tents waterproof?
A: Most quality canopies have a waterproof rating, typically 2000mm or higher for decent rain protection. However, even a waterproof top will leak if water pools. Look for a frame with a peak or slope that allows water to run off, and consider adding solid sidewalls for full protection. For a completely sealed option, you might also look into an air-tight X tent which is designed to be fully waterproof and bug-proof.
Q: What is the difference between a canopy and a tent?
A: A canopy is an open-sided shelter with a roof, designed for shade and weather protection. A tent is an enclosed structure with walls and a floor, designed for sleeping and full weather protection. Canopies are for daytime events; tents are for overnight stays.
参考文献
1. Is a Pop-Up Canopy 10×10 the Right Size for Me? – easysigns.com
2. 10×10 Custom Canopy Tent | Branded Tent Made In USA – tentcraft.com
3. The Best Canopy Tents | Tested & Ranked – outdoorgearlab.com
4. 10 x 10 Canopy Buying Guide & Printable Craft Tent … – craftprofessional.com
5. Canopy Buying Guide – wayfair.com
6. 10×10 Pop-Up Tent: The Ultimate Buying Guide – popupplus.com
7. Canopy Tents: A Complete Overview – uline.com
8. How to Choose a Canopy Tent – ehow.com
9. 10×10 Canopy Tents at Ace Hardware – acehardware.com
10. 10×10 Pop-Up Canopies at Home Depot – homedepot.com







