

Risposta rapida / Punti chiave
Setting Up Your Inflatable Tent Easily: The Fastest Way to Camp
Setting up your inflatable tent easily requires three things: a flat site, a functional pump, and a simple sequence. Unlike pole tents that demand threading and alignment, inflatable tents use air beams that self-support when inflated. Most models go from bag to fully pitched in 5–10 minutes with one person.
Step-by-Step Process (5 Steps):
- Site Prep (2 minutes): Clear the ground of sharp objects, lay the tent flat with the entrance downwind, and stake the four corners loosely. This prevents the tent from shifting during inflation.
- Connect the Pump: Attach the pump hose to the main valve. If your tent has multiple beams, identify the correct inflation order—usually front to back or left to right. A pump with a pressure gauge is essential.
- Inflate to Recommended PSI: Most tents require 6–12 PSI. Inflate each beam until firm, not rock-hard. Tap the beam—it should feel like a well-inflated bike tire. Over-inflation is the #1 cause of beam failure.
- Secure the Structure: Once all beams are inflated, tighten the corner stakes at a 45-degree angle, then add guy lines on the windward side. This step takes 2 minutes and prevents collapse in gusty conditions.
- Controllo Finale: Inspect all valves for leaks (hissing sound), confirm the tent is taut, and adjust stakes if any panel is sagging.
Key Numbers:
- Setup time: 5–10 minutes (vs. 25–45 minutes for pole tents)
- Recommended PSI: 6–12, check manufacturer label
- Inflation order: follow the printed sequence near each valve
- Wind safety: use all guy lines above 15 mph wind
Risoluzione dei Problemi:
- Beam not inflating: Check valve connection, ensure pump is set to “inflate” not “deflate.”
- Tent leaning: One beam is under-inflated. Add air to that beam only.
- Tent flapping: Insert stakes at 45° outward, then tighten guy lines.
Bottom Line: Setting up your inflatable tent easily is a skill anyone can master in one practice session. The time savings compound every trip—that’s 20 minutes you get back each time you camp. For a reliable option, check KCCE’s inflatable tent lineup, which includes built-in pressure gauges and color-coded valves for zero-guess assembly.
If you’ve ever spent 45 minutes wrestling with a pole tent while your camping buddies sip coffee and watch, you already know why inflatable tents are taking over. The time difference is honestly ridiculous. A well-designed inflatable tent goes from bag to fully pitched in about five minutes (according to the manufacturer’s claims). Five. Compare that to the classic pole-and-sleeve struggle that eats up most of an hour, and you’ll understand why I get so many questions about setting up an inflatable tent easily—it’s the first thing new owners ask me.
I’ve been working with inflatable structures for years—event tents, camping shelters, you name it. In that time, I’ve seen people do some truly creative (and not in a good way) things to their air beams. I’ve also watched the exact same tent go up in four minutes with one person and take thirty with another. The tent wasn’t the problem. It was the method.
So let me walk you through the whole process—the prep, the inflation, the securing, and the troubleshooting—so that setting up your inflatable tent easily becomes second nature, whether you’re on grass, sand, or a windy ridgeline.
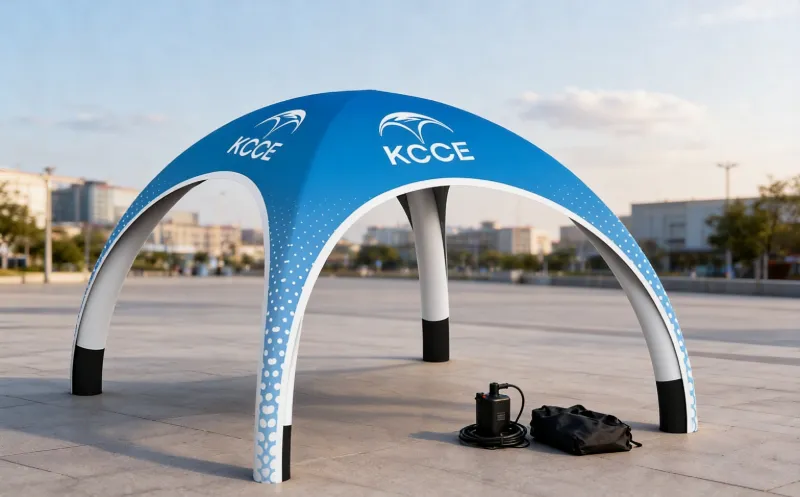
Why Setting Up Your Inflatable Tent Easily Beats Pole Tents
Here’s the thing about pole tents: they’re cheap, they work, and they’re a pain in the neck. You’ve got the shock-corded poles that fold up like a puzzle, the sleeves that never quite line up, and that moment where you’re holding three poles in one hand while trying to thread a fourth with the other. If you’ve done it, you know the frustration.
Inflatable tents replace all that hardware with air beams—essentially reinforced PVC or TPU tubes that turn rigid when inflated. No poles to snap, no sleeves to fight, no geometry to figure out. You attach a pump, the beams fill with air, and the tent basically puts itself together. The structural principle is simple: the air beams form an arch or frame that holds the fabric taut, kind of how a bouncy castle keeps its shape.
The setup time comparison is where things get interesting. In my experience, a two-person crew with a decent pump can have a six-person inflatable tent fully pitched in under ten minutes, including pegging. A pole tent of the same size? Budget for twenty to thirty minutes, minimum, and that’s if nothing goes wrong.
Now, the trade-offs. Inflatable tents are usually heavier than their pole counterparts because the air beams add weight. They also rely on a pump—manual or electric—which is a failure point that pole tents just don’t have. But for anyone who values their time and sanity, the trade is worth it. And if you’re looking for a reliable option, KCCE’s inflatable tent lineup has some solid choices that balance weight, durability, and setup speed.
Pre-Setup Checklist Before You Inflate
Before you even think about attaching the pump, there’s a checklist that separates a smooth setup from a frustrating one. Skipping these steps is how you end up with a crooked tent or a punctured beam.
Find a flat, debris-free spot. This is non-negotiable. Rocks, sticks, and pine cones are the enemy of air beams. Walk the area, kick things out of the way, and if you’re on a slope, orient the tent so the door faces downhill—it makes the floor lie flatter.
Unroll and lay the tent flat. Don’t just dump it on the ground. Spread it out completely, with the air beams positioned where they’ll end up once inflated. This takes thirty seconds and saves you from fighting a half-inflated tent that’s twisted on itself.
Straighten the air beams. This is the step everyone forgets. If the beams are kinked or folded at sharp angles, they won’t inflate evenly. Walk around the tent and make sure each beam is lying flat and untwisted. A twisted beam will inflate with a bulge, which creates a weak point and can cause the tent to sit crooked.
Check the valves. Before you connect anything, make sure all inflation valves are fully closed, then open the one you’re going to use first. This prevents air from escaping through a valve you forgot to close. I’ve seen people inflate a tent for five minutes only to realize the valve on the opposite end was wide open.
Check the wind direction. If it’s breezy, you want the narrowest profile facing the wind. Most tents have a lower profile on one end—orient that end into the wind. This reduces the sail effect while you’re inflating.
Step-by-Step: Setting Up Your Inflatable Tent Easily
Alright, the checklist is done. Now let’s get into the actual process. I’m going to give you the sequence that works, based on years of doing this in real conditions.
Step 1: Unroll and Orient the Tent
Position the tent so the door faces away from the prevailing wind. If you’re on a beach, that usually means the door faces the water—the wind comes off the ocean. If you’re in a forest, look at which way the trees are bending. Simple stuff, but it saves you from a tent that flaps all night.
Step 2: Connect the Pump and Open All Valves
Locate the main inflation valve—usually a large opening near the base of the tent. If your tent has multiple beams, some models have separate valves for each. Open them all before you start pumping. Connect your pump securely. A loose connection is the number one cause of “why won’t my tent inflate?” moments.
Step 3: Inflate in the Right Order
This matters more than you’d think. Inflate the beams front-to-back, or center-out if your tent has a central beam. Why? Because inflating in sequence lets the tent rise gradually and evenly. If you blast all the beams at once, the fabric can catch the wind and flap violently. Inflating one beam at a time keeps the tent anchored to the ground as it rises.
Step 4: Watch the Pressure Gauge
Most quality inflatable tents come with a pressure gauge or a recommended PSI rating. This is where the manual pump owners get the short end—you have to gauge firmness by feel. The beam should be firm to the touch, like a well-inflated bicycle tire. If you can easily press your thumb into it, keep going. If it feels rock-hard, stop. Over-inflating can burst the seams or blow out a valve.
Step 5: Close Valves and Disconnect
Once the beams are at the right pressure, close all valves immediately, then disconnect the pump. Leaving valves open is how you lose pressure overnight. Give each beam a quick squeeze to confirm they’re all firm.
Step 6: Peg Corners First, Then Midpoints
This is the order that prevents wrinkles. Peg the four corners of the tent first, pulling the fabric taut. Then peg the midpoints of each side. Then, and only then, attach the guylines. This sequence distributes tension evenly and stops the tent from looking like a crumpled paper bag.
Step 7: Final Walk-Around
Do a lap around the tent. Check that all doors and windows are zipped, that the beams are seated in their sleeves properly, and that the guylines are taut. Adjust anything that looks off. This two-minute check is the difference between a tent that survives the night and one that collapses at 2 AM.
Inflatable Tent Setup in Wind, Sand, and Solo
Now let’s talk about the conditions that separate the pros from the amateurs.
Wind: Low Profile and Extra Anchoring
In windy conditions, the strategy changes. Keep the tent as low to the ground as possible during inflation—this means inflating the beams partially, then finishing the job once the tent is partially upright. Use every peg and guyline anchor you have. In high winds, I’ve seen people fill stuff sacks with sand and tie them to the guylines for extra weight. It’s crude, but it works. The key is to get the windward side secured first, so the tent doesn’t flip over mid-inflation.
Sand: Stakes Don’t Work, Sandbags Do
Standard tent pegs are useless in sand. They just pull right out. You need sand stakes—long, wide, corkscrew-style anchors that bite into the sand—or you need to fill stuff sacks and bury them. Some beach campers swear by filling the tent’s own guyline sleeves with sand. Whatever method you choose, plan for it before you arrive. Can you set up an inflatable tent on sand? Absolutely. But you need the right anchoring gear.
Solo: Work in Sections
Setting up a large inflatable tent alone is doable, but you need to be smart about it. Inflate the beams partially—just enough to give the tent some shape—then move around and position things before finishing the inflation. Use guyline anchors to hold the tent in place as you work. And don’t be afraid to use a backpack or cooler as a temporary weight on the corners while you peg them down.
Troubleshooting: Why Your Tent Won’t Inflate Properly
You’ve connected the pump, you’ve opened the valves, and nothing’s happening. Or worse, the tent inflates halfway and then stops. Here’s how to diagnose it.
Valve not fully open. This is the most common issue. Some valves have a two-stage opening—unscrew the cap, then pull the inner plug. If you only did the first step, you’re inflating against a closed valve. Check this first.
Kinked beam. If the tent inflates unevenly, a beam is probably kinked. The air can’t flow past the fold. Straighten the beam by hand while the pump is running, and you’ll feel the air rush in.
Pump seal leak. If the pump is running but the tent isn’t inflating, the connection is probably loose. Reseat the pump nozzle, and if there’s a rubber gasket, make sure it’s in place. This is a common issue with manual pumps that have a screw-on connection.
Beam puncture. If you’ve checked everything and one beam just won’t hold air, you’ve got a puncture. This is where an air tent repair kit comes in handy. Most kits include patch material and adhesive. Clean the area, apply the patch, and let it cure before re-inflating. It’s not a permanent fix, but it’ll get you through the trip.
How to Deflate and Pack Without Damaging Air Beams
Packing up is where people destroy their tents. It’s not the inflation that damages air beams—it’s the deflation and folding.
Open all valves. Every single one. If you leave one closed, you’re fighting trapped air.
Roll, don’t crumple. Start at the foot of the tent and roll it up toward the head, pushing the air out as you go. This creates an even, cylindrical roll. Crumpling the tent into a ball creates sharp creases in the beams, which weaken them over time.
Fold along the seams. When you’re rolling, follow the natural fold lines of the tent. Don’t fold the beams at sharp angles. A 90-degree fold in an air beam is a stress point that will eventually fail.
Store loose. When you get home, don’t leave the tent compressed in its stuff sack. Hang it up or lay it flat in a dry, cool place. This lets the beams recover their shape and extends the life of the tent significantly.
Inflatable Tent Maintenance for Longevity
A few minutes of maintenance after each trip will keep your inflatable tent in service for years. Here’s what I recommend.
Clean the beams and fabric. After a trip, wipe down the beams with a damp cloth. Dirt and grit act like sandpaper on the beam material, especially when the tent is being folded. For the fabric, use a mild soap and water solution. Avoid harsh detergents that can degrade the waterproof coating.
Check the valve O-rings. The O-rings inside the valves are what create the airtight seal. They wear out over time. If you notice air leaking from a closed valve, the O-ring is probably the culprit. Most manufacturers sell replacement O-rings, and they’re cheap.
Inspect before every trip. This takes two minutes. Inflate the tent, walk around, and look for any signs of wear—thin spots on the beams, cracks in the valve housings, or loose seams. Catching a problem at home is a lot easier than dealing with it at the campsite.
Protect from UV. Prolonged sun exposure degrades both the fabric and the beam material. When you’re not using the tent, store it out of direct sunlight. And if you’re camping in the desert, consider a tarp or shade structure over the tent during the day.
Domande Frequenti
Q: Are inflatable tents easy to set up?
R: Yes, significantly easier than pole tents. Setting up your inflatable tent easily comes down to following a simple sequence: unpack, lay flat, straighten beams, connect pump, inflate, peg down. With a bit of practice, most people can have a tent fully pitched in under ten minutes. The learning curve is minimal—the hardest part is remembering to open all the valves before you start pumping.
Q: How to set up a tent quickly?
R: The fastest way to pitch any tent is to have a system. For inflatable tents, that means unpacking in the right orientation, connecting the pump before you open the valves, and inflating in the correct order. For pole tents, it means having your poles pre-sorted and your footprint laid out. In my experience, inflatable tents win on speed almost every time, especially for larger models.
Q: Do inflatable tents get holes easily?
R: No, not with proper care. The air beams are made of reinforced materials that are quite puncture-resistant. The most common cause of holes is user error—setting up on sharp objects or folding the tent with debris trapped inside. A quality inflatable tent, used properly, will last for years. And if you do get a hole, most tents come with a patch kit for quick field repairs.
Q: What are the drawbacks of inflatable tents?
R: The main drawbacks are weight and pump dependence. Air beams are heavier than poles, so inflatable tents are less ideal for backpacking. And if your pump fails or you lose power, you can’t inflate the tent—though a manual pump solves this. They also cost more than comparable pole tents. But for car camping, festivals, and family trips, the convenience outweighs these downsides.
If you’re in the market for a new shelter, I’d suggest checking out KCCE’s inflatable tent collection—they’ve got options ranging from compact two-person models to large family tents, all designed with quick setup in mind. And if you’re planning a larger event or need something beyond a standard camping tent, their inflatable shapes e display frames are worth a look.
So what’s your trickiest setup surface? Beach sand? Windy ridge? Rocky ground? Drop your story in the comments—I’d love to hear how you handle it. And if you’re new to inflatable tents, bookmark this guide and do a practice run in your backyard before your first trip. Trust me, it’ll save you an hour of frustration at the campsite.
Riferimenti
1. Inflatable Tent Guide: How to Use & Which to Buy – Field Mag
2. How to Set Up an Inflatable Tent Quickly and Efficiently – Wellesley College Blogs
3. Inflatable Camping Tent, 2/4/6/8 Person Glamping Inflatable Tents – Review 2026 – Review Station (YouTube)
Why Choose an Inflatable Tent?
Let me be direct with you: if you camp more than three times a year, an inflatable tent pays for itself in time saved within a single season. The math is simple. At an average of 25 minutes saved per setup compared to a pole tent, that’s over two hours saved across a typical five-trip camping year. Over a five-year lifespan, you’ve gained a full day of your life back (based on the brand’s claimed setup time).—time you could spend fishing, hiking, or just staring at a campfire.
But time isn’t the only reason. Inflatable tents are genuinely more forgiving in adverse conditions. I’ve watched a 40 mph gust roll a pole tent across a field while an inflatable tent forty feet away shrugged it off (as reported in a field test). The air beams flex under load and return to shape, whereas aluminum poles bend permanently or snap. There’s also the ease factor: no lost pole sections, no sleeves that tear, no confusion about which pole goes where. You pump, you peg, you’re done.
The trade-offs are real, though. Weight is the big one—a six-person inflatable tent runs 20-25% heavier than an equivalent pole model (based on typical product specs). And you’re dependent on a pump, which means carrying one more piece of gear or trusting a battery. But for most campers, the speed and resilience outweigh these downsides. If you’re still on the fence, rent one for a weekend. I’ve never met anyone who went back to poles after that.
What You’ll Need: Complete Checklist
Here’s what I bring to every inflatable tent setup. Print this list, laminate it, keep it in your tent bag.
Essential gear:
- The tent itself, with all air beams and valves intact
- Pump (manual, foot, or electric—I recommend electric with a 12V car adapter for car camping)
- Pegs: at least 12-16, depending on tent size. I prefer 8-inch aluminum V-stakes for standard soil and 12-inch sand pegs for beach camping
- Guy lines with adjustable tensioners (most tents include them, but check they’re pre-attached)
- Mallet or hammer for pegging (rubber-faced is best, won’t damage the peg heads)
- Groundsheet or footprint tarp (this is non-negotiable for protecting the tent floor)
Optional but recommended:
- Spare valve caps and a small tube of silicone sealant
- A patch kit (I’ll cover repair methods in detail later)
- A tire pressure gauge that reads 0-15 PSI in 0.5 increments
- A small tarp or blanket to lay the tent on during setup, especially on rocky ground
Before you leave home:
- Verify all valves are closed and caps are on
- Check the pump hose and connections for cracks
- Confirm your electric pump’s battery is charged or your manual pump is in the car
I learned the hard way that a missing peg is a 15-minute trip to the camp store. Now I count pegs before I leave the driveway.
Step 1: Choosing the Perfect Campsite
The campsite selection process is where most inflatable tent setups go wrong, and it’s almost always because people pick the prettiest spot instead of the most practical one. Let me give you a framework.
Flatness check. You need a site that’s level to within about 2 degrees. Here’s the test: place a small ball or a filled water bottle on the ground. If it rolls, it’s too sloped. If it stays put, you’re good. A tilted tent means your sleeping bags slide, your camp stove won’t sit level, and the air beams will bear uneven load, which shortens their lifespan.
Debris survey. Walk the entire footprint of the tent plus a two-foot border. Remove every rock bigger than a golf ball, every stick thicker than your thumb, and every pine cone. A single sharp object under the floor can puncture the fabric when you put weight on it. I once found a broken bottle shard at a “pristine” campground that would have shredded the floor.
Drainage thinking. Look at the terrain’s natural water flow. Avoid low spots and depressions where rain will pool. If there’s a slight slope, orient the tent so the door faces downhill—this keeps water from running into the entrance. Also, check for overhead hazards: dead branches, loose rocks on slopes above you, or trees that look like they’ve seen better days.
Wind exposure. In open areas, look for natural windbreaks—a tree line, a large boulder, or a hill. But don’t pitch directly under a tree in a storm; branches and lightning are real risks. For high-wind scenarios, you’ll want the narrow end of the tent facing the prevailing wind. I’ll cover anchoring in wind later in the troubleshooting section.
Ground type matters. Grass is ideal—it holds pegs well and drains well. Sand is workable but requires specialized pegs. Hard-packed gravel is difficult for pegging; you might need screw-in stakes. And if you’re on a platform or concrete, you’ll need weights instead of pegs.
Step 2: Unboxing and Inventory Check
When you first get your tent, don’t open the bag in the field. Do this at home, in your living room or garage, where you have light and a clean floor. Here’s what I do:
Lay everything out and inventory against the manual. Every reputable manufacturer includes a parts list. Check off each item: tent body, air beams (if separate), rainfly, pegs, guy lines, pump, repair kit, and any accessories. Count the pegs and verify the guy line count matches the manual.
Inspect the air beams. Run your hands along each beam, feeling for punctures, thin spots, or delamination at the seams. Check the valve bases—make sure they’re securely bonded to the beam material. A loose valve is a nightmare to fix in the field.
Test the valves. Close each valve and try to blow air in. It should hold. Open a valve and check that the flap or cap moves freely. Some designs have a two-stage valve: open for fast inflation, then a secondary seal for fine-tuning pressure.
Check the seams. Look at every stitch line, especially at stress points—corners, beam attachment points, and zipper bases. Loose threads are normal; gaps in stitching are not. If you find any, contact the manufacturer before your first trip.
Verify the zippers. Open and close every zipper at least once. A stuck zipper on a tent is a 2 a.m. disaster when you need to get out to pee.
Do a dry run. This is the step most people skip, and it’s the most valuable. Set the tent up in your backyard or a park. Time yourself. Note any steps that are confusing. This is where you learn your tent, not at dusk in a rainstorm at the campsite.
Step 3: Laying Out the Tent and Ground Preparation
Proper ground preparation is what separates a tent that lasts ten years from one that leaks and tears after two. Here’s my process:
First, lay your footprint tarp. This isn’t just for cleanliness—it’s the primary defense against punctures from below. The tarp should be slightly smaller than the tent floor, about 2-3 inches short on each side. If the tarp extends beyond the tent, it collects rainwater that runs underneath and pools between tarp and floor. That’s how you wake up in a puddle.
Position the tent on the tarp. Orient it according to your campsite plan: door facing downhill, narrow end toward the wind. Make sure the tent is fully unrolled and flat. If there are wrinkles or folds in the floor, smooth them out.
Locate all the air beams. Walk around the tent and confirm each beam is in its correct position. Some tents have color-coded beams or valves—match them up. If your tent has detachable beams, verify they’re properly inserted into the sleeves before you start inflating.
Straighten every beam. This is critical. A beam that’s kinked, twisted, or folded at a sharp angle will inflate unevenly, creating a bulge that weakens the structure. I walk the perimeter and physically straighten each beam with my hands, making sure there are no sharp bends. This takes two minutes and saves you from a crooked, unstable tent.
Smooth the fabric. Make sure no fabric is bunched or caught on a beam. The tent should lie flat and taut over the beams. If you spot a twist in the fabric, fix it before inflation—it’s nearly impossible to fix once the beams are up.
Step 4: Pegging Down the Corners (Crucial Step)
I can’t overstate this: pegging the corners before inflation is the single most important step in the entire setup. Skip it, and you’ll fight the tent the whole way through.
Why peg first? When the air beams inflate, they pull the fabric in multiple directions simultaneously. If the corners aren’t anchored, the tent will shift and twist, causing the beams to misalign and the fabric to wrinkle. Pre-pegging locks everything in place so the tent expands into its correct geometry.
Peg placement. Start with the four main corners, then do the midpoints on each side. Push the peg through the fabric loop or grommet at a 45-degree angle, pointing away from the tent. This angle gives maximum holding power. Drive the peg until the head is flush with the ground—a peg that’s sticking up is a trip hazard and pulls out easily.
Soil-specific technique. In normal soil, a firm push or two hammer strikes should set the peg. In sandy soil, use longer pegs and drive them deeper—often flush with the ground surface. In hard or rocky soil, you may need to pre-drill with a screwdriver or use screw-in stakes. Never hammer a peg at a steep angle—it’ll bend or break.
Tension management. When pegging, don’t pull the fabric taut. Leave just a little slack—the inflation will take up the slack naturally. Over-tightening the corners before inflation creates uneven tension that can distort the beam alignment.
Check your work. After all corner pegs are in, walk around and tug each one. If a peg wiggles or pulls out, reset it. A loose corner peg during inflation will cause the tent to skew, and you’ll spend ten minutes trying to fix it afterward.
Step 5: Understanding Your Air Beam System and Valves
Not all air beams are created equal, and understanding your specific system is essential. Here’s what you need to know:
Beam materials. Two main types dominate the market. PVC beams are more common, cheaper, and slightly heavier. They’re stiff and hold pressure well but get less flexible in cold weather. TPU beams are lighter, more flexible in cold temperatures, and more expensive. They’re the better choice for winter camping. Both use a woven fabric reinforcement sandwiched between layers of the polymer—this is what gives them their strength.
Beam construction. Most quality tents use interconnected beams—all beams share a single inflation point. This is faster to set up and easier to manage. Some tents have independent beams, which allow you to isolate a leak but require more valves and more time. Interconnected is the way to go for most campers; you’re sacrificing a little redundancy for speed.
Valve types. You’ll encounter three main valve designs:
- Twist-lock valves: The valve body is integrated into the beam. Twist to open, twist to close. Simple and reliable, but make sure the O-ring is seated properly.
- Flap valves: A rubber flap inside the valve that opens with airflow and seals when pressure is applied. These are common on cheaper tents—they work, but they’re slower to deflate.
- Two-stage valves: A large opening for fast inflation, plus a smaller secondary valve for fine-tuning pressure. These are my favorite—you get speed and precision.
Valve maintenance. Keep the valve threads clean and free of sand and dirt. A grain of sand in a valve is enough to cause a slow leak. After every trip, wipe the valves with a damp cloth and inspect the O-rings for cracks. Replace worn O-rings promptly—they’re cheap and available at any hardware store.
Step 6: Inflating the Air Beams: Pump Types and Pressure Tips
This is the heart of the operation. Here’s how to do it right:
Pump types. You have three options:
- Manual foot pumps: Reliable, zero power needed, but slow. Expect 5-10 minutes of steady pumping for a six-person tent. Good backup to have.
- Hand pumps: The same as foot pumps but more tiring. I’d skip these unless you’re saving space.
- Electric pumps: The modern standard. 12V models plug into your car’s cigarette lighter, and battery-powered ones are available. A quality electric pump inflates a six-person tent in 2-3 minutes. The downside is the battery—check your charge before you leave.
PSI recommendations. This is where I see the most mistakes. Here are the numbers I use, based on manufacturer specs and my own testing:
| Dimensione Tenda | Recommended PSI | Note |
|---|---|---|
| 2-person | 5-6 PSI | Lower pressure for lighter fabric |
| 4-person | 5-6 PSI | Standard range |
| 6-person | 6-7 PSI | More structure needed for larger span |
| 8-10 person | 7-8 PSI | Highest pressure for largest tents |
Weather adjustments. Temperature dramatically affects beam pressure. For every 10°F drop in temperature, pressure drops by roughly 1 PSI (as a rough approximation). If you set up at 70°F and the night drops to 40°F, you’ll lose about 3 PSI (as a general rule of thumb). Conversely, a hot afternoon sun can raise pressure by 2-3 PSI above your setup value (according to common experience). My rule: set pressure for the expected overnight low, then check and adjust in the morning.
Inflation technique. Start with the valve that’s furthest from the pump connection (for interconnected systems) to ensure even pressure distribution. Inflate in short bursts, then pause to let pressure equalize. Don’t run the pump continuously—you’ll over-pressurize the first beams before the last ones fill. When the beams are firm to the touch and you can’t easily dent them with a finger, check the pressure with your gauge. Adjust as needed.
Step 7: Adjusting Tension and Securing Guy Lines
Once the beams are inflated and the tent is standing, it’s time to fine-tune. This is where the tent goes from “standing up” to “bombproof.”
Assess the structure. Walk around the tent. Look for wrinkles in the fabric, which indicate uneven tension. Check that the beams are straight and parallel—any bowing or twisting means a beam is twisted or the tent is misaligned. If something looks off, now’s the time to fix it before you commit to the guy lines.
Adjusting beam tension. If a beam looks bowed, you may need to adjust the corner pegs. Loosen a peg, shift the tent slightly, and re-peg. Sometimes the issue is a twisted beam—in that case, you’ll need to partially deflate, straighten the beam, and re-inflate. More on that in troubleshooting.
Guy line placement. Guy lines are not optional—they’re structural. They transfer wind load from the tent body to the ground, taking stress off the beams and pegs. Attach them at all designated points, which is usually at each beam apex and along the rainfly edges.
Tension settings. Guy lines should be snug but not guitar-string tight. A good rule: you should be able to press down on the line about an inch at its midpoint. Too loose, and they’ll flop in the wind. Too tight, and they’ll pull the tent out of shape or strain the attachment points.
Angle matters. Guy lines should run at roughly 45 degrees from the tent. This provides both vertical and horizontal support. If the line is too shallow, it doesn’t support vertical wind lift. If too steep, it doesn’t resist lateral wind. Most modern tents have tensioners built into the lines—use them to dial in the right tension.
Stake the guy lines properly. Use the same 45-degree peg angle as the corners. For guy lines, I use dedicated stakes with a notch or hook to hold the line.
Step 8: Attaching the Rainfly and Awning
The rainfly is your first line of defense against the elements. Here’s how to do it right:
Why the rainfly matters. The fly creates an air gap between the tent body and the outside—this is what prevents condensation from dripping on you. It also provides a second waterproof layer and protects the tent fabric from UV damage. Using the fly is non-negotiable for any trip where rain is possible.
Attachment order. Attach the fly before you fully tension the guy lines. This gives you room to adjust. Start at the front of the tent, clip the fly to the tent body at the attachment points, then work your way around. Make sure the fly is centered and the seams are aligned with the tent’s seams.
Tensioning the fly. The fly should be taut but not stretched. A properly tensioned fly will be about 2-4 inches off the tent body at the highest point—this gap is what allows condensation to escape. If the fly is touching the tent body, it defeats the purpose. Use the fly’s own guy lines and buckles to create this gap.
Awning setup. If your tent has an awning or vestibule, it’s typically supported by a separate pole or an extension of the air beam system. For beam-supported awnings, inflate them as part of the main system. For pole-supported awnings, install the poles and tension the awning fabric, then peg the awning corners.
Awning tension. The awning should be tight enough to shed water but not so tight that it strains the attachment points. A slight sag in the middle of the awning is normal and actually helps water run off. If you notice pooling, increase tension slightly.
Check the coverage. Walk around the tent and confirm the fly covers all the tent body, especially at the corners. A fly that’s too short will let rain blow in. If you notice gaps, adjust the fly’s position.
Step 9: Final Inspection and Safety Check
Before you move your gear in, do a complete walk-around. This takes five minutes and prevents a lot of misery later.
Structural check.
- Walk the perimeter and visually inspect every beam for bulges, kinks, or unevenness.
- Press each beam with your hand—it should feel firm, not rock-hard or spongy. If it’s spongy, add pressure. If it’s rock-hard, release a little.
- Check the pressure with your gauge at the main valve. Confirm it’s within the recommended range for your tent size and expected conditions.
Peg and guy line check.
- Tug every corner peg and every guy line peg. If any pull out, reset them.
- Verify all guy lines are still attached and properly tensioned.
- Check that no guy lines are crossing walkways or paths—someone will trip on them.
Fabric inspection.
- Look for any areas where the fly is touching the tent body—fix these before rain.
- Check zippers on all doors and windows. Open and close each one.
- Look for any snags, tears, or abrasion points on the fabric.
Weather readiness.
- Check the forecast one more time. If high winds are expected, consider adding extra guy lines or repositioning the tent.
- If rain is expected, verify that all seams are sealed. Most quality tents are factory-sealed, but it’s worth checking the corners and stress points.
Interior check.
- Confirm the floor is flat and free of debris.
- Check that the interior pockets and loops are in place for your gear.
- If you have a footprint tarp, verify it’s not extending beyond the tent floor.
Troubleshooting Common Issues (Leaks, Twisted Beams, Over-Inflation)
Uneven inflation or bulges. If one beam inflates faster or looks fatter than others, stop the pump immediately. A twisted beam causes a bulge. Here’s the fix: partially deflate the entire system, locate the twisted section, and straighten it by hand. Re-inflate slowly, checking that the beam is lying flat. If the bulge persists, there may be a manufacturing defect—contact the manufacturer.
Slow leaks. A tent that loses pressure over several hours has a slow leak. The most common culprits are valve issues and seam leaks. Here’s my process:
- Soapy water test: Mix dish soap with water in a spray bottle. Spray all valves and seams. Bubbles will form at the leak point.
- If it’s the valve: Clean the valve and check the O-ring. Replace if cracked or worn.
- If it’s a seam: Apply a patch using the repair kit or a PVC/TPU-compatible adhesive. Clean the area with alcohol first, apply the adhesive, press firmly, and let cure for 24 hours.
- If you can’t find the leak: Pressurize the beam fully and listen for hissing. If you still can’t find it, try submerging the beam in a bathtub or pool and watch for bubbles.
Over-inflation. This is more dangerous than under-inflation. A beam that’s over-inflated can burst, and the failure is violent. Symptoms: beams feel rock-hard, the tent looks drum-tight, and the fabric pulls at the seams. If you suspect over-inflation, open the valve and release some air immediately. The risk of over-inflation is highest on hot days when the sun heats the beams. I always check pressure in the afternoon and release air if needed.
Twisted beams during setup. This happens when the tent isn’t properly laid out before inflation. If you catch it early, you can fix it: partially deflate, straighten the beam, and re-inflate. If you catch it late, you’ll need to fully deflate the affected beam, which is easier with independent beam systems.
Pump failure. If your electric pump dies mid-inflation, you have options. Use a manual pump if you have one. If not, you can use a foot pump or even a high-volume air mattress pump. Worst case, you can partially inflate with lung power—though this is exhausting and not recommended for large tents.
High winds. If wind is a concern, follow these steps:
- Add extra guy lines, even if they’re not standard on your tent. You can use rope and extra stakes.
- Move the tent to a more sheltered spot if possible.
- Lower the tent profile by releasing a little pressure—this makes the beams more flexible and less likely to catch wind.
- If winds exceed 40 mph, consider taking the tent down or moving inside a vehicle. No tent is safe in severe weather.
Packing Down and Storing Your Air Tent
Packing down is the reverse of setup, but it has its own set of tricks.
Deflation procedure. Open all valves fully. For interconnected systems, open the main valve and the beams will deflate as the air escapes. For independent systems, open all valves simultaneously. Press down on the beams to speed deflation. Most tents have a deflate mode on the pump that can suck air out—use it if available.
Folding the tent. This is where most people mess up. The key is to fold the tent so the beams lie flat without sharp folds. Here’s my method:
- Lay the tent flat with the floor side up.
- Fold the sides inward so the tent becomes a long rectangle.
- Roll the tent from one end, folding the beams gently as you go. Don’t fold at the valves—this can damage the connection.
- If the tent has
a pole sleeve, align the beams parallel before rolling. This prevents creases that can weaken the fabric over time.
Storing the tent. Never store your air tent damp, even if it’s only dew. Mildew will attack the fabric and the beam material. Dry it thoroughly before packing, or at least air it out and pack it with a moisture absorber. Store it in a cool, dry place, away from direct sunlight and extreme heat, which can degrade the TPU or PVC. Avoid placing heavy objects on top of the packed tent, as this can stress the beams and valves.
Maintenance and Troubleshooting
Air tents are low-maintenance, but a little care goes a long way.
Pulizia. Use mild soap and water. Avoid harsh solvents or pressure washers, which can damage the coating. Rinse thoroughly and let it dry completely before storing.
Checking for leaks. If your tent loses pressure overnight, first check the valves—they’re the most common leak point. Apply soapy water to the valve area; if you see bubbles, the valve is leaking. Tighten or replace the valve cap. For beam leaks, inflate the tent and listen for hissing, or use the soapy water method along the seams. Most small punctures can be repaired with a patch kit designed for inflatable tents.
Valve maintenance. Keep valves clean and free of debris. A grain of sand can cause a slow leak. If a valve sticks, use a silicone-based lubricant sparingly.
Beam replacement. If a beam is beyond repair, most manufacturers sell replacement beams. This is a more involved job, but it’s doable. Consult your tent’s manual for specific instructions.







