

Rented a tent that collapsed mid-event? You’re not alone. I’ve lost count of how many marketing managers have told me that exact story over the years — usually standing in a puddle of rainwater, holding a broken aluminum pole, surrounded by soaked brochures and a very unhappy boss on the phone.
Here’s the thing about outdoor exhibition tents: they look simple, but they’re not. A cheap canopy from the big-box store might survive a sunny Saturday at a farmers market, but put it in front of a trade show hall with wind gusts and a sudden downpour, and you’ll watch your brand investment fold like a cheap suit.
That’s why I’m writing this guide. After years in the event industry — and more tent installations than I can count — I’ve developed a decision framework that cuts through the marketing noise. This isn’t a product list. It’s a framework for thinking about what you actually need, why you need it, and what separates a $500 tent from a $2,000 one. By the time you finish reading, you’ll know exactly what questions to ask any supplier — including us.
Quick Answer
An outdoor exhibition tent is a semi-permanent or portable structure designed to protect and showcase your brand at outdoor events, trade shows, and exhibitions — and the best one for you depends on frame material (aluminum vs. steel), fabric quality (polyester vs. PVC), wind rating, and size matched to your booth space, not on brand name or price tag alone.
What Is an Outdoor Exhibition Tent?
Let’s start with the basics, because surprisingly few people actually understand what they’re buying.
An outdoor exhibition tent is a freestanding structure designed specifically for outdoor events, trade shows, product launches, and corporate gatherings. Unlike a camping tent (which is meant to be hidden in the woods), these are branding platforms first and shelters second. They’re engineered to carry printed graphics, withstand weather, and create a professional presence that says “we belong here.”
The market breaks down into three main structural categories:
Canopy tents — These are the pop-up style units you see everywhere. Folding frame, typically 10×10 feet, sets up in minutes. Good for smaller booths and quick deployments. Lightweight, portable, but generally not built for extreme weather.
Pole tents — These use center poles and perimeter poles with tensioned fabric. They’re cheaper per square foot but the center poles eat into your usable space. For exhibition purposes, they’re usually a poor choice unless you’re covering a very large area on a budget.
Frame tents — This is what most serious exhibition organizers end up with. The frame carries all the structural load, meaning no center poles. Every square meter inside is usable. You can arrange product displays, demo stations, and meeting areas exactly as you envision, without working around structural obstacles.
The structure type matters enormously for branding. Here’s why: a frame tent gives you clean, uninterrupted wall space for graphics. A pole tent gives you a pole in the middle of your display. Which one do you think makes a better first impression?
Speaking of first impressions — that’s exactly what RÖDER, a German tent manufacturer, emphasizes in their work for DOKA at Bauma 2019. They built a complete exhibition house with gallery levels and side entrances, all from tent structures. The point wasn’t just shelter — it was creating a branded environment that felt substantial and permanent. That’s the ceiling of what’s possible with the right outdoor exhibition tent.
Aluminum vs. Steel Frames: Which Is Stronger?
This is the question I get asked more than any other, and the answer surprises most people.
Aluminum frames are the industry standard for most exhibition applications. They’re lightweight — typically 30-40% lighter than steel — which means faster setup, easier transport, and less labor cost over the life of the tent. Modern aluminum alloys, such as 6061-T6 and 6082-T6, are known for excellent strength-to-weight ratios. The RÖDER reference I mentioned earlier uses aluminum alloy frames precisely because they’re “lightweight yet rigid” — that’s a direct quote from their project documentation, and it’s the right engineering answer for most situations.
Steel frames are heavier, stronger in raw terms, and usually cheaper per pound of material. But here’s the catch: steel rusts. Unless it’s galvanized or powder-coated (and even then, scratches expose bare metal), steel will corrode over time, especially in humid or coastal environments. Steel frames also require more people to handle — A 20×20 steel frame tent might need more people to assemble than the same size in aluminum, depending on the design.
Wind resistance is where things get interesting. The frame material matters less than the frame geometry and the anchoring system. A well-engineered aluminum frame with proper bracing will outperform a poorly-designed steel frame in high winds, every time. The engineering question isn’t “which metal is stronger” — it’s “which structure distributes load better.”
From a maintenance standpoint, aluminum wins almost every time. No rust, no painting, no corrosion treatment. Wipe it down, store it dry, and it’ll last a decade or more. Steel requires periodic inspection for rust spots, especially at weld points and bolt holes.
My take? Unless you’re setting up a semi-permanent structure that will never move, aluminum is the right choice for 95% of exhibition applications. The weight savings alone pays for itself in labor costs within a few events.
That said, there’s a middle ground worth mentioning. Some manufacturers use hybrid designs — aluminum for the main structural members, steel for high-wear connection points. This gives you the best of both worlds, though it complicates repair logistics slightly.
Polyester vs. Vinyl vs. PVC Fabric
Now we’re getting into the part that most buyers overlook — and it’s the part that determines whether your tent looks professional on day one or looks like a faded beach umbrella by month six.
Kain poliester is the lightweight option. It’s typically used on canopy tents and cheaper frame tents. Good polyester with a PU (polyurethane) coating can be reasonably waterproof, and it takes dye-sublimation printing beautifully — vivid colors, sharp edges, excellent detail reproduction. The downsides? Polyester stretches when wet, degrades under prolonged UV exposure, and generally has a shorter lifespan than heavier materials. Think 2-4 years of regular use before it starts looking tired.
Vinyl (PVC-coated polyester) is the workhorse of the exhibition industry. The base fabric is polyester, but it’s coated with PVC on both sides, making it fully waterproof, highly UV-resistant, and much more durable. This is what you want if your tent will see regular outdoor use. The trade-off is weight and print quality — vinyl graphics aren’t as sharp as dye-sublimation on polyester, though modern digital printing on vinyl has closed much of the gap.
PVC-laminated fabrics are the heavy-duty option, often used for large exhibition marquees and semi-permanent structures. These are thick, stiff, and incredibly durable. They’re also heavy and expensive. You don’t need this for a 10×10 trade show booth, but if you’re building a 40×60 exhibition hall that needs to survive a season of weather, this is the category you’re shopping in.
Now, the specs that actually matter:
Waterproofing — Look for a hydrostatic head rating. For exhibition use, you want at least 1500mm, and ideally 3000mm or higher, as recommended by industry guidelines. Anything less is a picnic tent, not an exhibition tent. A waterproof tent isn’t just about keeping rain out — it’s about protecting your products, your printed graphics, and your reputation.
Fire retardancy — This is non-negotiable. Most venues require fire-retardant materials, and many jurisdictions have legal requirements. In the US, look for CPAI-84 certification. In Europe, the standard is often DIN 4102 B1 or M2. Always ask for the certificate — a reputable manufacturer will provide it without hesitation.
UV degradation — Here’s a number that surprises people: Even good PVC-coated fabric will lose a significant portion of its tensile strength after several years of outdoor exposure. The UV stabilizers in the PVC coating slow this process, but they don’t stop it. If your tent lives outside for extended periods, budget for fabric replacement every 3-5 years regardless of how well you maintain it.
Pembersihan — Vinyl and PVC fabrics clean up with mild soap and water. Polyester needs more care — avoid harsh detergents and never machine-wash. Mildew is the enemy of all tent fabrics, so always dry the tent completely before storage. This isn’t just about aesthetics — mildew attacks the fabric fibers and the waterproofing coating, permanently compromising the material.
Wind Ratings and Anchoring Systems
You might be wondering: how much wind can these things actually handle? It’s a fair question, and the answer is more nuanced than most suppliers admit.
Most quality frame tents are rated for winds up to about 60-70 mph (roughly 95-110 km/h) when properly anchored, according to brand specifications. But here’s the critical phrase: when properly anchored. An unanchored tent is a sail with a frame attached to it. No frame — aluminum, steel, or titanium — can save you if the anchoring fails.
The industry typically categorizes wind resistance using PSI (pounds per square inch) ratings, though honestly, the more practical measure is the wind speed the manufacturer has tested the tent against. Reputable manufacturers will provide this data. If a supplier can’t tell you the tested wind rating, that’s a red flag.
Here’s what I’ve learned from real-world failures:
Stakes work on grass and soft ground. They’re the cheapest option and perfectly adequate for most events. But they’re useless on asphalt, concrete, or gravel. If your event is in a parking lot, stakes are not your answer.
Weights and ballasts are the universal solution. Water barrels, concrete blocks, or purpose-made ballast plates — these work on any surface. The rule of thumb is that you need enough weight to counteract the lift force of the wind on the tent’s surface area. A 10×10 tent with a high-profile roof can generate significant lift in a strong gust. Skimping on ballast is how tents end up in neighboring booths — or in trees.
Sandbags are a common option but they have a problem: they’re only as heavy as the sand in them, and wet sand is heavier than dry sand. If you’re filling sandbags on site, account for the weight variation.
Auger anchors screw into the ground and provide excellent holding power in soil. They’re popular for longer-term installations. They don’t work on hard surfaces.
The real-world failure point is almost never the frame or the fabric — it’s the anchoring. I’ve seen $5,000 tents destroyed because someone used inadequate stakes on a windy day. And I’ve seen $800 tents survive a storm because the owner took anchoring seriously.
For a heavy duty outdoor exhibition tent, invest in a proper anchoring system. It’s not the glamorous purchase, but it’s the one that keeps your tent (and your brand) standing when the weather turns.
Sizing Guide for Your Event Type
“How big should my tent be?” This is the second most common question I hear, and the answer depends on what you’re doing with it.
10×10 (3×3 meter) — This is the standard trade show booth size. It’s also the sweet spot for most canopy tents and smaller frame tents. You can fit a display table, some product shelving, and a small meeting area. For a first-time exhibitor or a modest product showcase, this is where most people start.
10×20 (3×6 meter) — Double the length, which changes everything. You can now have a proper reception area at the front, a product demonstration zone in the middle, and a private meeting space in the back. This is the most popular size for serious exhibitors.
20×20 (6×6 meter) — This is where you’re making a statement. A 20×20 gives you room for multiple demo stations, a lounge area, and substantial branding walls. It’s the size that starts to feel like a mini-pavilion rather than a booth.
Large outdoor exhibition tent (30×30 and up) — At this scale, you’re talking about structures that rival small buildings. These are typically used for entire pavilions or as the centerpiece of a corporate event. They require professional installation teams and often need permits.
But size isn’t just about floor area. Ceiling height matters more than most people realize. Standard frame tents have ceilings around 10-11 feet at the center, as commonly specified. If you’re hanging lighting, banners, or equipment, you need to account for that. Some manufacturers offer high-peak options that add several feet of clearance — worth considering if you’re planning anything elaborate.
Here’s my practical advice: measure your actual needs, then add 20%. The most common regret I hear from exhibitors is “I wish we’d gone bigger.” The reverse — “I wish we’d gone smaller” — almost never happens.
Also consider the site environment. As one manufacturer’s guide notes, tent construction works on mud, lawn, asphalt, and cement — there’s no special site requirement. But drainage matters. If you’re setting up in a low area that collects water, that’s a problem no tent size will solve.
Customization and Branding Options
This is where the tent stops being a shelter and becomes a marketing asset. And it’s where the price differences between “cheap” and “premium” really show up.
Printing methods — The two main options are dye-sublimation and vinyl graphics.
Dye-sublimation prints directly onto polyester fabric. The colors are vibrant, the detail is sharp, and the print becomes part of the fabric itself — it won’t crack, peel, or fade as quickly as surface prints. The downside is that it only works on polyester, which means you’re limited to lighter-weight fabrics. For a custom exhibition tent where branding is the whole point, this is usually the best choice.
Vinyl graphics are printed on adhesive vinyl and applied to the tent surface. They work on any fabric type, and they’re easier to replace if you need to update your branding. The downsides are visible edges, potential peeling at corners, and a slightly less premium look. For temporary events or budget-conscious projects, vinyl is perfectly acceptable.
Full-wall printing — The most impactful branding option is printing on the side walls. A 10×10 tent with four printed walls gives you a large amount of advertising space. This is where a tent display model — the term for a tent configured specifically for branded display — earns its keep. You’re not just buying a shelter; you’re buying a mobile billboard.
Aksesoris — Beyond printing, consider:
- Lighting — LED string lights, floodlights, or backlit graphics. Lighting extends your event presence into evening hours and dramatically improves the perceived quality of your space.
- Dinding samping — Full walls, half walls, or window walls. Full walls give you weather protection and branding space. Half walls keep the space open while providing some shelter. Window walls are great for product displays that need natural light.
- Flooring — Snap-together flooring tiles or roll-out carpet. This is often overlooked but makes a huge difference in perceived quality. A tent with proper flooring looks intentional; a tent on bare ground looks temporary.
- Weight bags — Integrated ballast systems that attach to the frame. Much better than improvised solutions.
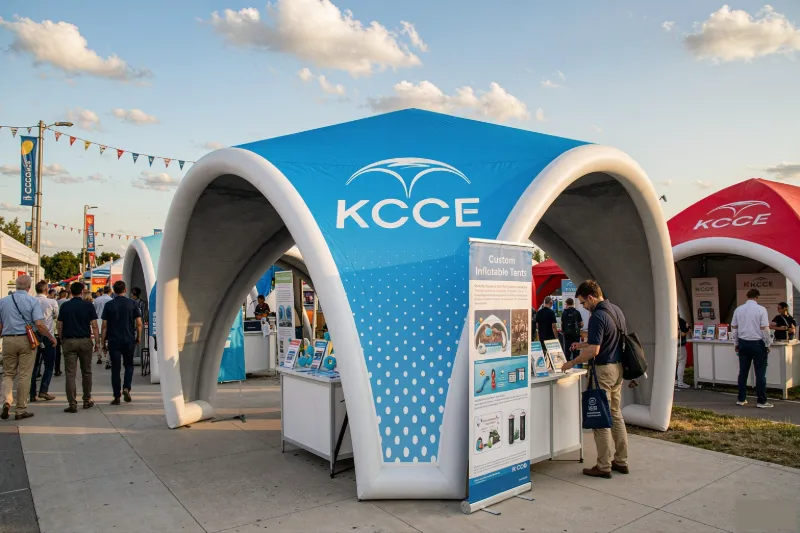
If you’re exploring inflatable options for faster setup, KCCE’s tenda tiup line is worth a look — inflatables set up significantly faster than traditional frame tents, though they have different wind characteristics and require an air blower running during the event.
Cost Breakdown: Why Prices Vary So Much
Let’s talk money. You can buy a 10×10 canopy tent for $200, or you can spend $3,000 on a professional frame tent with printed graphics. Both will technically provide shelter. The difference is in what happens after the first season.
Here’s what drives the price:
Frame gauge — Thicker wall aluminum costs more but resists bending and fatigue better. A frame that uses thinner wall tubing will be cheaper and lighter than one using thicker wall tubing. — but it will also be more prone to bending under wind load or rough handling. This is the single biggest differentiator between cheap and premium frames.
Fabric denier — Higher denier means thicker, stronger fabric. A higher-denier polyester is noticeably more durable than a lower-denier one. PVC-coated fabrics add another layer of cost but also add waterproofing and UV resistance.
Print quality — Dye-sublimation printing is more expensive than vinyl application, but the result is dramatically better for branding purposes.
Garansi — A manufacturer that offers a 3-year or 5-year warranty is signaling confidence in their product. That warranty is baked into the price. It’s usually worth paying for.
Merek — Yes, you’re paying for the name. But brand reputation in this industry correlates with actual quality control, customer support, and replacement part availability. A no-name tent that fails at a critical event costs you more than the money you saved.
Rental vs. purchase — If you exhibit once or twice a year, renting might make sense. You avoid storage costs, maintenance, and the risk of the tent aging. But if you exhibit regularly, purchase pays off quickly — Typically within a few events, depending on rental rates in your area.
Here’s a tent price comparison to think about: A lower-priced tent might last a few seasons with light use, while a higher-priced tent might last longer with regular use. The cost per event is roughly the same — but the $2,000 tent looks professional from day one, while the $500 tent starts looking tired after the first season. The premium tent also holds resale value if you ever upgrade.
For a large outdoor exhibition tent, the price scales non-linearly. A 20×20 costs more than twice a 10×10 because the structural requirements increase with span. Plan your budget accordingly.
Setup Time and Labor Requirements
Nobody talks about this enough, but setup time is a real cost — and it’s often the difference between a smooth event and a stressful one.
Canopy tents — 2 people, 10-15 minutes. This is the big selling point of pop-up canopies. You literally unfold, extend, and lock. No tools required.
Small frame tents (10×10 to 10×20) — 2-3 people, 30-45 minutes. The frame assembles in sections, and the fabric drapes over and attaches with hook-and-loop or bungee connections. Doable by the event staff with minimal training.
Medium frame tents (20×20 to 20×40) — 4-6 people, 2-4 hours. This is where professional help starts to make sense. The frame sections are heavy, and alignment becomes critical. Mistakes at this scale are expensive to fix.
Large exhibition tents (30×30 and up) — Professional installation crew, 1-2 days. This is not a DIY project. The engineering, the rigging, and the safety considerations all require trained personnel.
Here’s a tip from experience: whatever the manufacturer says about setup time, add 50% for your first deployment. You’ll get faster with practice, but the first time is always slower than advertised.
Also consider: does the tent require tools? Some frames use captive pins that need no tools; others use bolts that require wrenches. Tool-free assembly is worth paying extra for — you won’t believe how easy it is to lose a critical wrench in the chaos of event setup.
Quick Decision Checklist
Before you make a purchase, run through this checklist. If you can answer these questions with confidence, you’re ready to buy.
Frame questions:
- Is the frame aluminum or steel? (Aluminum for most applications)
- What is the wall thickness of the main tubing?
- Is the frame engineered for the wind conditions in your region?
- Does assembly require tools, or is it tool-free?
Fabric questions:
- What is the fabric weight (denier)?
- What is the hydrostatic head rating for waterproofing?
- Does the fabric meet fire retardancy standards (CPAI-84, DIN 4102 B1, or M2)?
- How many years of UV exposure is the fabric rated for?
Anchoring questions:
- What anchoring system is included with the tent?
- What is the recommended ballast weight for your tent size?
- Does the anchoring system work on the surfaces where you’ll exhibit?
Sizing questions:
- Does the tent size match your booth space allocation?
- Is the ceiling height adequate for your planned displays and lighting?
- Have you added 20% to your initial size estimate?
Branding questions:
- What printing method will you use (dye-sublimation vs. vinyl)?
- Does the tent allow for full-wall printing?
- What accessories (lighting, walls, flooring) do you need?
Vendor questions:
- What warranty does the manufacturer offer?
- Are replacement parts available? How long does shipping take?
- What is the manufacturing lead time?
Storage and transport:
- Does the tent come with a storage bag or case?
- What are the packed dimensions? Will it fit in your vehicle?
- Does the tent need to be completely dry before storage?
Inflatable Alternatives: When to Consider Them
Now, I know some of you are thinking: “What about inflatable tents?” Fair question. They’re a legitimate category, and for certain applications, they’re the right answer.
Inflatable tents use air beams instead of rigid frames. They set up in minutes — literally inflate and go. They’re dramatically lighter than frame tents for transport, and when deflated, they pack into a fraction of the volume.
The trade-offs are real, though. Inflatables require a constant air supply (usually a blower running the entire event). They’re more vulnerable to punctures and tears. And in high winds, they can be less stable than rigid-frame tents — though modern designs with proper anchoring have narrowed this gap significantly.
A company like KCCE specializes in inflatable solutions, including tents, furniture, and display shapes. Their Air Tight X Tent, designed back in 2008, was engineered to be airtight, waterproof, and bug-proof — which shows how far inflatable technology has come. For events where speed of setup and portability are the top priorities, an inflatable might be the better choice than a traditional frame tent.
But for most exhibition applications, where branding quality and structural rigidity matter most, a well-built frame tent remains the standard. My advice: consider inflatables for quick-turnaround events or situations where transport logistics are tight. Choose a frame tent when you need the best possible branding surface and the most predictable weather performance.
Pertanyaan yang Sering Diajukan
Q: What is the best outdoor exhibition tent for windy conditions?
A: The best option for windy conditions is a heavy duty outdoor exhibition tent with an aluminum alloy frame, high-quality PVC-coated fabric, and a robust anchoring system. Look for manufacturers who provide tested wind ratings — reputable brands typically rate their tents for 60-70 mph winds when properly anchored. The frame geometry matters more than the brand name; a well-braced frame with adequate ballast will outperform a heavier frame with poor anchoring.
Q: How do I choose between a canopy tent and a frame tent for events?
A: Choose a canopy tent for quick, temporary setups where portability is the priority — think one-day events, markets, or pop-up activations. Choose a frame tent for multi-day exhibitions, branded trade show appearances, or any situation where you need clean, uninterrupted interior space. Frame tents cost more and take longer to set up, but they offer better branding surfaces, higher wind resistance, and no center poles blocking your display.
Q: What size outdoor exhibition tent do I need for a standard trade show booth?
A: A 10×10 foot tent is the standard trade show booth size and works well for a display table and product shelving. If you need room for a meeting area or product demonstrations, step up to a 10×20. For anything larger, consider a 20×20, which gives you space for multiple zones. Always add about 20% to your initial estimate — going bigger is almost always the right call.
Q: How do I secure a large outdoor exhibition tent properly?
A: Use a combination of anchoring methods appropriate to your surface: stakes for grass, ballast weights for hard surfaces, and auger anchors for long-term installations. The rule of thumb is that you need enough weight to counteract wind lift on the tent’s surface area — For a 20×20 tent, that’s typically a significant amount of ballast distributed across the frame legs. Never rely on stakes alone on hard surfaces.
Q: How long does a quality outdoor exhibition tent last?
A: With proper care and storage, A quality frame tent should last many years, and the aluminum frame can last even longer. The fabric is typically the limiting factor: Expect to replace polyester fabric every few years and PVC-coated fabric every several years., depending on UV exposure and how often the tent is used. Always dry the tent completely before storage to prevent mildew.
Q: Why is a custom exhibition tent so much more expensive than a plain one?
A: The cost difference comes from three factors: frame quality (thicker aluminum costs more), fabric quality (higher denier and PVC coating add cost), and printing (dye-sublimation printing is more expensive than vinyl application but looks dramatically better). A $500 tent and a $2,000 tent may look similar in a showroom, but the difference shows up in wind resistance, print durability, and lifespan.
Q: Can I use a pop-up tent for professional exhibitions?
A: You can, but it’s usually not the best choice. Pop-up canopy tents are fine for casual events, but they lack the wind resistance, branding quality, and interior space of a proper frame tent. If you’re representing your company at a trade show, the tent is part of your brand presentation — a wobbly pop-up with peeling graphics sends the wrong message. Invest in a proper frame tent for professional appearances.
Q: What is the difference between a heavy duty tent and a standard tent?
A: A heavy duty outdoor exhibition tent uses thicker frame tubing, higher denier fabric, and stronger connectors than a standard tent. This translates to better wind resistance, longer lifespan, and the ability to withstand repeated setup and takedown cycles. Heavy duty tents also typically have better warranties and are designed for commercial use — they’re built to be used dozens of times per year, not once or twice.
Referensi
1. Tents for big events – RÖDER – RÖDER HTS Hochenperatur Systeme GmbH
2. Outdoor Exhibition Tents: Ultimate Guide For Its Types & Features – Economy Tent International
3. Large A-Shaped Tent for Trade Shows & Exhibitions – Shoulder Tent
4. How To Choose The Specifications Of Outdoor Exhibition Tents – Tendars Tent
5. Outdoor Trade Show Tents: What to Know Before You Buy – DisplayPro







