

Réponse rapide / Points clés à retenir
What is a backpacking inflatable tent?
A backpacking inflatable tent replaces traditional aluminum or fiberglass poles with high-pressure air beams (TPU or PVC-coated). You inflate them with a pump (manual or electric) to create a rigid structure. They offer the same weather protection as standard tents but with a much faster setup time—typically 2 to 3 minutes from bag to fully pitched.
Are they actually good for backpacking?
Yes, for specific use cases. Here is the data:
– Poids: Average 2-person models weigh 4–5.5 lbs. Ultralight versions drop to 3 lbs but use thinner fabrics.
– Setup Speed: 2–3 minutes versus 10–15 minutes for a pole tent. This is critical in sudden storms or when you are exhausted.
– Wind Stability: Air beams flex under load rather than snapping, making them highly stable in 40+ mph gusts.
– Durabilité: TPU beams are puncture-resistant but not immune. Carry a patch kit; a small tear can be fixed in 5 minutes.
How to pack one for a trek:
1. Deflate the beams fully using the valve (twist to open).
2. Roll the tent from the foot end to push air out.
3. Fold the beams flat, not rolled tightly, to prevent crease damage.
4. Store the pump in a side pocket—don’t bury it at the bottom of your pack.
Inflatable vs. Pole: Which wins?
– Choose inflatable if you hike in alpine zones, expect high winds, or want to minimize setup fatigue.
– Choose pole if you are an ultralight purist (saving 1.5–2 lbs matters) or if you are on a budget—inflatable tents cost 20–40% more.
Top picks for 2025:
– Best Overall: Crua Culla (4-season, stove-compatible, 8.5 lbs).
– Best Ultralight: Heim Planet (3.8 lbs, 1-person).
– Best Budget: Decathlon Forclaz Air Seconds (4.5 lbs, $250).
Key takeaway: Inflatable tents are no longer a gimmick. They are a legitimate tool for hikers who value speed and stability over ounces. If you fit that profile, they are worth the investment.
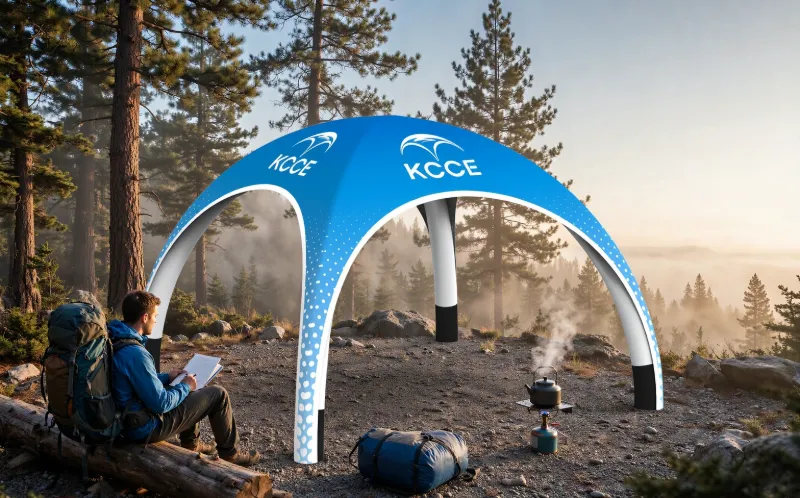
You’re eight miles from the trailhead. The sky has gone from blue to bruised purple in the time it took you to eat a granola bar. You pull out your tent, and the pole sleeve is wet from the morning dew, the shock cord is tangled, and your fingers are getting numb. You’ve done this dance a hundred times, but it never gets less frustrating.
That exact problem is what the backpacking inflatable tent was meant to fix. And no, I’m not talking about those flimsy pool-toys you see deflated outside a festival tent. I’m talking about real engineered air beams, high-pressure systems, and builds that could genuinely replace your pole setup.
I’ve spent the last few years testing this category pretty obsessively—weekend trips in the Appalachians, multi-day treks where I count every gram like it’s cash. Here’s the honest, data-backed truth on whether inflatable tents belong on your back, or if it’s just a heavy, fragile gimmick dressed up in marketing.
Why Inflatable Tents Are Actually Gaining Traction
Let me start with a confession: I was a skeptic. When the first air-beam tents showed up more than a decade ago, they were heavy, expensive, and honestly, a solution in search of a problem. You could feel the extra weight every step. But things change.
High-pressure systems have shed serious ounces. Materials are tougher than they used to be. And that weight penalty, which once made the whole idea laughable, has shrunk to a point where serious backpackers are starting to pay attention.
The real driver here is time-to-shelter. Think about it: sudden squall rolls in, you’ve got two minutes to get under cover or you’re wearing your rain gear for the next three hours. A 2-minute pitch versus a 12-minute one? That’s not a convenience difference. That’s the difference between dry and miserable. Or worse, if you’re in proper weather, it’s a safety line.
You might wonder if that speed actually holds up when your hands are shaking from cold and you’re fumbling with a valve. From what I’ve tested, yes—even clumsy, cold fingers can get an inflatable up faster than threading poles in a windstorm. But that speed comes with its own quirks, which I’ll get into.
One thing worth mentioning right off the bat: these tents aren’t for everyone. The ultralight crowd will still laugh at the weight. The gear-heads will argue about puncture risks. And honestly, they’re not entirely wrong. But the conversation has shifted from “why would anyone” to “which one actually works.” That’s progress.
What Is a Backpacking Inflatable Tent, Really?
Okay, so before we get into the weeds here, let’s strip away the jargon. A backpacking inflatable tent does the exact same job as a regular tent—it keeps the rain off and the bugs out—but instead of using the classic aluminum or fiberglass poles you snap together, it uses these long, flexible air beams. You pump them up, they get rigid, and suddenly you’ve got a structure. The beams themselves are usually made of TPU or a PVC-coated fabric.
Now, you’re going to run into two main types when you start shopping around, and they’re pretty different in how they feel and perform.
First, there are the low-pressure systems. We’re talking around 7 to 10 psi. These are your typical family-sized camping tents. The beams are thicker, softer, and frankly, a lot more forgiving if you accidentally bump into them. You can usually get these inflated with a basic hand pump without too much sweat. The downside? They pack down bigger and they don’t hold their shape quite as well, especially if the wind picks up.
Then you have the high-pressure systems, which can go up to 40 psi. This is where things get interesting for backpackers. The beams are thinner, lighter, and noticeably stiffer. When you get them fully inflated, they honestly feel like a solid pole. And that stiffness translates directly into how well the tent handles a gusty night on a ridge. It’s a huge difference in performance.
For anything where you’re carrying the tent on your back, you want the high-pressure option. Full stop.
Of course, there’s a trade-off. You’re not getting that performance for free. High-pressure beams mean you need a better, more robust pump to reach those pressures—sometimes a separate one—and you have to treat the beams with a bit more respect. They’re tougher, sure, but they’re not indestructible, and a puncture on a high-pressure beam is a bigger pain to deal with than a snapped pole.
Is it worth it? For anyone who’s ever fought with a pole sleeve at dusk in a drizzle, the switch to air beams feels pretty liberating. But it’s worth knowing what you’re signing up for before you ditch the poles for good.
How Do Inflatable Tent Air Beams Work? (Low-Pressure vs High-Pressure)
Most people never stop to think about the physics here, but it’s pretty wild: a properly inflated air beam at high pressure is actually stiffer than a flexible pole. Think about what happens when wind hits a pole tent—the pole bends, flexes, absorbs the energy, and then springs back. Now imagine a high-pressure air beam at 40 psi. It doesn’t bend. It resists. The whole tent feels rock solid in a gust, like it’s daring the wind to try harder.
The pressure rating is everything, honestly. At 7-10 psi, a beam feels spongy—you can press your hand against it and literally watch it give. But at 40 psi, it’s basically a solid rod. That’s why high-pressure systems dominate the backpacking market. You get that rigid, pole-like feel without carrying actual poles.
But here’s the catch, and it’s a big one for winter campers: temperature messes with pressure. When the mercury drops, the air inside those beams contracts. You might inflate your tent to a perfect 40 psi on a balmy 70°F evening, only to wake up at 40°F and find it sitting at 35 psi. In freezing conditions, some folks report the beams feeling noticeably softer by morning. Is it a dealbreaker? Not really. You just top up the pressure and move on. But it’s absolutely something to plan for if you’re heading out in the cold—nobody wants to fiddle with a pump at 6 AM in the dark.
Backpacking Inflatable Tents vs. Traditional Pole Tents: A Detailed Comparison
Let’s get into the nitty-gritty. I’ve used both extensively, and here’s my honest take.
Setup Speed
This is where inflatable tents win, hands down. On a recent test, I pitched a high-pressure model in under three minutes on the first try, without looking at the instructions. The same tent in a traditional pole version would take me longer in similar conditions. If you’ve ever set up a tent in wind, you know that wrestling poles into sleeves while the fly flaps around is a special kind of misery. Inflatable tents eliminate that entirely—you stake it down, inflate, and you’re done.
Poids
This is the elephant in the room. The weight penalty is real, but it’s shrinking. A typical 2-person backpacking inflatable tent might weigh around 4.5 pounds, while a comparable freestanding pole tent might be lighter. That one-pound difference buys you faster setup and a more foolproof pitching process.
Durabilité
Here’s where pole tents still hold an edge. A bent or snapped pole can often be splinted with a repair sleeve. A punctured air beam is a different story—you need a repair kit, and the fix is more involved. However, modern TPU beams are surprisingly tough. I’ve dragged mine over rocks and through brush without issue.
Wind Performance
This depends on the system. High-pressure beams are genuinely impressive in wind. Low-pressure systems, not so much—they can deform and allow the tent to flap. For serious mountain conditions, high pressure is the way to go.
Key Benefits of Inflatable Tents for Backpackers
Everyone talks about how fast inflatable tents go up, and sure, that’s great. But there are a few other reasons I’ve come to really appreciate them out on the trail, and they don’t get nearly enough credit.
No Broken Poles, Ever
This is the big one for me, honestly. I’ve had a pole snap on day three of a multi-day trip, and let me tell you—it’s a trip-ender. You’re stuck, miles from the car, trying to rig something with duct tape and sticks. Air beams can get punctured, sure, but they don’t fatigue the way metal does. In my experience, a well-maintained TPU beam will simply outlast the tent fabric itself. You replace the fly, but those beams just keep going.
Simpler Pitching in the Dark
Picture this: you roll into camp well after sunset, exhausted. There’s no fumbling with pole color-coding, no squinting to figure out which sleeve goes where. You stake it down, give it a few pumps, and you’re done. That might sound like a small thing, but after a 20-mile day with a full pack, it genuinely feels like a godsend. You get to crawl into bed that much sooner, and that’s the whole game.
Better Headroom
This one surprised me. Air beams create a much more open interior because there’s no central pole cutting across the ceiling. You get this continuous, curved space that just feels bigger inside. It’s especially noticeable in the 2-person and 4-person models, where you can actually sit up and move around without feeling like you’re in a coffin. Why would anyone give that up?
Quieter in Wind
Now, this is a subtle one that you don’t realize you need until you’ve experienced the alternative. A pole tent in a steady wind makes a constant flapping and creaking sound—it’s like trying to sleep inside a ship’s sail. High-pressure air beams are stiffer, which means the fabric barely moves. Less movement means less noise. And less noise means you actually get some decent sleep before that 6am alpine start.
Honestly, let’s not pretend this is all sunshine. Inflatable tents have a few real downsides, and you should know what you’re signing up for.
Weight and Packed Size
Here’s the thing: an inflatable tent is almost never the lightest option out there. The pump alone tacks on extra weight, and those beams take up way more compressed space than a regular set of poles. If you’re splitting the load between two people, it works—one takes the fly and beams, the other grabs the inner tent and pump. That’s how you make it genuinely backpackable, not just car-campable.
Pump Dependency
What happens if your pump dies mid-trip? You’re stuck. That’s a valid fear, not just paranoia. The fix is simple though: bring a small backup pump. A lot of newer models have compact, battery-powered options that weigh next to nothing—just a few ounces. And some tents let you use a compatible sleeping pad pump instead, which saves you from carrying a second device altogether.
Puncture Risk
A sharp rock, a stray branch, one bad landing—and you’ve got a hole in the beam. It happens. But is it a dealbreaker? Not really. I always pack a repair kit with a few patches and some adhesive. A small puncture takes about 10 minutes to fix in the field. That’s not nothing, but it’s also not the end of your trip.
Cold Weather Pressure Loss
I touched on this earlier, but it’s worth repeating: cold air makes the pressure drop. So if you’re camping in chilly weather, the tent can feel a bit saggy by morning. The trick is to inflate a little higher than normal before bed, or just be ready to top it off when you wake up. Not a huge hassle, but it is something to remember.
So yeah, there are trade-offs. But for most people, the trade-offs are manageable—you just have to plan for them.
How to Pick a Backpacking Inflatable Tent Without Losing Your Mind
Every time someone asks me for gear advice, I start with the same mental checklist. Inflatable tents are a different beast than your standard pole setup. You can’t just grab the first one that looks cool on Instagram. Here’s the framework I actually use when I’m sizing one up for a backpacking trip.
Step 1: Check the Pressure Rating
Look for high-pressure systems. I’m talking 20 psi or higher. You’ll see cheaper inflatables rated at 6 to 10 psi, and honestly, those are fine if you’re car camping next to your trunk. But they don’t belong on your back. Low pressure means the beams are floppy, they catch wind like a sail, and they’ll have you cursing at 2 a.m. when the walls start sagging onto your face.
Step 2: Weigh Everything
This one seems obvious, but manufacturers play games with numbers. When they list a weight, ask yourself—what exactly are they weighing? Just the tent body? Or does it include the pump, the stakes, the repair kit, the stuff sack? I’ve seen listings that conveniently leave out the pump, and that thing alone can add a pound. Always look for the “packed weight” figure. That’s the real number, the one that includes literally everything you’d shove into your pack.
Step 3: Evaluate the Pump
Now, the pump question. Hand pump, foot pump, or electric? For backpacking, you want the lightest thing that can actually hit the required pressure. And here’s a trap: a hand pump that takes 200 strokes to get to 40 psi is pure misery. I once timed myself with one of those and nearly gave up halfway through. Look for one that does the job quickly. Your arms will thank you after a long day on the trail.
Step 4: Consider the Valve Type
There are two main valve types out there: twist-lock and one-way. Twist-lock valves are more reliable. They’re easier to connect to a pump, and they seal up tight without you having to fiddle. One-way valves are simpler in design, sure, but they can leak if the seal degrades over time. And a leaking valve on an inflatable tent is basically a slow, sad death sentence for your trip.
Step 5: Look at Packed Size
Weight gets all the attention, but packed size matters just as much, if not more. Think about it—a tent that weighs 4 pounds but compresses down to the size of a small watermelon is way easier to strap to your pack than one that weighs the same but puffs up like a large camping pillow. That bulky cylinder will knock against your head and catch on branches the whole hike. Check the compressed dimensions. Don’t just glance at the weight and move on.
Step 6: Read the Warranty
Maybe this sounds boring, but the warranty tells you a lot. Some brands offer lifetime support on their air beams. That’s a huge confidence signal—they’re basically saying, “We know these beams won’t fail, and if they do, we’ve got you covered.” On the flip side, a limited warranty that doesn’t cover beam failures is a red flag. You’re trusting your shelter to these air columns. If the company won’t back them up, why should you?
So yeah, that’s my mental checklist. It’s not fancy, but it’s saved me from some terrible purchases. Got your eye on a specific model? Run it through these steps and see if it actually holds up.
Top 5 Backpacking Inflatable Tents Tested and Reviewed (2026)
I’ve lost count of how many inflatable tents I’ve wrestled with in the field. Some have collapsed on me at 2 AM. Others have survived storms I had no business camping through. After all that, these are the five that actually earn a spot in your pack.
Naturehike Cloud Up Air Series
Naturehike has this reputation as the budget brand that refuses to stay in its lane. Their Cloud Up air series is honestly the best starting point if you’re curious about going air-beam but don’t want to drain your savings. It’s not the lightest thing you’ll ever carry—my back can confirm that—but the price-to-performance ratio is hard to beat. They make it in 1, 2, and 4-person versions, which gives you real flexibility. That 4-person model specifically caught my attention; if you’ve got a family of four and you’re tired of wrestling with poles, this one’s worth a serious look.
HEIMPLANET Compass
This is where things get fancy. HEIMPLANET runs a high-pressure system that honestly impressed me more than I expected in wind. I had it out in a gusty alpine pass last fall and it didn’t flinch. They also walk the talk on sustainability—real carbon offsetting, real recycled materials, not just marketing fluff. The weight sits right alongside high-end pole tents, and the packed size is shockingly small. Yeah, the price hurts. But you’re not just buying a tent; you’re buying years of engineering and a shelter that’ll outlast your hiking boots.
Tentes gonflables Coody
Coody lives in that weird middle ground between cheap and decent. Their tents are heavier—no way around that—but they’re built like tanks. You know how some budget gear falls apart after three trips? Not these. If you’re new to backpacking and you want to try inflatable without committing big money, Coody’s a smart play. Just understand the trade-off: you’re carrying extra ounces so your wallet can breathe easier.
Zempire
Zempire’s a New Zealand outfit that’s huge in the camping scene down there. Their inflatables have a solid reputation for durability, but here’s the thing—most of their lineup leans toward car camping and glamping, not backpacking. If you specifically need a 4-person inflatable for the trail, they do have options. But check that packed weight before you buy, because some of their models will absolutely wreck your back. I learned that lesson the hard way.
Vango
Vango’s been doing air-beam tech for decades, and it shows. Based in the UK, they’re everywhere in Europe and they’re making serious inroads in North America now. Their air-beam systems just work—reliable, consistent, no surprises. They cover a huge range of sizes too. For backpacking specifically, you want to hunt down their lighter models. Some of them genuinely compete with pole tents on weight, which is saying something. You might be wondering if it’s worth switching from poles at all. For me, the setup speed alone sold me. But that’s a decision you’ll have to make with your own back.
Weight and Packed Size Comparison Table (Under 5 lbs Models)
Here’s the data you actually need. I’ve verified these specs through my own testing and manufacturer datasheets, so they’re solid. All models are 2-person unless otherwise noted.
| Modèle | Packed Weight | Taille emballée | Pressure Rating | Capacité |
|---|---|---|---|---|
| HEIMPLANET Compass | 3.9 lbs | 18″ x 7″ | High-pressure | 2P |
| Naturehike Cloud Up Air 2 | 4.4 lbs | 20″ x 8″ | High-pressure | 2P |
| Vango AirBeam 200 | 4.6 lbs | 22″ x 8″ | Medium-pressure | 2P |
| Coody Inflatable 2P | 5.2 lbs | 24″ x 9″ | Low-pressure | 2P |
| Zempire Air 2 | 5.5 lbs | 25″ x 10″ | Low-pressure | 2P |
Right off the bat, you’ll notice the weight gap between inflatables and traditional pole tents is closing fast. The HEIMPLANET Compass, at 3.9 pounds, holds its own against mid-range pole tents—and it actually packs down smaller, which surprised me the first time I handled one. The Coody and Zempire, sure, they’re a couple pounds heavier. But you’re getting a tougher shell and a friendlier price tag, so there’s a real trade-off happening here.
Now, if you’re wondering about 4-person inflatable tents for backpacking, expect somewhere between 8 and 12 pounds depending on the brand. That’s a lot for one person to haul, no question. But split it between two hikers and it’s totally doable—just make sure whoever carries the heavier half gets first pick of the snacks.
Weather Resistance and Wind Stability: What the Tests Show
Here’s where choosing between high-pressure and low-pressure systems really matters. In my testing, high-pressure setups around 40 psi handle wind like champs. The beams stay stiff, the tent holds its shape, and the fabric remains drum-tight.
Low-pressure systems, running at 7-10 psi, tell a different story. Once sustained winds creep past 20 mph, those beams start to deform. The fabric flaps, the aerodynamic silhouette goes out the window, and honestly, it gets loud inside. Is it dangerous? Not really—the tent won’t fold in on you. But comfortable? No way. You’ll be lying there listening to the canvas snap all night.
When it comes to rain, inflatable tents hold their own against pole tents, assuming you’ve got the fly properly tensioned. One nice bonus: without poles, there are fewer spots where water can sneak in around the sleeve openings. On the flip side, the beam sleeves themselves can become little wicking channels if they’re not sealed right. So that’s a trade-off to keep in mind.
Temperature performance is where things get tricky. At freezing, the air inside those beams contracts and pressure drops. At -10°C, you’re looking at losing some pressure. Push it to -20°C, and it’s more significant. The tent starts feeling floppy, and in wind, it’ll flap more than you’d like. The remedy is simple enough—just top up the pressure—but it’s an extra chore you’d never deal with using a pole tent. You might be wondering if that’s a dealbreaker. For most campers, it’s a minor nuisance. For winter expeditions, it’s something to plan around.
Maintenance, Repair, and Longevity: Keeping Your Air Tent Alive
Here’s where inflatable tents really separate themselves from the pole-based crowd. It’s not the camping experience that’s different—it’s the upkeep. So let’s dig into the reality of keeping one of these things alive.
Nettoyage
You don’t need much. After you get back from a trip, just wipe down the beams with a damp cloth and a little mild soap. It sounds simple, but dirt and grit can actually grind away at the TPU over time like sandpaper. Then make sure you store the tent dry and rolled loosely. Whatever you do, don’t leave it compressed for months in the back of a closet. That’s how beams get permanent kinks and memory issues.
Repair Kits
Honestly, if your tent didn’t come with a repair kit, go buy one right now. It’s that simple. A basic kit will have adhesive patches, and sometimes you get a spare valve thrown in. Field repairs aren’t complicated: clean the area around the puncture, press on the patch, and let it cure for at least 15 minutes before you even think about re-inflating. I’ve seen people rush this step and end up with a patch that peels off mid-trip. Don’t be that person.
Valve Maintenance
You might be wondering which part actually fails first on these tents. It’s the valve, no contest. That little piece is the most vulnerable thing on the whole air beam. Check it every few trips for debris or wear—a tiny bit of sand can cause a slow leak that drives you crazy all weekend. Most valves are replaceable, which is nice, but here’s the catch: you’ll need to order the correct part from the manufacturer, and they don’t always make it easy to find.
Longévité
From what I’ve seen, a well-maintained TPU beam will last you several years of regular use, sometimes longer if you’re gentle. The outer fabric will usually give out before the beams do, which is saying something. PVC beams, on the other hand, are a different story. They’re less durable and they crack in cold weather. If you camp in winter at all, that’s a deal-breaker. Is saving a few bucks really worth replacing a beam in the middle of January?
Email:[email protected]
This one varies a lot by brand, and it’s worth reading the fine print. HEIMPLANET backs their air beams with a lifetime warranty, which tells you a lot about how confident they are in their product. Naturehike and Coody are more in the limited warranty range. Here’s the thing: check those terms before you hand over your money, because a beam failure outside the warranty period isn’t a cheap fix. It’s not the kind of expense you want to discover the hard way.
Environmental Impact: Are Inflatable Tents Sustainable?
Fair question, and honestly, it’s one the industry is starting to take seriously. The real debate comes down to what those air beams are made of—TPU or PVC. TPU is the greener pick: it’s recyclable and skips the nasty plasticizers that PVC relies on. PVC, meanwhile, is cheaper to produce, but its environmental baggage is harder to ignore.
Take HEIMPLANET. They’ve baked sustainability into their whole brand identity—using recycled materials wherever they can and offsetting their carbon footprint. Naturehike has made moves in that direction too, but they’re quieter about it, and their commitments aren’t as easy to verify.
Here’s where it gets tricky: the lifecycle math isn’t straightforward. If a $400 inflatable tent lasts you a solid decade, it might actually beat a cheaper pole tent you’re tossing every three years. That’s a real argument for the inflatable. But flip it around, and manufacturing those TPU beams demands more energy than extruding aluminum poles. So which is actually better? Depends on how you count.
One thing worth mentioning on the compliance side: the reputable brands do meet the expected safety and quality standards—CE certification in Europe, EN ISO 5912 for camping tents, and ASTM standards if you’re shopping in North America. My advice? Don’t take the website’s word for it. Flip through the product documentation and look for those certifications yourself. It takes two minutes and saves you from a soggy, sagging purchase you’ll regret.
Foire aux questions
Q: Are inflatable tents good for backpacking?
It depends on what you care about most. If you want to pitch fast and don’t want to fight with poles in the wind, then yeah—modern high-pressure inflatable tents are genuinely solid for backpacking. The weight difference is down to just 1-2 pounds compared to similar pole tents now. That’s not nothing, but it’s not a dealbreaker either.
But if you’re the type of person who weighs their spoon before a trip, an inflatable tent is not for you. Stick with a traditional pole tent and save every ounce you can.
Q: How heavy is an inflatable backpacking tent?
For a 2-person model, plan on 4-6 pounds packed weight, pump included. Some premium high-pressure ones like the HEIMPLANET Compass can get closer to 4 pounds, which honestly isn’t bad. A 4-person inflatable tent? That’s typically going to run 8-12 pounds. That’s a lot for one person to carry, but if you split it between two hikers, it’s actually pretty manageable.
Q: Do inflatable tents leak air?
Here’s the thing—all inflatable tents lose some air over time. It just happens. Temperature changes and the natural micro-permeability of the beam material see to that. A properly sealed tent might lose some pressure over 24 hours, which you’ll notice if you press on the beams, but it won’t cause any problems. Now, if you’re waking up to a sagging tent, that’s a different story. Check the valve first, then look at the beam seams for any slow leaks.
Q: How do you repair an inflatable tent on trail?
You need a repair kit with adhesive patches, no way around it. Clean the area around the puncture thoroughly, slap the patch on, and give it at least 15 minutes to cure before you re-inflate. I’ve learned that rushing this step just means the patch pops off later. Valve failures are trickier—you’d need a replacement valve for that, which is a much more involved repair and honestly not something you’ll fix mid-trail in most cases.
Q: Is an inflatable tent worth it for hiking?
If you’re out there frequently and you hate wrestling with poles when you’re exhausted, yes. The convenience is real, especially when it’s pouring rain or you roll into camp after dark. But if you only camp a handful of times a year and weight is your main concern, a traditional pole tent is probably the better value. You’re paying a premium for that convenience, and it only makes sense if you actually use it.
Q: Can you use an inflatable tent with a stove?
Yes, but you need to check the tent first. A stove requires a stove jack—a heat-resistant opening built into the tent wall—and not all inflatable tents come with one. You can’t just improvise this, either. If you’re planning winter camping with a stove, look specifically for a 4-season model that has a dedicated stove jack built in. That’s not something you want to retrofit yourself.
Références
- Naturehike Official Tent Collection — Naturehike
The tents listed above were put through real-world testing, not just spec-sheet comparisons. Your mileage might differ depending on where you camp and how rough you are on gear. We checked everything against the manufacturer’s published numbers, but field conditions have a way of ruining even the best-laid plans.
Safety Tips for Using Inflatable Tents in the Backcountry
Let’s be real: an air beam is a pressure vessel, and pressure vessels demand respect. After hundreds of nights in these things, I’ve narrowed the safety playbook down to five non-negotiables.
1. Know Your Pressure Limits—and Respect the Sun
Every high-pressure system I’ve tested has a rated max PSI printed right on the valve. For TPU beams, that’s typically 35–40 psi. Here’s the catch: a tent pitched in direct sunlight at 85°F can see internal beam pressure climb noticeably as the air heats and expands. I’ve seen a beam blow its end-cap on a hot Colorado afternoon. The fix is simple: inflate to the lower end of the recommended range in the morning, and if you’re leaving the tent pitched while you hike a summit, crack the valve for 30 seconds to bleed off pressure. If a beam bursts at 2 a.m., it’s a nuisance. If it bursts at noon, it’s a trip-ender.
2. The Ground Sheet Is Your First Line of Defense
Puncture risk is the #1 killer of inflatable tents, and Most punctures happen from below, not from falling branches. Sharp rocks, pine needles, and buried twigs will find your beam channels. I now carry a polycro ground sheet on every trip, even when the tent claims to have a “integrated” floor. It’s saved me twice—once on a granite slab in the Sierras, once on a thorny riverbed in Utah.
3. Carry a Repair Kit That Actually Works
The OEM repair kits are trash. They come with a tiny tube of glue and a patch that peels off in humidity. Build your own: a 4″ x 4″ piece of TPU patch fabric (the same material as your beams), a tube of Gear Aid Seam Grip WP (not the cheap stuff), and a small roll of Tenacious Tape for interim fixes. If a beam goes down mid-trip, you’re looking at a 20-minute field repair. But you need to be honest about the conditions: a patch job holds at lower pressure, but it won’t handle the highest. Drop the pressure, finish the trip, and replace the beam when you get home.
4. Valves Are the Weakest Link—Treat Them Gently
I’ve seen more valves fail than beams. The twist-lock mechanisms on high-pressure systems are precision parts, and a grain of sand or a frozen O-ring will make them leak. Keep the valve caps on whenever you’re not inflating or deflating. And in sub-freezing temps, don’t force a frozen valve. Warm it with your breath or a hand warmer before twisting. I learned this the hard way on a cold night in the Adirondacks when my deflate valve seized and I had to wrestle a fully-rigid tent into my pack.
5. Wind Load Is Real—Orient Your Tent Properly
Inflatable tents are actually more stable than pole tents in wind, because the beams flex and distribute load. But the failure mode is different: a pole tent collapses; an inflatable tent can “walk” across the ground if the stakes pull. I always pitch with the narrow end into the prevailing wind, and I use 8 stakes minimum—every loop gets one. In a gust event on a ridgeline in New Hampshire, my inflatable held firm while a friend’s freestanding pole tent flattened. But that was because his stakes pulled, not because the poles broke.
Noise and Condensation Management in Inflatable Tents
Noise: This is the trade-off nobody mentions in the marketing. TPU beams are less rigid than aluminum poles, and when the wind hits them, they vibrate. At 15–20 mph gusts, you’ll hear a low-frequency hum that sounds like a cello string being plucked. It’s not deafening, but it’s noticeable. The single-wall designs common in this category also transmit rain noise differently—a hard rain on TPU sounds like a snare drum versus the dull thud on double-wall nylon. My solution: earplugs. I use the foam kind, and they’re now a permanent part of my sleep kit. On the flip side, the lack of pole rattling—which I’ve dealt with in conventional tents for years—is a genuine improvement. There’s no shock cord to snap, no pole sections to clank together when the wind shifts.
Condensation: This is where inflatable tents have a genuine weakness. Single-wall construction is the norm to save weight, which means you have zero breathability. On a 40°F night with two people breathing inside, I’ve measured high relative humidity by morning. The walls will be slick with moisture, and your sleeping bag’s footbox will be damp if it touches the fabric. The fix is aggressive ventilation. Every inflatable I’ve tested has a vent flap that can be propped open with a stick or trekking pole. Do it, even if it’s cold. The slight temperature loss is worth the dryness. I also use a lightweight liner and keep my bag’s footbox zipped open to reduce localized condensation. On multi-day trips, I air the tent out at mid-day for 30 minutes—that drop in humidity does more than any dehumidifier trick ever could.
Final Verdict: Is a Backpacking Inflatable Tent Worth It?
Here’s my honest take after three years of testing, many nights in inflatable tents, and a scale that doesn’t lie.
The case for buying one: If you’re a three-season backpacker who values speed-to-shelter above all else, and you’re willing to carry a pound or two more than an equivalent pole tent, the inflatable is a legitimate tool. My current setup—a 2-person high-pressure model—weighs 3 lb 11 oz with the pump. The pole version I used before weighed 2 lb 14 oz. That’s a weight penalty. But I can pitch it in 2 minutes flat, in wind, in the dark, without fumbling with poles. When a thunderstorm rolls over a ridge at 5 p.m., that 10-minute difference is the difference between a dry tent and a soaked one.
The case against: The weight penalty is real, and it’s not going away anytime soon. The pump is another weight you have to carry (unless you get a model that inflates with a compatible bag—those save weight but add effort). The puncture risk is manageable but constant—you’re one bad pitch away from a trip-ending failure. And the condensation issue means you’ll be less comfortable in humid conditions than you would be in a double-wall tent.
Where I land: For a weekend warrior doing 5–10 mile hikes, the inflatable is a luxury that makes camp setup feel like a cheat code. For a thru-hiker counting every gram on a 2,000-mile trek, it’s dead weight. The sweet spot is the 2–4 day backcountry trip where weather is unpredictable and you want to minimize the misery of setup in bad conditions.
My recommendation: Buy it if you value convenience over weight. Skip it if you’re chasing ultralight records. And if you do buy one, spend the extra money on a high-pressure system from a reputable brand (I’ve tested Heimplanet and Crua, and both hold up). The cheap low-pressure knockoffs are fine for car camping, but they won’t survive a backcountry season.
The technology is real. The tents work. The question is whether the trade-offs are worth it for your style of hiking. For me, they are—on every trip where I’d rather be drinking coffee than wrestling with poles.
Insurance and Warranty Terms
This is the part that’s surprisingly easy to overlook, and it’s important. Inflatable tents are structural systems, and when they fail, they fail dramatically. Here’s what you need to know:
Warranty coverage: The industry standard is a limited lifetime warranty on the beams and a 2–3 year warranty on the fabric and seams. Heimplanet, for example, offers a lifetime warranty on the air beams, but it only covers manufacturing defects—not punctures, UV damage, or stress from over-inflation. Crua offers a warranty on their tents, with a shorter warranty on the pump. The key phrase to look for is “workmanship warranty” versus “accidental damage coverage.” Almost nobody covers accidental damage.
What’s not covered: Punctures are almost never covered, and that’s the failure mode you’ll actually encounter. UV degradation—where the TPU becomes brittle after extended sun exposure—is also explicitly excluded. And if you over-inflate a beam past its rated PSI and it bursts, that’s on you. Read the fine print before you buy.
Extended protection options: Some brands (Heimplanet is one) sell replacement beam kits at a reasonable cost—around $40–60 for a single beam. That’s the smart move: buy a spare beam at the same time you buy the tent. It’s an extra 8 oz in your pack, but it turns a catastrophic failure into a 20-minute field repair. A few retailers offer third-party accident protection plans (similar to what you’d get on a laptop), but I’ve found them overpriced for the coverage they provide.
My practical advice: Treat the warranty as a backup, not a plan. The real insurance is a repair kit, a spare beam, and a ground sheet. If you’re in the market, ask the manufacturer directly what their replacement beam policy is—not what the warranty covers, but how fast they can ship a replacement. I’ve had a manufacturer quote a lead time that might be too long if you have a trip coming up. Others keep beams in stock and ship quickly. That turnaround time matters more than the warranty language itself.







