

You just bought a dome tent. Now it’s 9 PM, it’s raining, and the poles look like spaghetti. We’ve all been there—standing in the dark, headlamp between your teeth, wondering if you accidentally bought a circus tent that requires a degree in structural engineering. Here’s the good news: learning how to set up a dome tent properly takes about fifteen minutes of actual practice, and after that, it becomes muscle memory. This guide covers setup, troubleshooting, and takedown in clear steps—no fluff, no jargon, just what works.
إجابة سريعة
Setting up a dome tent means laying out the body flat, assembling the poles into two or three crossing arches, threading them through the sleeves or clipping them to the frame, anchoring one end, then raising the arches so the tent pops into its signature dome shape before staking everything down and attaching the rainfly.
Before You Start: Site Selection & Prep
Let’s be honest: half of your dome tent setup problems aren’t tent problems at all. They’re site problems. I’ve watched people fight with a perfectly good tent for twenty minutes on a slope that would make a mountain goat nervous. Don’t be that person.
Find flat ground. Walk around the area and look for a spot that’s relatively level, free of rocks, roots, and anything that could puncture your floor. The small effort here saves you from waking up at 3 AM sliding into your camping partner.
Clear the debris. According to the Howcast guide on setting up a dome tent, the very first step is finding a clear, flat area and removing any rocks and debris before laying down a ground tarp. That’s not optional—that’s the foundation of everything that follows.
Check the wind direction. Position the tent so the narrow end faces the prevailing wind. A dome tent is actually pretty aerodynamic compared to cabin tents, but you still want to minimize the surface area the wind can push against.
Lay your footprint. A tent footprint—a ground cloth that sits under your tent—is one of those things beginners skip and veterans never do without. It protects your floor from wear and moisture, and it makes cleanup dramatically easier. If your tent didn’t come with one, a simple tarp cut slightly smaller than your tent’s footprint works fine.
Unpack and sort. Pull everything out of the stuff sack and lay it on the ground. You should have the tent body, the rainfly, poles, stakes, and possibly a footprint. Sort the poles by length if they’re different. Trust me, trying to figure out which pole goes where in the dark is not how you want to spend your evening.
How to Set Up a Dome Tent: Core Steps
Here’s the thing about dome tent setup: once you understand the logic of the frame, the whole process clicks. A dome tent is essentially two or three flexible poles that cross at the top, creating a self-supporting arch structure. The tent body hangs from or attaches to that frame. That’s it. Everything else is details.
Step 1: Lay Out the Tent Body Flat
Spread the tent body on your footprint or tarp with the door facing the direction you want. Make sure all zippers are at least partially open—this seems trivial, but a zipped tent creates air resistance that makes raising the poles much harder. You’re essentially fighting a sealed balloon at that point.
Step 2: Assemble the Poles
Now we get to tent pole assembly. Most dome tents use shock-corded poles—sections connected by an elastic cord inside. The cord keeps the sections together, which is great until you’re wrestling with a pole that keeps trying to reassemble itself mid-thread.
Connect the pole sections fully, making sure each joint is seated properly. A partially seated joint is a weak point that can snap under tension. According to KOA’s guide on setting up tents fast, understanding which type of tent you have—dome, tunnel, or A-frame—changes your approach to pole assembly, but the core principle remains: fully seat every joint.
Step 3: Insert Poles Through Sleeves or Clips
This is where dome tents split into two camps: sleeve-style and clip-style. Sleeves are fabric tunnels sewn into the tent body that the poles slide through. Clips are plastic or metal hooks that snap around the poles.
Sleeves: Start at one end and feed the pole through the sleeve gradually. Don’t push—pull the fabric over the pole instead. Pushing creates friction and can snag the pole on the fabric. If you’re asking how to put up a tent step by step, this is the step where most people get frustrated, so take your time.
Clips: Clip-style tents are genuinely faster. You assemble the poles, lay them across the tent body, and snap each clip onto the pole. The trade-off is that clip tents can be slightly less stable in high winds because the poles aren’t as integrated with the fabric.
If you’re wondering how to set up a tent with 3 poles, the process is the same—you just have one more arch to insert. The two main poles cross at the top, and the third pole often creates a porch or vestibule area.
Step 4: Anchor One End, Then Arch the Poles
Here’s the sequence that saves you from frustration: stake down one corner of the tent body before you raise the poles. This anchors the tent so it doesn’t slide around while you’re working.
Once one end is anchored, take the end of a pole and insert it into the grommet or pin at the tent’s corner. Then walk the pole around to the opposite corner, bending it into an arch as you go, and seat it in the opposite grommet. The dome tent frame will start to take shape immediately.
Repeat with the second pole, crossing it over the first. If you’re doing a three-pole dome, the third pole typically goes perpendicular or creates the vestibule.
Step 5: Attach the Tent Body to the Frame
With the frame standing, now you attach the tent body. If you’re using sleeves, you should have threaded the poles through before raising them. If you’re using clips, this is when you snap everything into place.
Tent clips vs sleeves is a genuine debate in the camping community. Clips are faster and easier to repair. Sleeves distribute stress better and perform better in wind. Neither is wrong—it’s about what matters more to you.
Step 6: Stake the Corners, Then the Center Points
Staking a dome tent follows a specific order: corners first, then the center points on each side. This creates even tension across the fabric and prevents wrinkles and flapping.
Pull the corner stake loops taut before driving the stakes in at a 45-degree angle, angled away from the tent. This gives the stake maximum holding power. Then work the center points, then everything in between.
If you’re dealing with windy conditions, this staking order matters even more. The tent stakes wind can catch if they’re not properly tensioned, so take the extra thirty seconds to get it right.
Step 7: Attach the Rainfly and Ensure Ventilation
Rainfly installation is the step everyone rushes, and it’s the one that determines whether you sleep dry or wake up in a puddle. The rainfly is the waterproof outer layer that goes over your tent body.
Lay the rainfly over the tent, matching the door openings. Most rainflies have color-coded clips or straps that match specific points on the tent body—match them up. Then stake out the rainfly’s guy lines to create tension. A taut rainfly sheds water and wind; a loose one flaps all night and lets water pool.
Critical: ventilate. Open the rainfly’s vents and don’t fully zip the doors. Condensation from your breathing is the #1 cause of “my tent is leaking” complaints, and it’s not a leak at all—it’s you, exhaling moisture all night. A properly set rainfly with open vents prevents most of this.
Solo Setup: How to Pitch a Dome Tent Alone
Here’s the reality: most of us aren’t always camping with a partner. If you’re trying to figure out how to put up a tent by yourself, the good news is that dome tents are actually the easiest style for solo setup. The self-supporting frame does most of the heavy lifting.
Stake corners before inserting poles. This is the single biggest tip for one person tent setup. If you stake at least one corner—ideally two—before raising the poles, the tent can’t slide away from you while you’re working.
Use your backpack as a wind anchor. If it’s windy, put your backpack or a heavy object inside the tent body before you start raising the poles. The weight keeps the tent from becoming a kite.
Go pole by pole. Don’t try to raise both poles at once. Insert and arch one pole, then the second. The tent will look floppy between the first and second poles—that’s normal. You’re building a structure one arch at a time.
Use the pole-bend technique. When inserting the second pole, bend it slightly as you walk it around to the opposite corner. The arch gives you better leverage and control than trying to push the pole straight through.
KOA’s guide specifically addresses solo setup, noting that the key is working methodically rather than trying to do everything at once. Slow is smooth, and smooth is fast.
Troubleshooting Common Dome Tent Problems
No matter how many times you’ve practiced, things go wrong. Here’s how to handle the most common issues.
Poles Don’t Fit the Sleeves
If a pole is catching inside a sleeve, don’t force it. Pull the sleeve fabric over the pole rather than pushing the pole through. If the pole is genuinely too long, check that all the sections are fully seated—a partially collapsed section makes the pole longer than it should be.
For tent pole repair, carry a pole splint or repair sleeve. These are cheap, lightweight, and can save a trip if a pole snaps. If you’re stuck without one, a duct-tape wrap and a stick can get you through the night.
Lost Stakes or Windy Conditions
If you’ve lost stakes, you can improvise with sturdy sticks, tent guy lines tied to rocks, or even heavy logs. But honestly, the better solution is to carry a few extra stakes and practice proper tent stakes wind technique—stakes driven at 45 degrees, angled away from the tent, hold dramatically better than straight-down stakes.
Rainfly Confusion
Rainfly orientation confuses everyone at least once. The key is matching the fly’s door opening to the tent’s door opening, and looking for any color-coding or labeled corners. If it doesn’t seem to fit, you probably have it rotated 180 degrees. Flip it and try again.
Takedown & Packing: The Forgotten Half
Everyone obsesses over setup, but takedown is where tents get damaged. Here’s the right sequence.
Remove poles before stakes. This seems counterintuitive—shouldn’t you unpeg first?—but removing the poles first releases the structural tension, making the stakes easier to pull and preventing the tent from snapping back at you.
Pull stakes, not fabric. Use a stake puller or the claw end of a hammer. Pulling on the fabric tears the stake loops.
Shake out debris. Turn the tent over and shake out any dirt, leaves, or critters before folding. Yes, critters—I once found a frog that had taken up residence in a friend’s tent during a weekend trip.
Fold in a figure-eight pattern. For packing a dome tent, don’t try to fold it into a perfect rectangle. Instead, gather the tent into a loose bundle and push the air out. Then roll or stuff it into the sack. The figure-eight fold—where you twist the tent into a rough circle—works best for dome tents.
Dry before storage. Tent storage mold is a real thing. A tent packed damp will develop mildew within days, and once mildew sets in, the fabric degrades and the waterproof coating breaks down. If you can’t dry it before packing, at least hang it up as soon as you get home.
2-Pole vs 3-Pole Dome Tents
If you’re shopping or just curious about how to set up a big tent, understanding the difference between 2-pole and 3-pole domes helps.
2-pole domes are the classic design. Two poles cross at the top, creating four anchor points. They’re lighter, simpler, and faster to set up. For solo campers or minimalist backpackers, this is usually the sweet spot.
3-pole domes add a third pole, which typically creates a vestibule or extends the interior space. The extra pole means more stability in wind and more room, but it also means more weight and a slightly longer setup time. If you’re learning how to set up a tent with 3 poles, the process is identical—you’re just repeating the arch-raising step.
For families or groups wondering how to set up a big tent, the 3-pole design is often the right call. The vestibule gives you covered storage for boots and packs, and the extra headroom makes changing clothes less of a contortion act.
Practice Makes Permanent
Here’s my honest advice: don’t wait until you’re at the campsite to figure out your tent. Set it up in your backyard or living room first. Time yourself. Do it twice. The second time will take half as long as the first, and by the third time, you’ll be able to do it in the dark.
This is especially important for anyone searching for how to set up a dome tent for beginners. The learning curve isn’t steep, but it exists, and the worst time to learn is when you’re tired, hungry, and losing daylight. A twenty-minute practice session at home saves you an hour of frustration in the field.
If you’re a visual learner, there are plenty of resources showing how to set up a tent with pictures, including the illustrated guide from Trek Southwest. Sometimes seeing the sequence once is all you need.
When Traditional Poles Aren’t Your Thing
Now, let me mention something that might surprise you. While this guide has focused on traditional pole-based dome tents, the industry has evolved. If you’re setting up tents frequently—say, for events, festivals, or commercial use—you might want to look at inflatable alternatives that skip the pole assembly entirely.
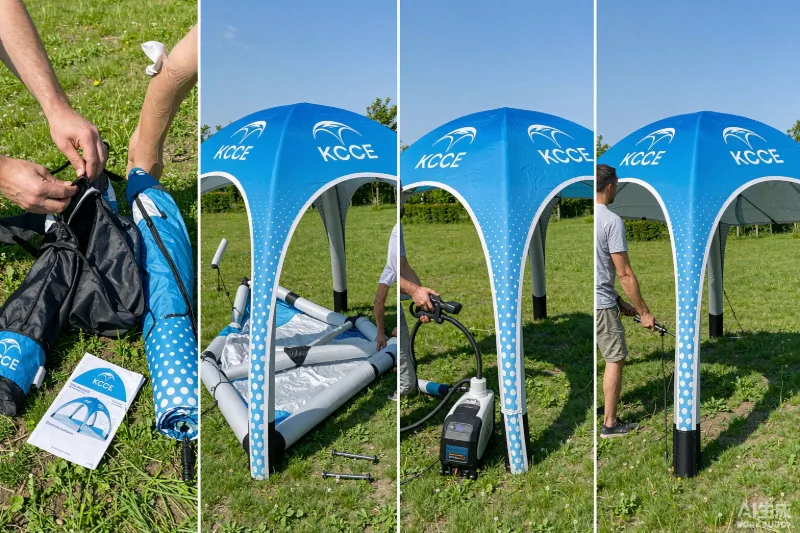
Companies like KCCE manufacture خيام قابلة للنفخ that use air beams instead of poles. The setup process is genuinely different: you lay the tent flat, connect an air pump, and the structure self-erects in minutes. No pole assembly, no sleeves, no wrestling with shock-corded sections. For anyone who sets up tents regularly, the time savings add up fast.
That said, for the classic camping experience, a traditional dome tent is still hard to beat. The pole-based design is proven, repairable, and doesn’t require any equipment beyond what’s in the bag.
الأسئلة الشائعة
Q: How to setup a 3 person dome tent?
١. ج: A 3-person dome tent follows the same steps as any dome tent. Lay out the body, assemble the poles, thread them through the sleeves or clips, anchor one corner, raise the arches, then stake everything down. The only difference is scale—3-person tents typically have more headroom and floor space, so give yourself a few extra minutes.
Q: How to setup a tent for beginners?
١. ج: Start by finding flat, clear ground and laying a footprint. Unpack everything and sort your poles. Assemble the poles fully before inserting them, stake one corner before raising the arches, and attach the rainfly with ventilation open. Practice at home once before your first trip.
Q: How to set up a kids dome tent?
١. ج: Kids dome tents are smaller but use the same pole-and-sleeve mechanism. The key difference is scale—smaller poles mean less force needed to arch them, making them easier for kids to help with. Follow the same steps: lay flat, assemble poles, insert, anchor, raise, stake.
Q: How to put a tent up step by step?
١. ج: The core sequence is: choose a flat site, lay your footprint, unpack and sort, assemble poles, insert poles through sleeves or clips, stake one end, raise the arches, attach the tent body, stake corners then center points, and finally attach the rainfly with vents open.
المراجع
1. How to Set Up a Dome Tent – Howcast
2. Tips for Setting Up Tents Fast – KOA Camping Blog
3. How to Set Up a Tent – In Pictures – Trek Southwest







